
![[Grasshopper] How to use Cull Index to delete items with specified index numbers](https://iarchway.com/wp-content/uploads/2025/06/Cull-Index.png)
This article explains how to use Cull Index to delete items with specified index numbers.
On the Grasshopper, it is displayed as either an icon or text.
About Data Structure

The leftmost column is called Index number.
And the data in the Index number is called Item.
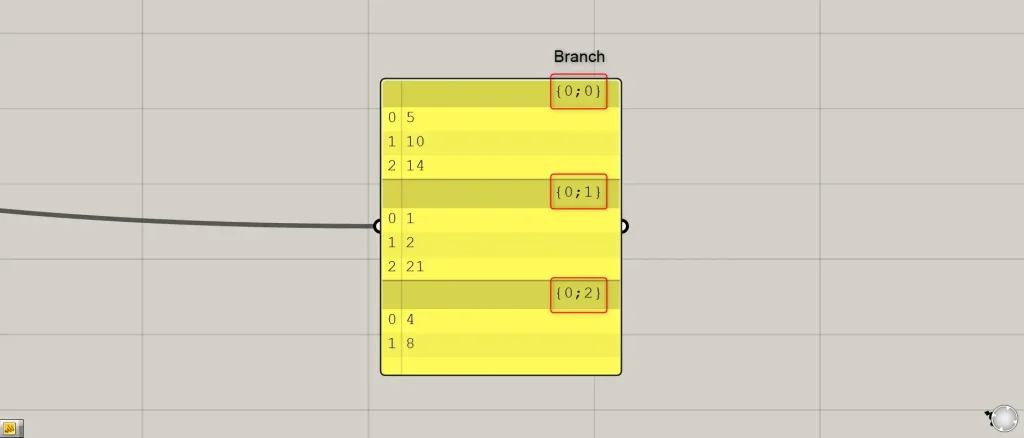
If there are several groups like this, this is called a Branch.
Specify a single Index number to delete an Item
Cull Index can be used to delete any data in a listing.
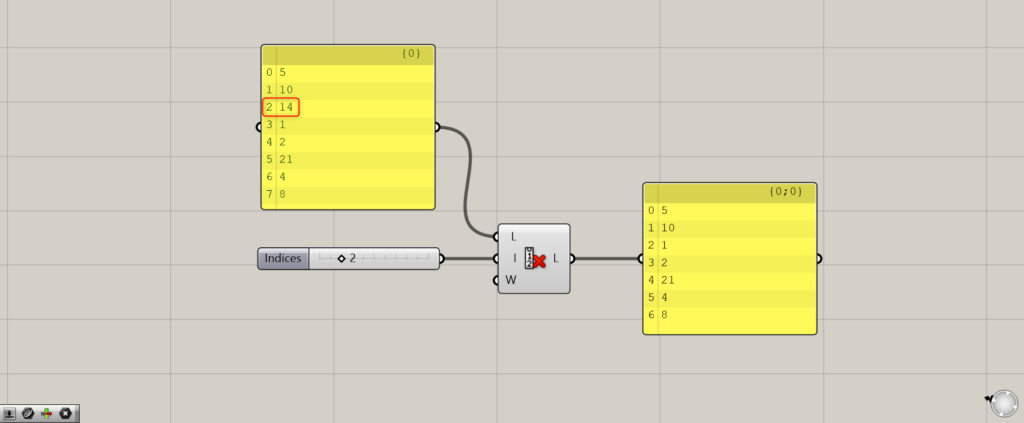
Connect the data to be used this time to the Cull Index(L) and input the Index number to the Cull Index(I).
This time, Index number is set to 2, so Index number 2, 14, is deleted as a result.
Specify multiple Index numbers
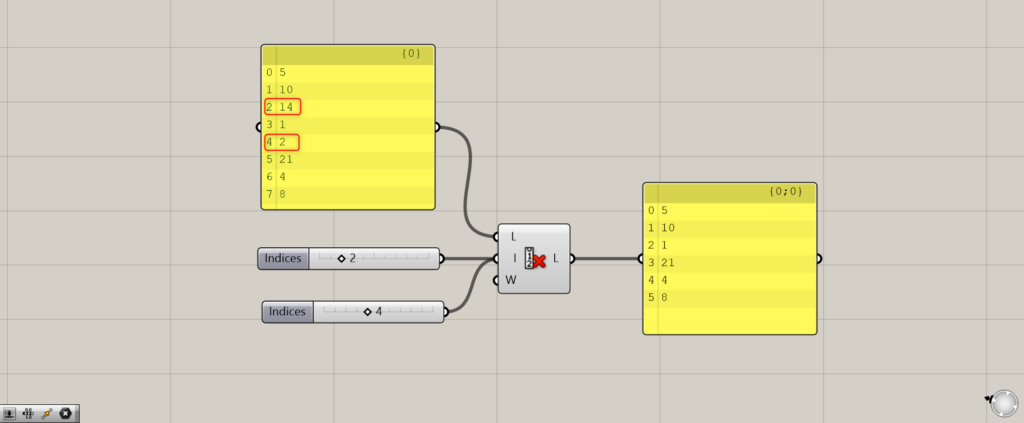
Multiple Index numbers can also be specified.
Enter multiple numbers in the Cull Index(I).
In this case, 2 and 4 are entered.
As a result, Index numbers 2 and 4, 14 and 2, are removed from the data.
If the data is divided into branches
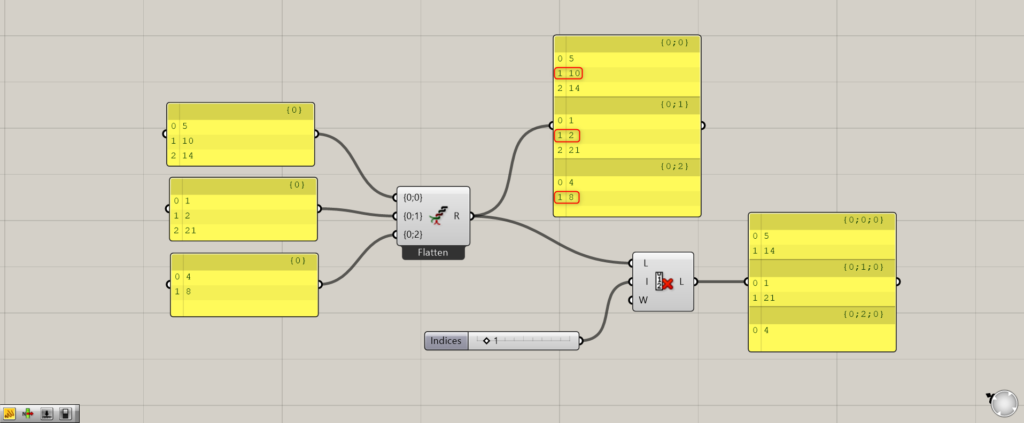
Components used:①Entwine ②Cull Index
Entwine is used to create data that is divided into branches.
In the case of branch data, you can delete items of any index number in each branch.
In this case, Index number 1 was selected.
Then, 10, 2, and 8 of Index number 1 on each level were deleted.
Index number is counted from the back if the index number is negative
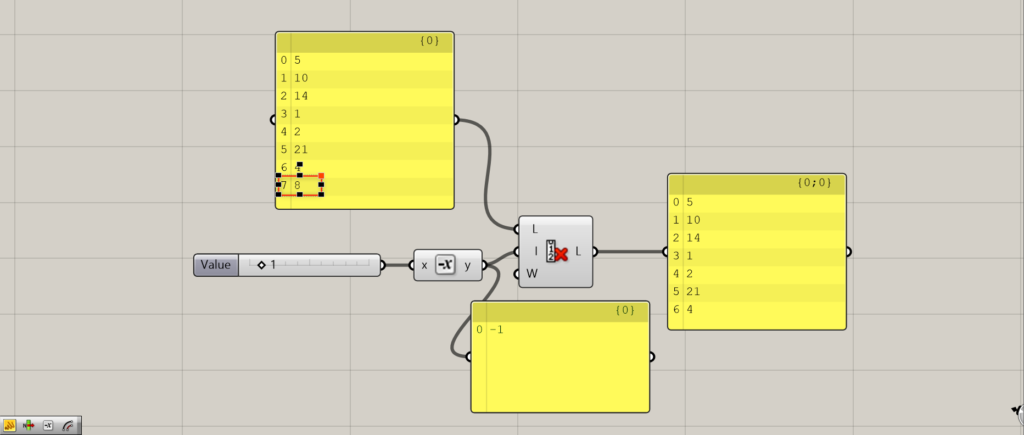
Additional component:①Negative
Index number is set to a negative value so that it is counted from the back.
Using the Negative component, the number was set to -1.
The data for the rearmost Index number 7 was then deleted.
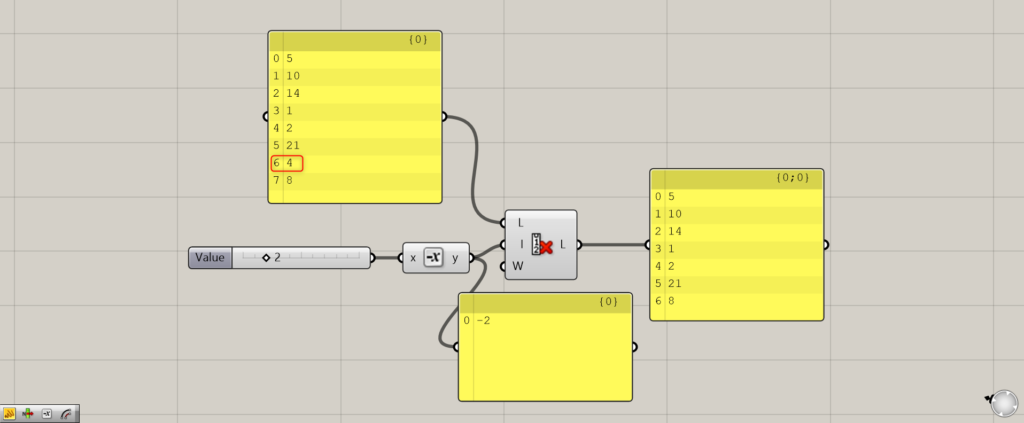
If the number is set to -2, we see that the data in Index number 6, the second from the back, is deleted.
The next to the last Index number goes back to the beginning
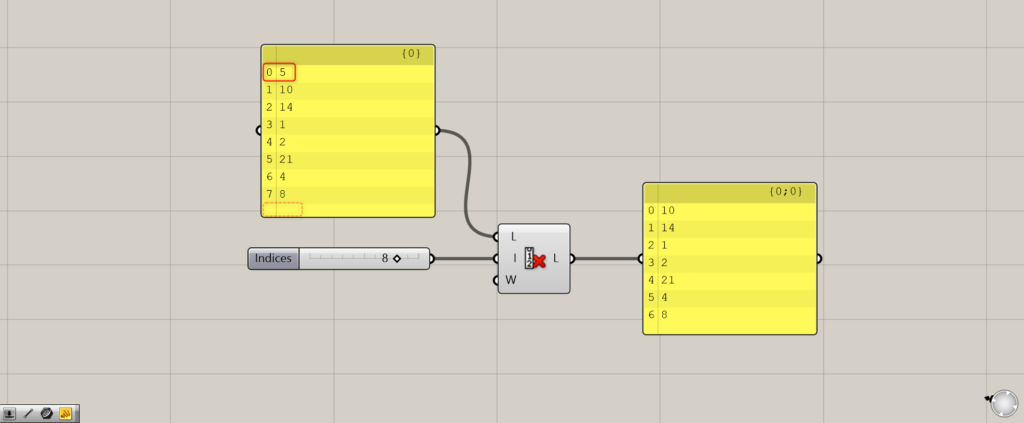
If you specify an Index number that is greater than the last Index number, it will start counting back to the beginning.
In this case, the Index number is set to 8, but the last Index number of the actual data ends at 7.
In that case, we go back to the beginning, Index number 0 becomes the 8th, and the data in Index number 0 is deleted.
Avoid going back to the beginning
Additional component:①Boolean Toggle
It is also possible to prevent the Index number from going back to the beginning even if it reaches the end.
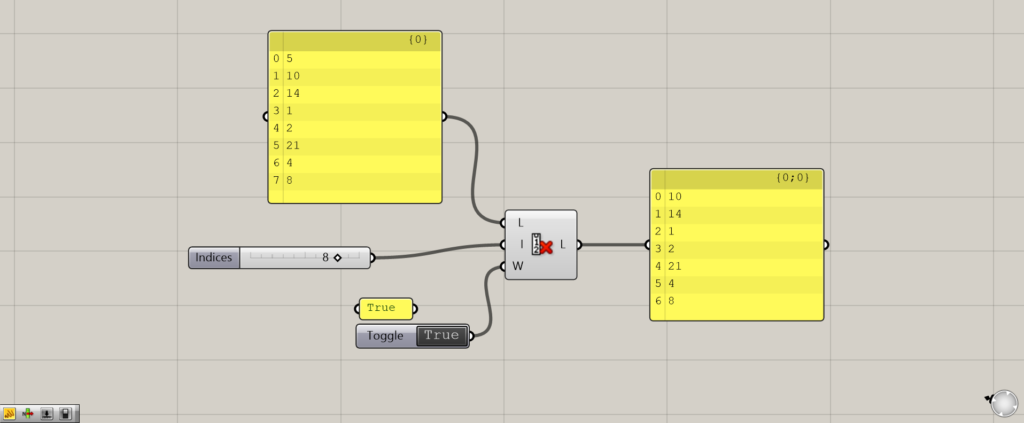
This can be done by entering Boolean Toggle False or False in the Panel at the Cull Index(W).
Initially, the Cull Index(W) is set to True.
Double click on the Boolean Toggle to change it from True to False.
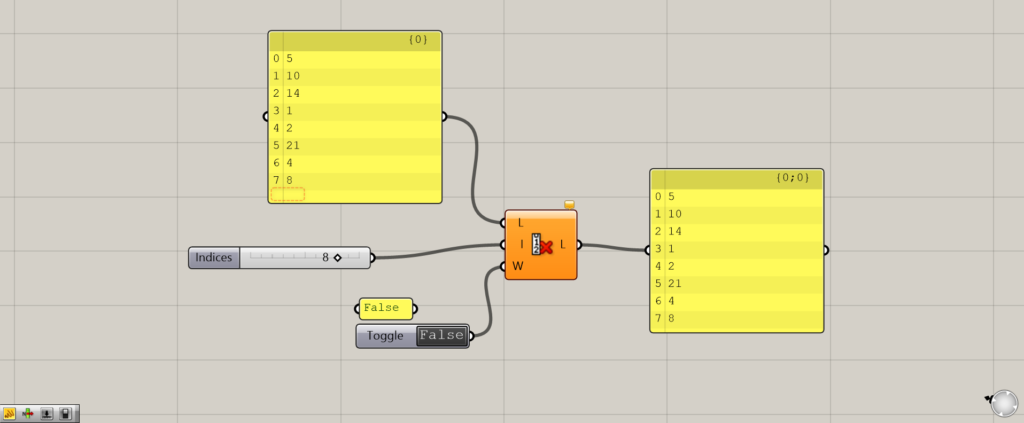
If the Index number exceeds the last 7, then the Cull Index will show an orange error.
This prevents the Index number from going back to the beginning.
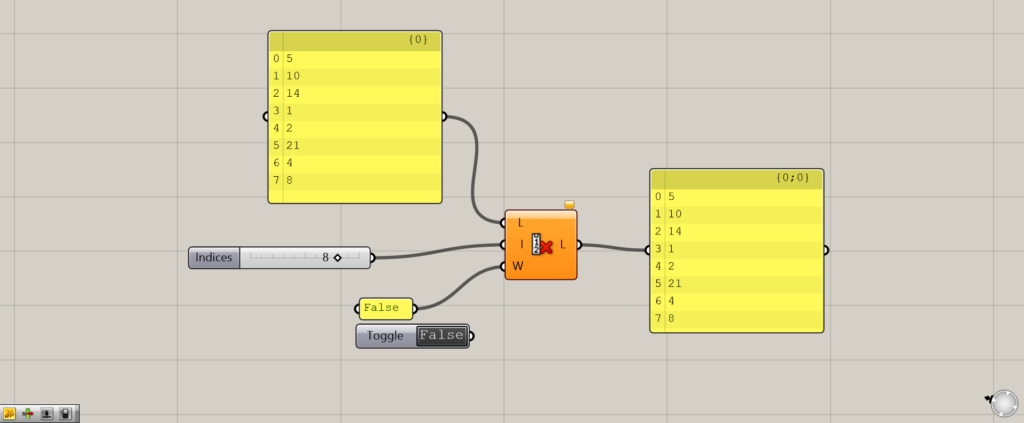
Thus, you can see that entering False in the Panel is performing well.
List of Grasshopper articles using Cull Index component↓


Comment