
![[Grasshopper] How to connect multiple circles with tangent lines or curves [Data download available]](https://iarchway.com/wp-content/uploads/2025/08/eyecatch2.png)
This article explains how to connect multiple circles with tangent lines or curves.
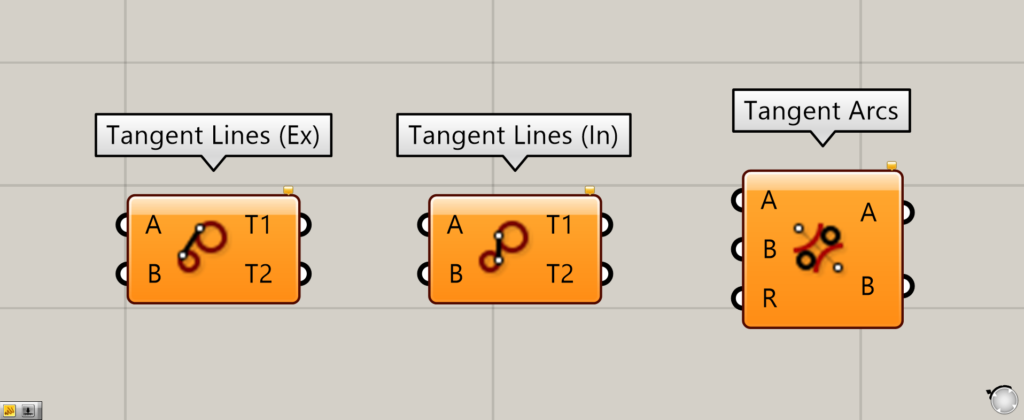
Tangent Lines (Ex), Tangent Lines (In), and Tangent Arcs can be used to connect multiple circles with tangent lines or curves.
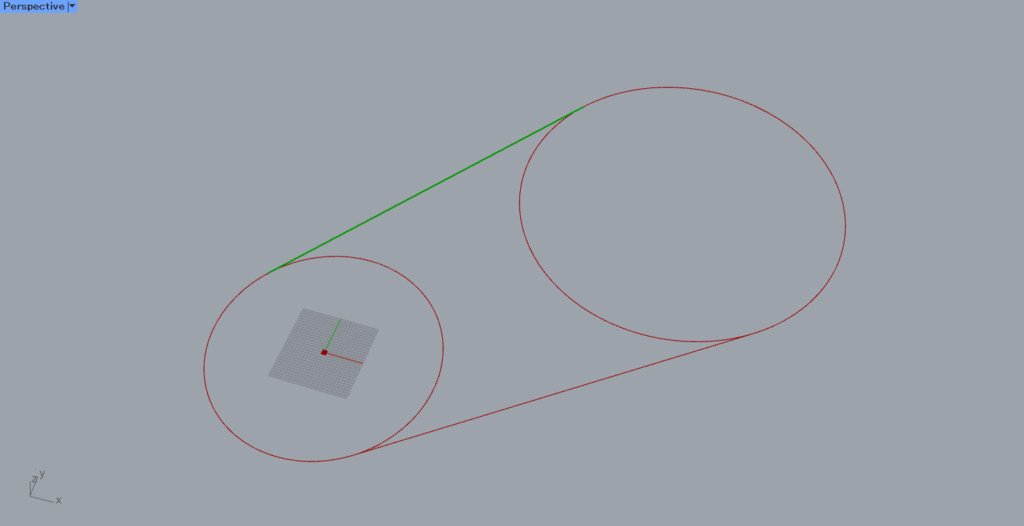
This is the case of Tangent Lines (Ex).

This is the case of Tangent Lines (In).

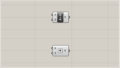
This is the case of Tangent Arcs.
Depending on how you use it, it can be applied to multiple circles as shown in the image above.
After explaining the three components, we will also explain how to remove excess lines.

We will also explain how to add thickness.
We will now explain them one at a time.
Click here to download the data for the Grasshopper used in this article.
Please refer to the Terms of Use regarding the use of the downloadable data.
Preparation of circles
First, create two circles.
You can create them on Rhinoceros, but this time we will create them on Grasshopper.
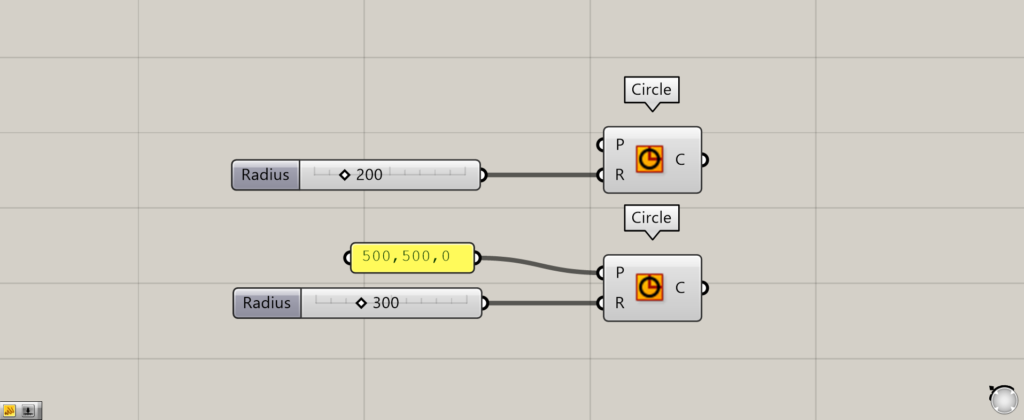
Components used: (1) Circle
Circle is used to create a circle.
Enter the coordinates of the center point of the circle (if not entered, the circle will be created at coordinates 0,0,0) in the Circle(P).
Enter a numerical value for the radius in the Circle(R).
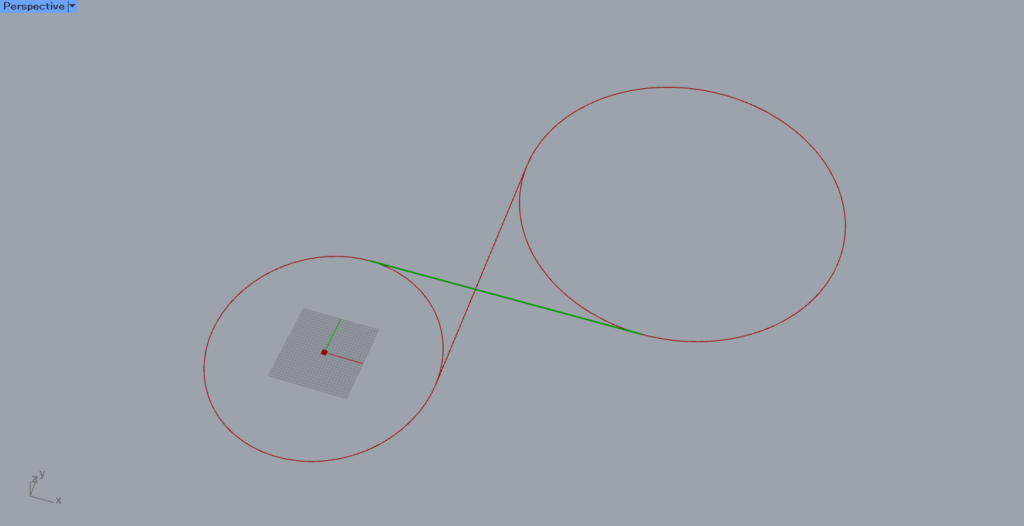
In this case, we set one circle of radius 200 at position 0,0,0 and one circle of radius 300 at position 500,500,0.
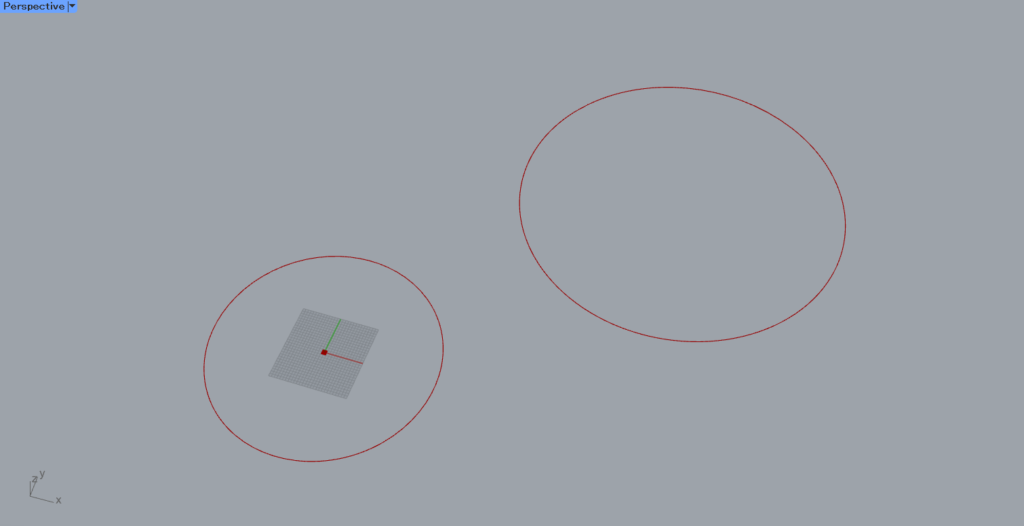
Two such circles were then created.
We will now use these two circles for the explanation.
Tangent Lines (Ex)
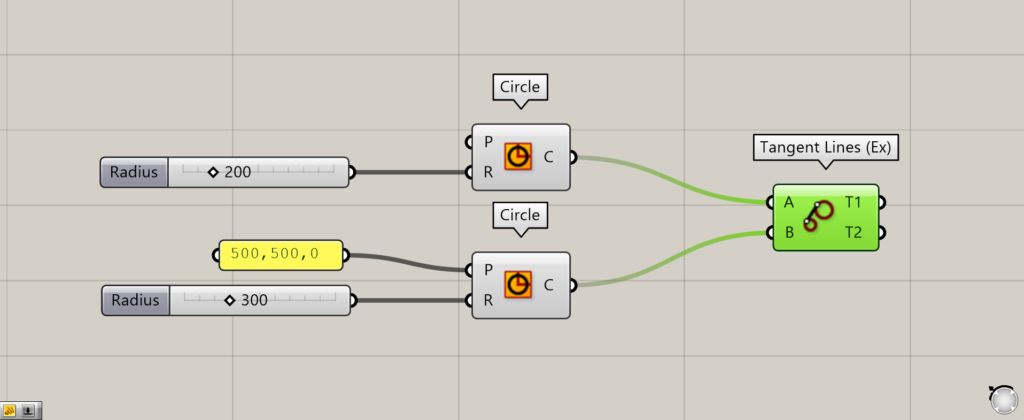
Components used: (1) Circle (2) Tangent Lines (Ex)
Tangent Lines (Ex) creates tangent lines between two circles.
Connect two Circle to the Tangent Lines (Ex)(A and B).
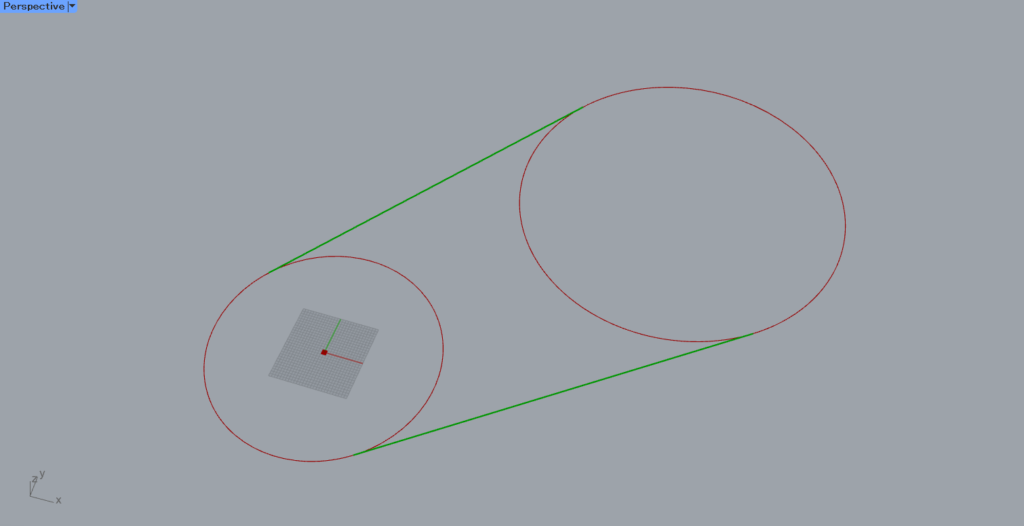
This creates tangent lines.
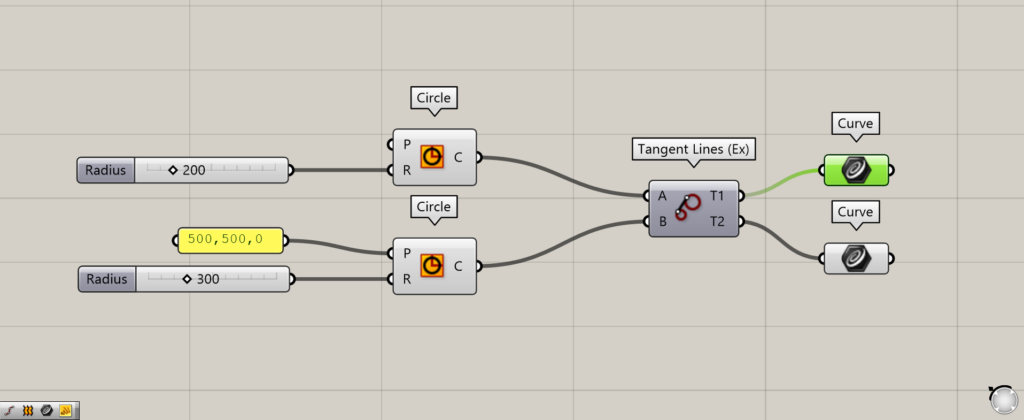
The Tangent Lines (Ex)(T1 and T2) outputs their respective line data.

As you can see, the respective line data is output from the T1 and T2.
Tangent Lines (In)
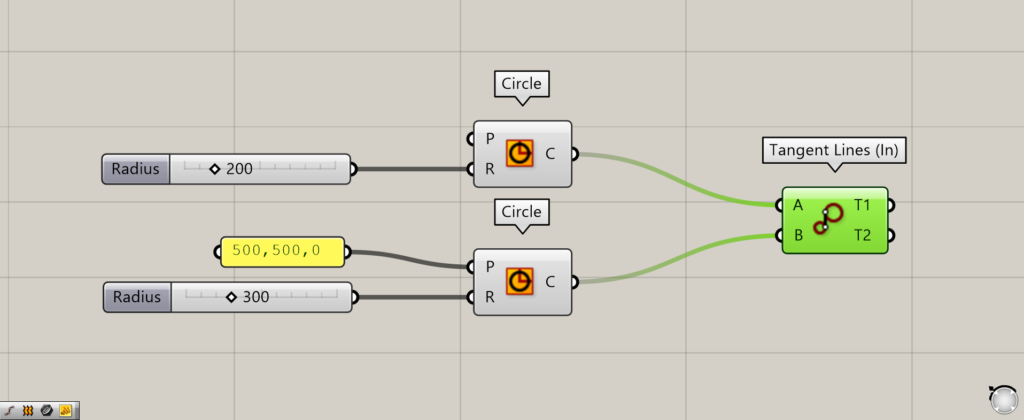
Components used: (1) Circle (2) Tangent Lines (In)
Tangent Lines (In) creates two tangent lines that intersect.
Connect two Circle to the Tangent Lines (In)(A and B).
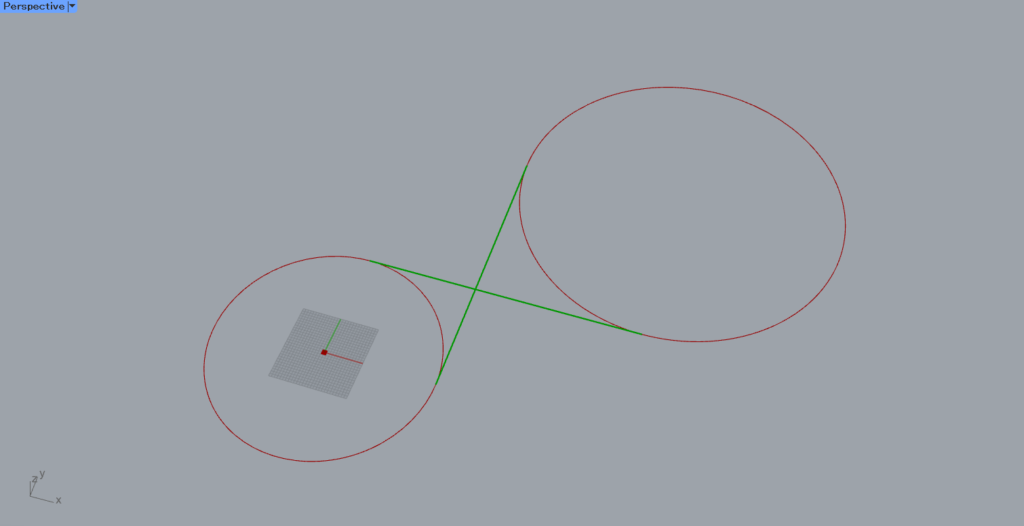
As you can see, intersecting tangent lines are created.
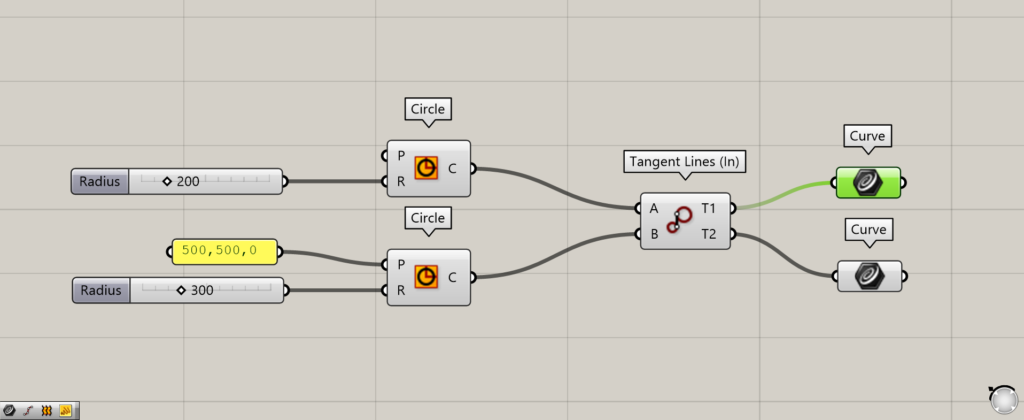
Additional Component: (1) Curve
The T1 and T2 output their respective line data.
As you can see, each line data is output.
Tangent Arcs
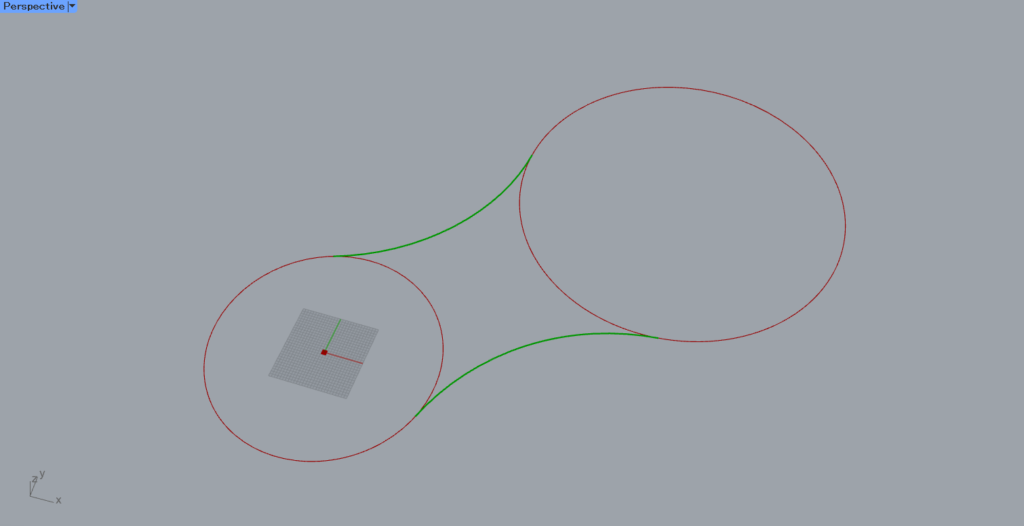
Components used: (1) Circle (2) Tangent Arcs
Tangent Arcs can be used to create tangent curves by specifying the radius.
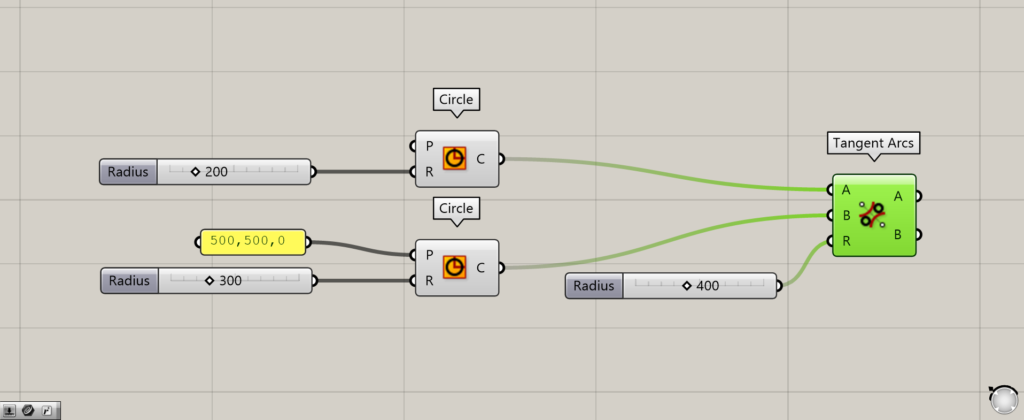
Connect two Circle to the Tangent Arcs(A and B).
Enter a numerical value for the radius in the Tangent Arcs(R).
In this case, 400 is entered.
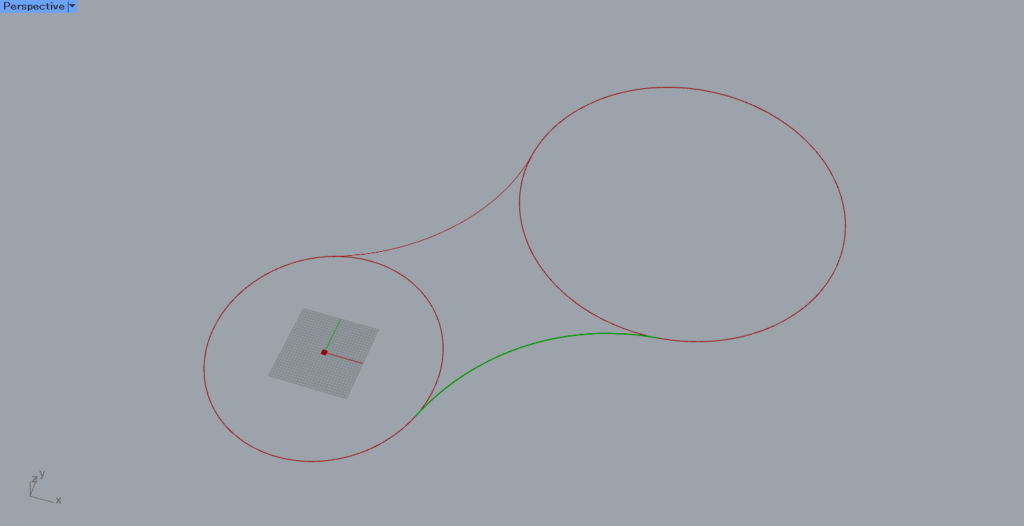
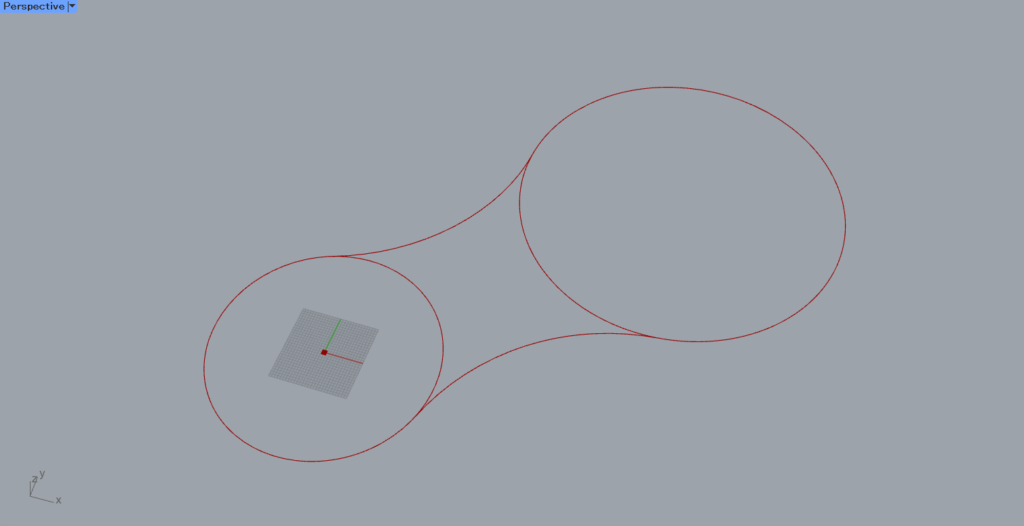
Then, tangent curves are created as shown here.
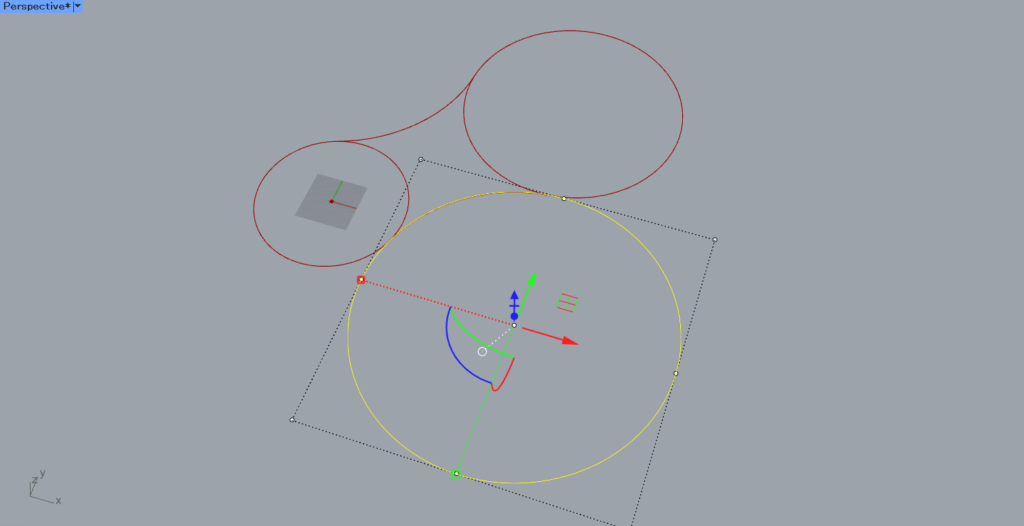
We created a circle with a radius of 400 and compared them.
As you can see, a portion of the circle with a radius of 400 is used for the tangent curve.
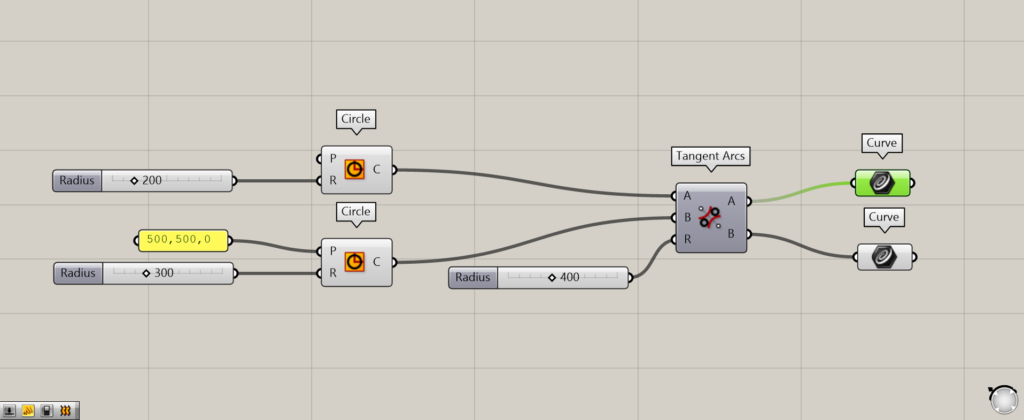
The Tangent Arcs(A and B) on the right side output the respective curve data.
As you can see, the respective curve data is output from the A and B.
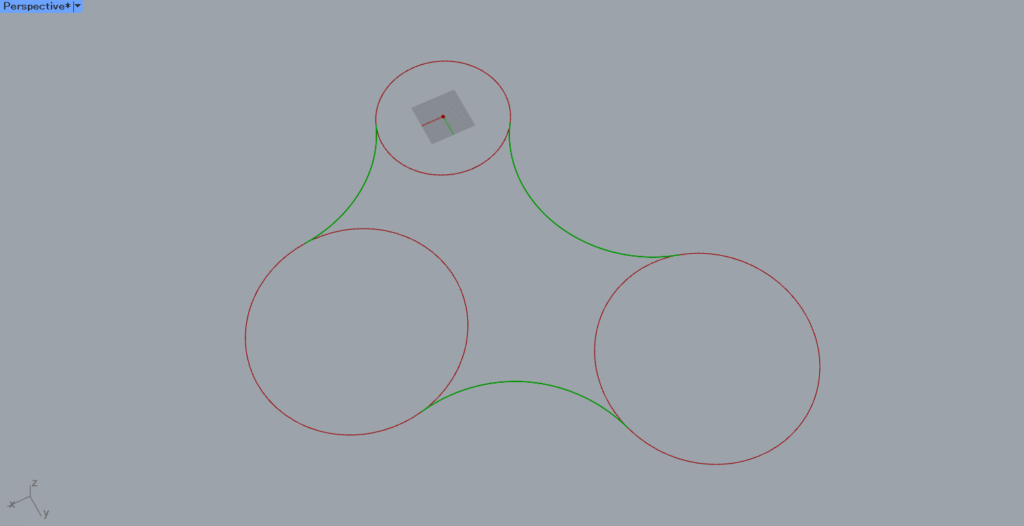
When there are three or more circles
Components used: (1) Circle (2) Tangent Arcs (3) Curve
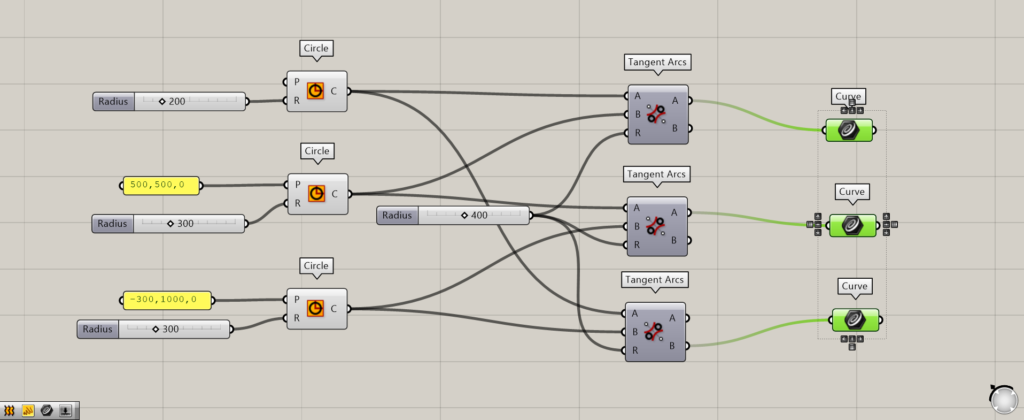
Even if there are three or more circles, you can combine them with each Tangent system component.
The image above shows the case of three circles.
In this case, only the outer curve is extracted by Curve, since the inner curve is not displayed.

Then, the same could be done with 3 circles like this.
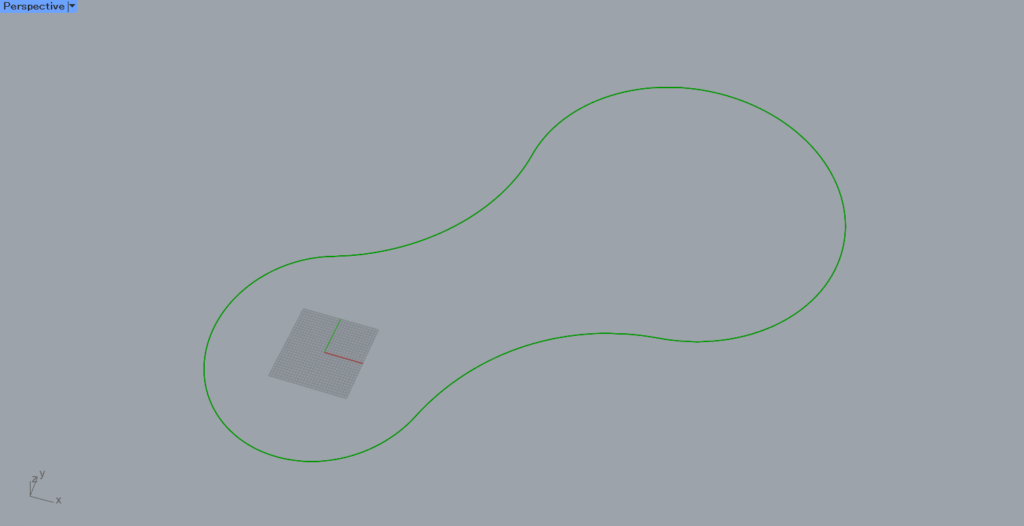
Erasing and merging excess lines and curves

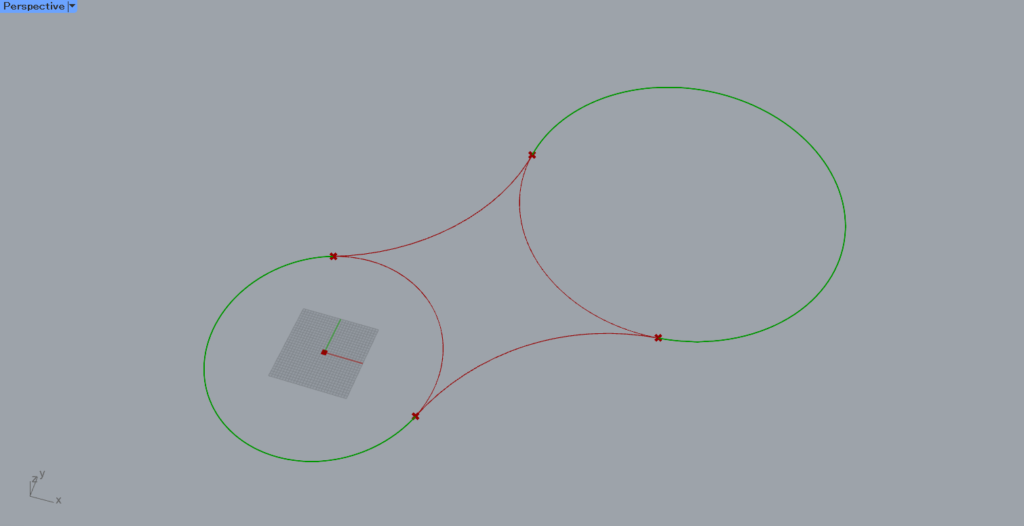
There are cases where you may want to erase the extra inner curves and merge them.
Therefore, we will also explain how to leave only the outer curves and merge them, as shown in the image above.
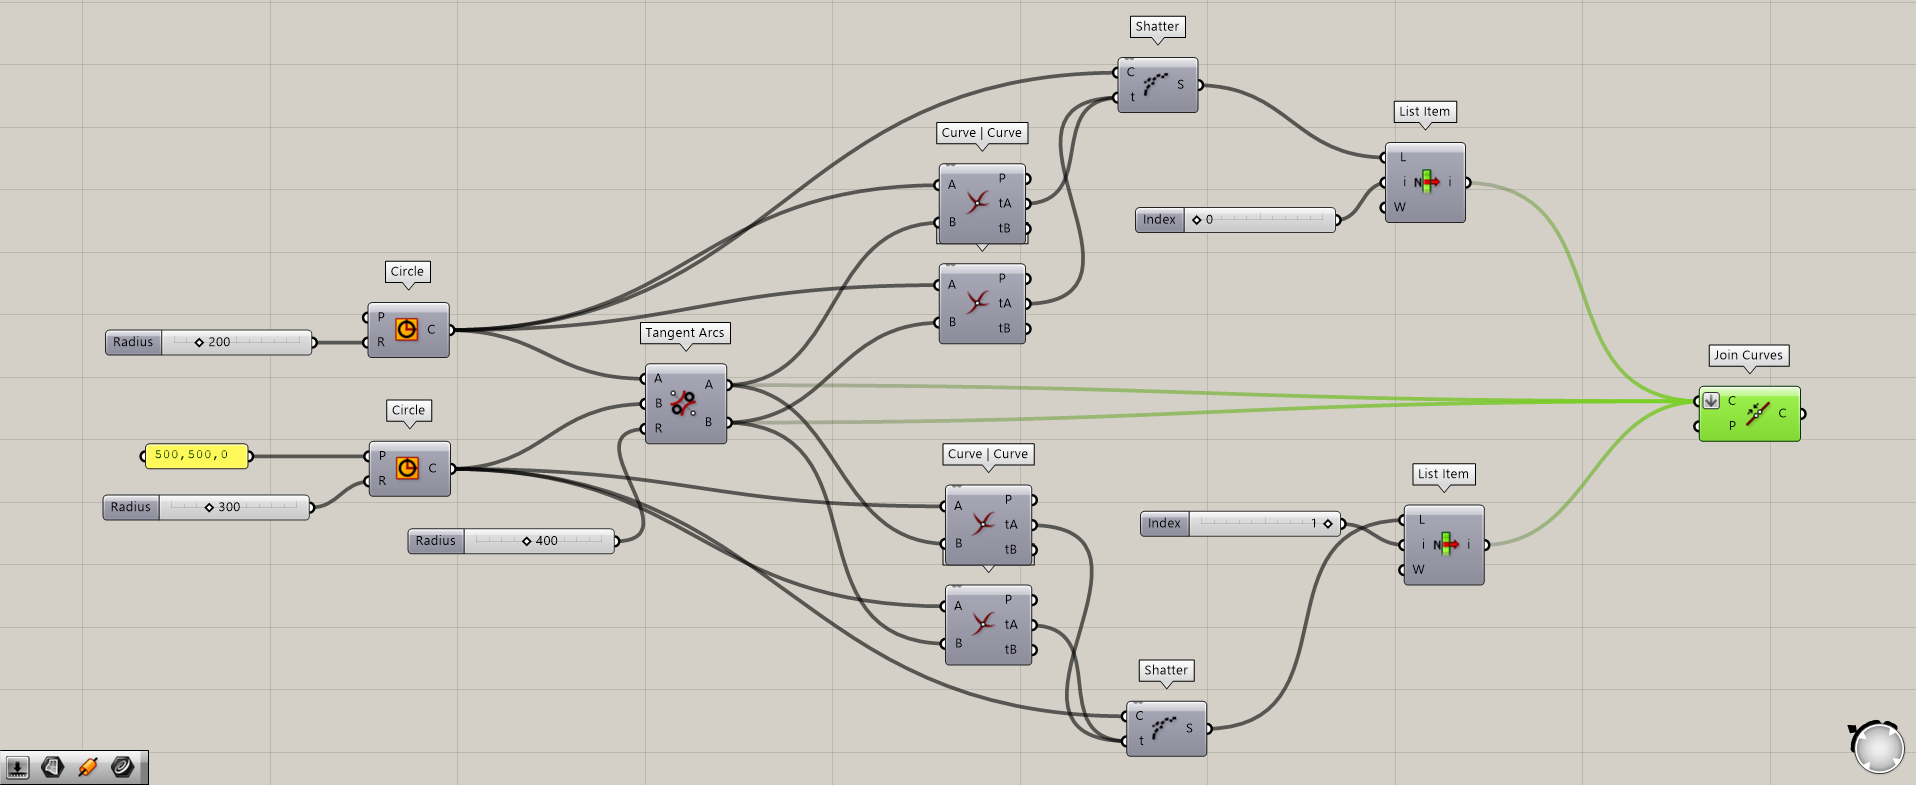
Components used: (1) Circle (2) Tangent Arcs (3) Curve | Curve (4) Shatter (5) List Item (6) Join Curves
Start with extra curves like this.
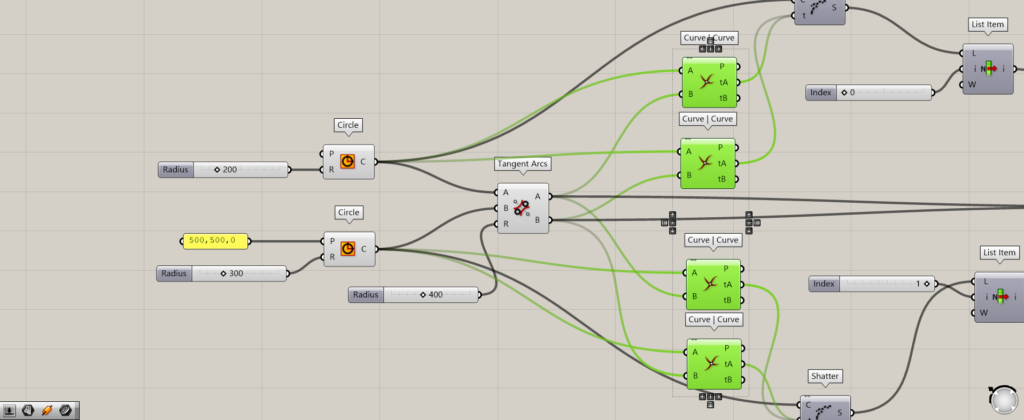
Connect each circle and tangent curve to the Curve | Curve.
Do this for all the areas where the circle and the tangent curve touch.
In this case, we are using four Curve | Curves, since there are four locations.
Then, the data of the intersection of the circle and the tangent curve is extracted as shown here.
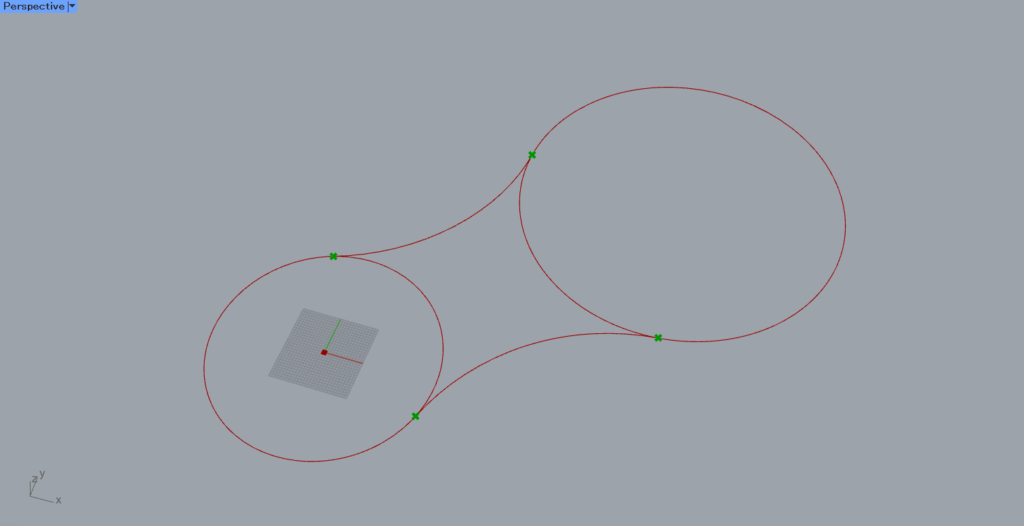
Then, connect the Circle to the Shatter(C) and the Curve | Curve(tA) to the Shatter(t).
The tA provides data on the position of the point on the curve, and by using Shatter, the curve can be divided at that position.
As you can see, the circle is divided into two curves at the position where the tangent curves touch.
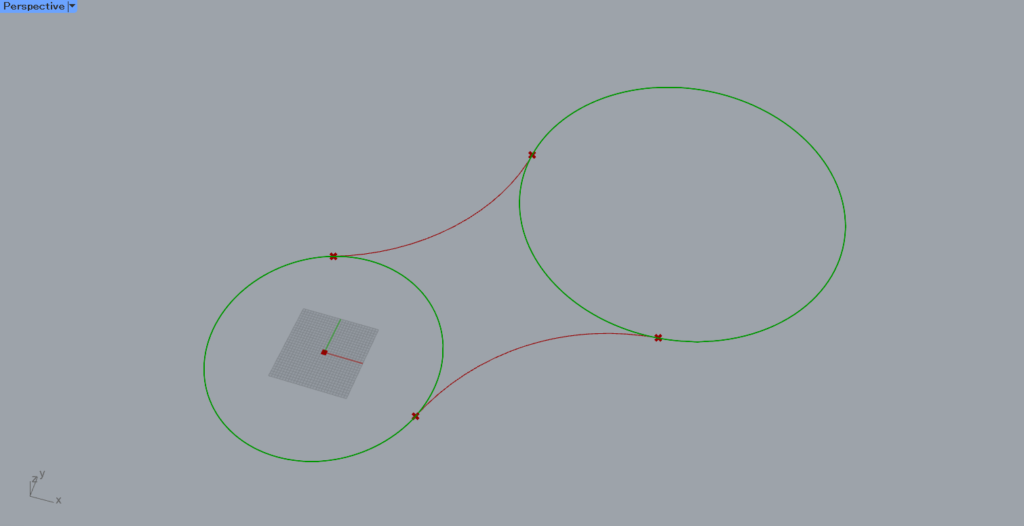
The circle is split at the position of the red point.
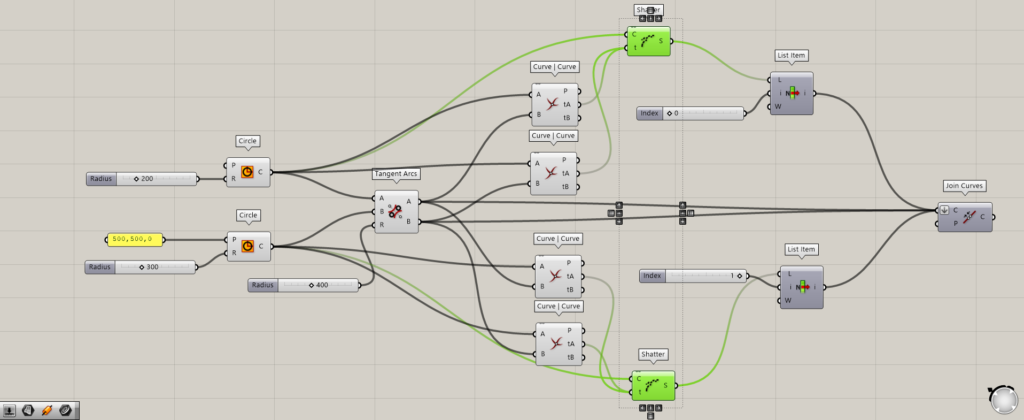
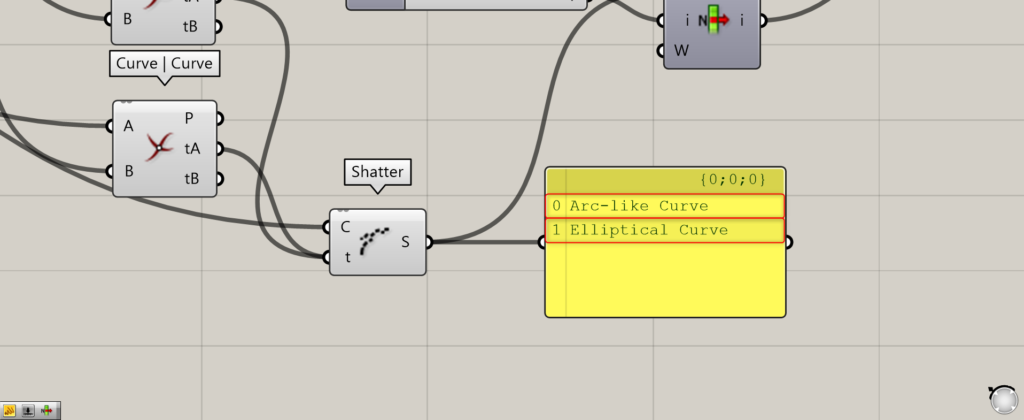
Then, by using List Item, the outer curve is extracted by specifying the index number.
Enter 0 or 1 in the List Item(i) to extract the outer or inner curve.
Then, only the outer curves are extracted, as shown here.
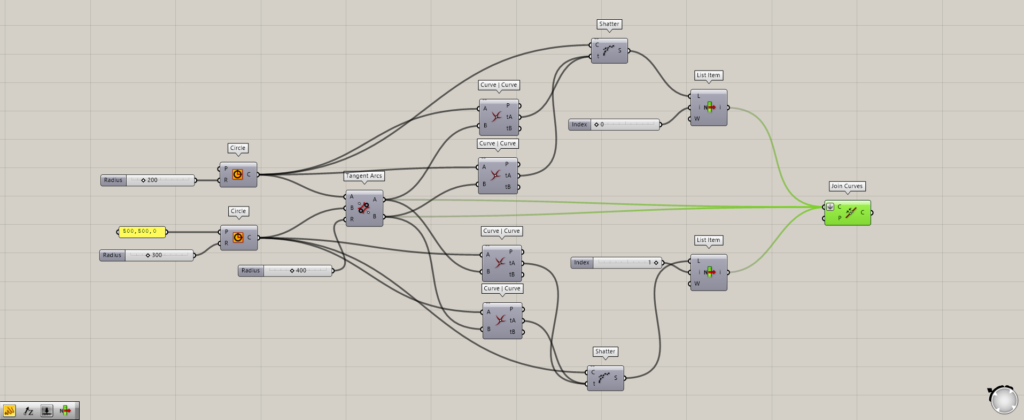
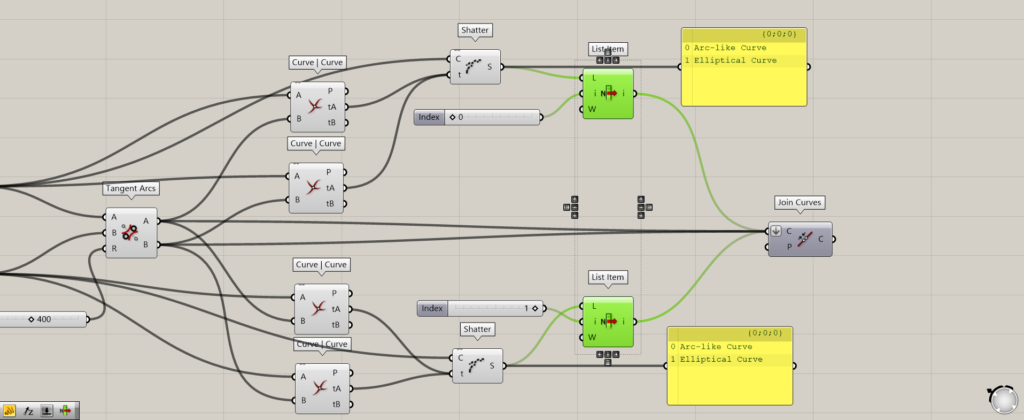
Finally, use Join Curves to join the tangent curve and the curve extracted by List Item.
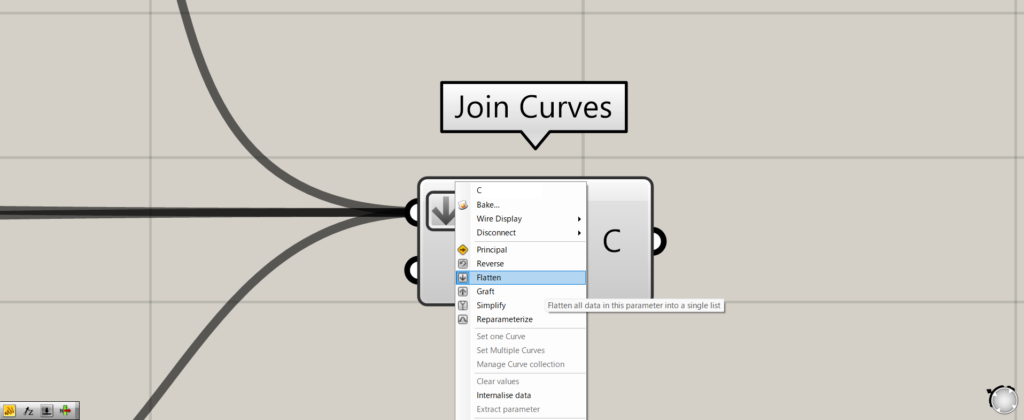
At this point, right-click on the Join Curves(C) and set it to Flatten.
If you do not do this, the curves will not be joined.

As a result, the extra curves are removed and joined as shown here.
Adding Thickness
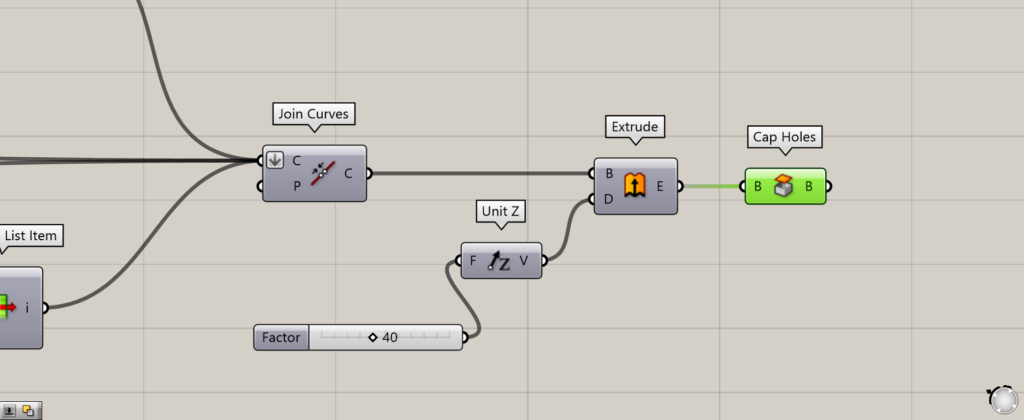
Components used: (1) Extrude (2) Unit Z (3) Cap Holes
To add thickness, connect to Extrude(B) and connect to Unit Z(D) with the numerical value of the distance to be pushed out.
Then, by covering it with Cap holes, you can add thickness.
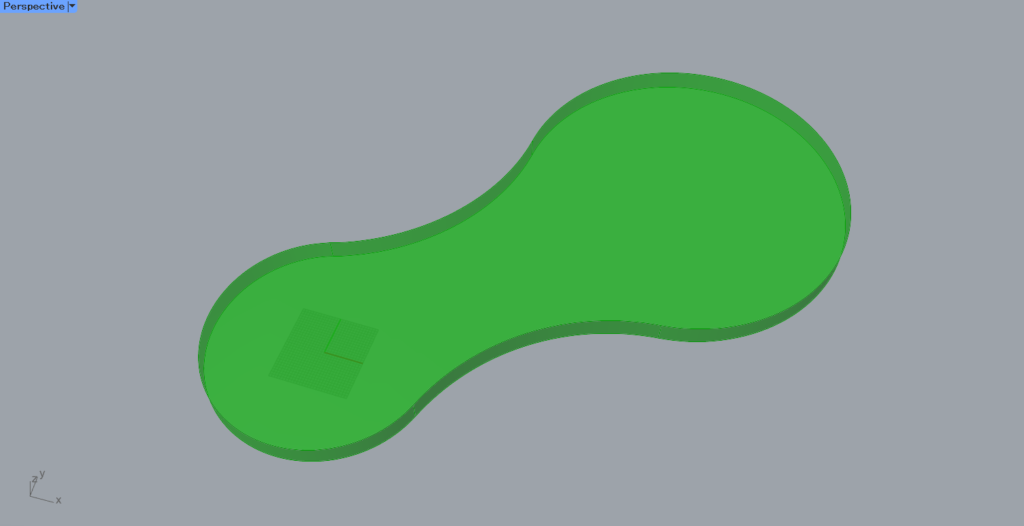
As you can see, the thickness can now be added.
That’s all for this time.


Comment