
![[Grasshopper] How to use Gene Pool to create multiple number sliders](https://iarchway.com/wp-content/uploads/2025/10/Gene-Pool.png)
This article explains how to use Gene Pool to create multiple number sliders.
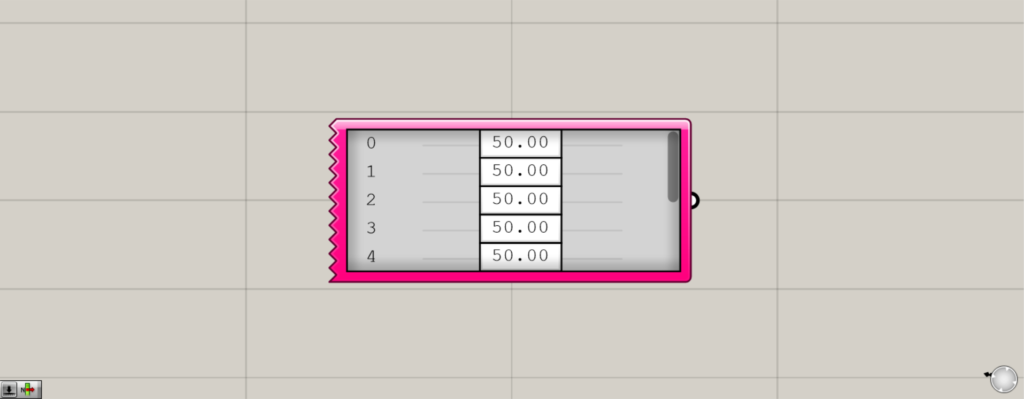
On the Grasshopper, it is represented by the image above.
Creating multiple number sliders
By using Gene Pool, you can create multiple number sliders.
As an image, multiple Number Sliders can be managed with a single component.
How to set up Gene Pool
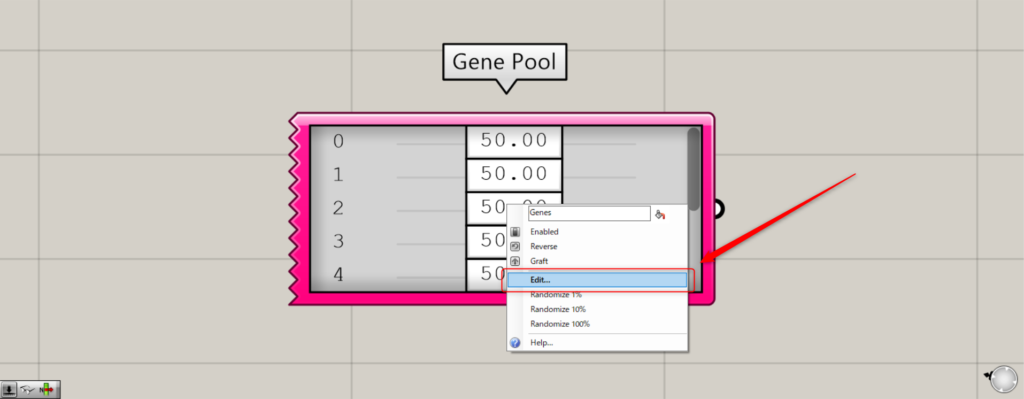
To set a number, right-click on the Gene Pool and select Edit.
The Gene Pool settings screen will then appear.
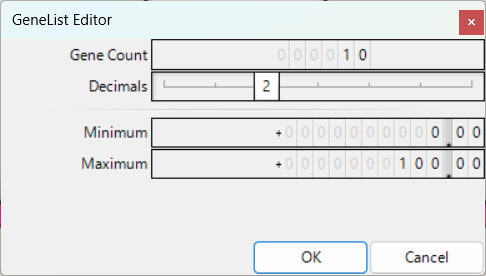
In Gene Count, enter the number of numbers to be created.
If the number is 10, 10 numerical data will be created.
In Decimals, enter the number of decimal places.
If the number is 2, numbers up to the second decimal place will be created.
Minimum is the minimum value of the number.
In Maximum, enter the maximum value of the number.
If Minimum is 0 and Maximum is 100, a number that can be changed from 0 to 100 will be created.
Usage Example 1
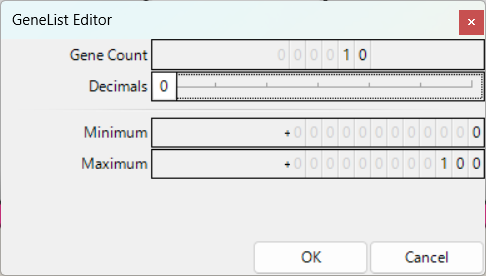
At first, we will explain the setup with only the default Decimals as an integer of 0.
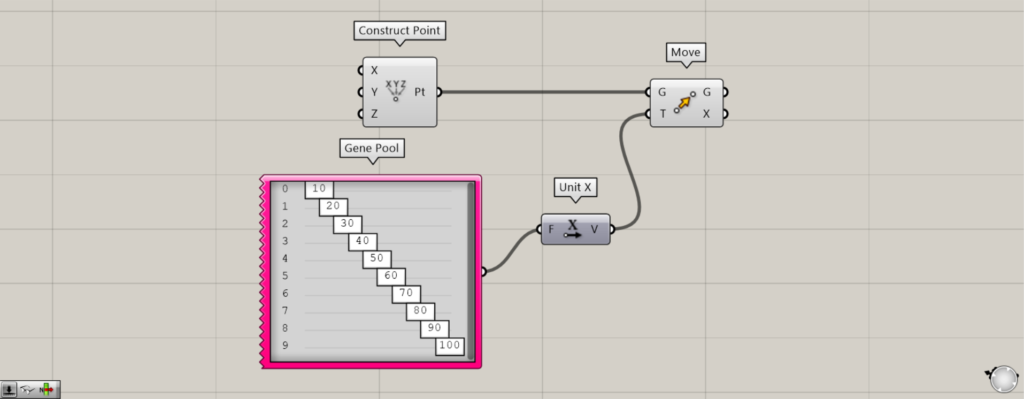
Components used: (1) Construct Point (2) Gene Pool (3) Unit X (4) Move
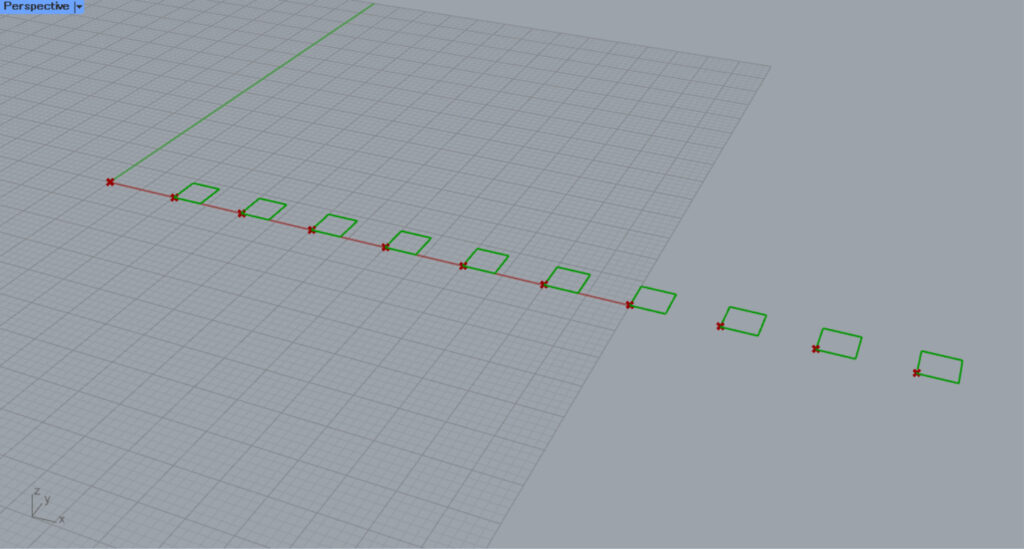
At first, we will show an example of using Gene Pool to copy points continuously in the X direction.
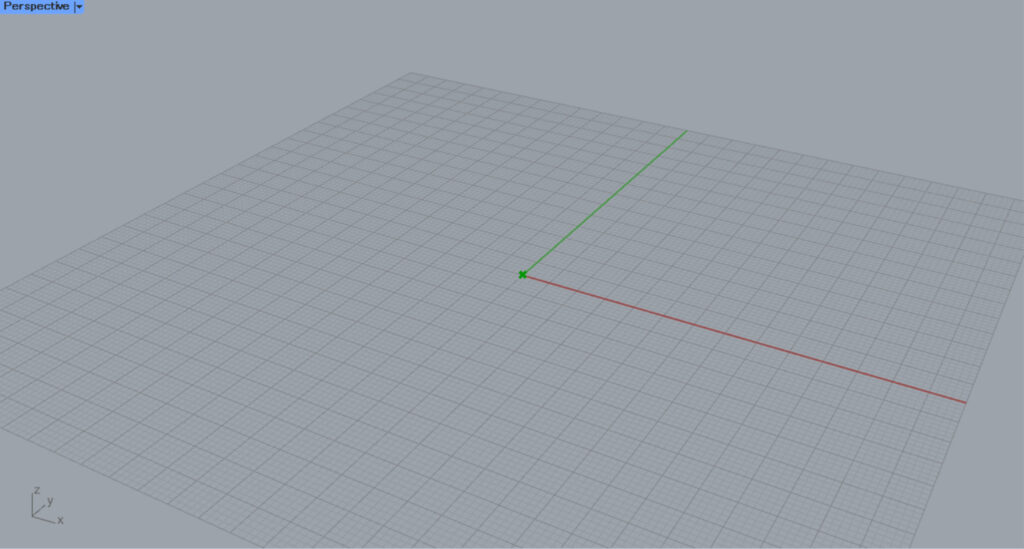
When a Construct Point is placed, a point is created at the origin.
Then, in the Gene Pool, the first number is set to 10, the next to 20, and so on, increasing the number by 10.
In this case, 10 numerical data are prepared.
Next, we connect the Gene Pool to Unit X to obtain a vector in the X direction.
Finally, we connect Construct Point to the Move(G) and Unit X to the Move(T).
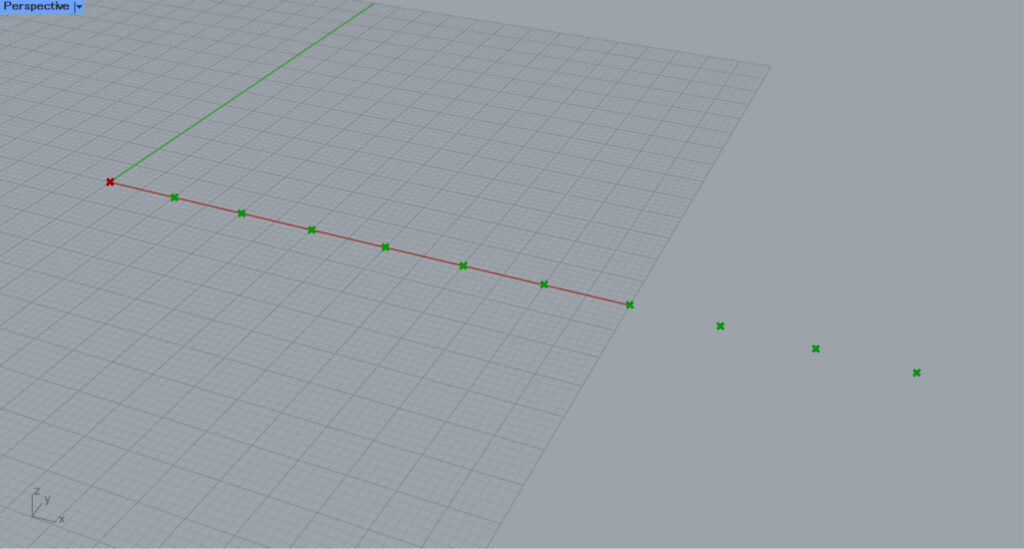
The points are now continuously copied in the X direction.
In this way, multiple numerical data can be created together in the Gene Pool.
Usage Example 2
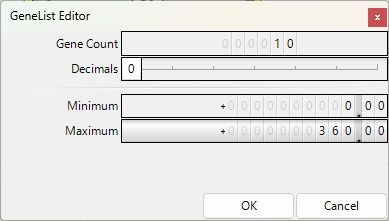
In the next usage example, set Decimals to 0, Minimum to 0, and Maximum to 360 for the Gene Pool settings.
This will allow you to set the numbers in integers from 0~360.
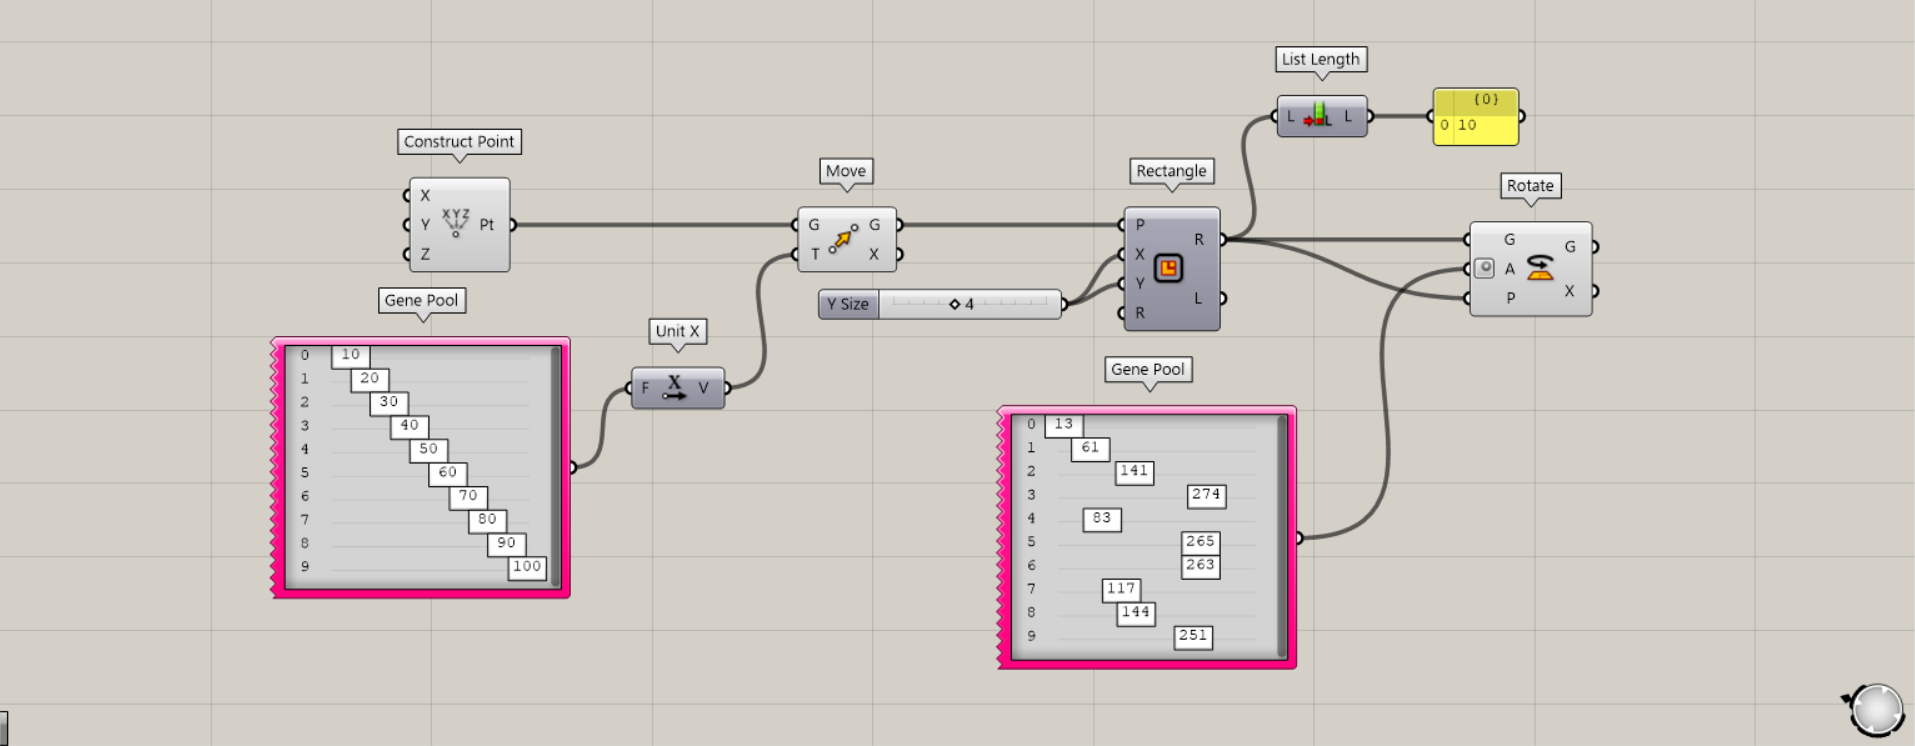
Components used: (1) Construct Point (2) Gene Pool (3) Unit X (4) Move (5) Rectangle (6) List Length (7) Rotate
In Example 2, squares are created at the points created in Example 1 and rotated at different angles.
In Example 1, multiple numerical data were assigned to a single point.
In Example 2, the same number of numeric data is assigned to multiple data.
Connect the Move used earlier to the Rectangle(P).
In addition, enter the numerical values for the lengths of the two sides into the Rectangle.
In this case, we enter 4 for both sides.
A square is then created at each point.
Then, connect the Rectangle(R) to the List Length.
The number of data in the Rectangle is then checked.
In this case, 10 is output.
The same number of data as this number is also created in the Gene Pool.
In this case, 10 Gene Pools are set up in the range of 0~360.
Then, the values of each Gene Pool are varied appropriately.
Then, connect the Rotate(G and P) to the Rectangle(R).
Then, connect the newly created Gene Pool to the Rotate(A).
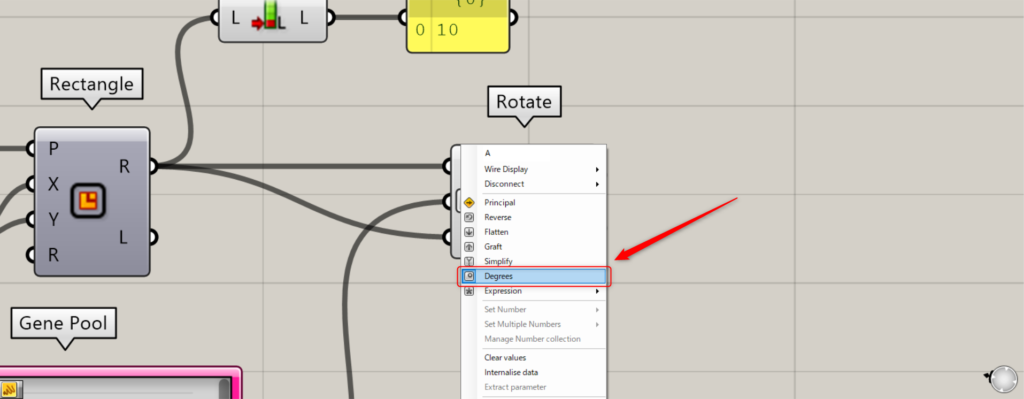
Right-click on the Rotate(A) and select Degrees.
This will allow you to use the numerical values as frequencies.
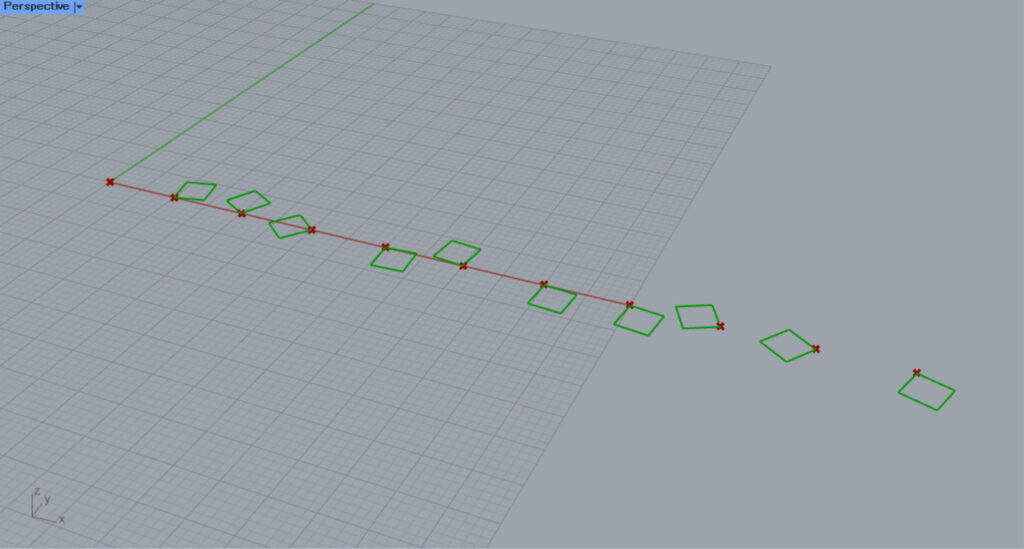
The square is now rotated according to the angle set in the Gene Pool.
In this way, the same number of numerical data can be assigned to multiple data.
Useful for optimization
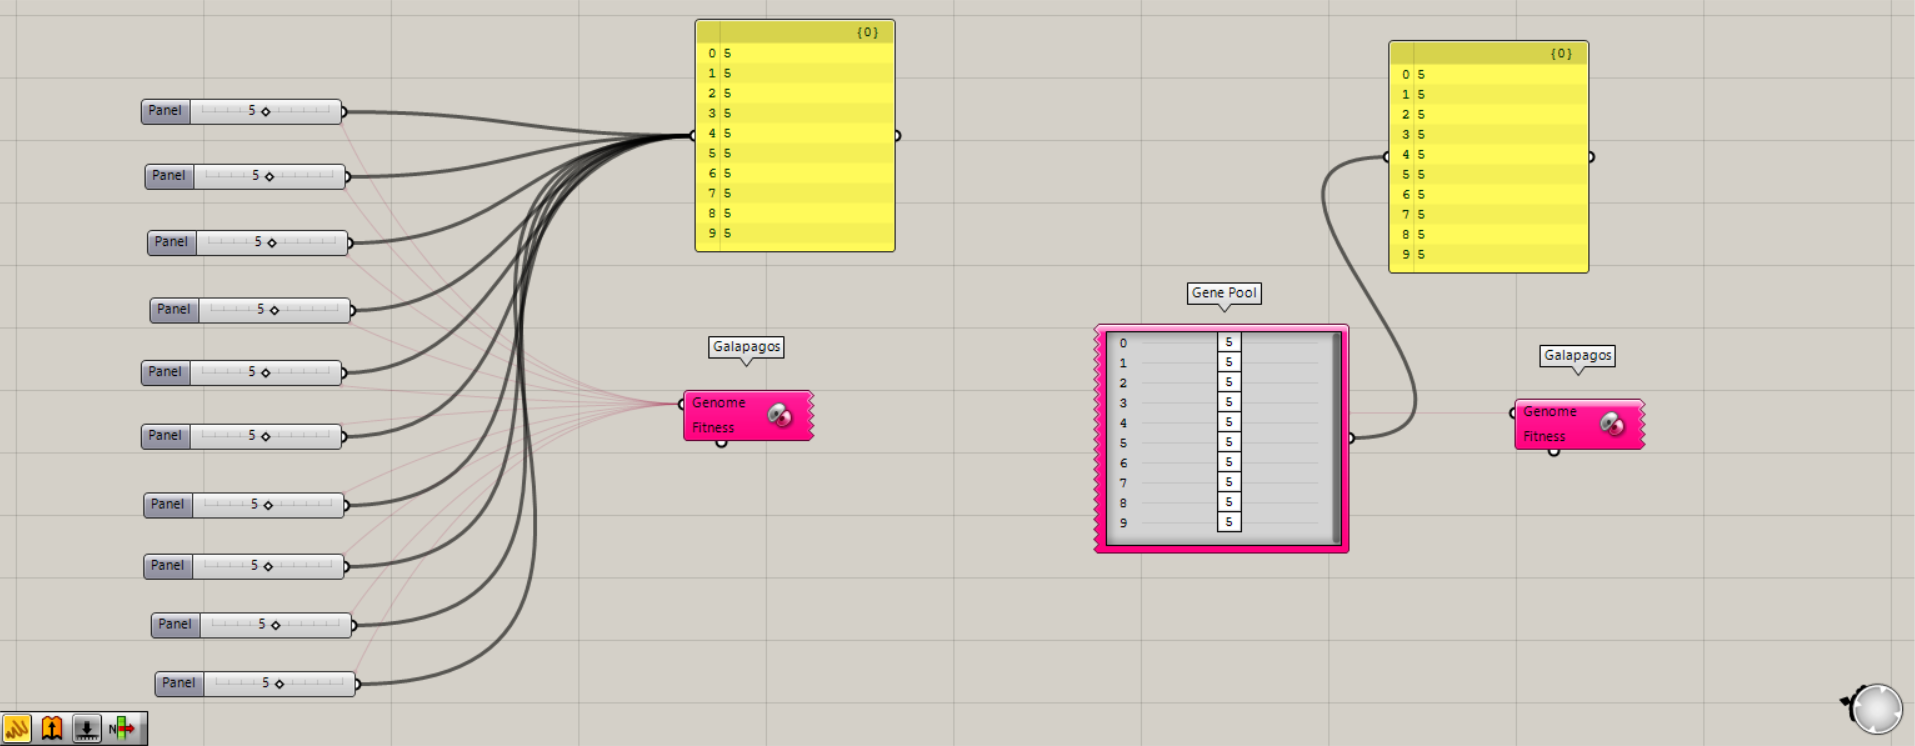
Gene Pool is also very convenient for optimization because it eliminates the need to prepare multiple Number Sliders.
In the image above, variables are being set during optimization using Galapagos.
When using Number Slider to set variables, it becomes complicated as shown on the left.
However, when using Gene Pool, it is very simple.
For an actual example of using Gene Pool for optimization, please refer to the usage example in the article above.
List of Grasshopper articles using Gene Pool component↓


Comment