
![[Grasshopper] How to Use Box for Setting and Creating Boxes](https://iarchway.com/wp-content/uploads/2026/01/Box.png)
This article explains how to store and create boxes.
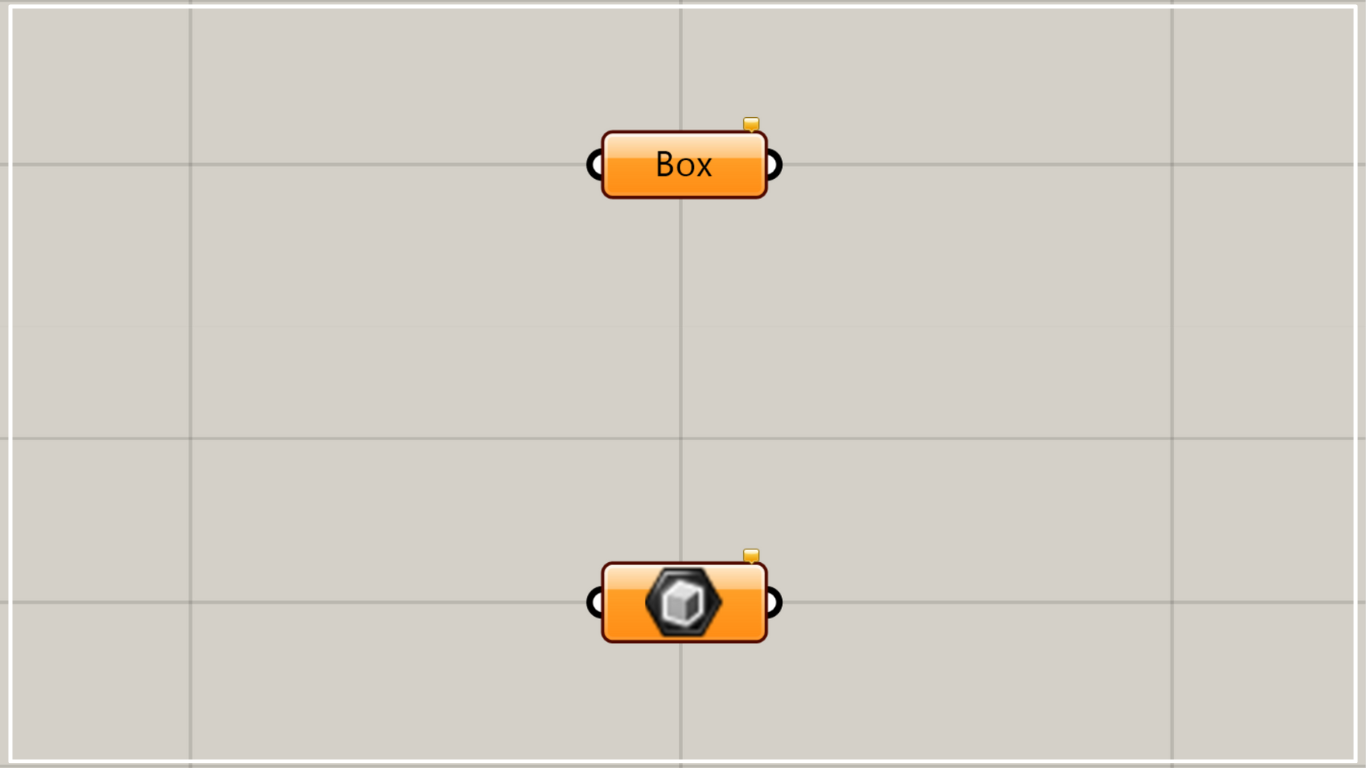
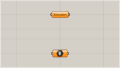
On the Grasshopper, it is represented by either of the two above.
Setting the box
Using Box allows you to set boxes.
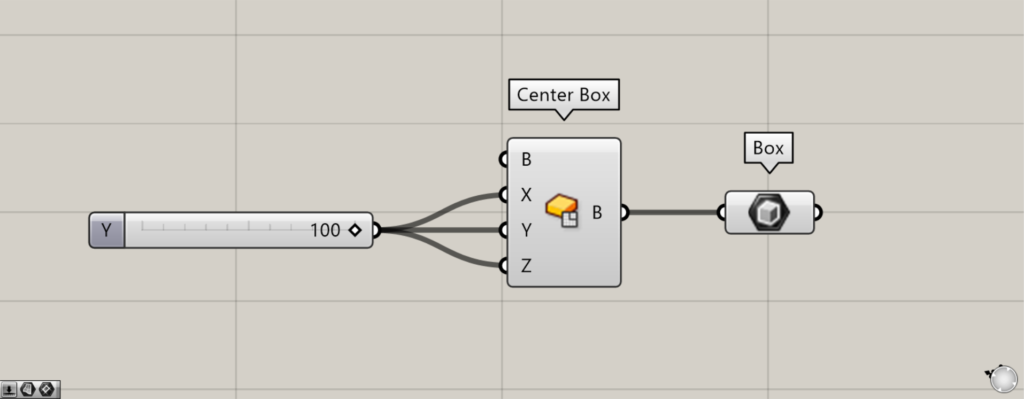
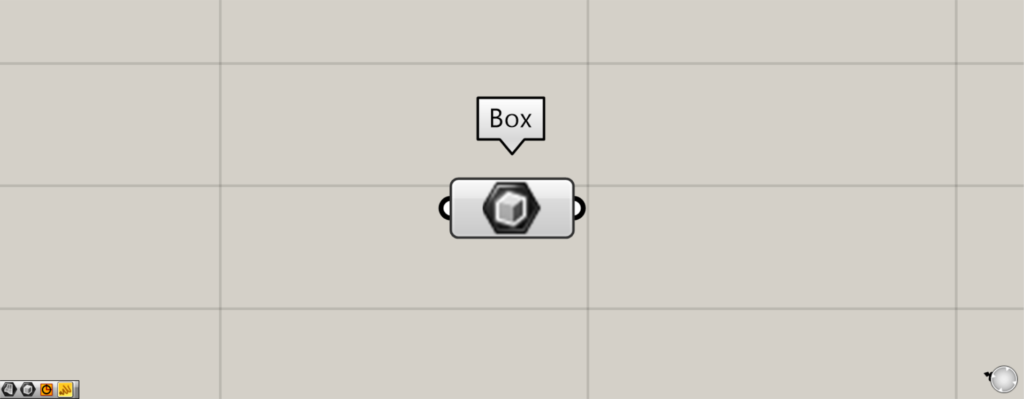
Components used: ①Center Box ②Box
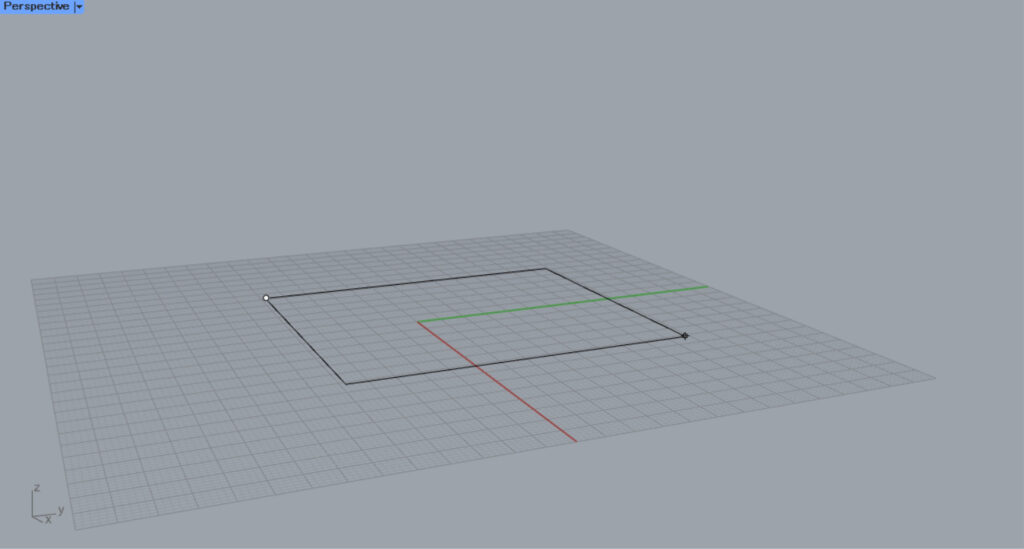
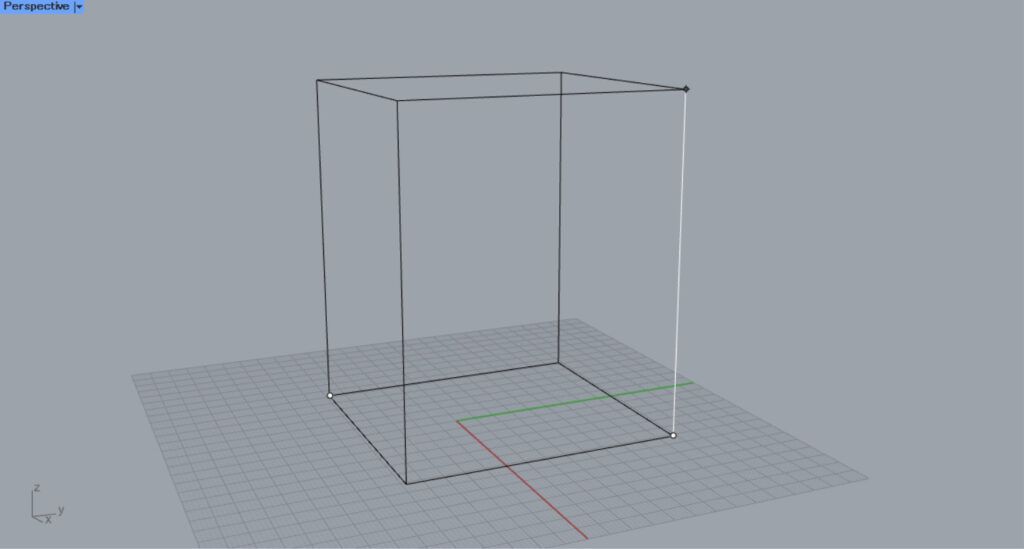
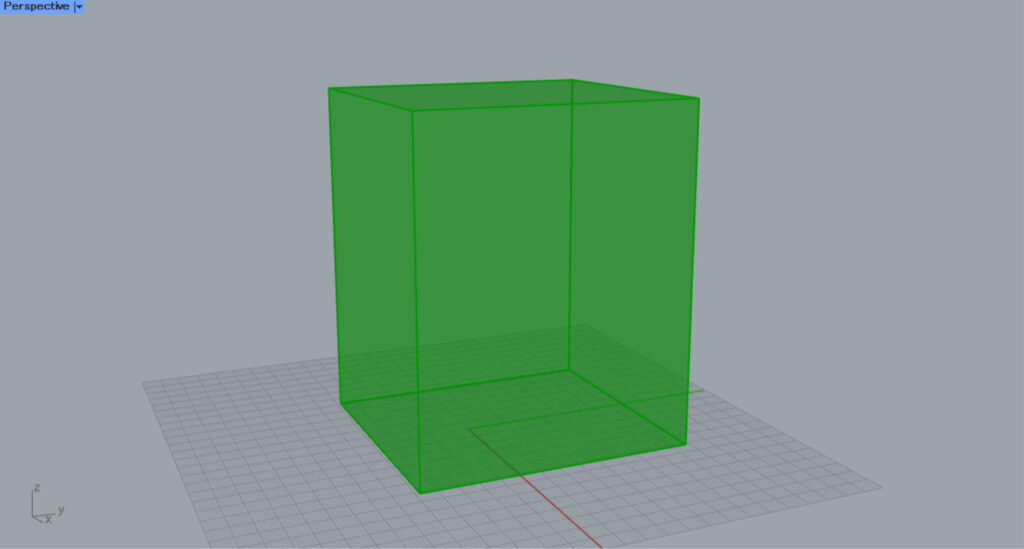
For example, let’s create a box and set it in Box.
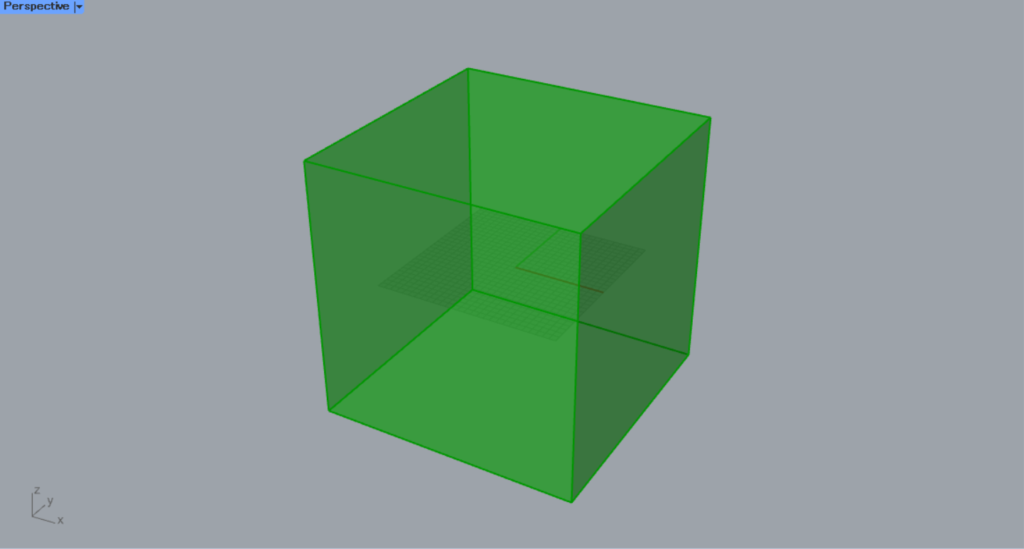
Enter the value 100 into the Center Box(X, Y, and Z).
Then, a 100×100×100 cube will be created.
Then connect the Center Box to the Box.
Then, the created box was set in the Box.
In this way, you can set boxes in Box.
Close the open model
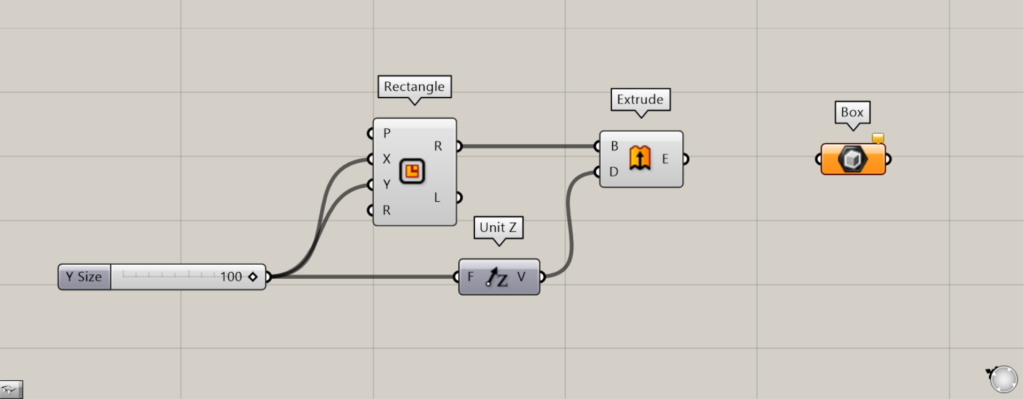
Components used: ① Rectangle ② Unit Z ③ Extrude ④ Box
Connecting an open model to the Box also allows you to close the open model.
Entering 100 into the Rectangle(X and Y) creates a 100×100 square.
Enter 100 into Unit Z and connect it to Extrude(D).
Then, connect the Rectangle(R) to the Extrude(B).
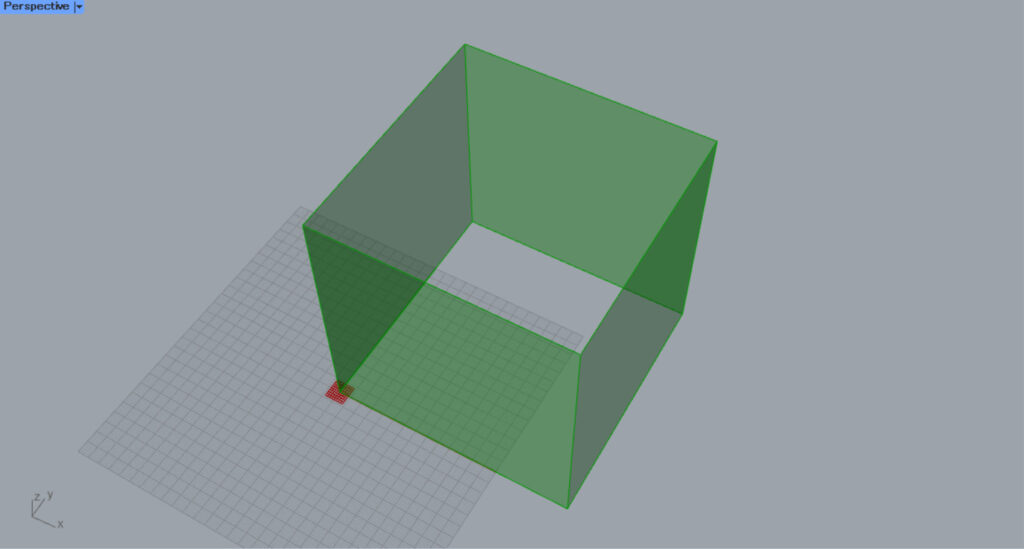
Then, a cube-like object with dimensions 100×100×100 is created, but it is not closed.
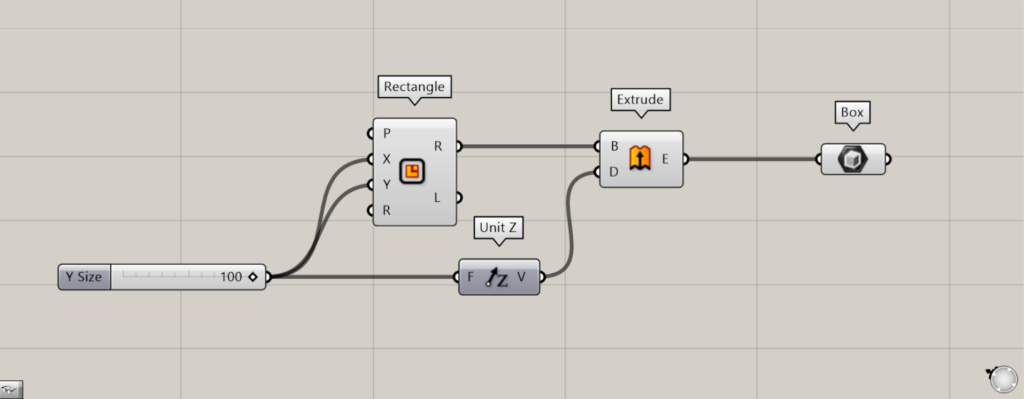
Connect the Extrude to the Box.
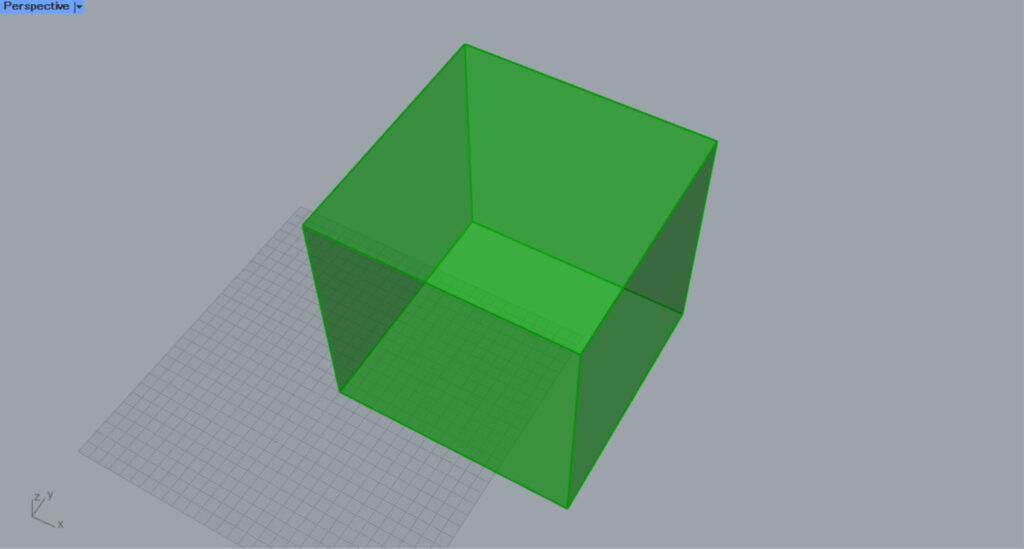
Then, the open model was closed.
In this way, it also has the effect of closing open models.
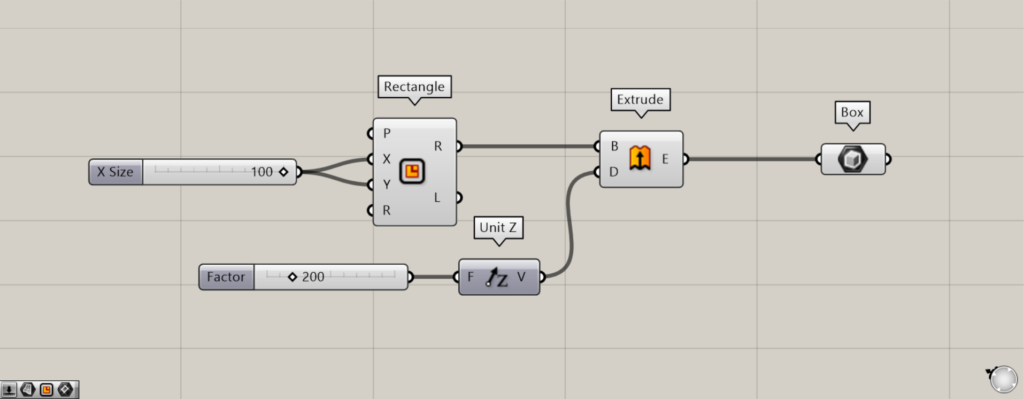
Set the value of Unit Z to 200, creating a 100×100×200 rectangular prism.
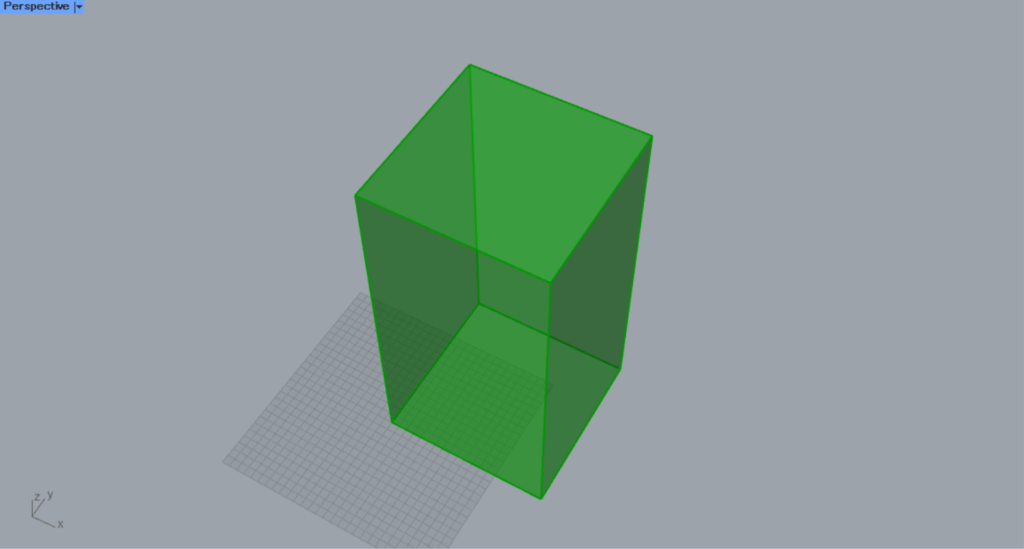
In this way, the same effect applies not only to cubes but also to rectangular prisms and boxes.
Set models other than boxes
You can also store models other than boxes.
If you set something other than a standard box, a new box will be created based on its shape.
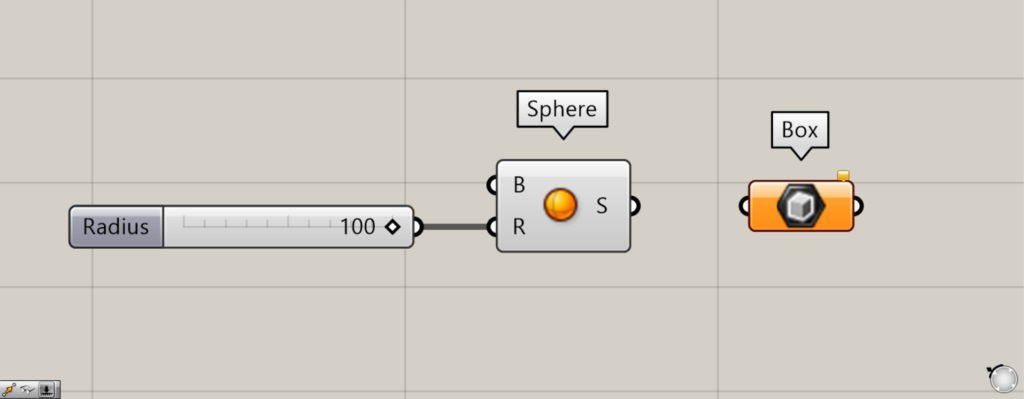
Components used: ① Sphere ② Box
For example, let’s start by placing the sphere in the box.

Enter the radius value into the sphere(R).
This time, we entered 100.
Then, a sphere with a radius of 100 was created.
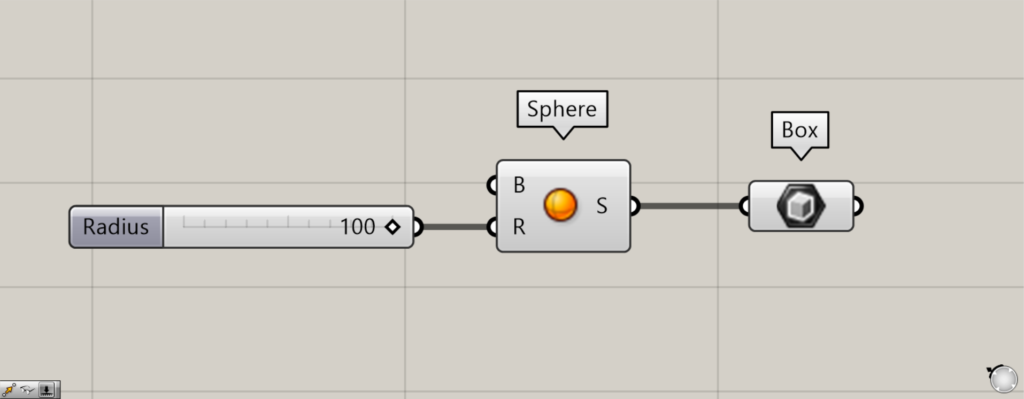
Then connect the Sphere to the Box.
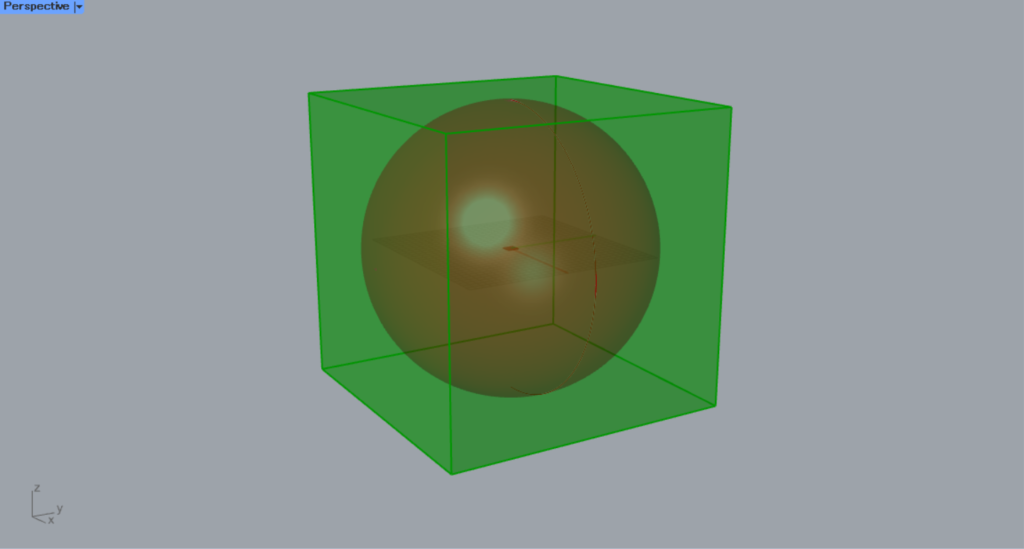
Then, a box is created so that the sphere is surrounded by it like this.
In this way, when you set a model other than a box, a box is created to enclose that model.
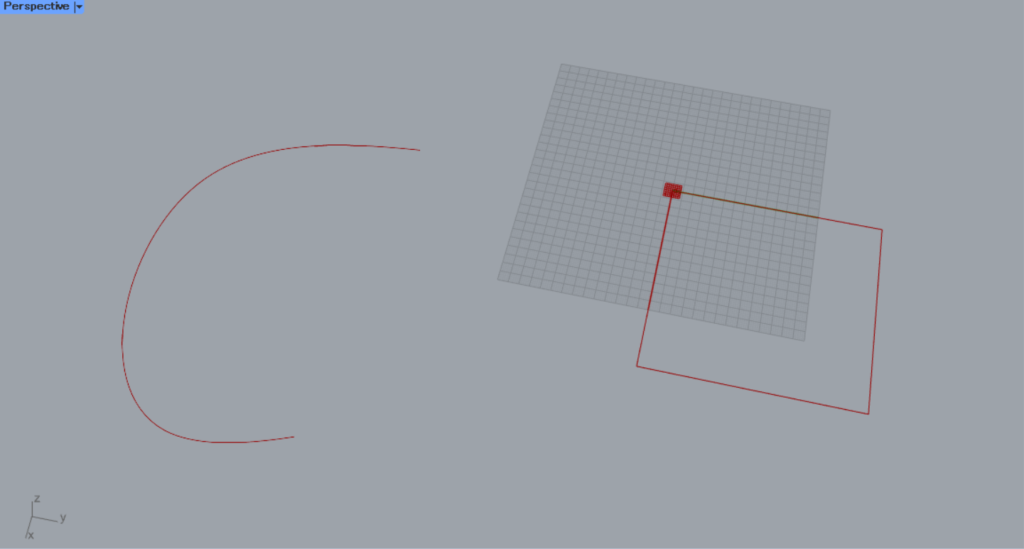
Next, let’s try setting the curve data in a Box.
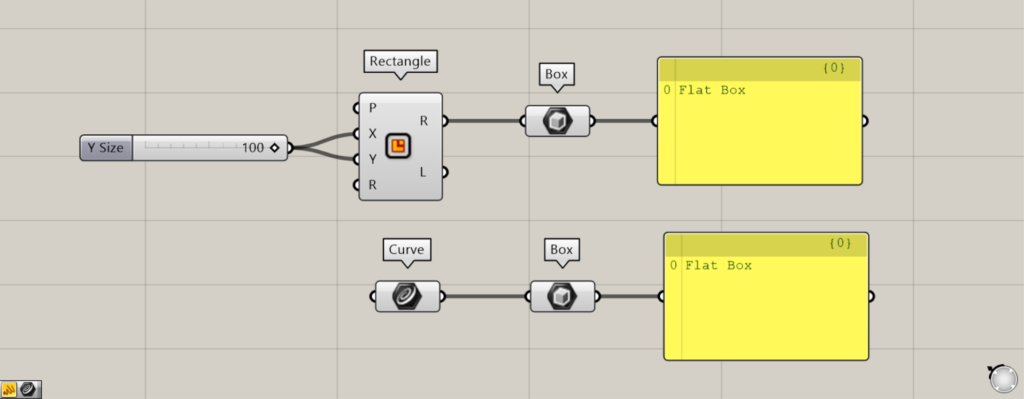
Components used: ① Rectangle ② Curve ③ Box
This time, we will set the rectangle curve created with Rectangle and the curve created with Rhino in Curve for use.
Connect the Rectangle and Curve to the Box, respectively.
Then, a square was created from the curve like this.
It looks like a surface, but when connected to a Panel, it outputs as a Flat Box.
Therefore, although it has no thickness, it is treated as a box.
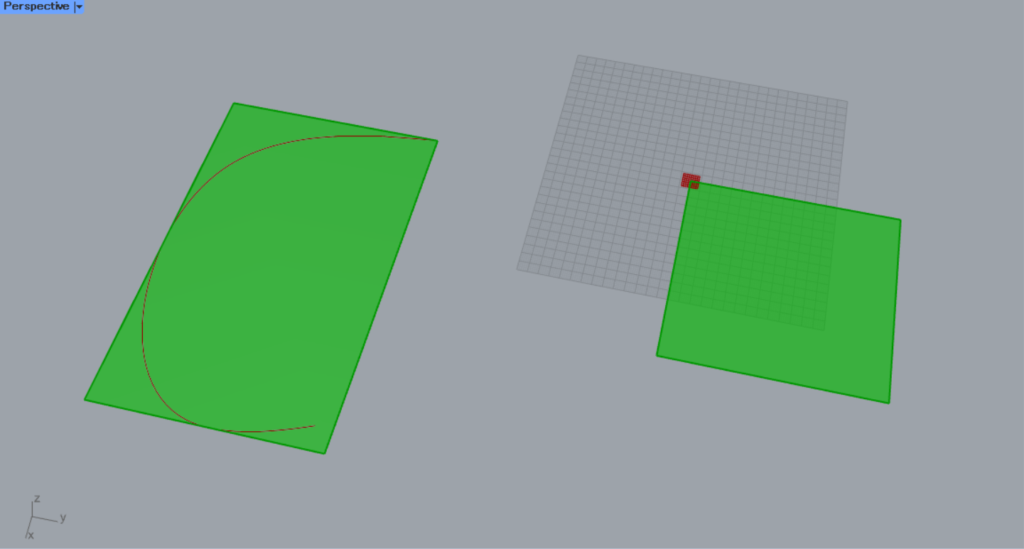
I’ll try editing the curve into a 3D shape.
Then, a box was created to enclose the curve.
By connecting curve data to a Box in this manner, a box is created to enclose the curve.
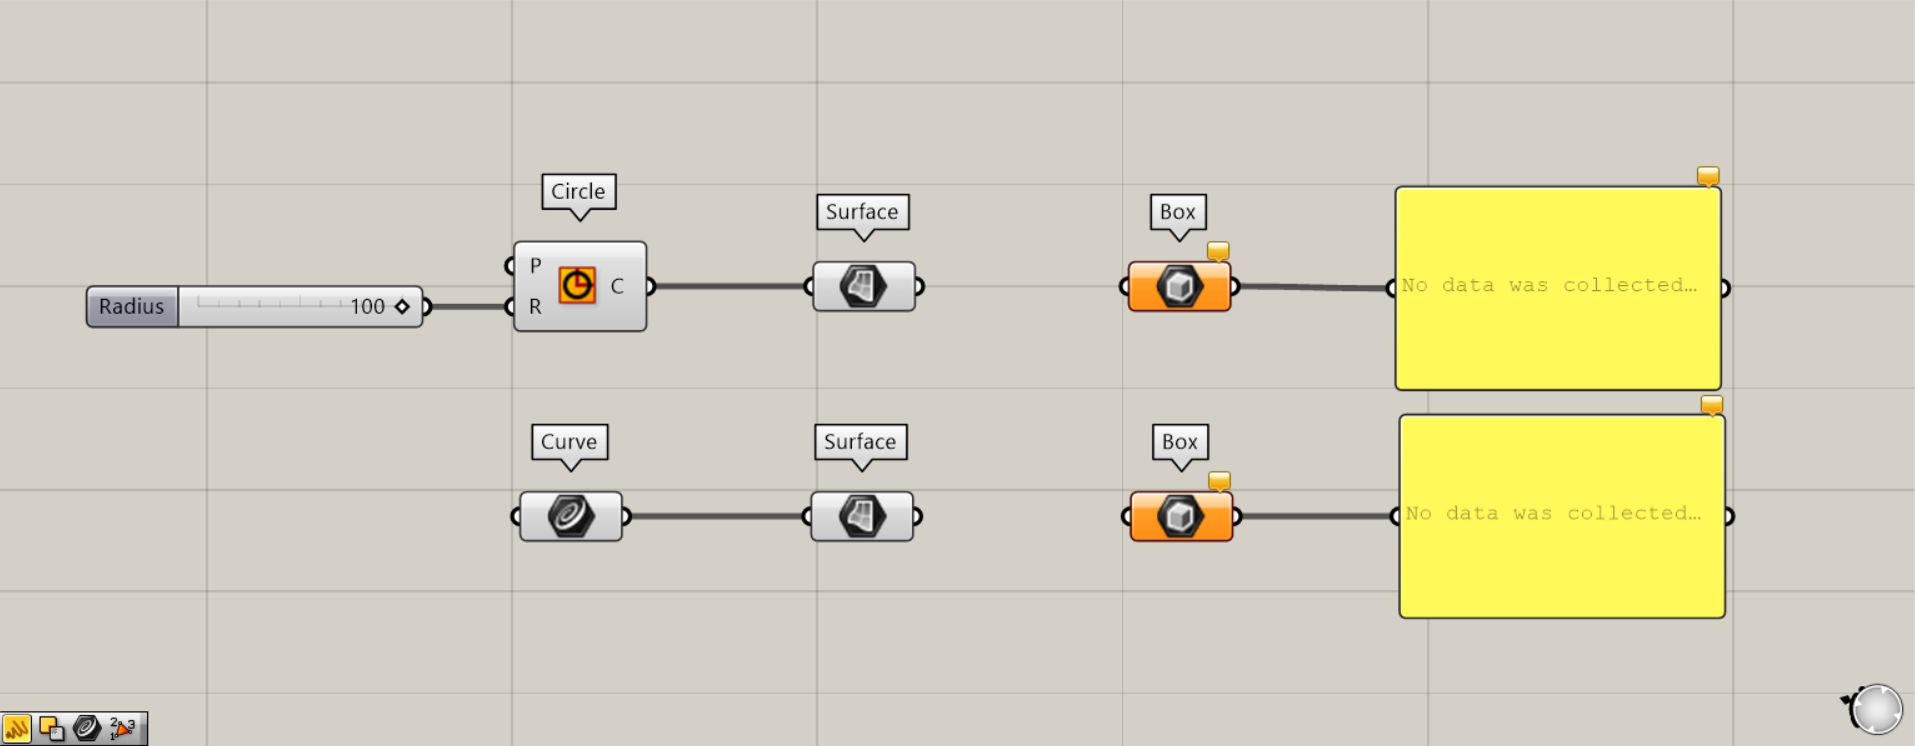
Components used: ①Circle ②Curve ③Surface ④Box
Next, let’s connect a surface to the Box.
This time, we are converting the circle created with Circle and the closed, continuous straight lines created in Rhino into a surface.
Enter the radius value into the Circle(R).
This time, we are entering the value 100.
Next, connect the Curve containing the curve created on Rhino and the Circle to the Surface.
Then, the curve data will be converted to a surface.
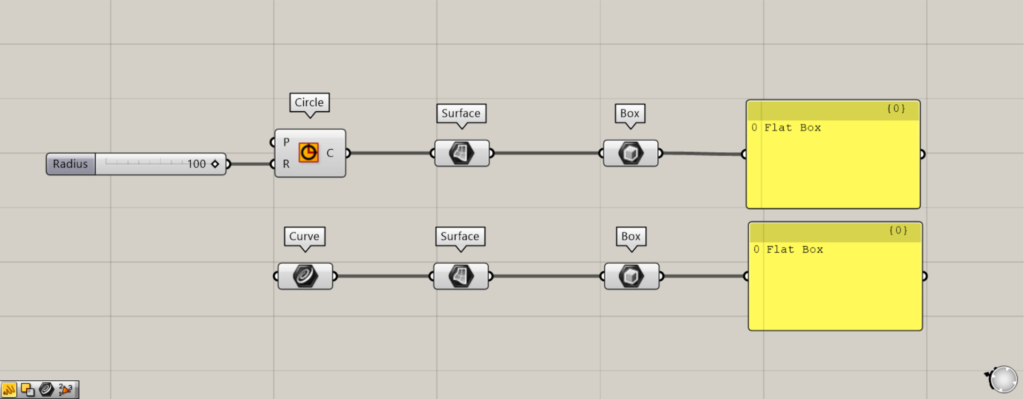
Then connect the Surface to the Box.
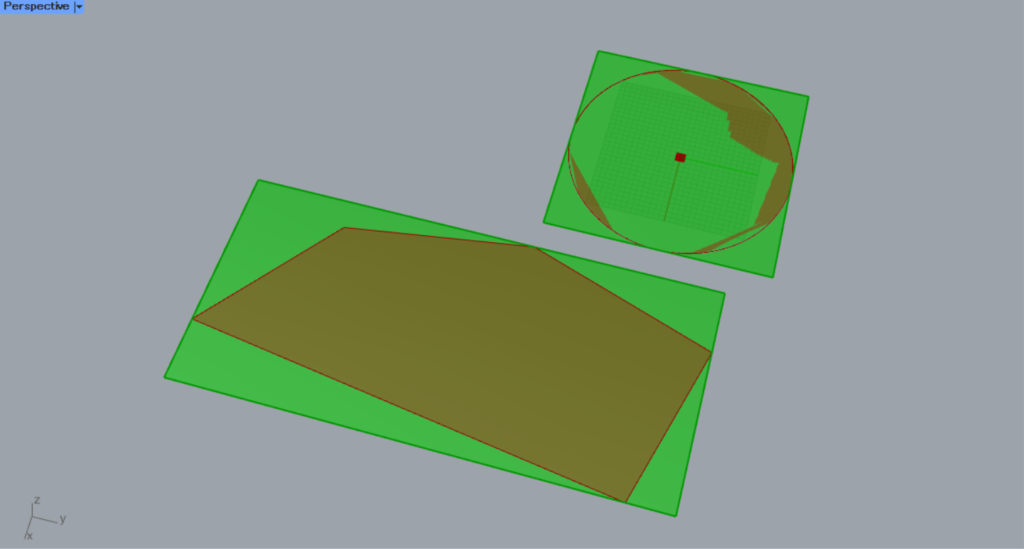
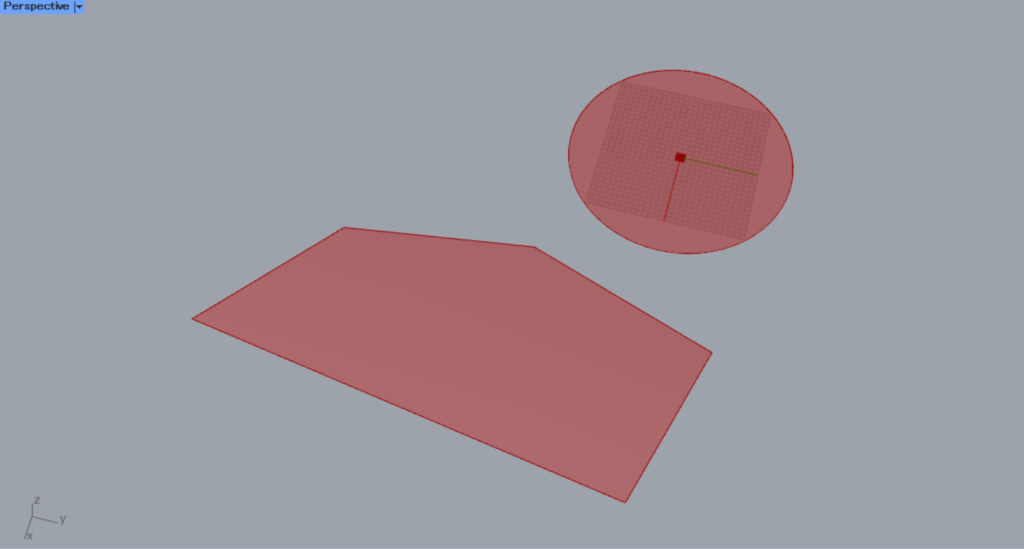
Then, a box will be created surrounding the surface.
In this case, since the surface has no thickness, Flat Box data will be output.
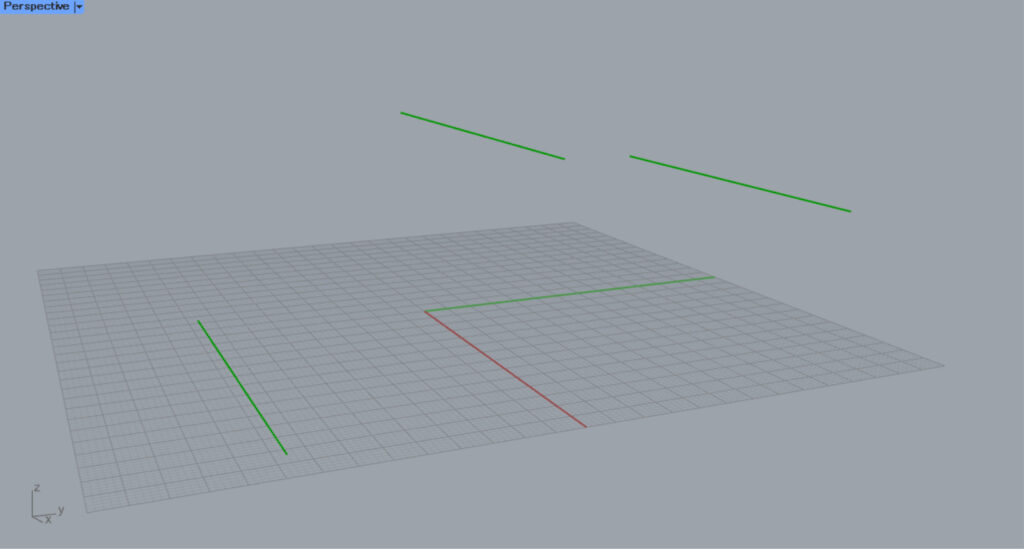
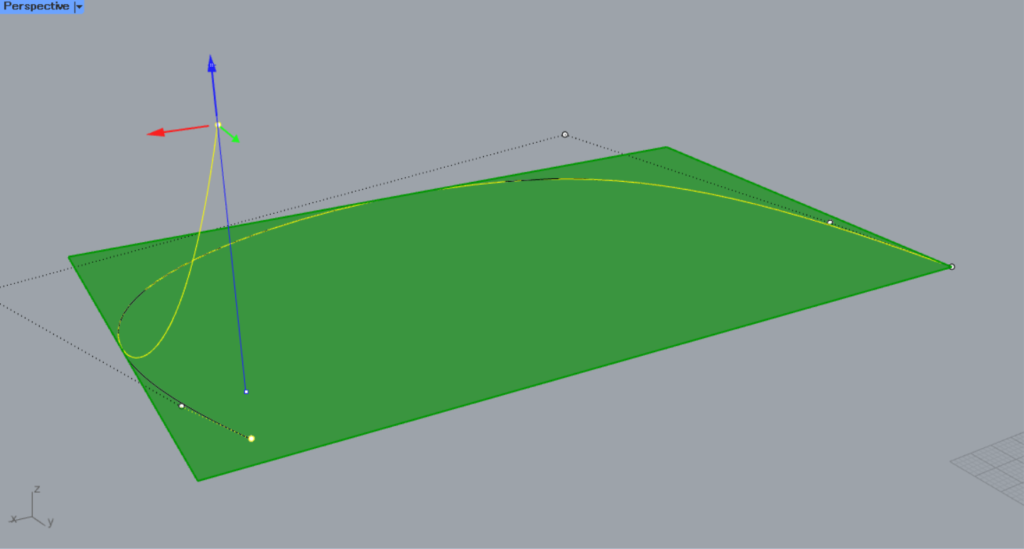
Let’s also look at the case of three-dimentional surfaces.
This time, as shown in the image above, we will create a surface from the three lines created on Rhino.
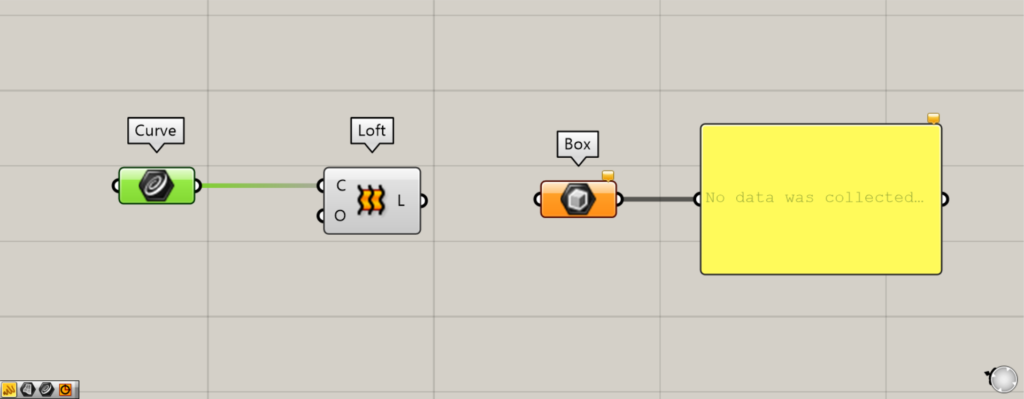
Components used: ①Curve ②Loft ③Box
Set the three lines in Curve.
Then connect Curve to the Loft(C).
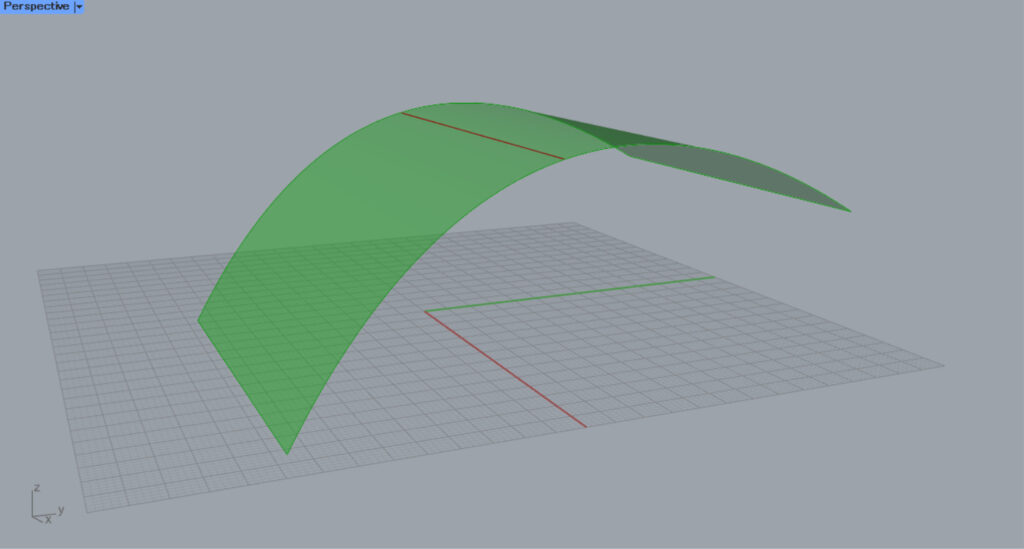
Then, a surface like this was created.
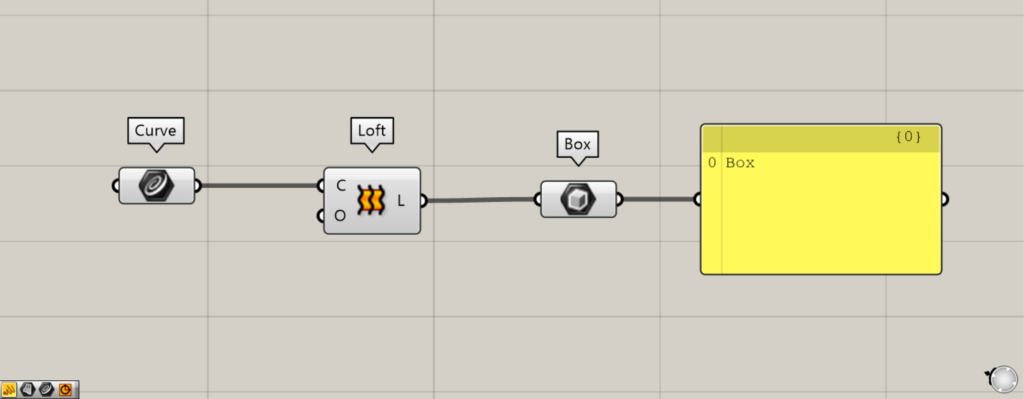
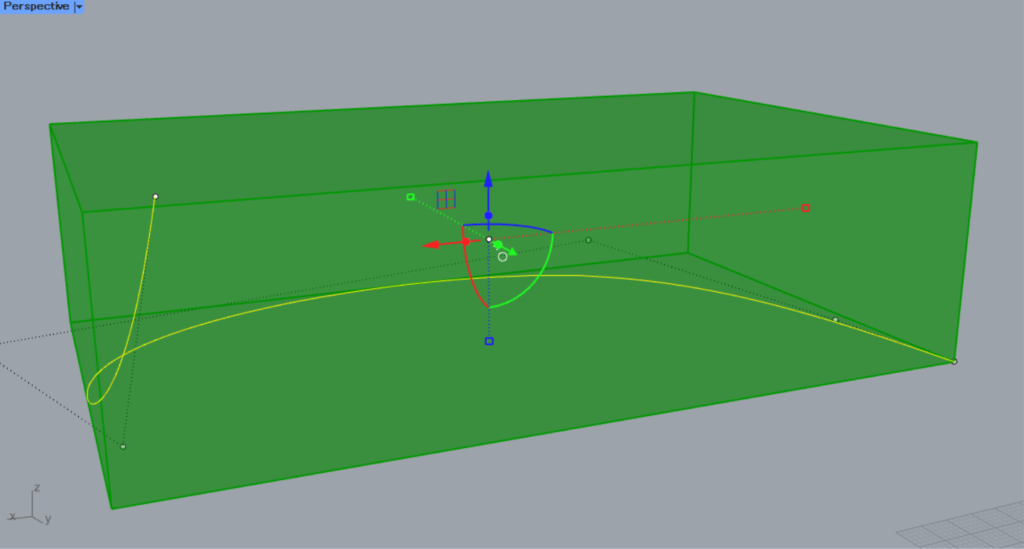
Then connect the Loft to the box.
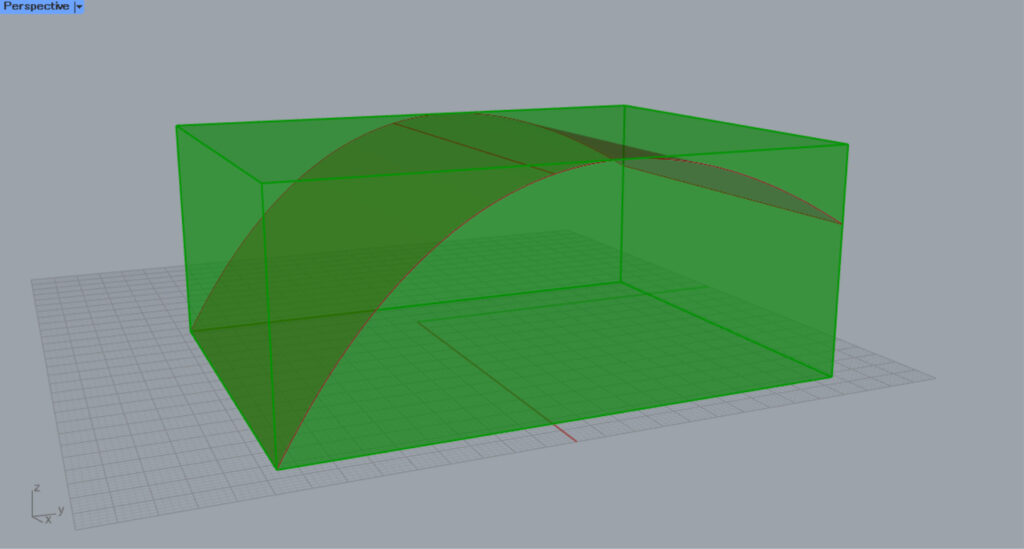
Then, a box was created to enclose the surface.
Store or create boxes directly in the Box
You can also set or create boxes directly in Box.
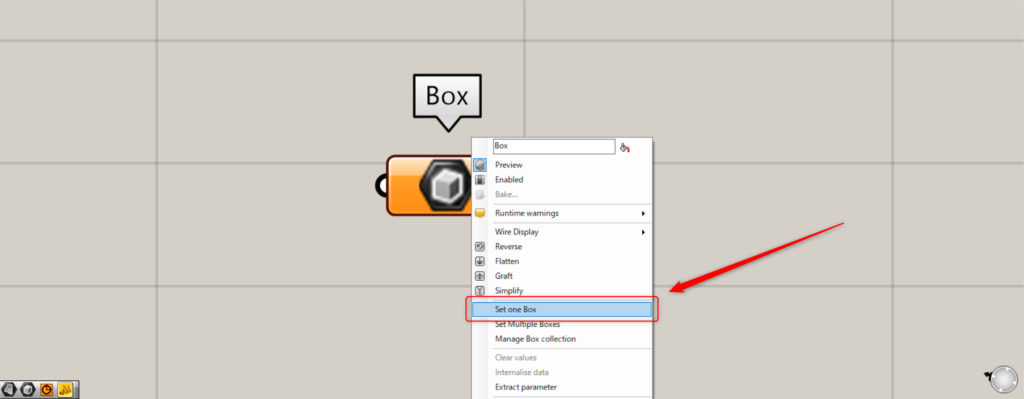
For a single box, right-click the Box and select “Set one Box”.
Then, the screen will switch to Rhino.
Create a box on Rhino.
Then, a box was created and set in Box.
This is the result on the Rhino.
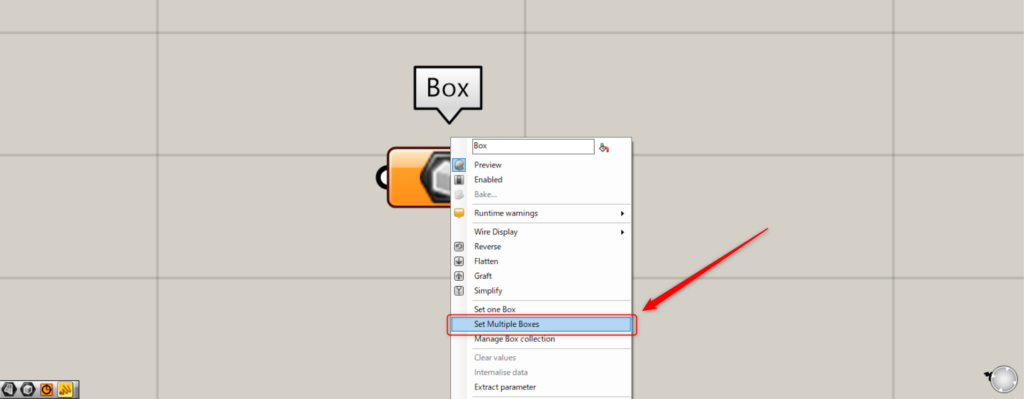
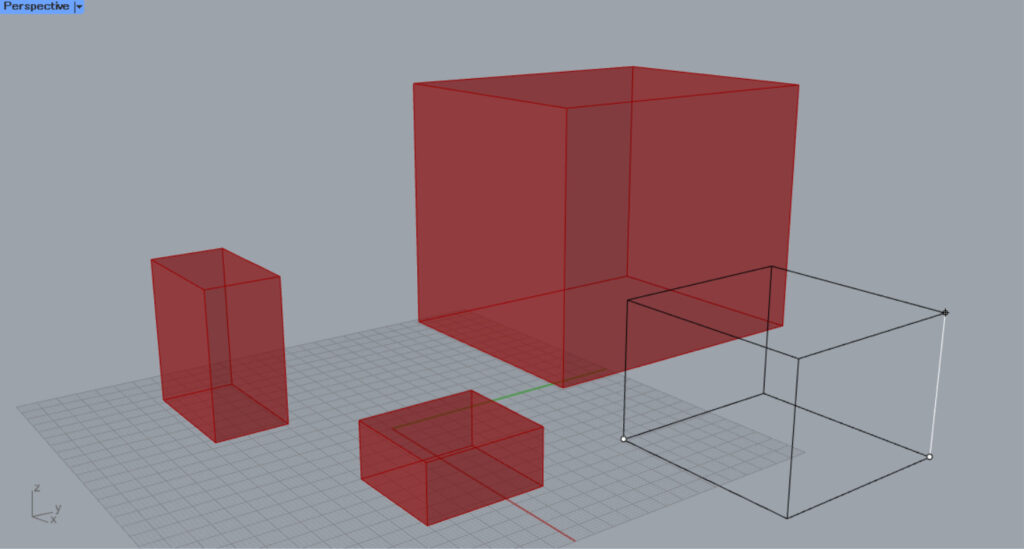
For multiple boxes, right-click the box and select “Set Multiple Boxes”.
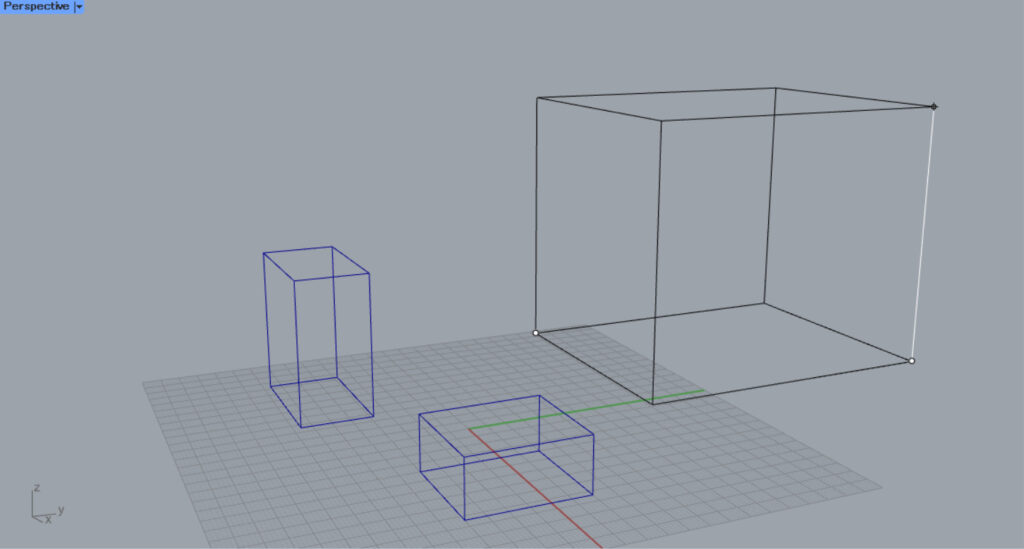
After that, create multiple boxes in Rhino.

Then, multiple boxes were set directly in Box.
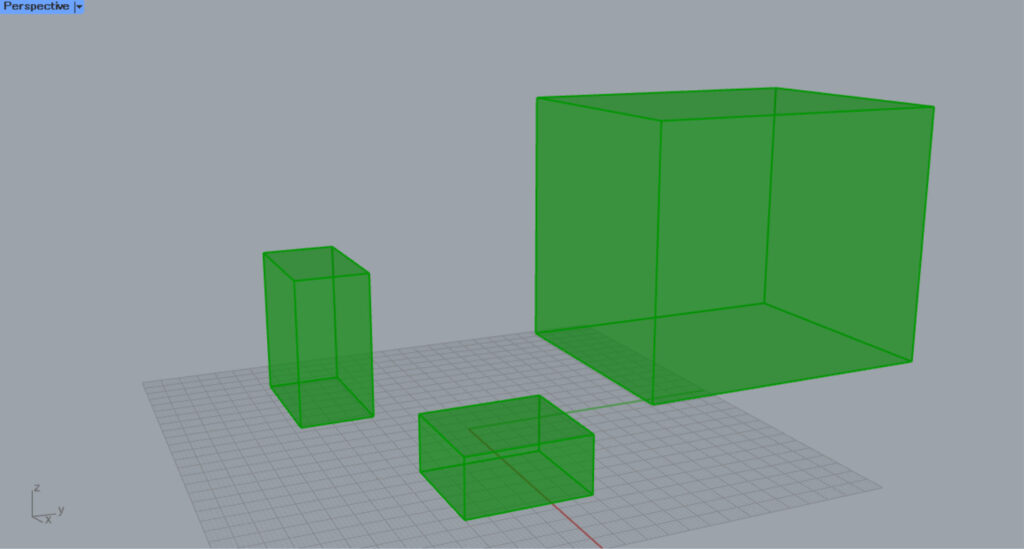
This is the result on Rhino.
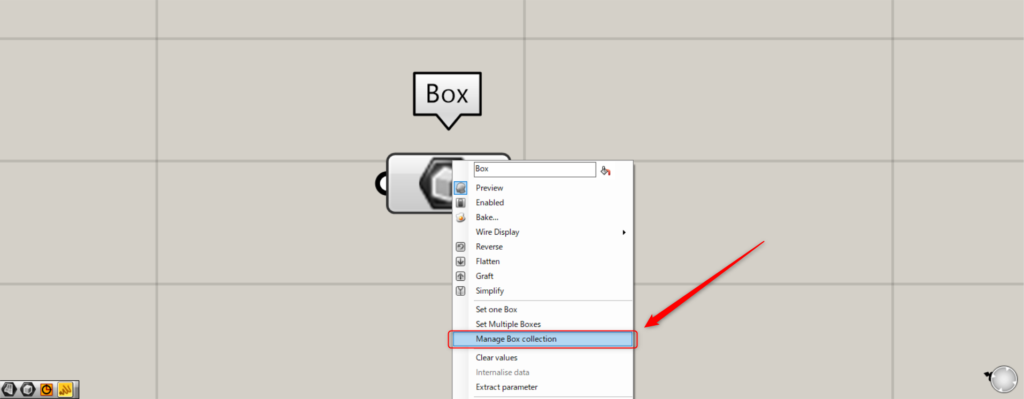
To manage and edit set+ boxes, right-click the Box and select “Manage Box Collection”.
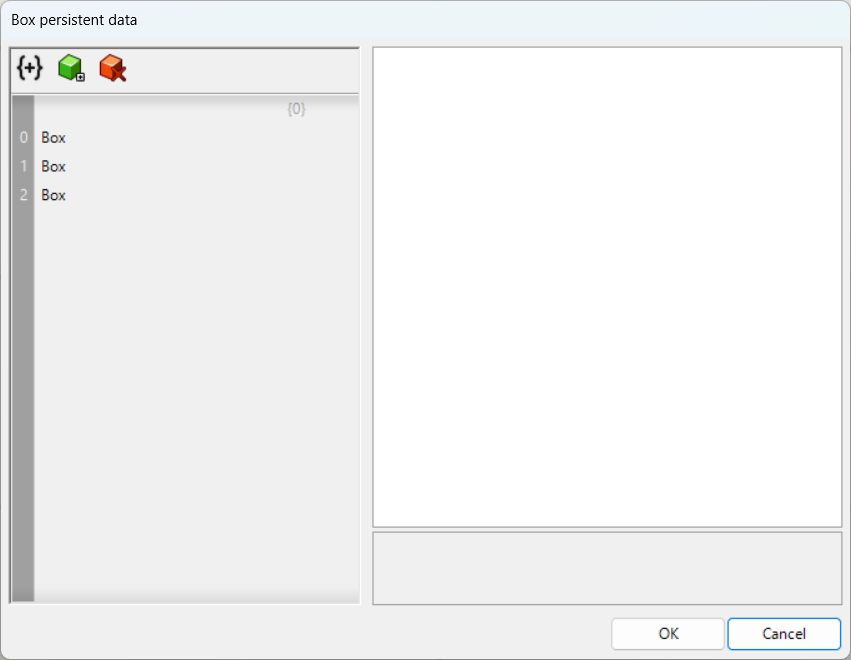
Then, the Box settings screen will appear as shown below.
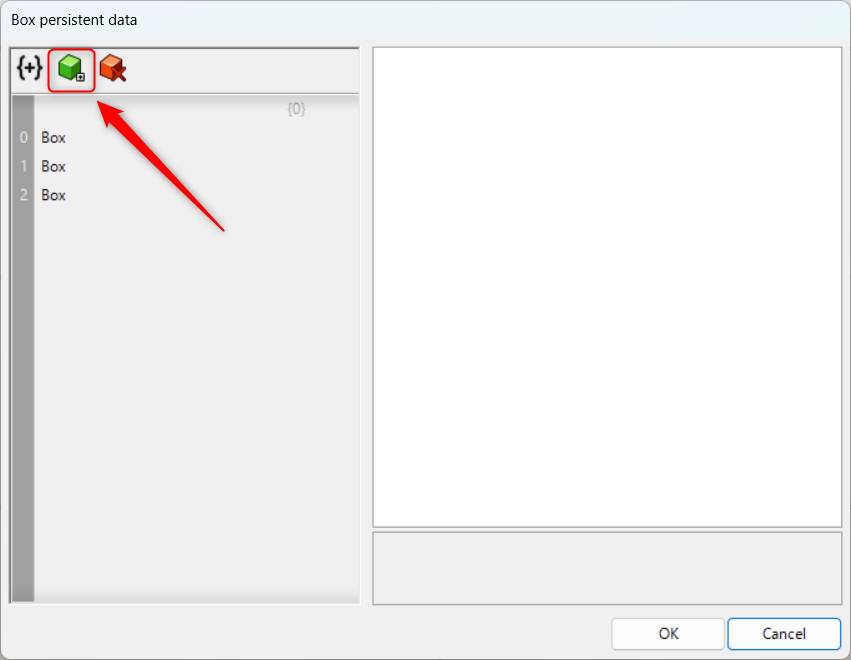
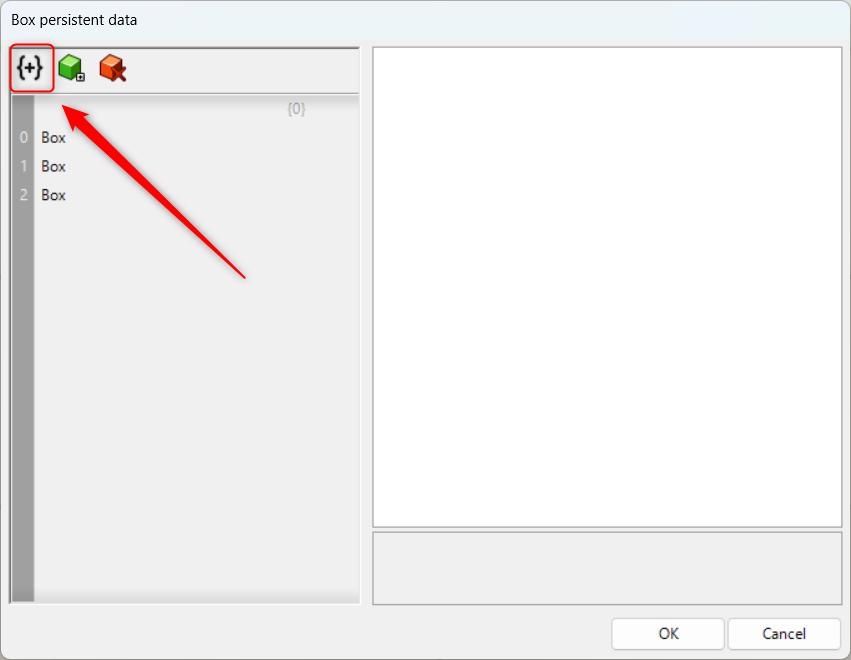
Click the green icon in the upper left to add a box.
After clicking, create a box on Rhino.
Then, a box was added like this.
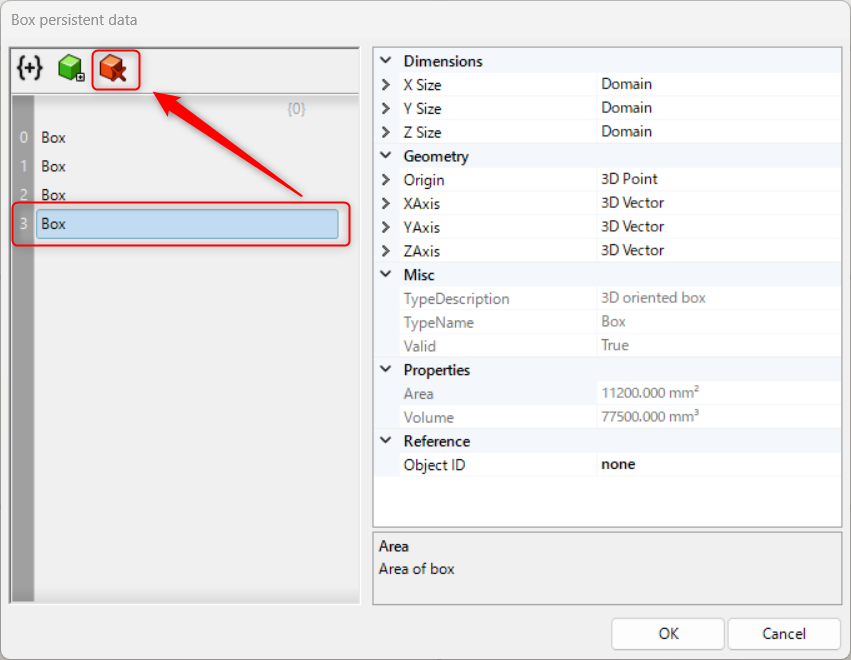
With the box data selected, click the red icon in the upper-left corner to delete the box.
In this way, the box has been deleted.
Click the icon in the top-left corner to create a hierarchy.
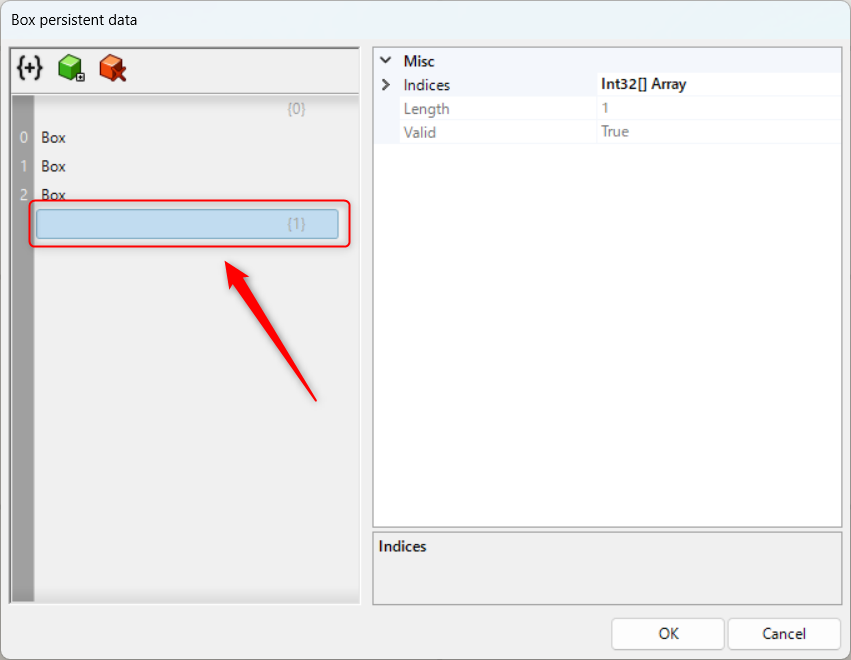
In this way, the hierarchy has been created.
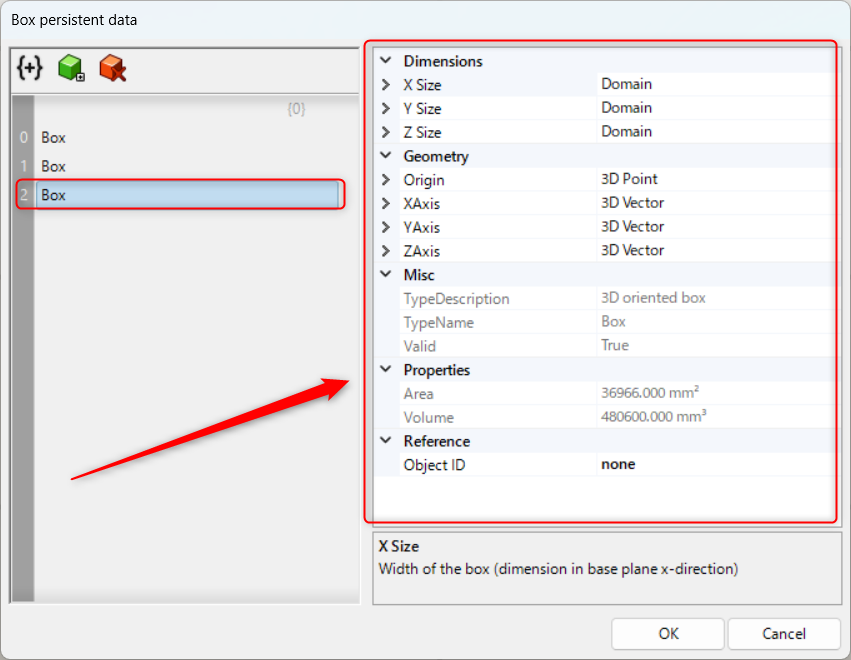
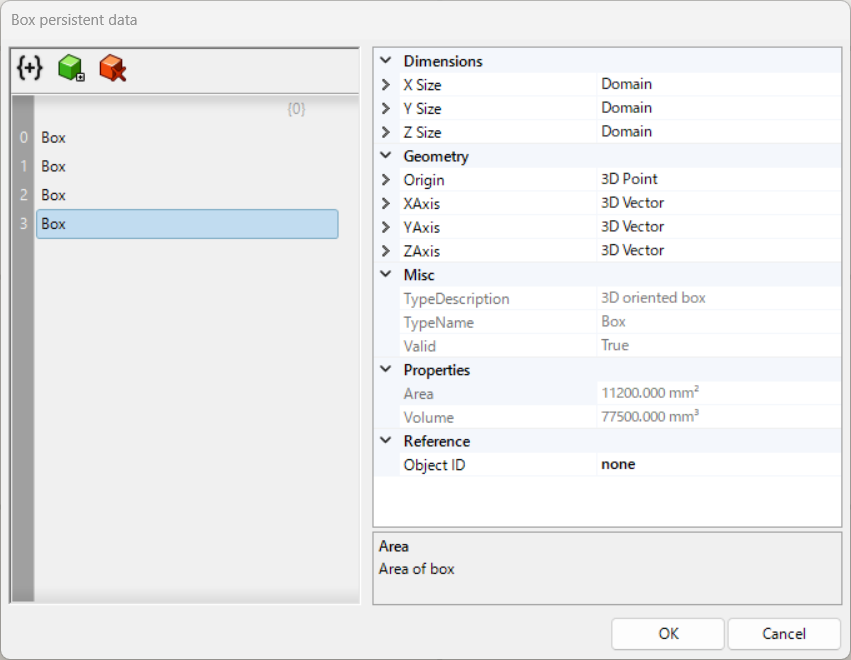
Selecting a box allows you to edit it individually in the right-hand pane.
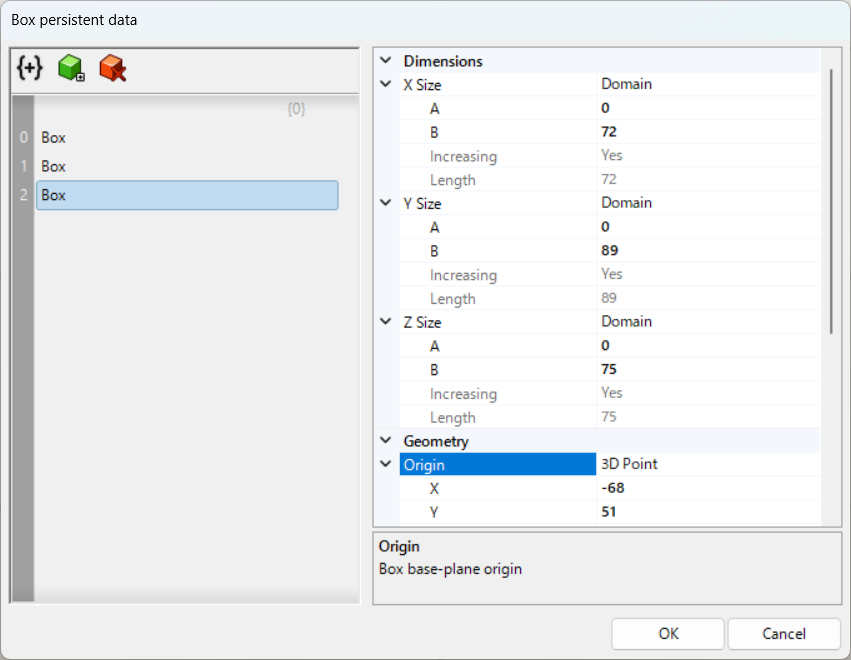
Click the arrow to display various pull-down menus, allowing you to edit each item such as size and coordinates.
List of Grasshopper articles using Box component↓

Comment