
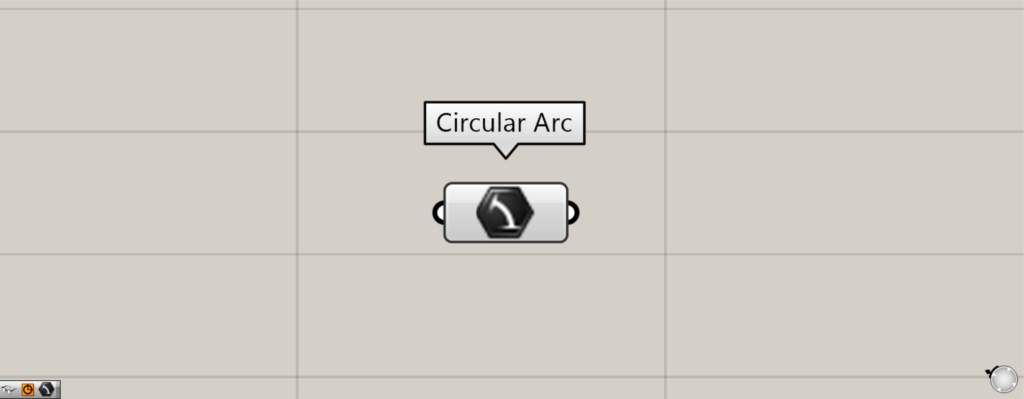
![[Grasshopper] How to use Circular Arc to set arcs](https://iarchway.com/wp-content/uploads/2025/10/Circular-Arc.png)
This article explains how to use Circular Arc to set arcs.
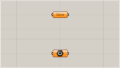
On the Grasshopper, it is represented by either of the two above.
Setting arcs
Circular Arc can be used to set a circular arc.
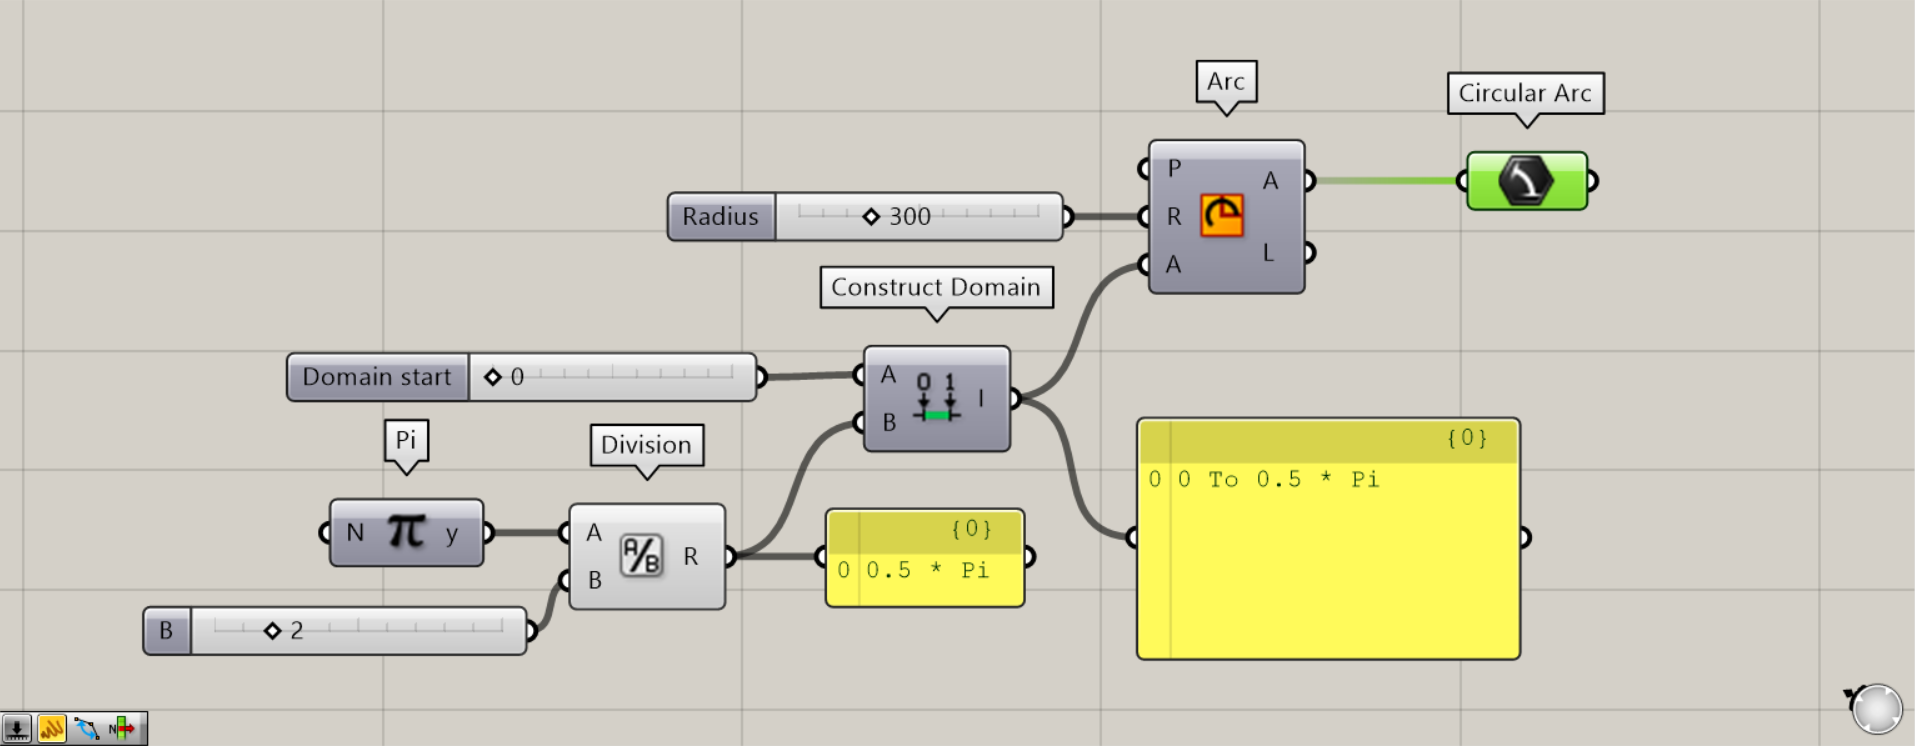
Components used: (1) Pi (2) Division (3) Construct Domain (4) Arc (5) Circular Arc
First, let’s try storing the arc created on the Grasshopper in the Circular Arc.
Input Pi to the Division(A) and 2 to the Division(B) to create a number Π/2 (0.5 x Π).
Then, connect 0 to the Construct Domain(A) and the Division to the Construct Domain(B).
Then a range from 0 to Π/2 (0.5 x Π) is created.
Then, connect the number 300 of the radius to the Arc(R).
Furthermore, we connect Construct Domain to the Arc(A).
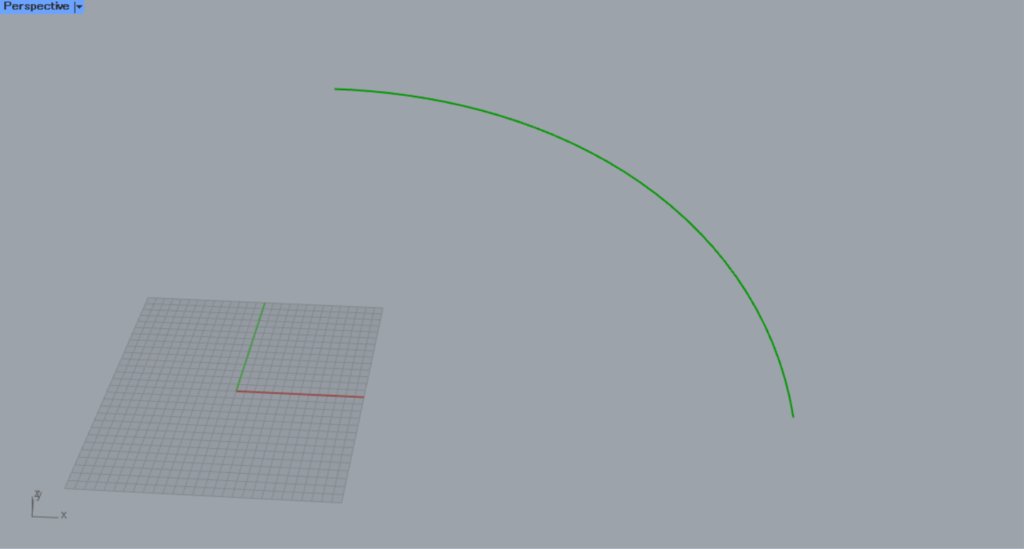
This creates an arc with a radius of 300 and 0~90 degrees.
Finally, connect Arc to Circular Arc.
The arc is now set in Circular Arc.
In this way, you can set a circular arc in Circular Arc.
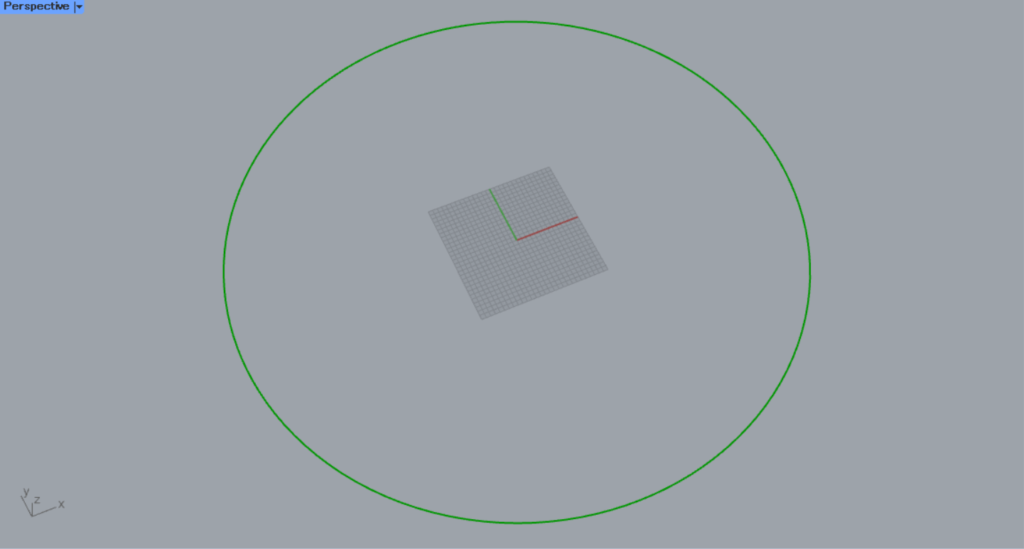
Setting a circle
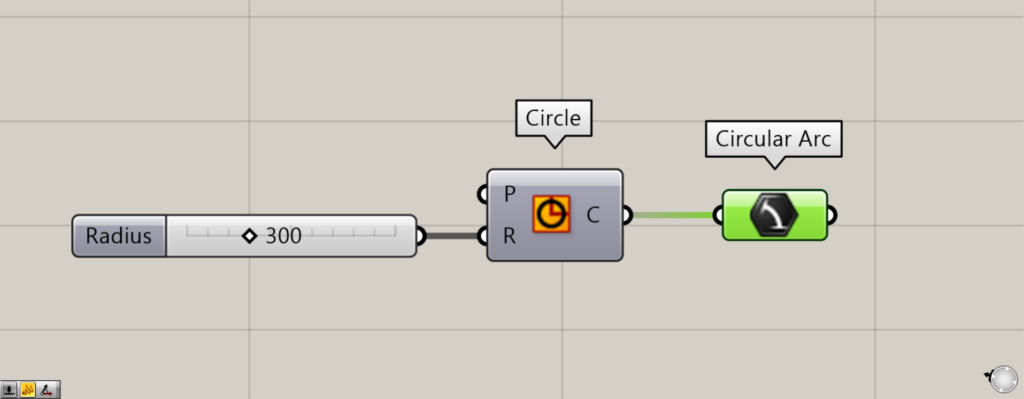
Components used: (1) Circle (2) Circular Arc
Circular Arc can also set a circle (since it is recognized as a circular arc of 0~360 degrees).
Enter a numerical value for the radius in the Circle(R).
In this case, we entered 300.
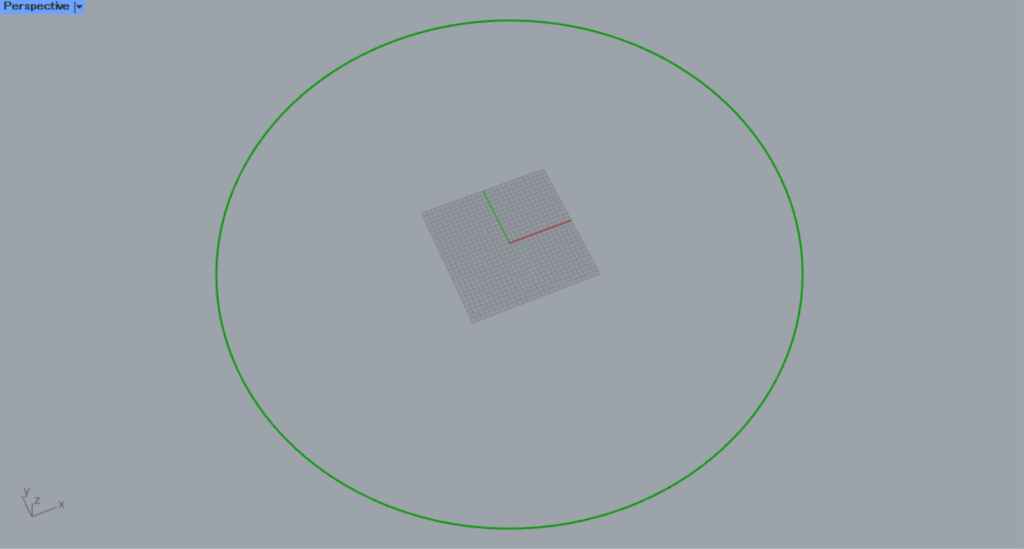
A circle with a radius of 300 is then created.
Then, Circle is connected to Circular Arc.
We found that even a circle can be connected to Circular Arc.
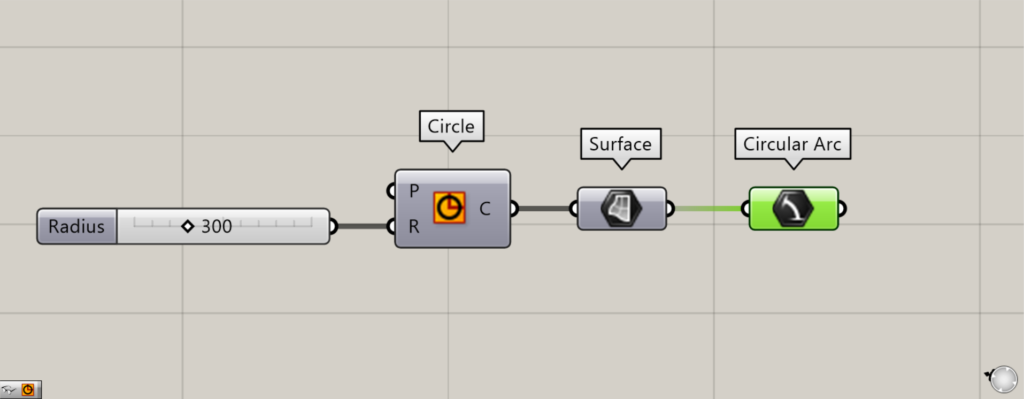
Additional Components: (1) Surface
The circle can be converted to surfaces because they are closed curves.
In this case, it can be set in Circular Arc even if it is a surface.
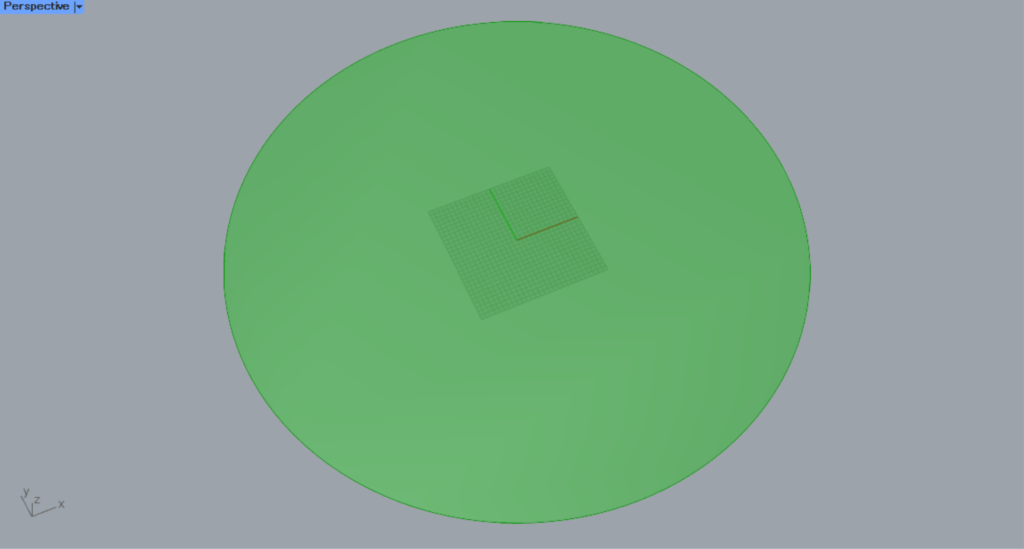
The curve circle will then be converted to a surface.
Then connect Surface to Circular Arc.
Then you can set the surface into Circular Arc, although it will be converted into curve data.
Cannot store anything but arcs and circles
Surfaces other than arcs and circles cannot be set in Circular Arc.
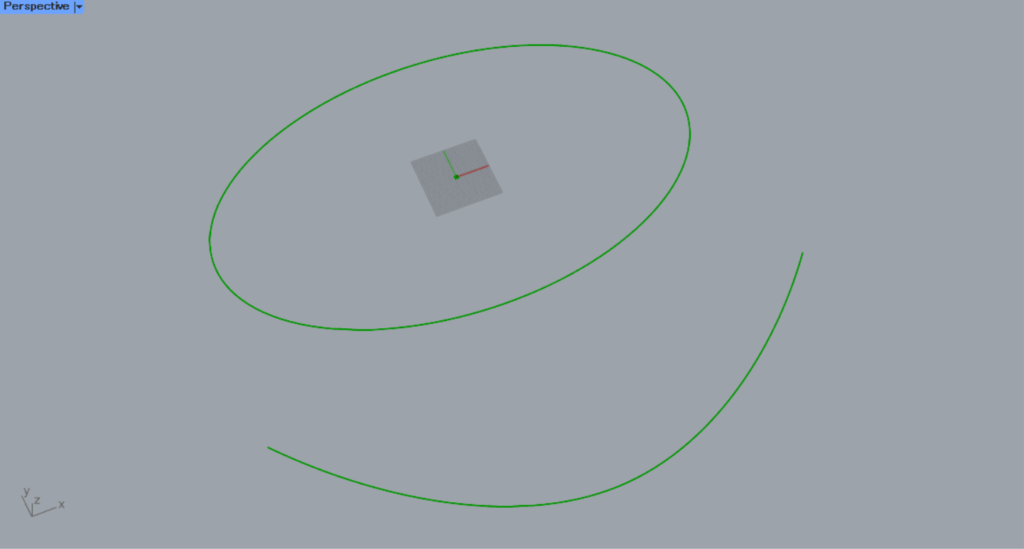
Let’s try to connect ellipse and curve data to Circular Arc.
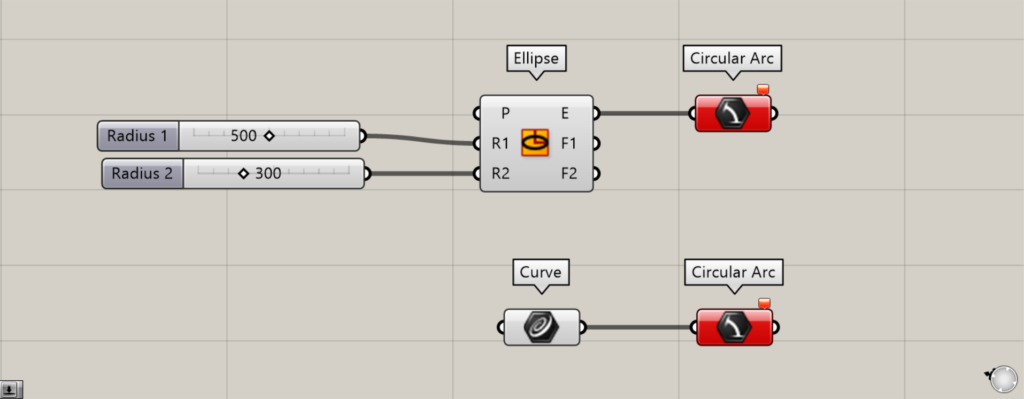
Components used: (1) Ellipse (2) Curve (3) Circular Arc
When connected to Circular Arc, an error occurs as shown in the image above.
Setting directly in Circular Arc
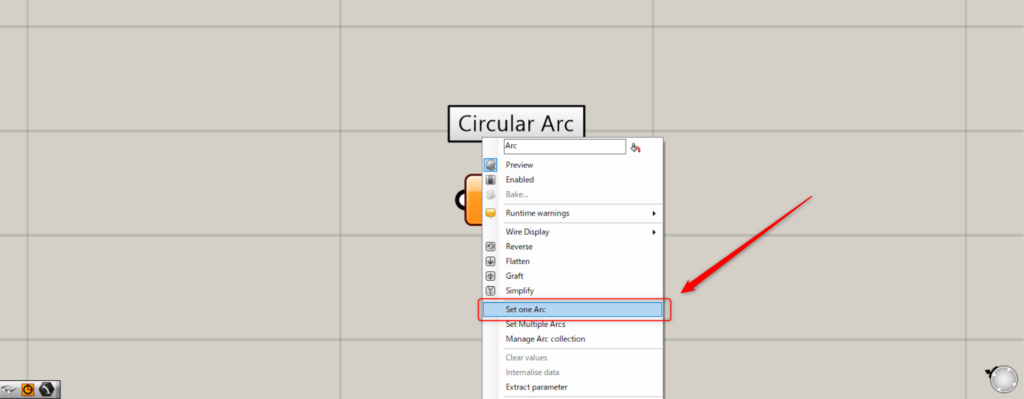
Circular arcs and circles can also be directly stored in Circular Arc.
To directly store a single arc, right-click on Circular Arc and select Set one Arc.
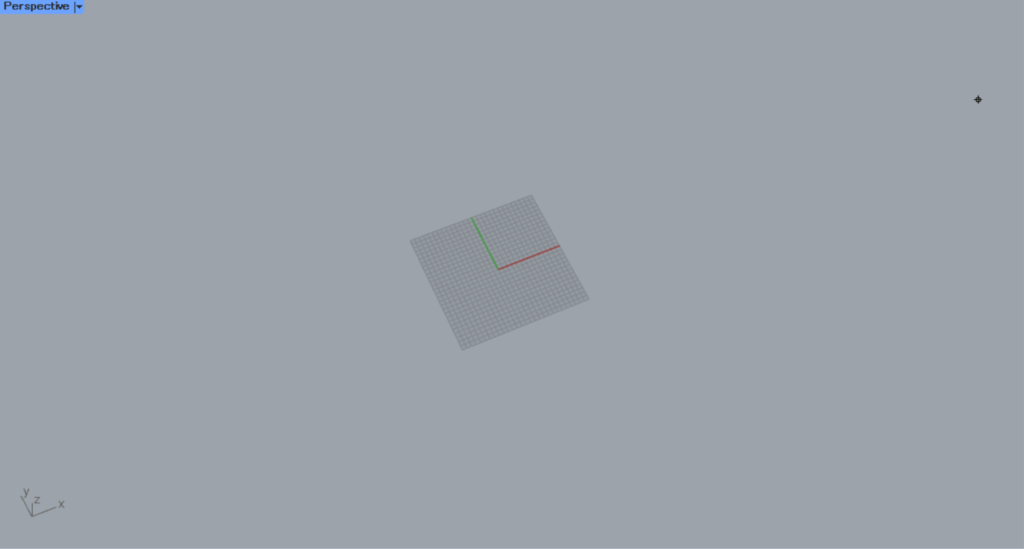
You will then see the screen on the Rhino.
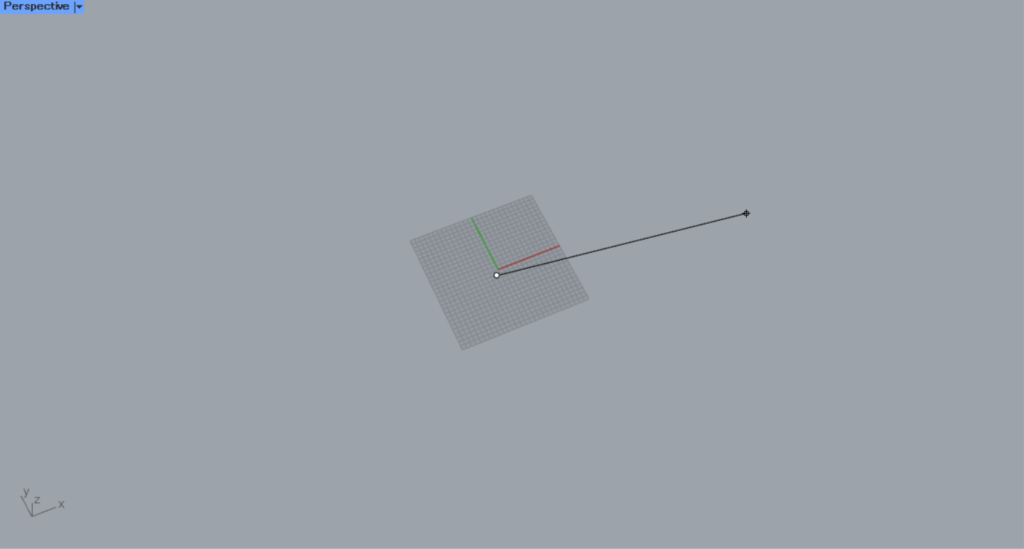
Specify the center point of the arc and draw a radius line.

Specify the end point and angle of the arc.
The arc is now directly set.
This is the view on the Rhino.
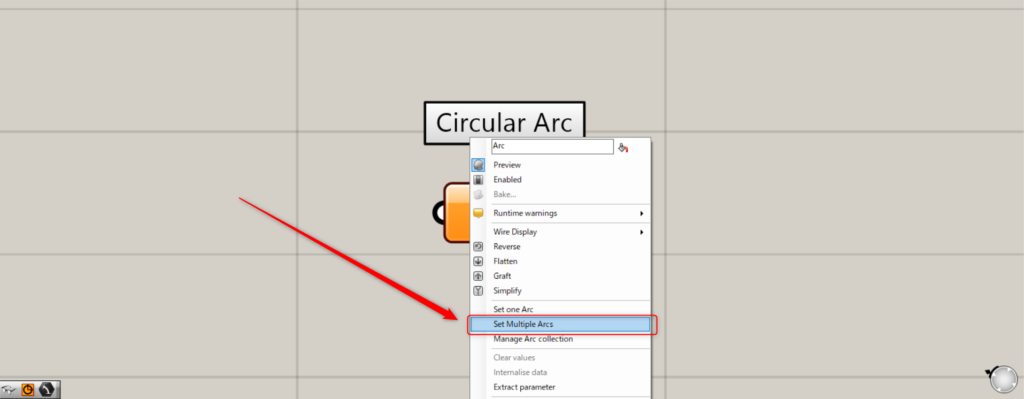
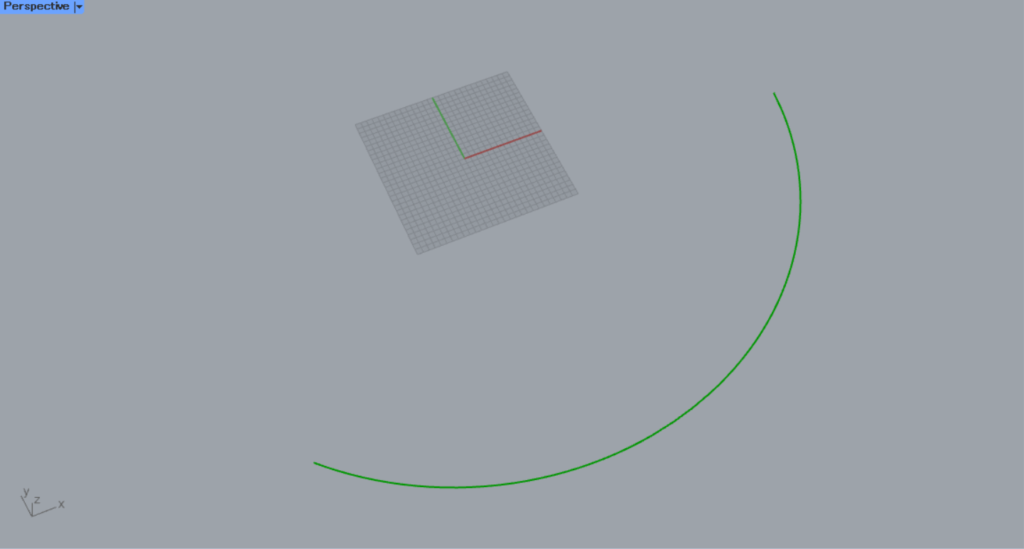
To directly set multiple arcs, right click on Circular Arc and select Set Multiple Arcs.
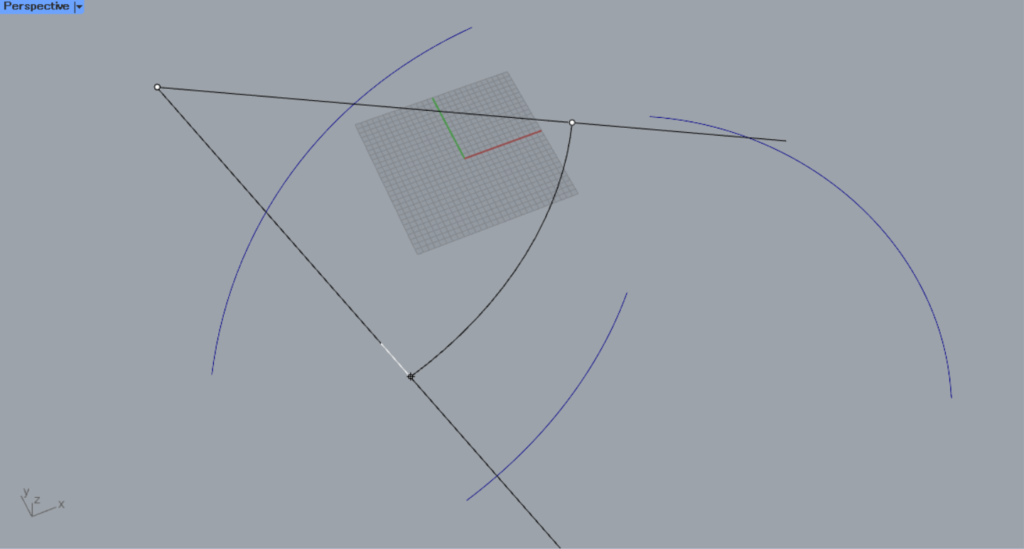
Create multiple arcs on the Rhino as we did with one.

The multiple arcs are then set directly.
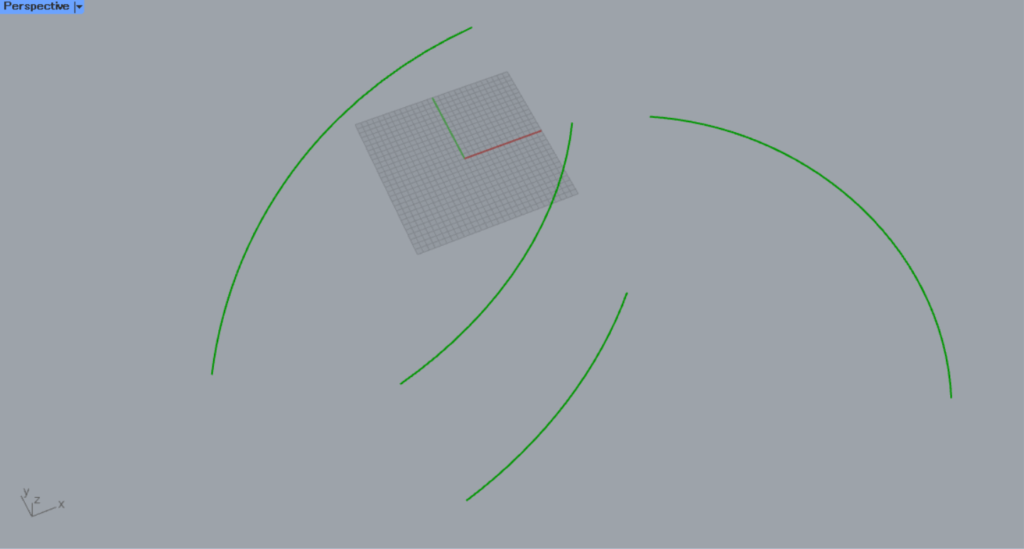
Here is a view of the Rhino.

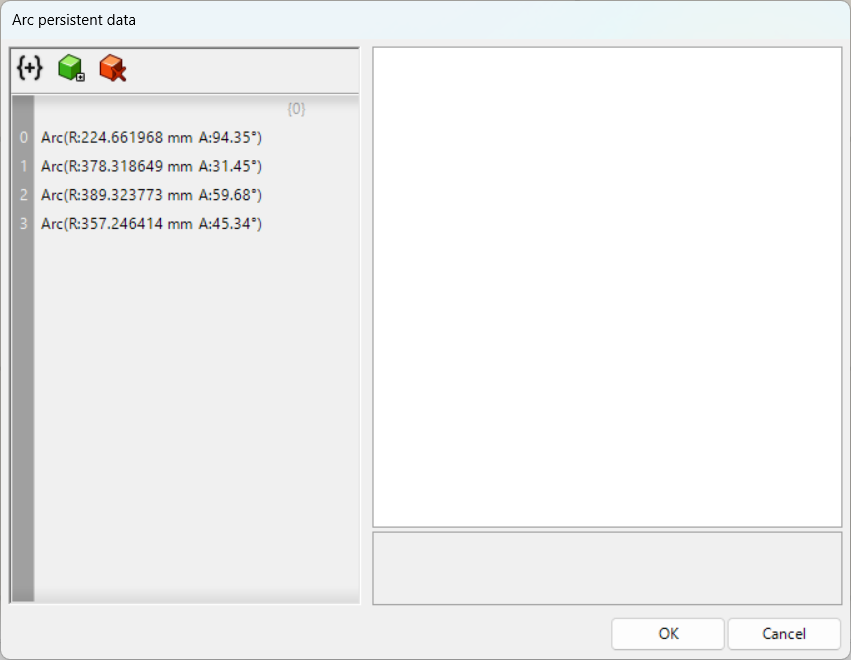
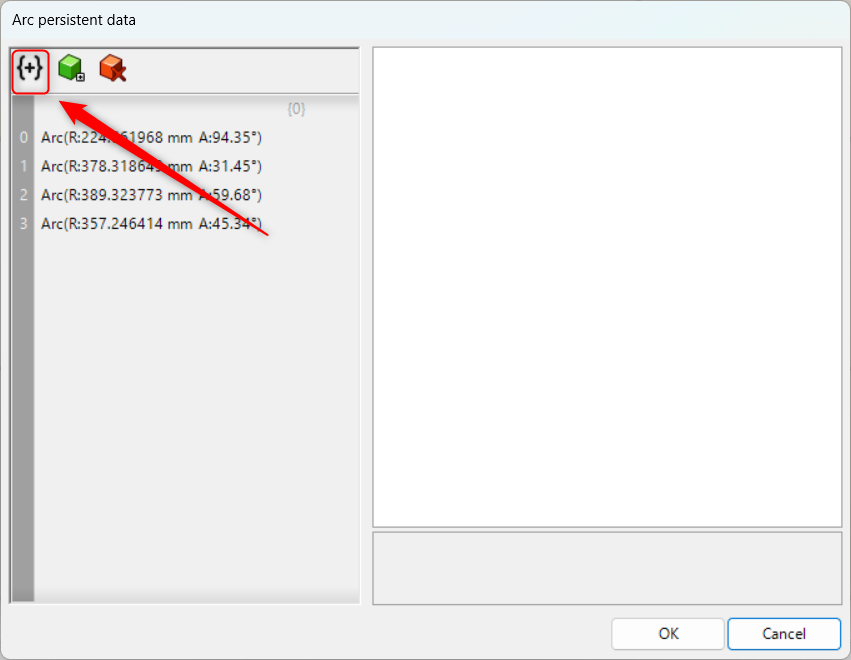
To manage the stored arcs, right click on Circular Arc and select Manage Arc collection.
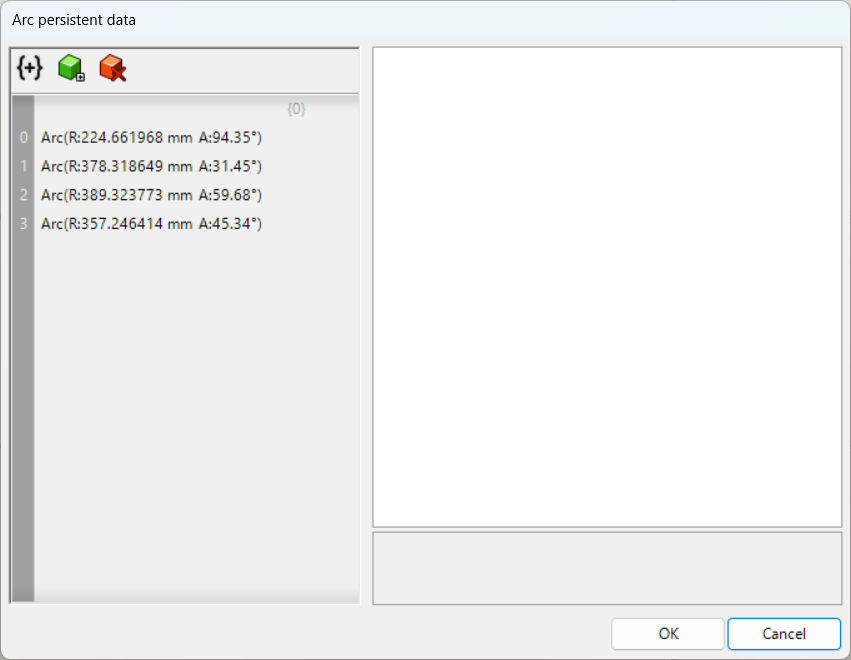
You will then see the Manage Circular Arc window like this.
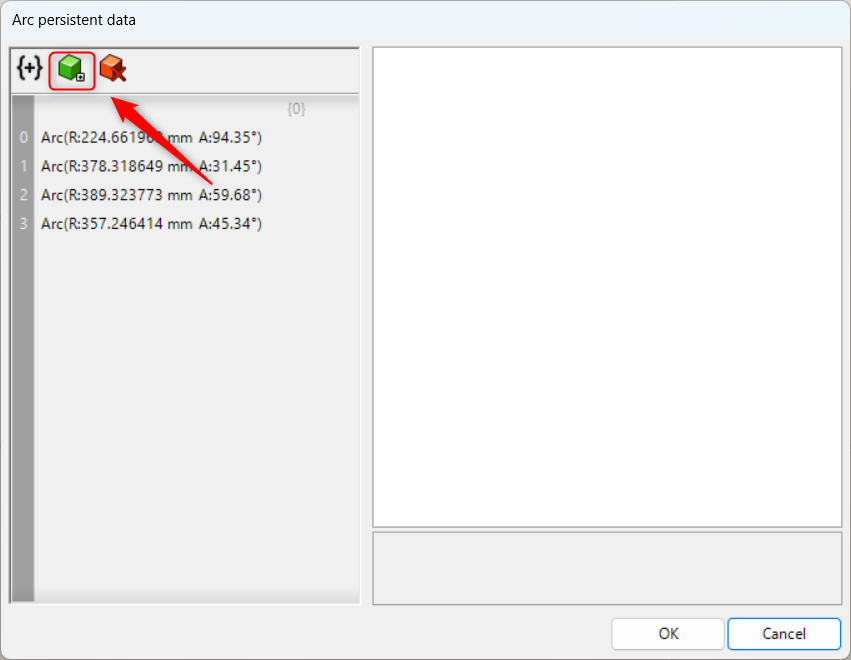
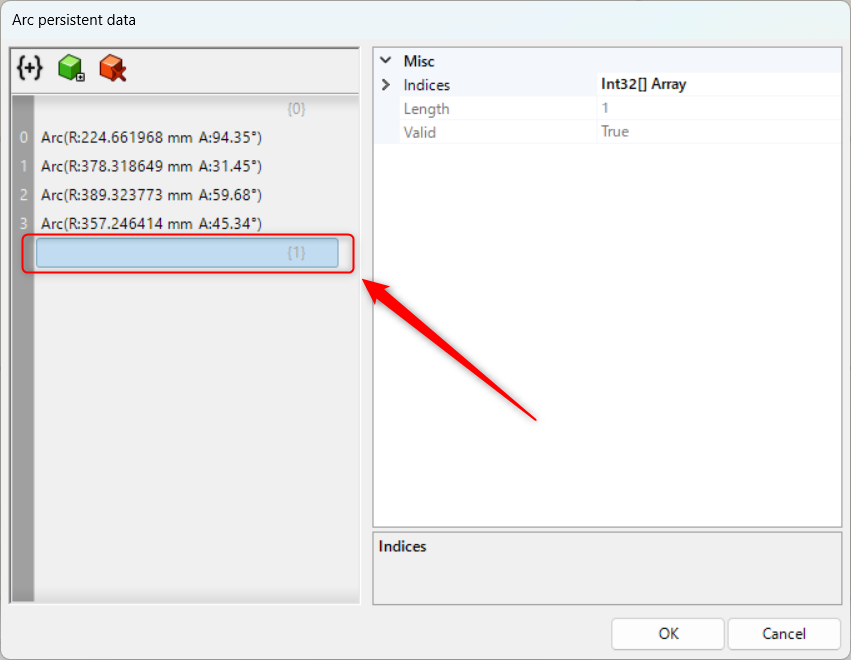
Click the green icon in the upper left corner to add a new arc.
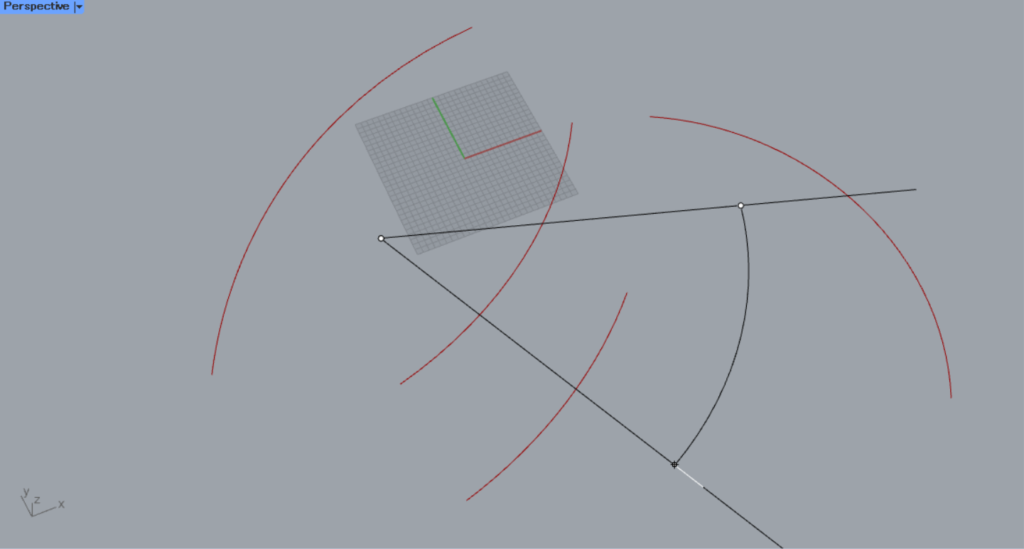
Then create the arc on the Rhino.
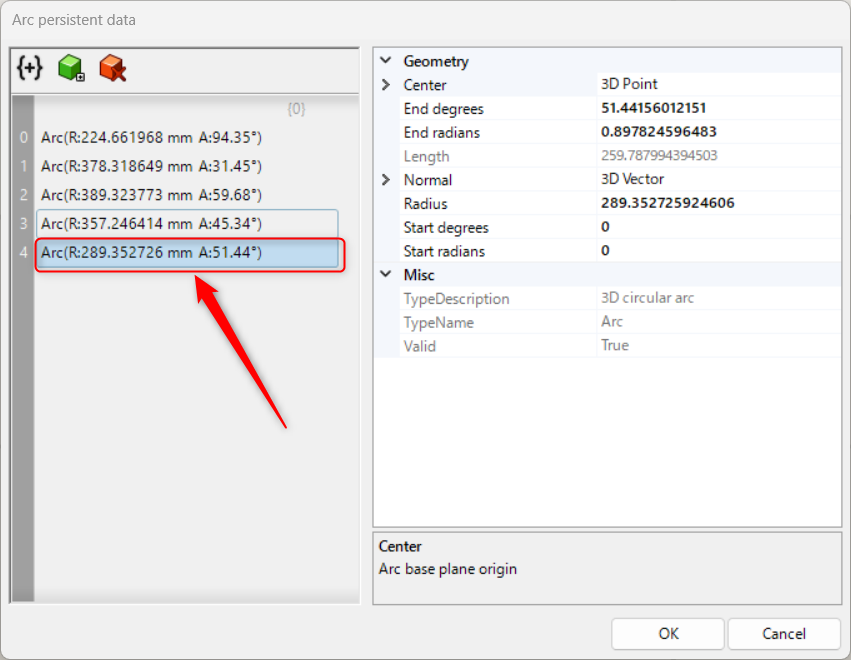
The arc is now added as shown here.
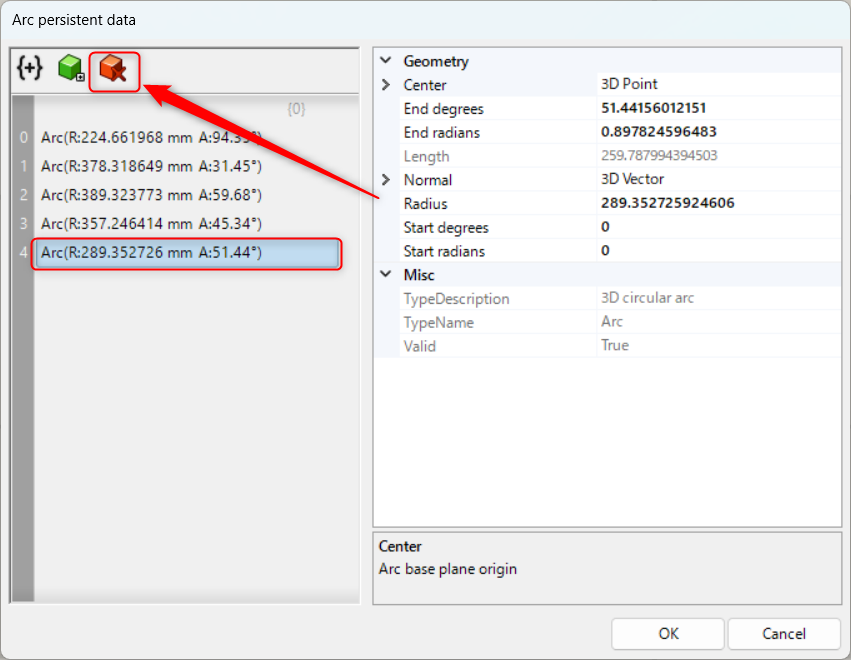
While an arc is selected, you can delete it by clicking the red icon in the upper left corner.
In this case, the fifth arc is deleted.
The arc is now deleted as shown here.
Clicking on the leftmost icon creates a branch in the data.
As you can see, a branch has been added.
List of Grasshopper articles using Circular Arc component↓

Comment