
![[Grasshopper]How to use the Flip Matrix component to swap rows and columns](https://iarchway.com/wp-content/uploads/2025/06/Flip-Matrix.png)
This article explains how to use the Flip Matrix component to swap rows and columns.
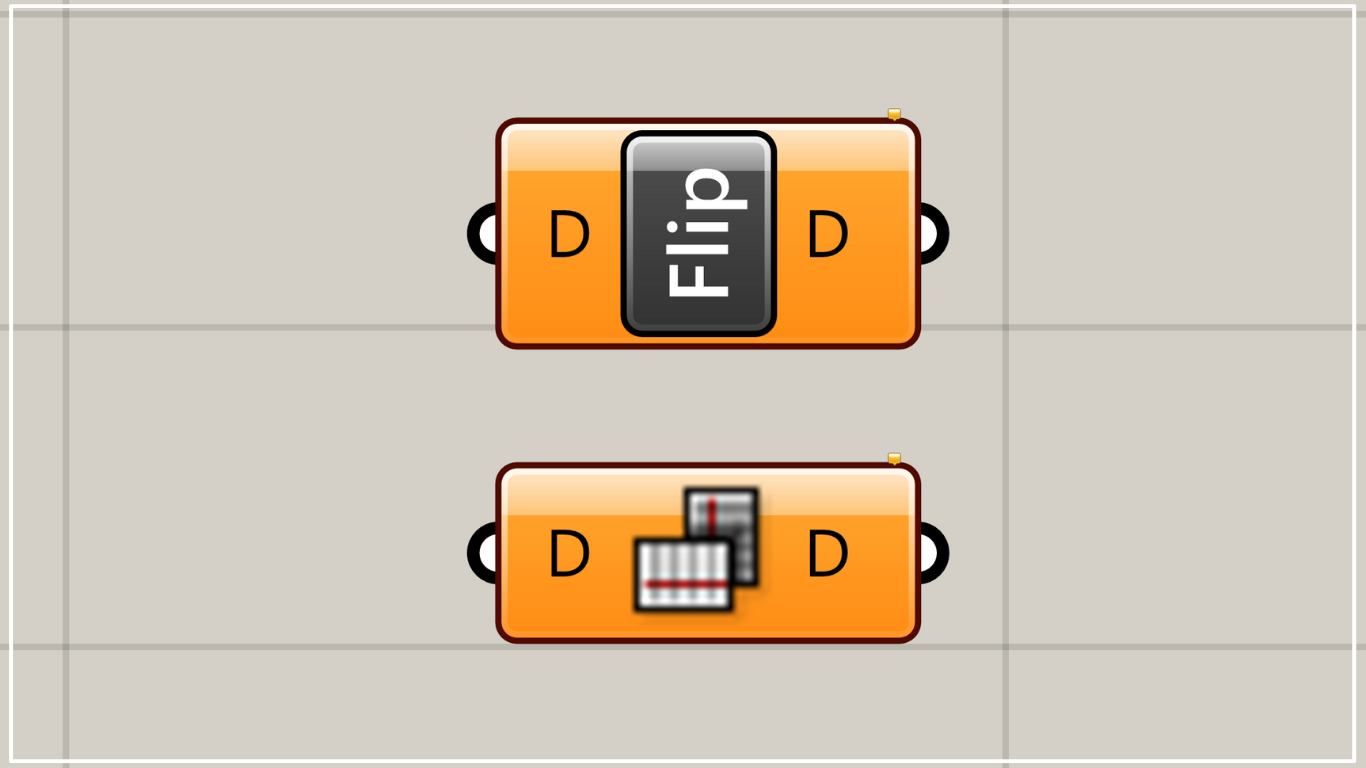
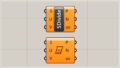
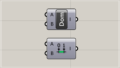
On the Grasshopper, it is represented by one of the two above.
The data and data structure used in this project
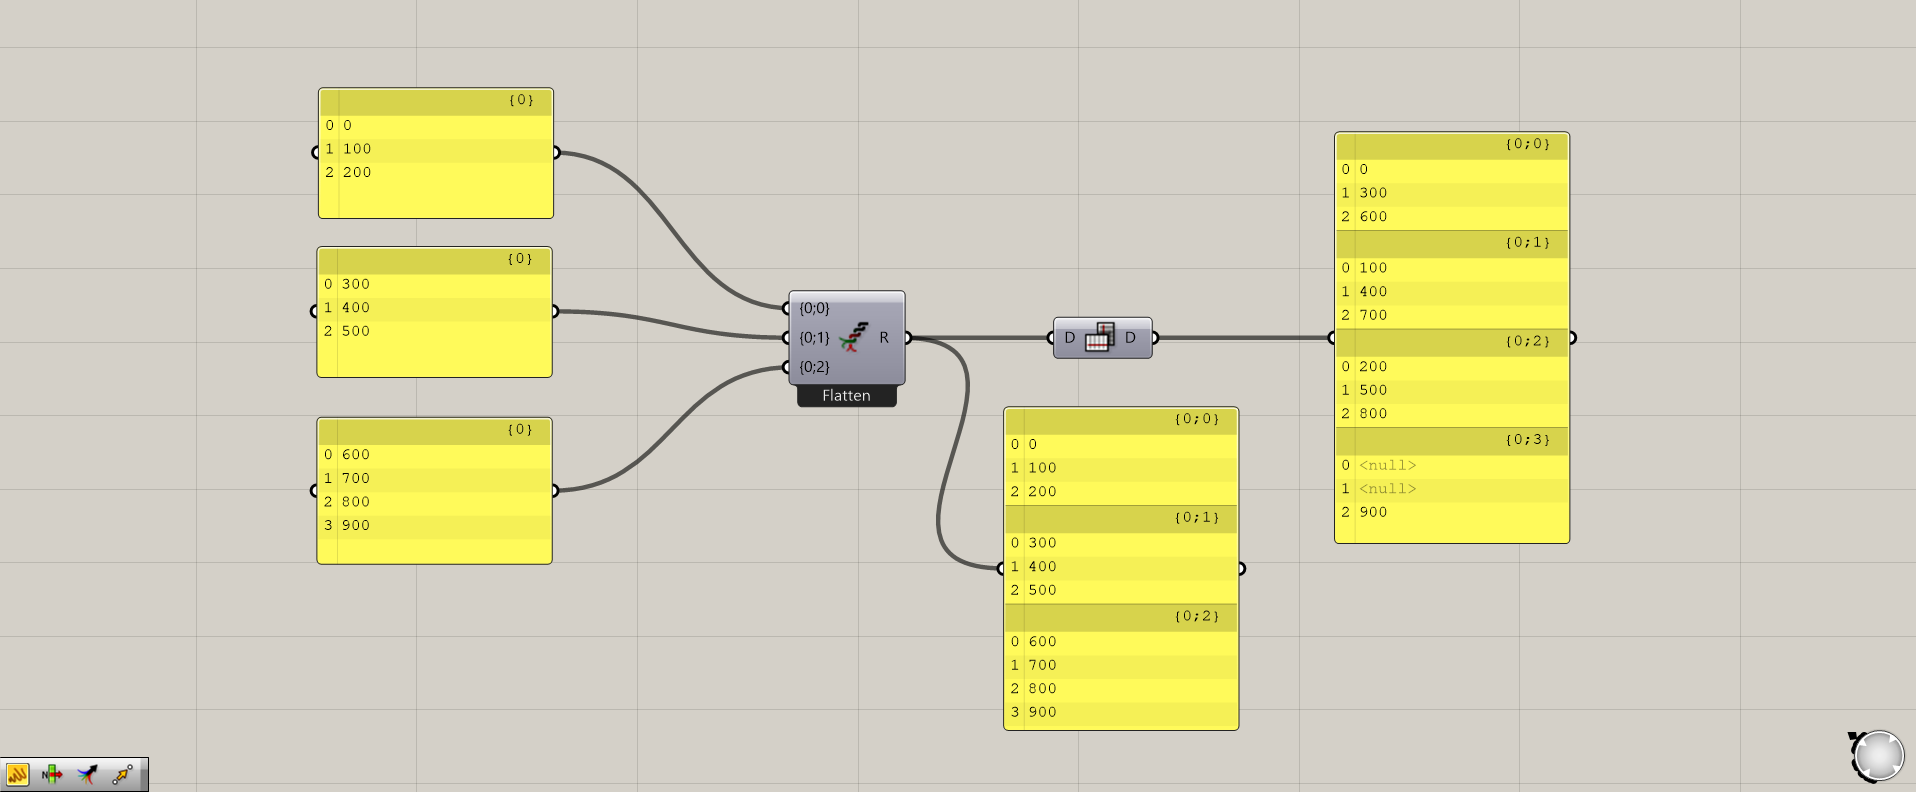
The data used in this project will be as shown in the image above.
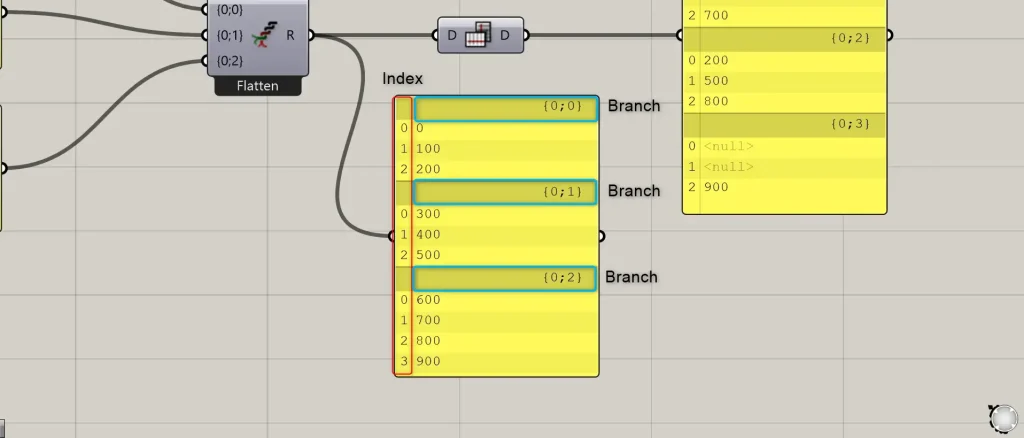
The data structure is called the Index number, which is surrounded by a red box.
The blue boxed areas are called the Branch, and in the image above it is divided into three parts.
It will be a set of the same Index number.

Before using Flip Matrix, there are three layers of data.
The data corresponding to Index number 0 are 0, 300, and 600, respectively.
Using Flip Matrix, the same Index numbers in each branch are gathered together to form a new branch.
In the example above, 0, 300, and 600 with Index number 0 are gathered together.
Similarly, the branch of 2.3 is a collection of objects with the same Index number, creating a branch.
Reason why null appears
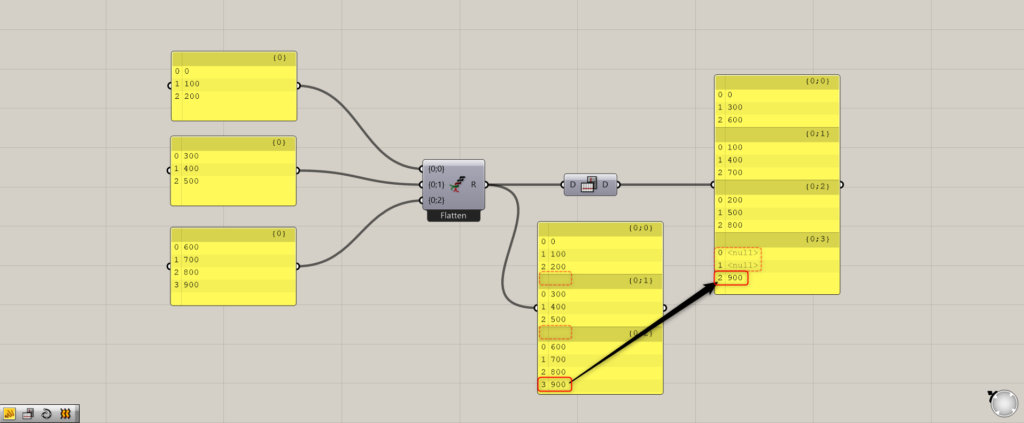
However, Index numbers 0 and 1 on the fourth layer of data after Flip Matrix show “null”
This is caused by the fact that the third layer of the original data has four data while the first and second layers have only three.
Therefore, as a result of Flip Matrix, the data with Index number 3 (4th) in the original data is only in the third branch, and as a result of forcibly Flip Matrixing the part with no data, it is displayed as “null”.
Therefore, be careful with the data structure when using Flip Matrix.
Swap rows and columns
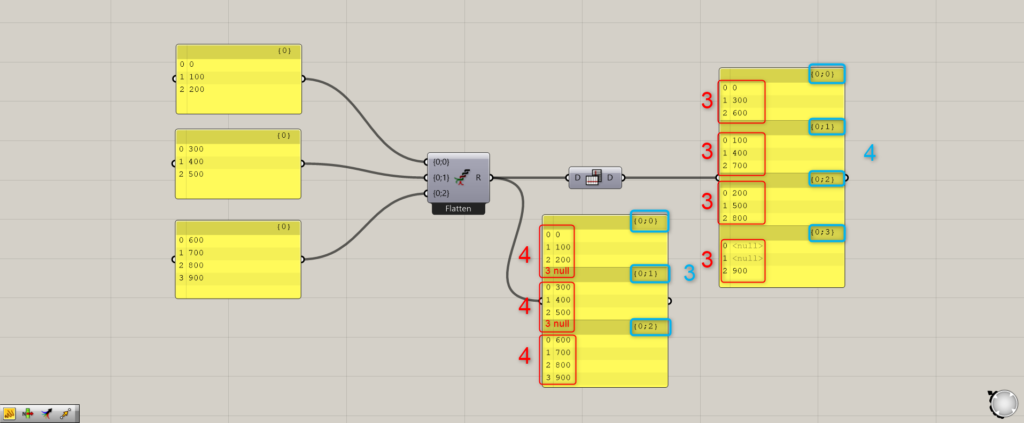
In addition, the Flip Matrix swaps the number of rows and columns.
Red is the number of Indexes in the branch, blue is the number of branches.
Originally the number of Indexes was 4, but after Flip Matrix it is 3.
Conversely, the number of branches was originally 3, but after Flip Matrix it is now 4.
Let’s take a look at the Flip Matrix results visually.
Let’s take a look at the Flip Matrix results visually.
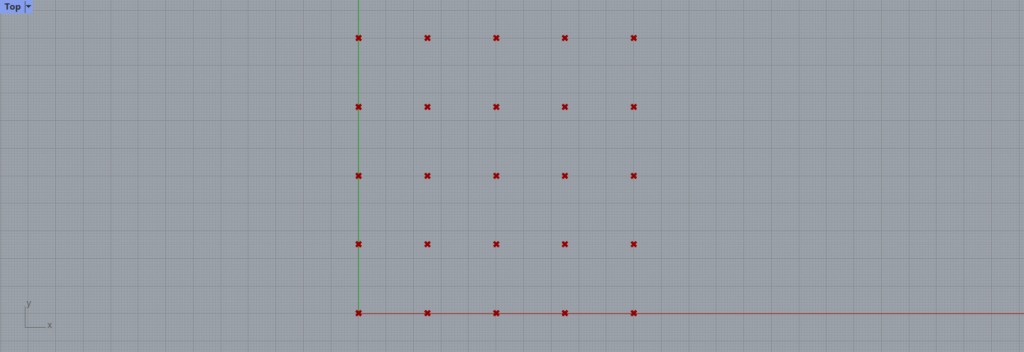
A 5 x 5 grit has been created.
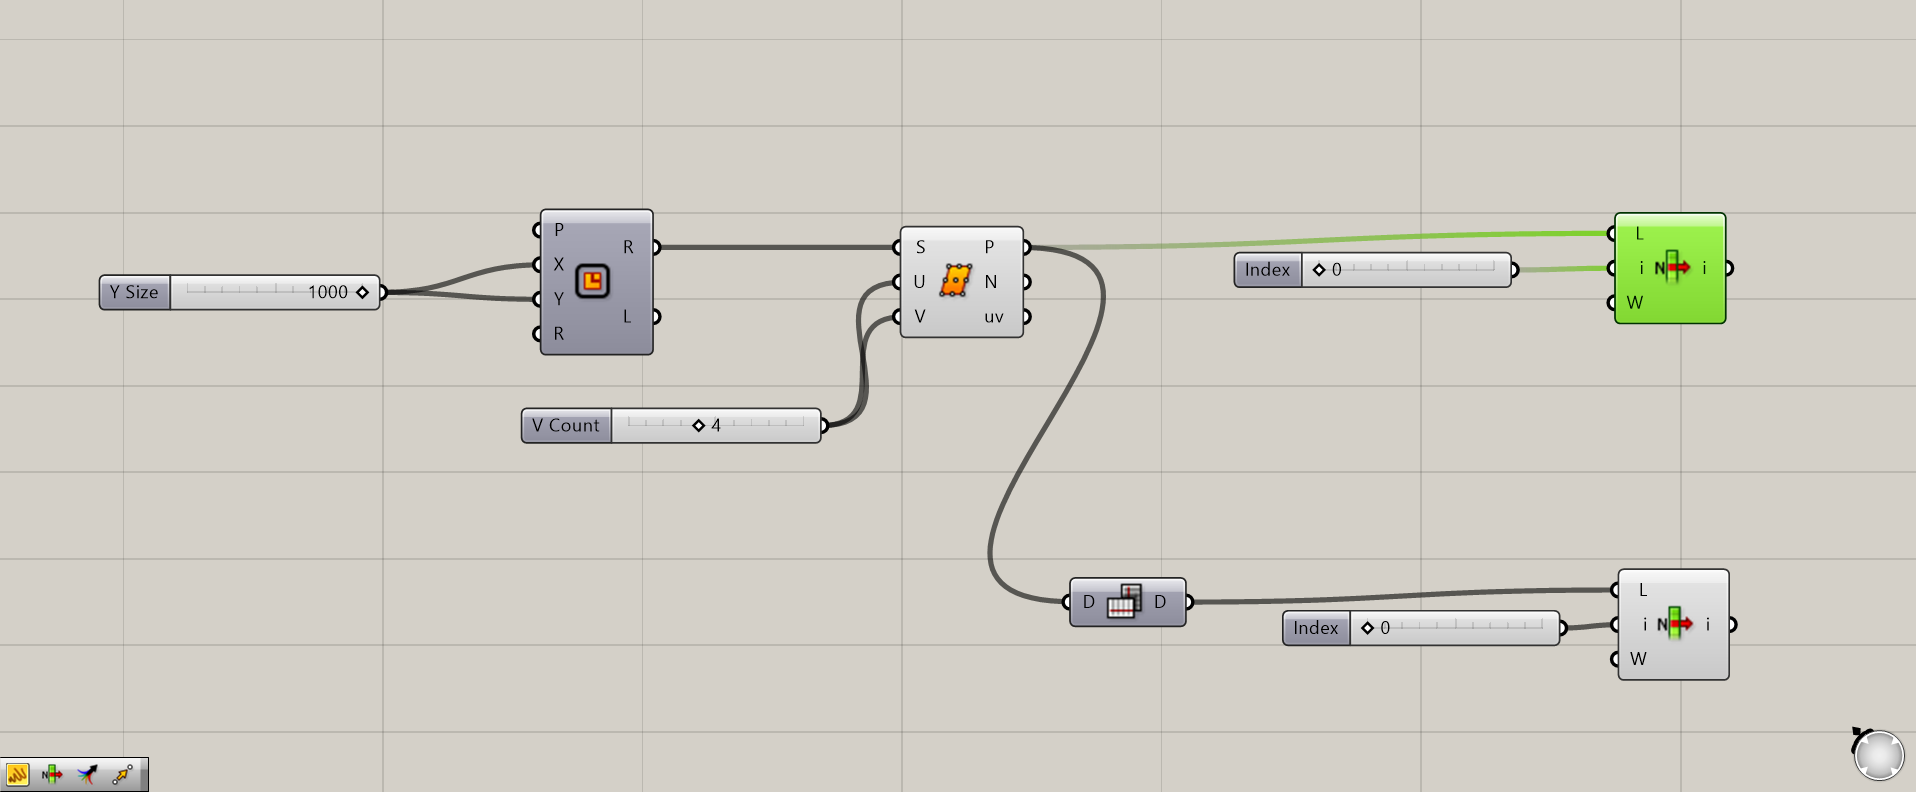
1: Rectangle 2: Divide Surface 3: Flip Matrix 4: List Item
First, we get one line before the Flip Matrix.
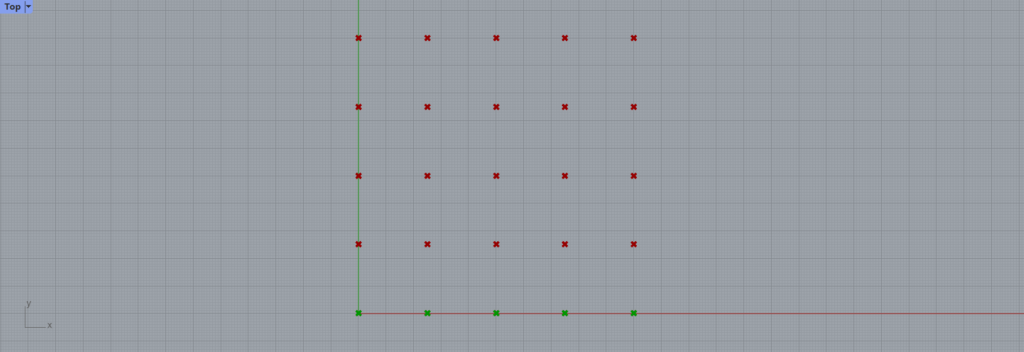
We have obtained a single horizontal row.
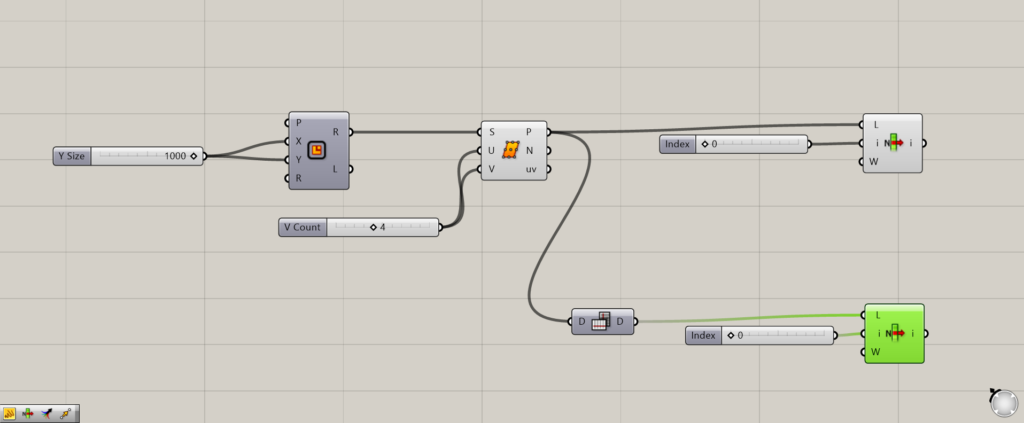
This time, it is done with a Flip Matrix in between.
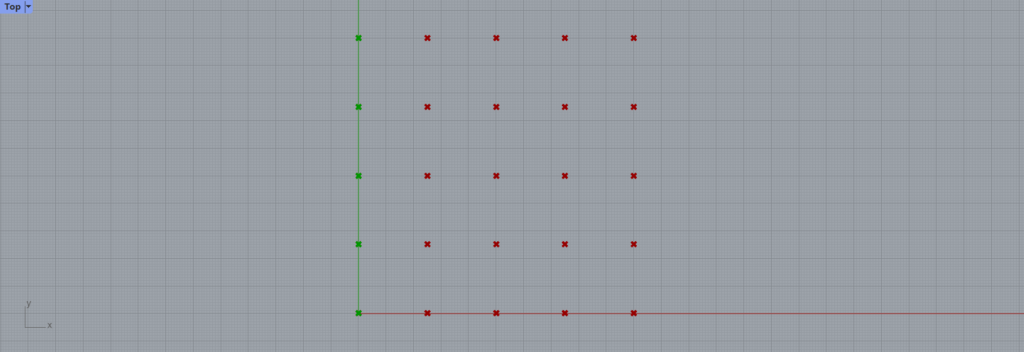
As a result, the first column is retrieved.
Thus, you can see the effect of Flip Matrix flipping the rows and columns.
List of Grasshopper articles using the Flip Matrix component↓

Comment