
![[Grasshopper] How to use Loft Options for setting up Loft](https://iarchway.com/wp-content/uploads/2026/01/eyecatch-1.png)
This article explains how to use Loft Options for setting up Loft.
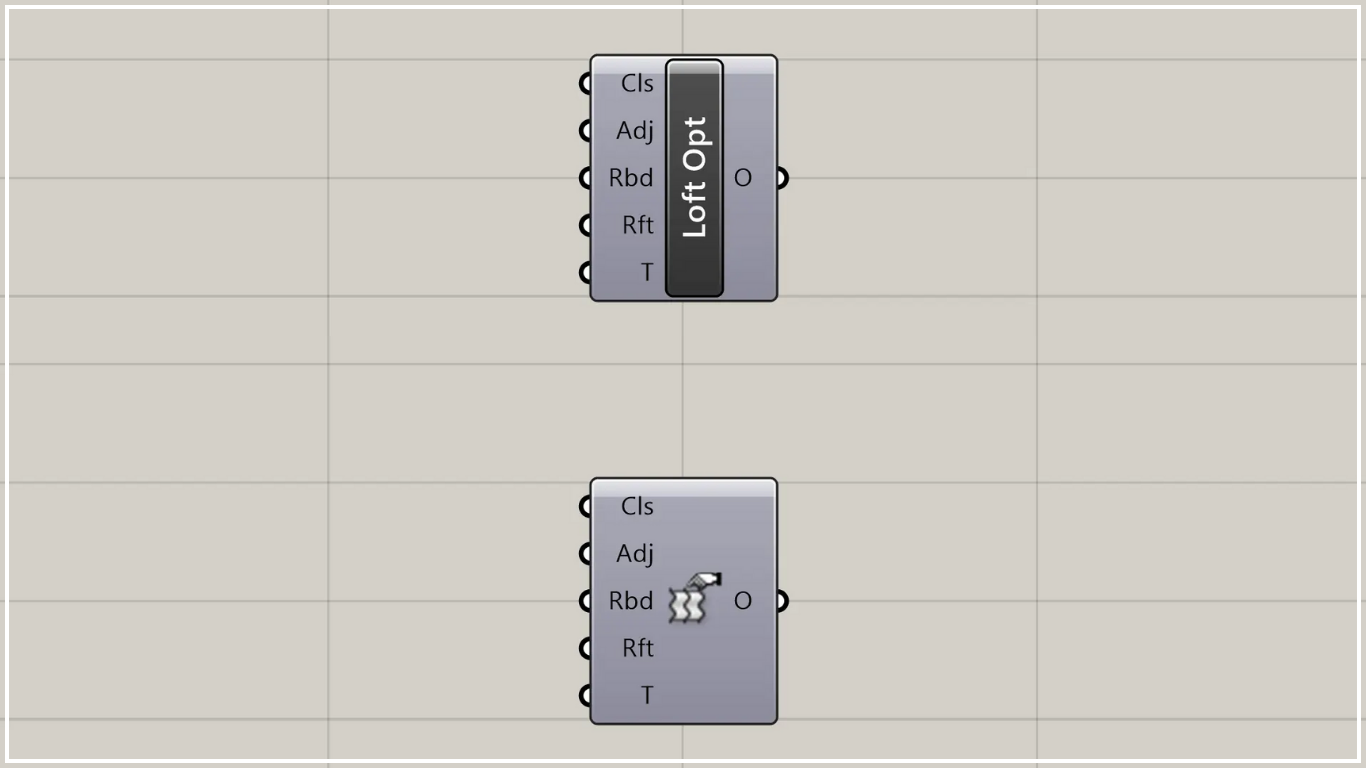
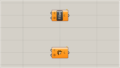
In Grasshopper, it is represented by one of the two above.
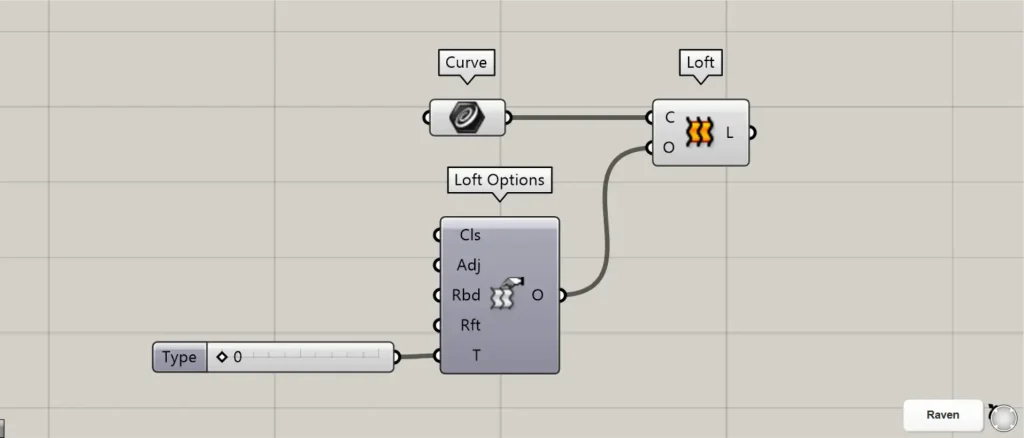
Configure Loft
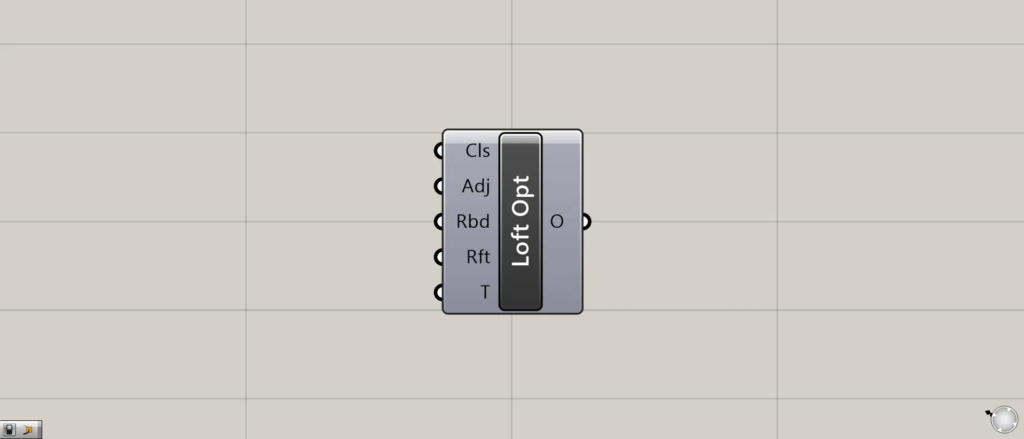
Using Loft Options allows you to configure Loft settings.
To use it, you must connect Loft Options(O) to Loft(O).
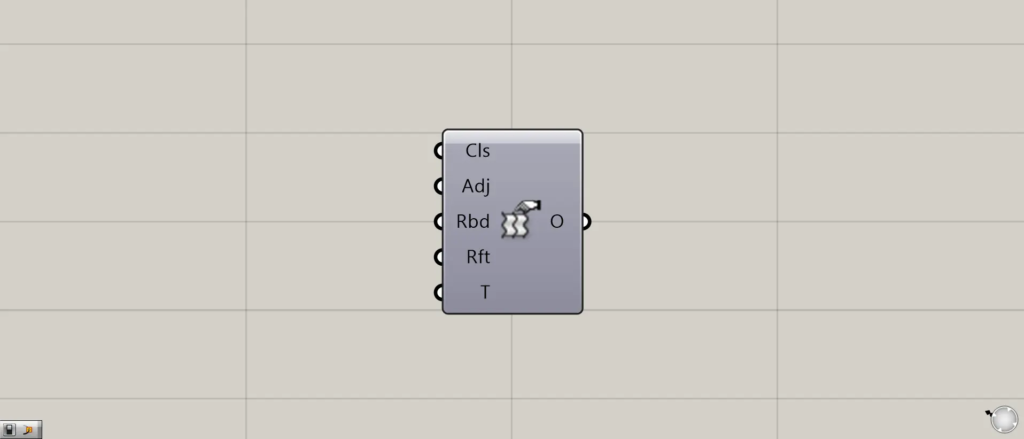
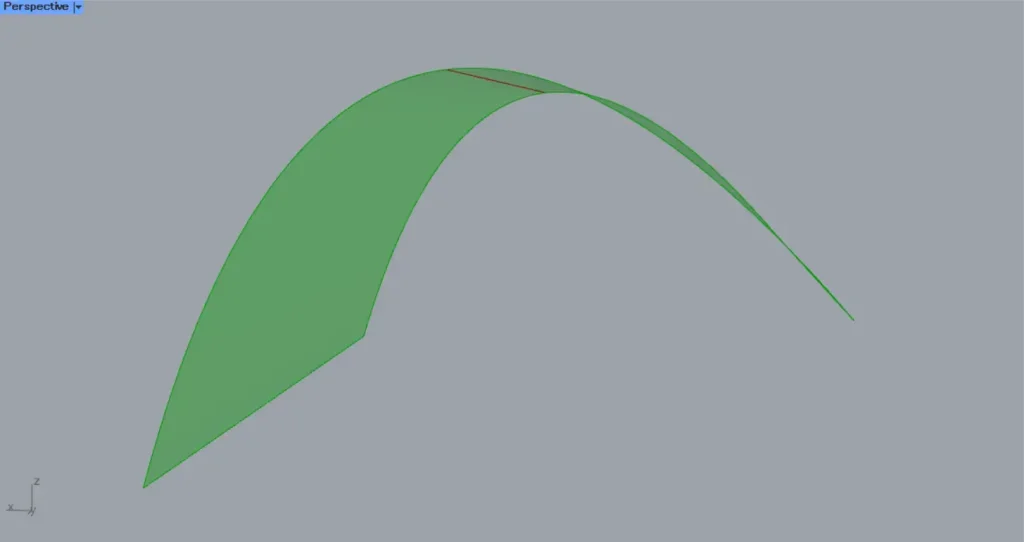
Cls
Using the Cls terminal, you can close loft surfaces.
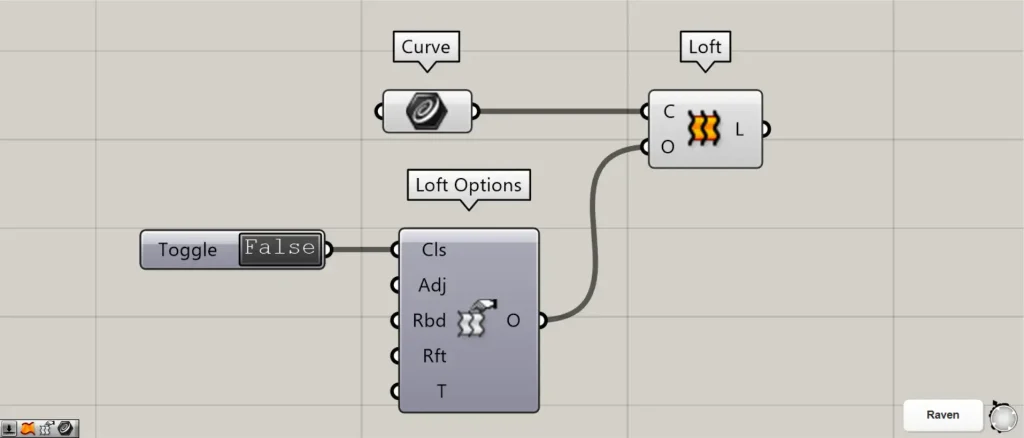
Components used: ①Curve ②Loft ③Loft Options ④Boolean Toggle
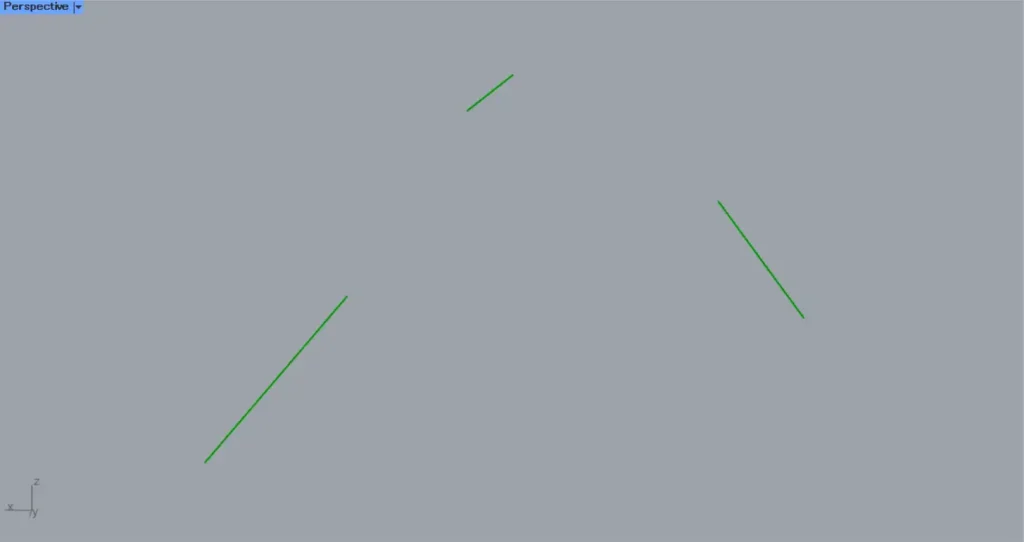
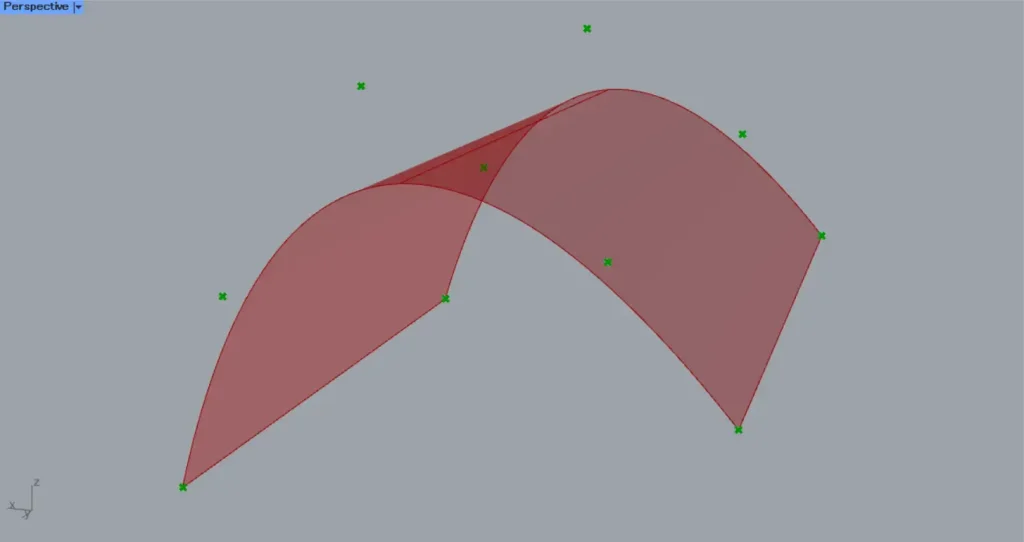
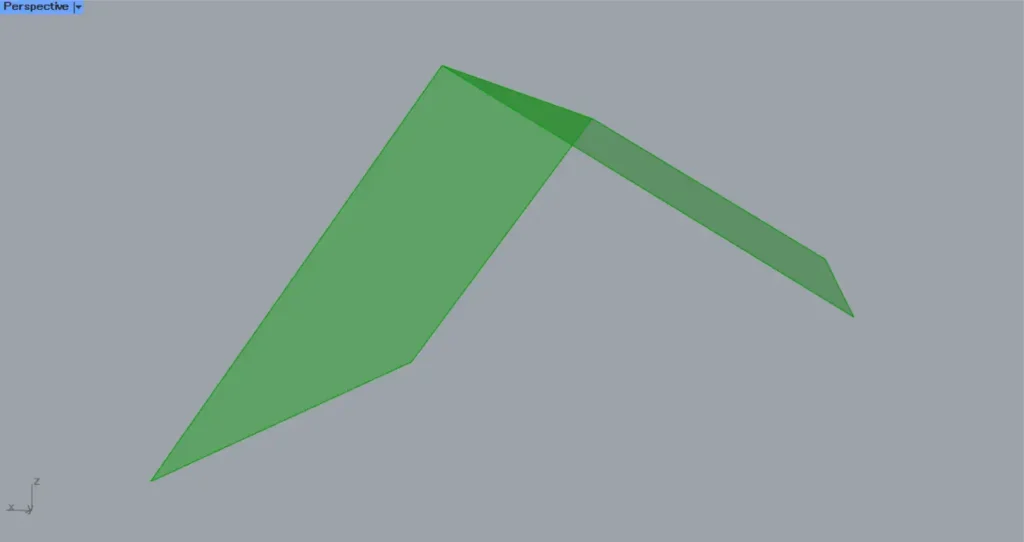
This time, the three lines in the image above are set in Curve.

Connecting Curve to Loft(C) creates a surface that connects the three lines.
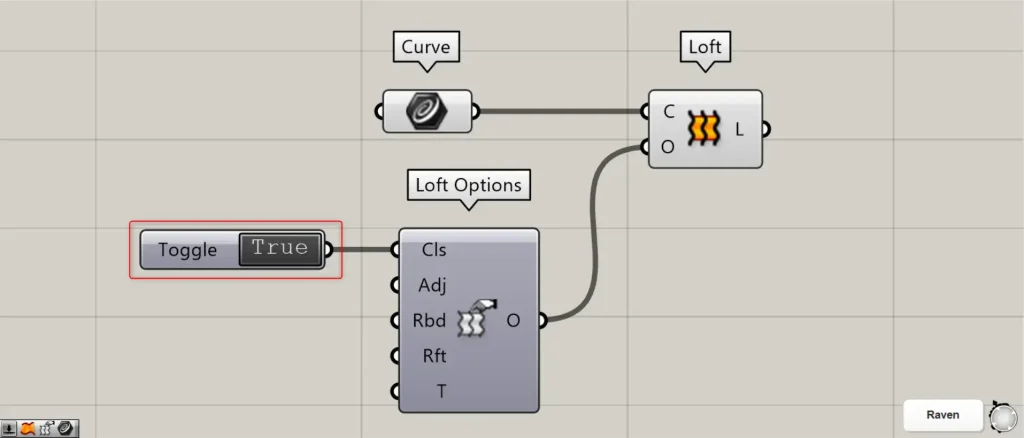
Connect Loft Options to Loft(O).
Then, connect the False or True information to the Loft Options(Cls).
This time, we entered a Boolean Toggle.
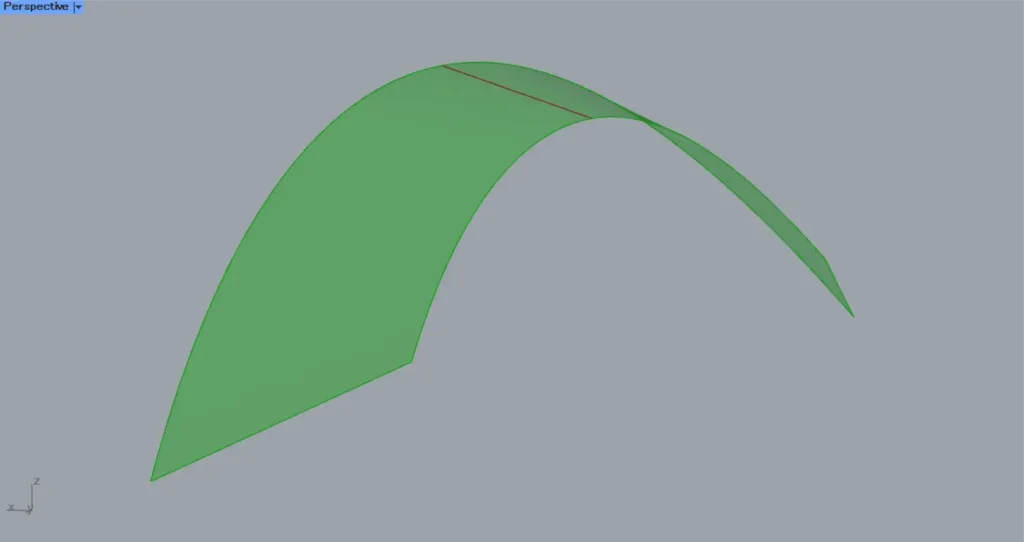
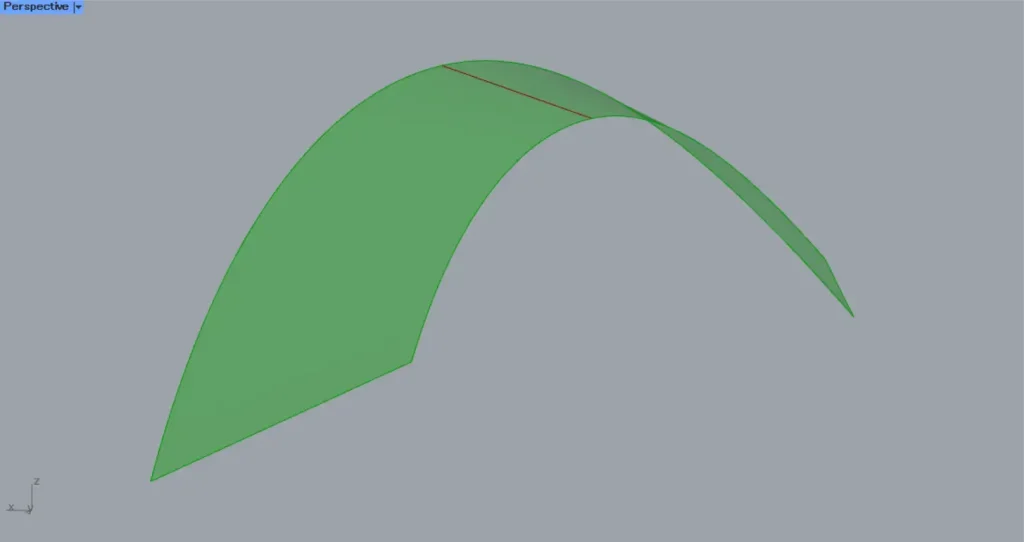
If False, the surface will be open.
If True, connect the first and last lines to close the surface.

The image above shows the surface when set to True.
Adj
Using the Adj terminal, you can adjust the position of the loft surface’s seam.
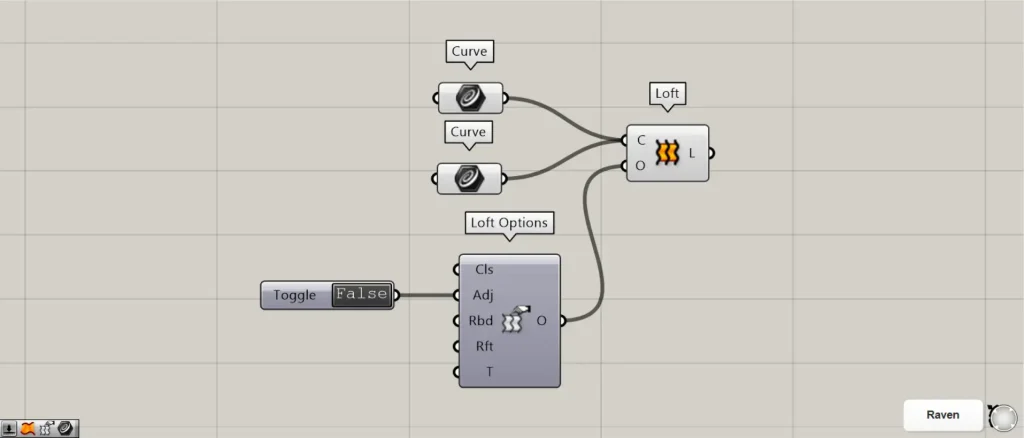
Components Used: ①Curve ②Loft ③Loft Options ④Boolean Toggle
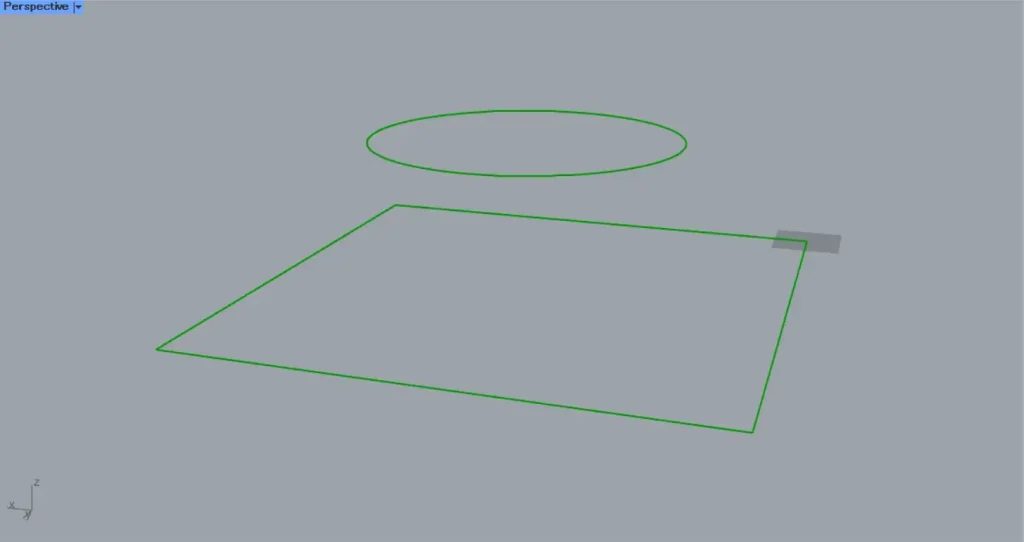
For this example, we will use curve data of a circle and a square.
Circle and square line data are set in Curve, respectively.

Connecting a Curve to a Loft(C) creates a surface that connects the curves of a circle and a square.
However, when dealing with different shapes such as circles and squares, the position of the seams differs, which can cause the surface to twist.
Connect Loft Options to Loft(O).
Then, connect the False or True information to the Loft Options(Adj).
This time, we entered a Boolean Toggle.
If False, the seam position remains unchanged.
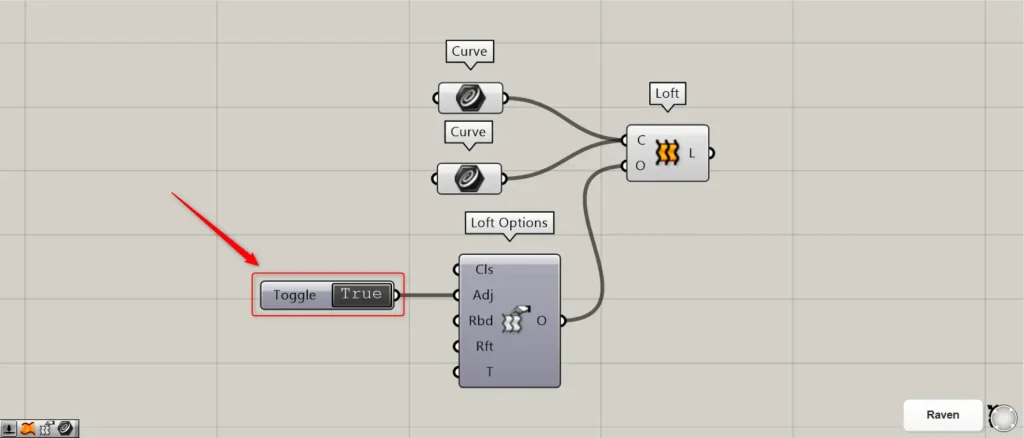
If True, the seam position is adjusted.

The image above shows the surface when True.
The surface distortion has been eliminated due to the adjustment of the seam position.
Rbd
The Rbd terminal allows you to adjust the number of control points on a surface.

Components used: ①Curve ②Loft ③Loft Options ④Boolean Toggle ⑤Surface Points
When the Rbd terminal value is 0, it will be the same as the number of control points before input.
As the number of Rbd terminals increases, the number of control points also increases.
This time, we are visualizing control points using Surface Points.
The image above shows the Rbd terminal reading 0.
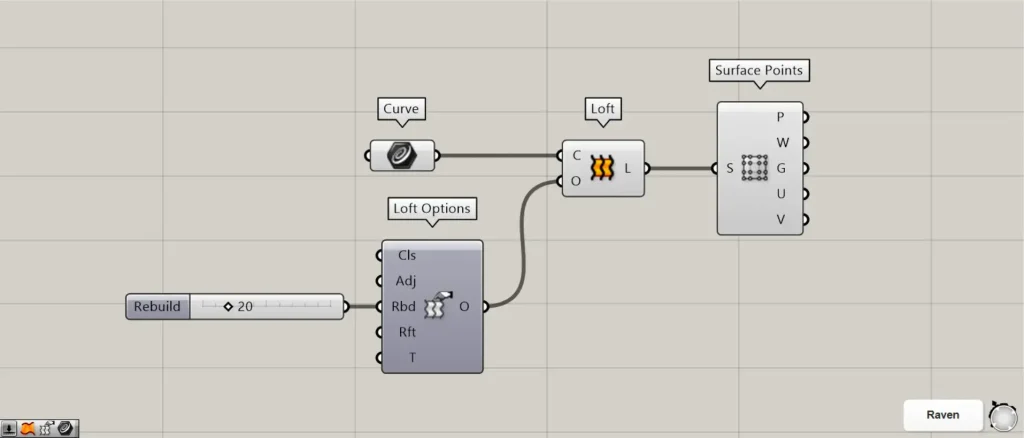
Next, let’s change the value of the Rbd terminal to 20.
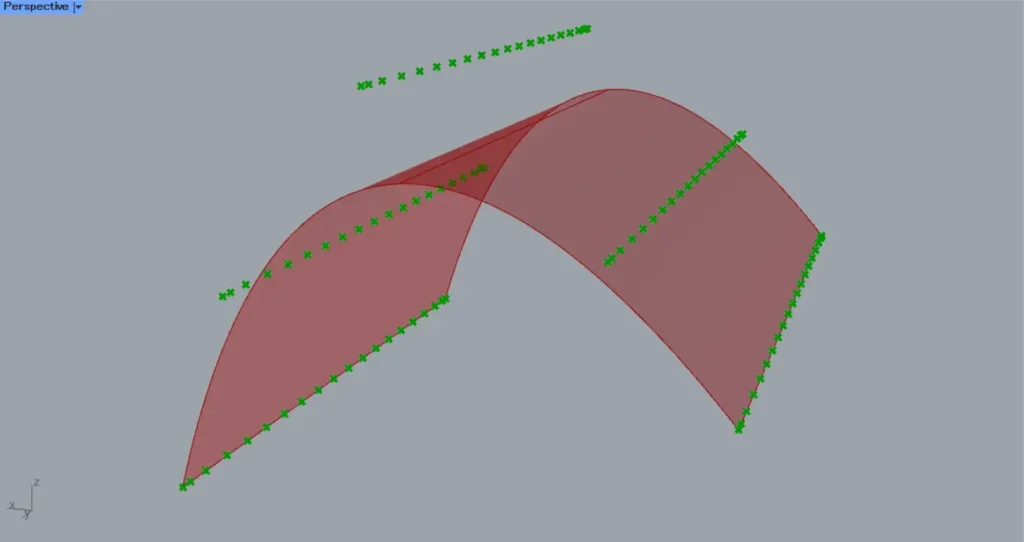
Then, as shown in the image above, the number of control points increased.
Rft
At the Rft terminal, you can adjust the number of control points on the surface according to the input tolerance value.
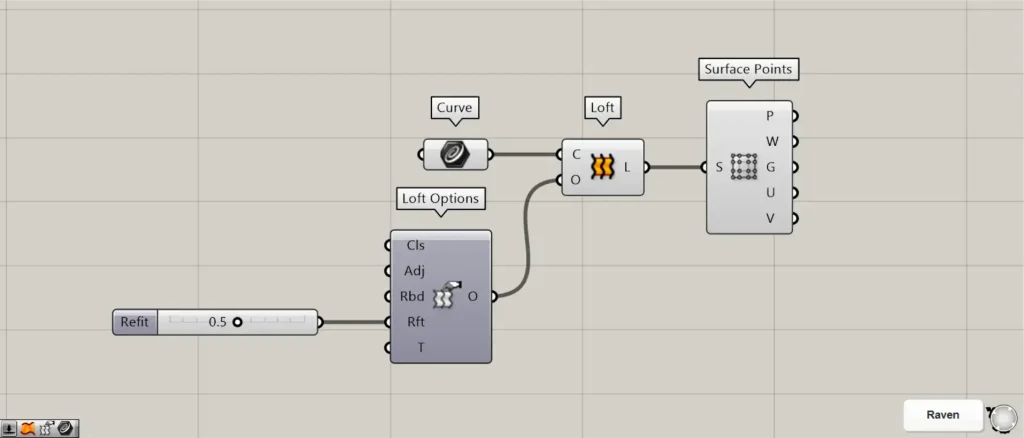
Components Used: ①Curve ②Loft ③Loft Options ④Boolean Toggle ⑤Surface Points

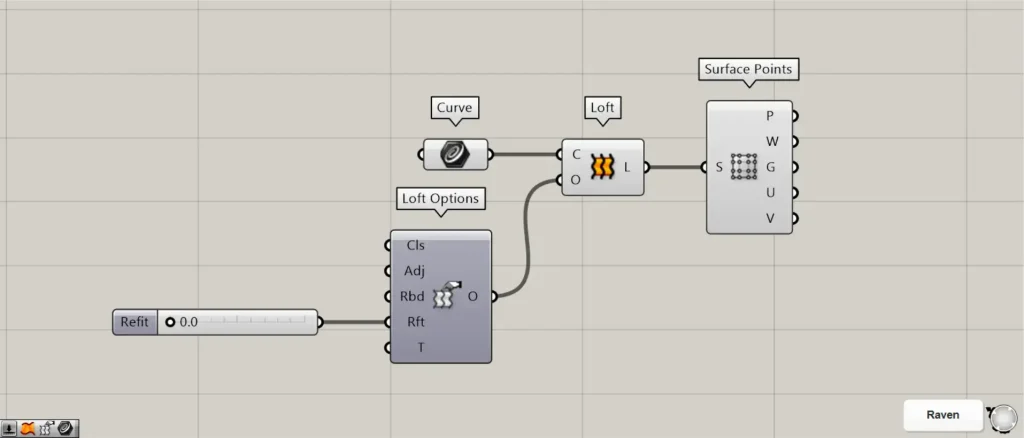
As an example, the three curves in the image above are set in Curve.
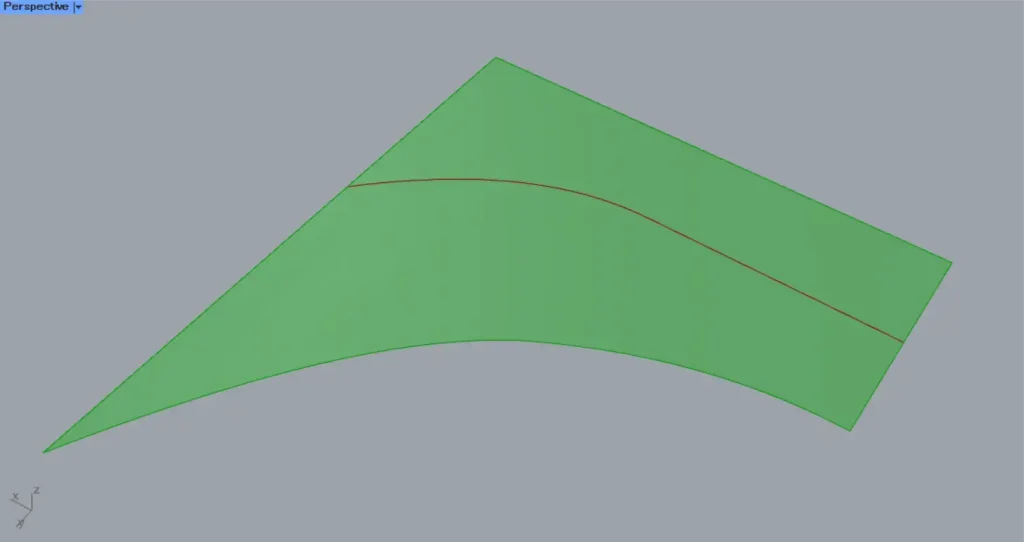
Connecting Curve to Loft(C) creates a surface that connects the three curves.
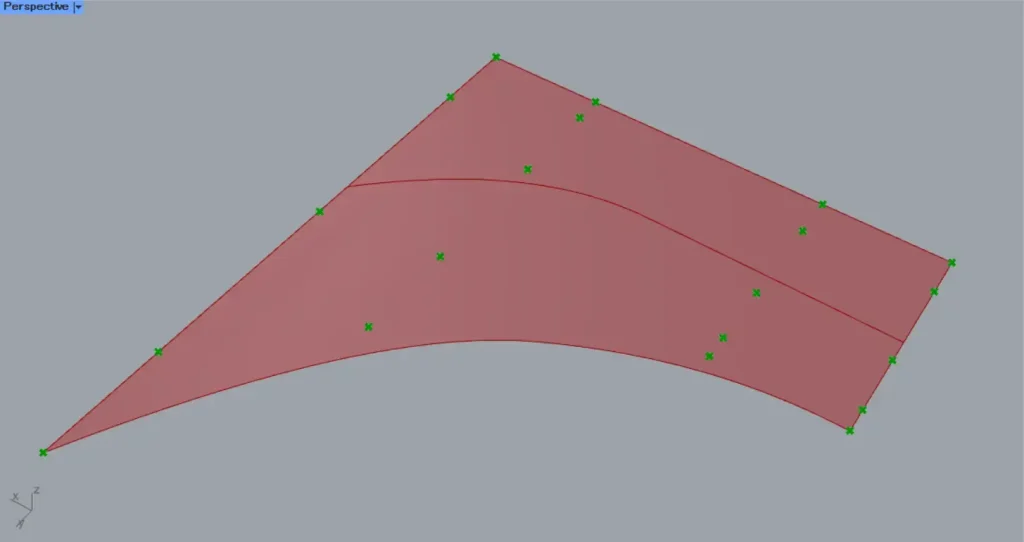
Connecting Loft to Surface Points allows you to visualize control points.
Then connect the Loft Options to the Loft(O).
Then, enter the numerical value for the tolerance into Loft Options(Rft).
The image above shows the process of entering the number zero.
If the value is 0, there is no change from before input.
Let’s try entering the value 0.5.
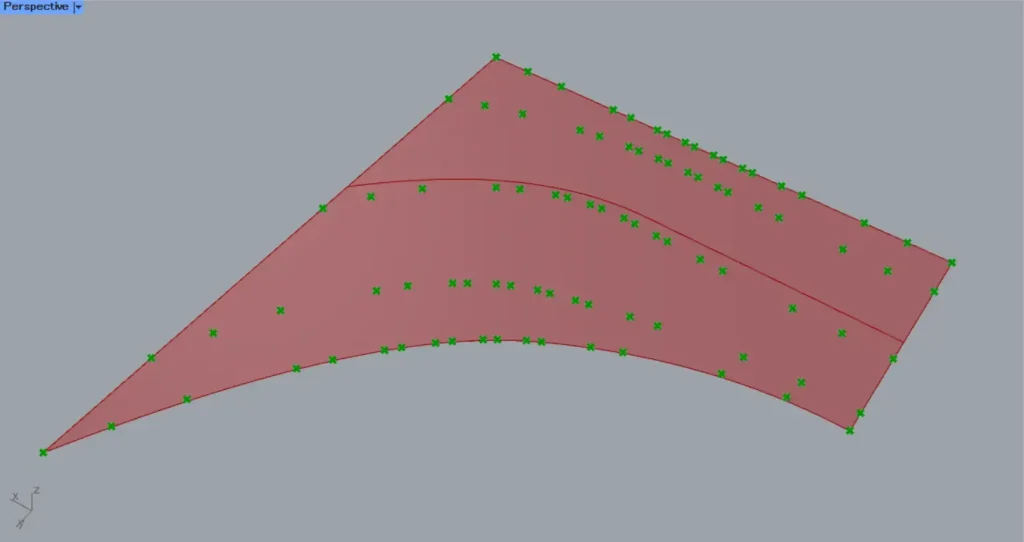
Then, as shown in the image above, the number of control points changed.
T
By entering one of the values 0, 1, 2, 3, or 5 at the T-terminal, you can change the shape settings for the loft surface.
| Input value | 0 | 1 | 2 | 3 | 5 |
| Shape Settings | Normal | Loose | Tight | Straight | Uniform |
Please note that if the value is 4, an error will occur because the corresponding shape has not been set.
Components used: ① Curve ② Loft ③ Loft Options
Normal
If you enter a value of 0, it will take on the Normal shape.
This shape represents the original state of the surface before input.
Loose
If you enter a value of 1, it will take on a Loose shape.
In the case of Loose, the control points of the lines used to create the surface and the control points of the loft surface will be in the same position.
Tight
When you enter a value of 2, it will take on the Tight shape.
In the case of Tight, a loft surface that follows the original curve is created.
Straight
When you enter the number 3, it will form a Straight shape.
For Straight, a loft surface is created that connects the original curves with a plane.
Uniform
If you enter the value 5, it will become a uniform shape.
For Uniform, a loft surface with uniform knot vectors is created.
List of Grasshopper articles using Loft Options component↓


Comment