
![[Grasshopper]磁場を利用した天井デザインの作成方法[データも配布]](https://iarchway.com/wp-content/uploads/2025/02/eyecatch_web-8.jpg)
This article describes how to design a ceiling using magnetic fields in Grasshopper.
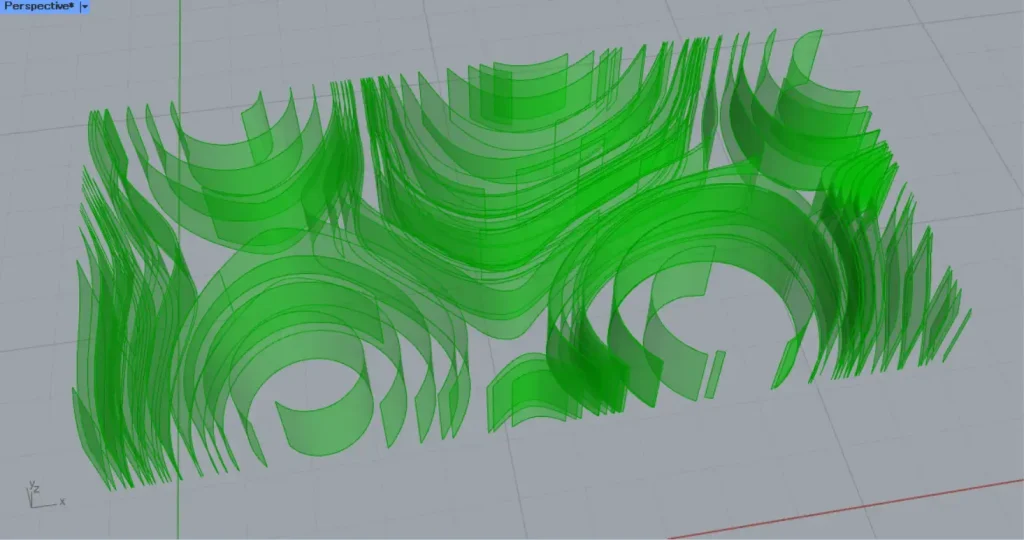
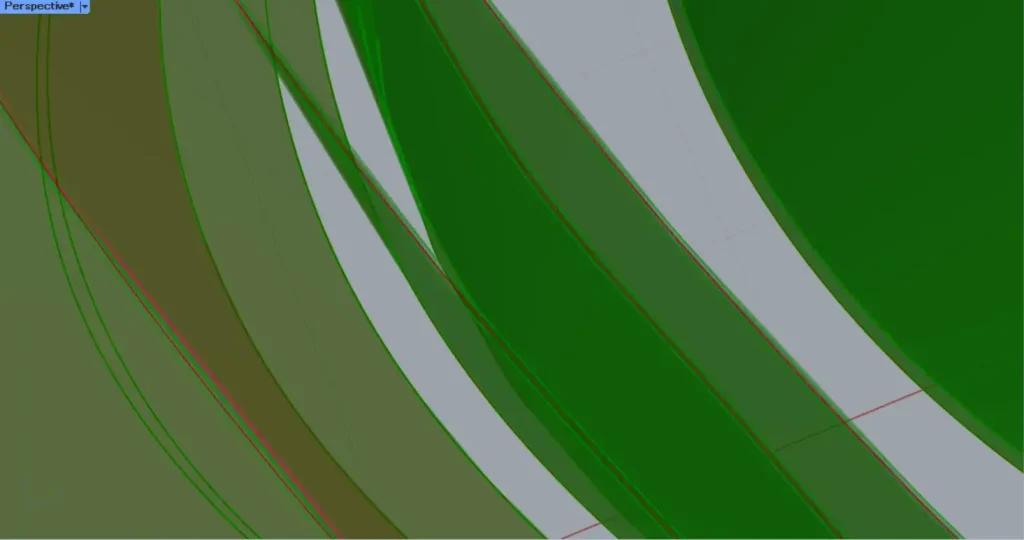
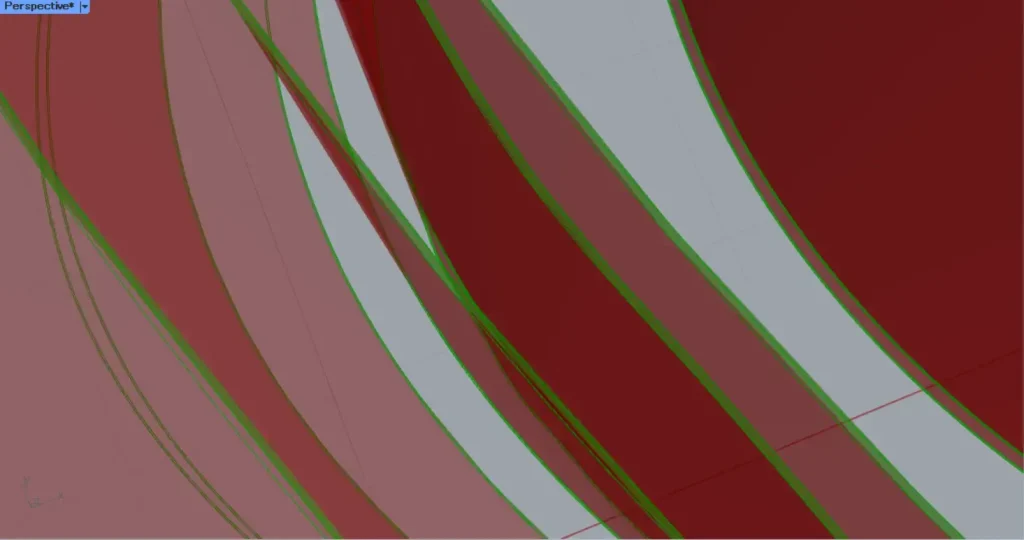
Model Images
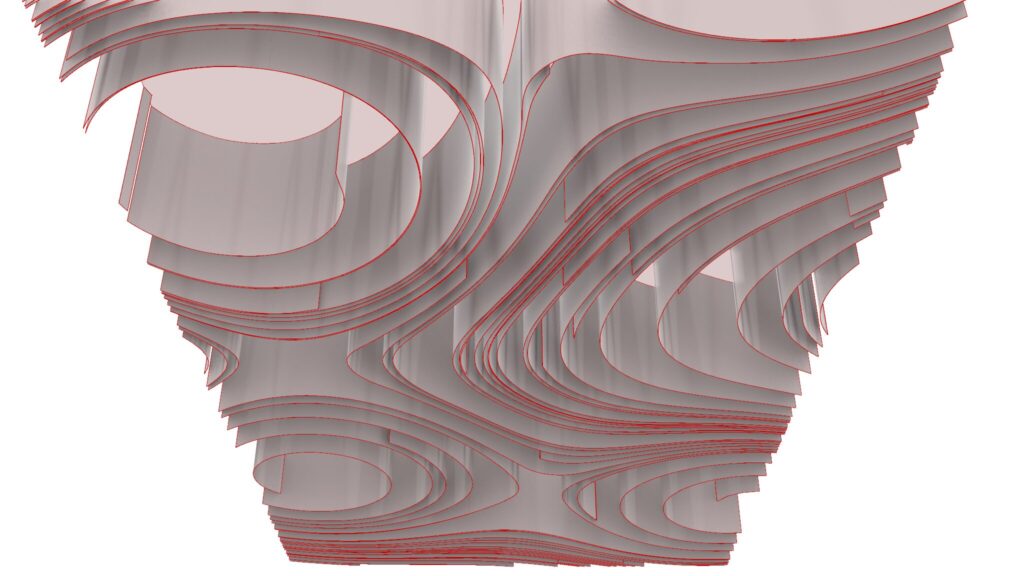
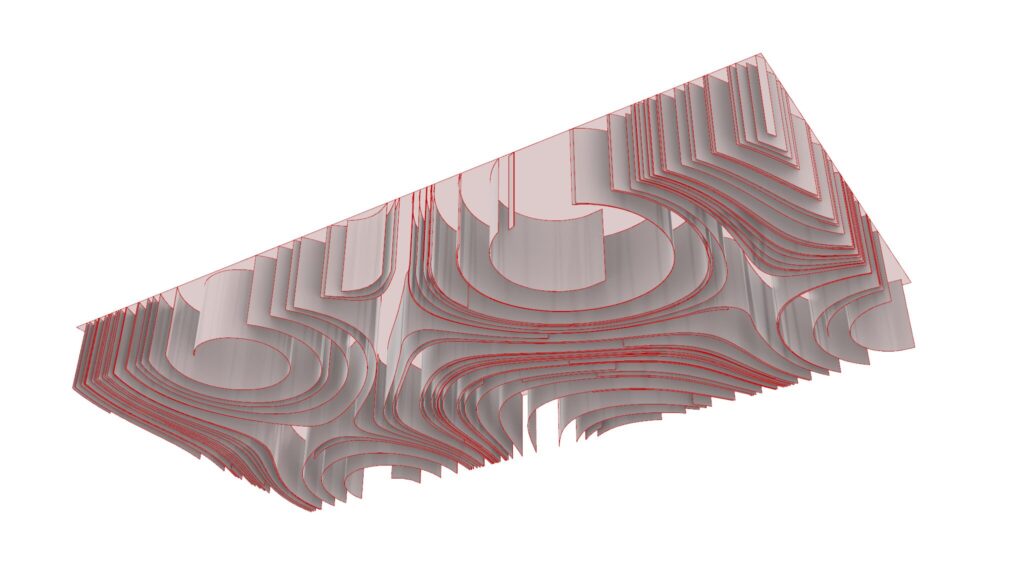
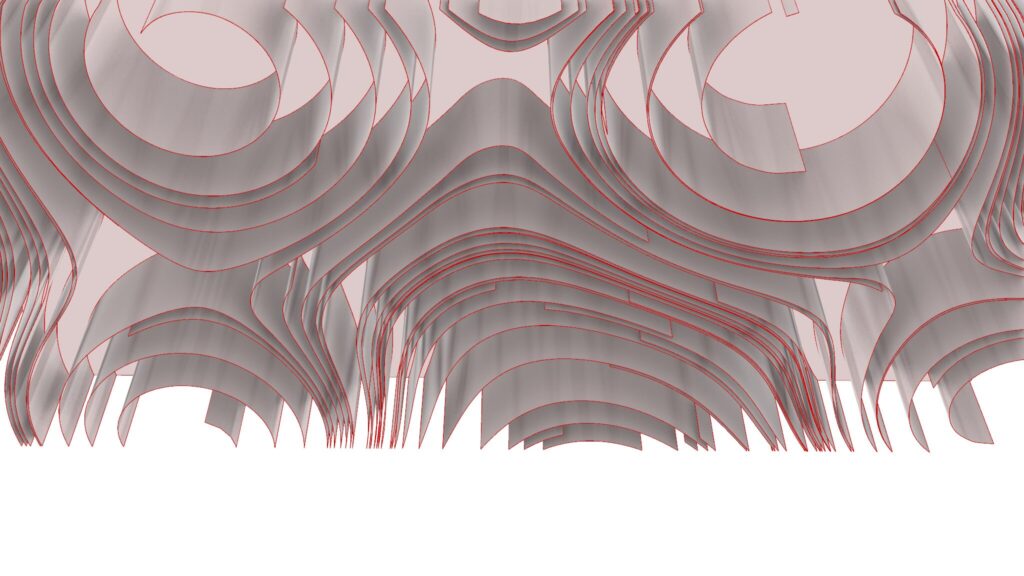
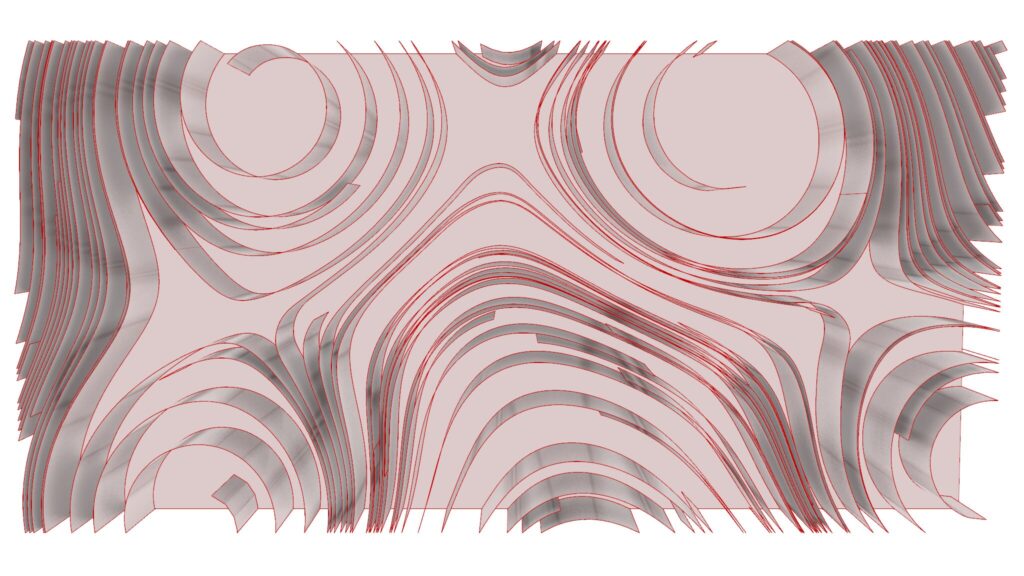
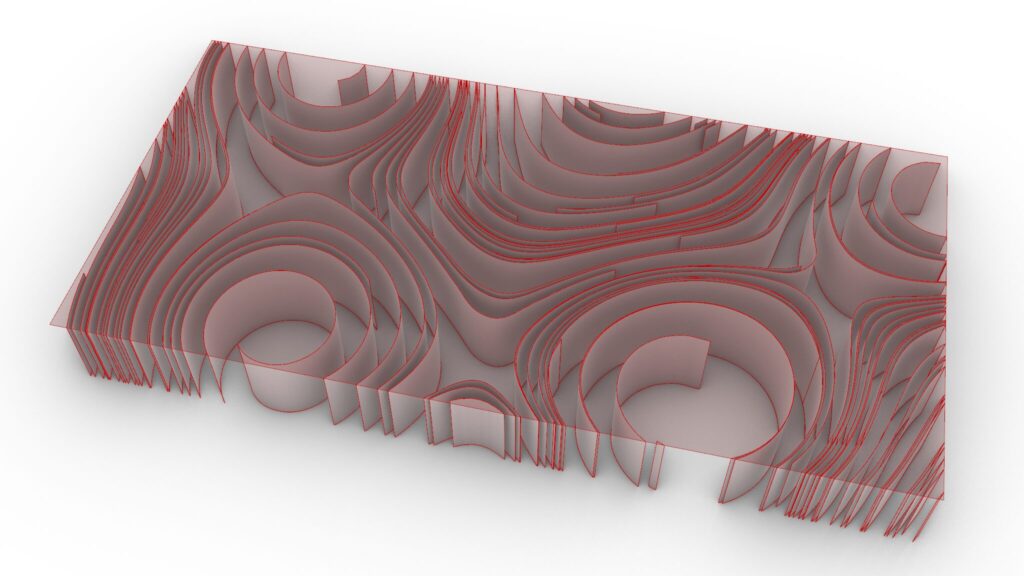
The top five images are from Grasshopper.


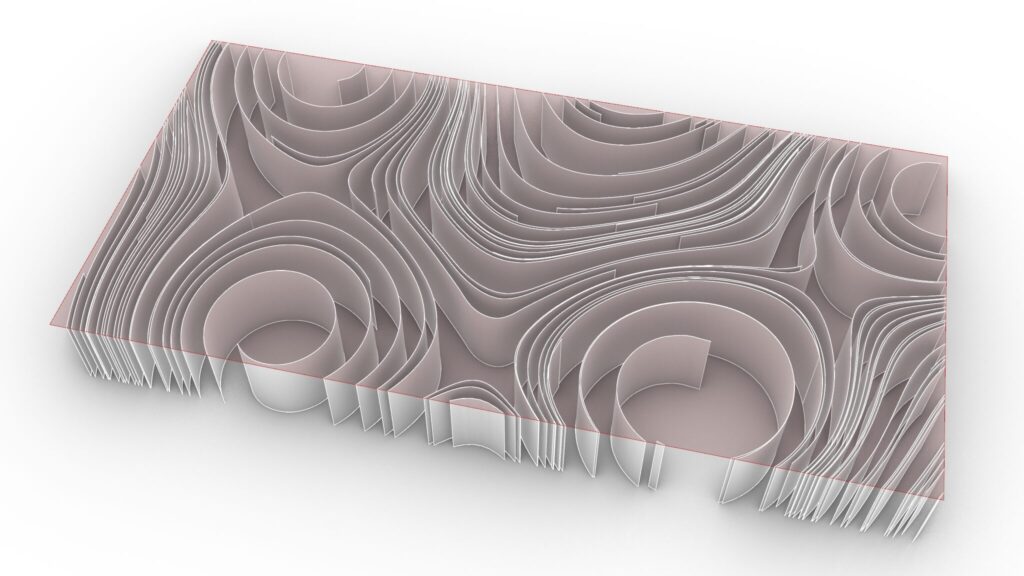
The top four images show the model exported on Rhinoceros.

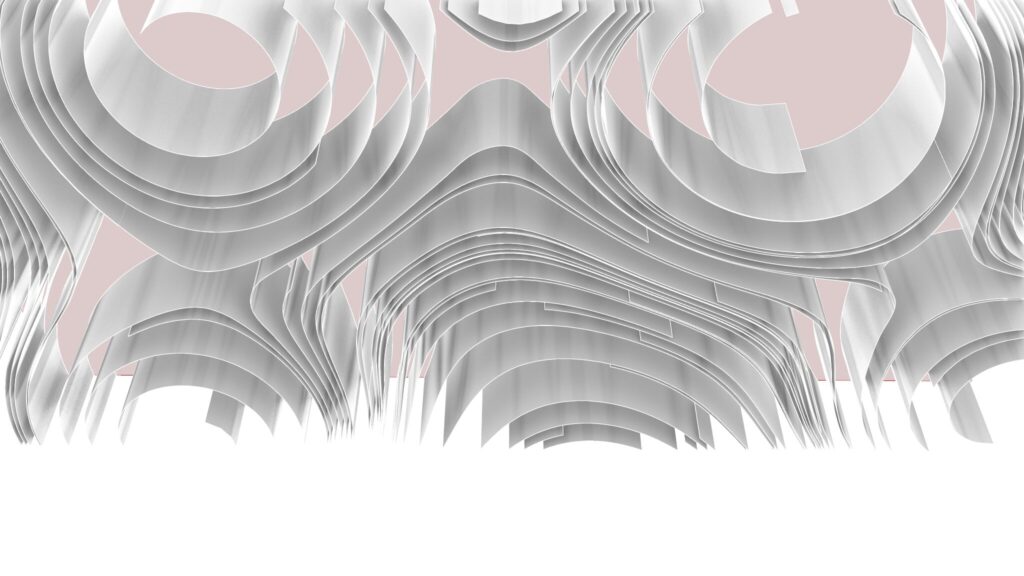
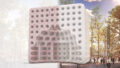
The image above shows the final rendering.
Click here to download the Grasshopper file
Please refer to the Terms of Use regarding the use of downloadable data.
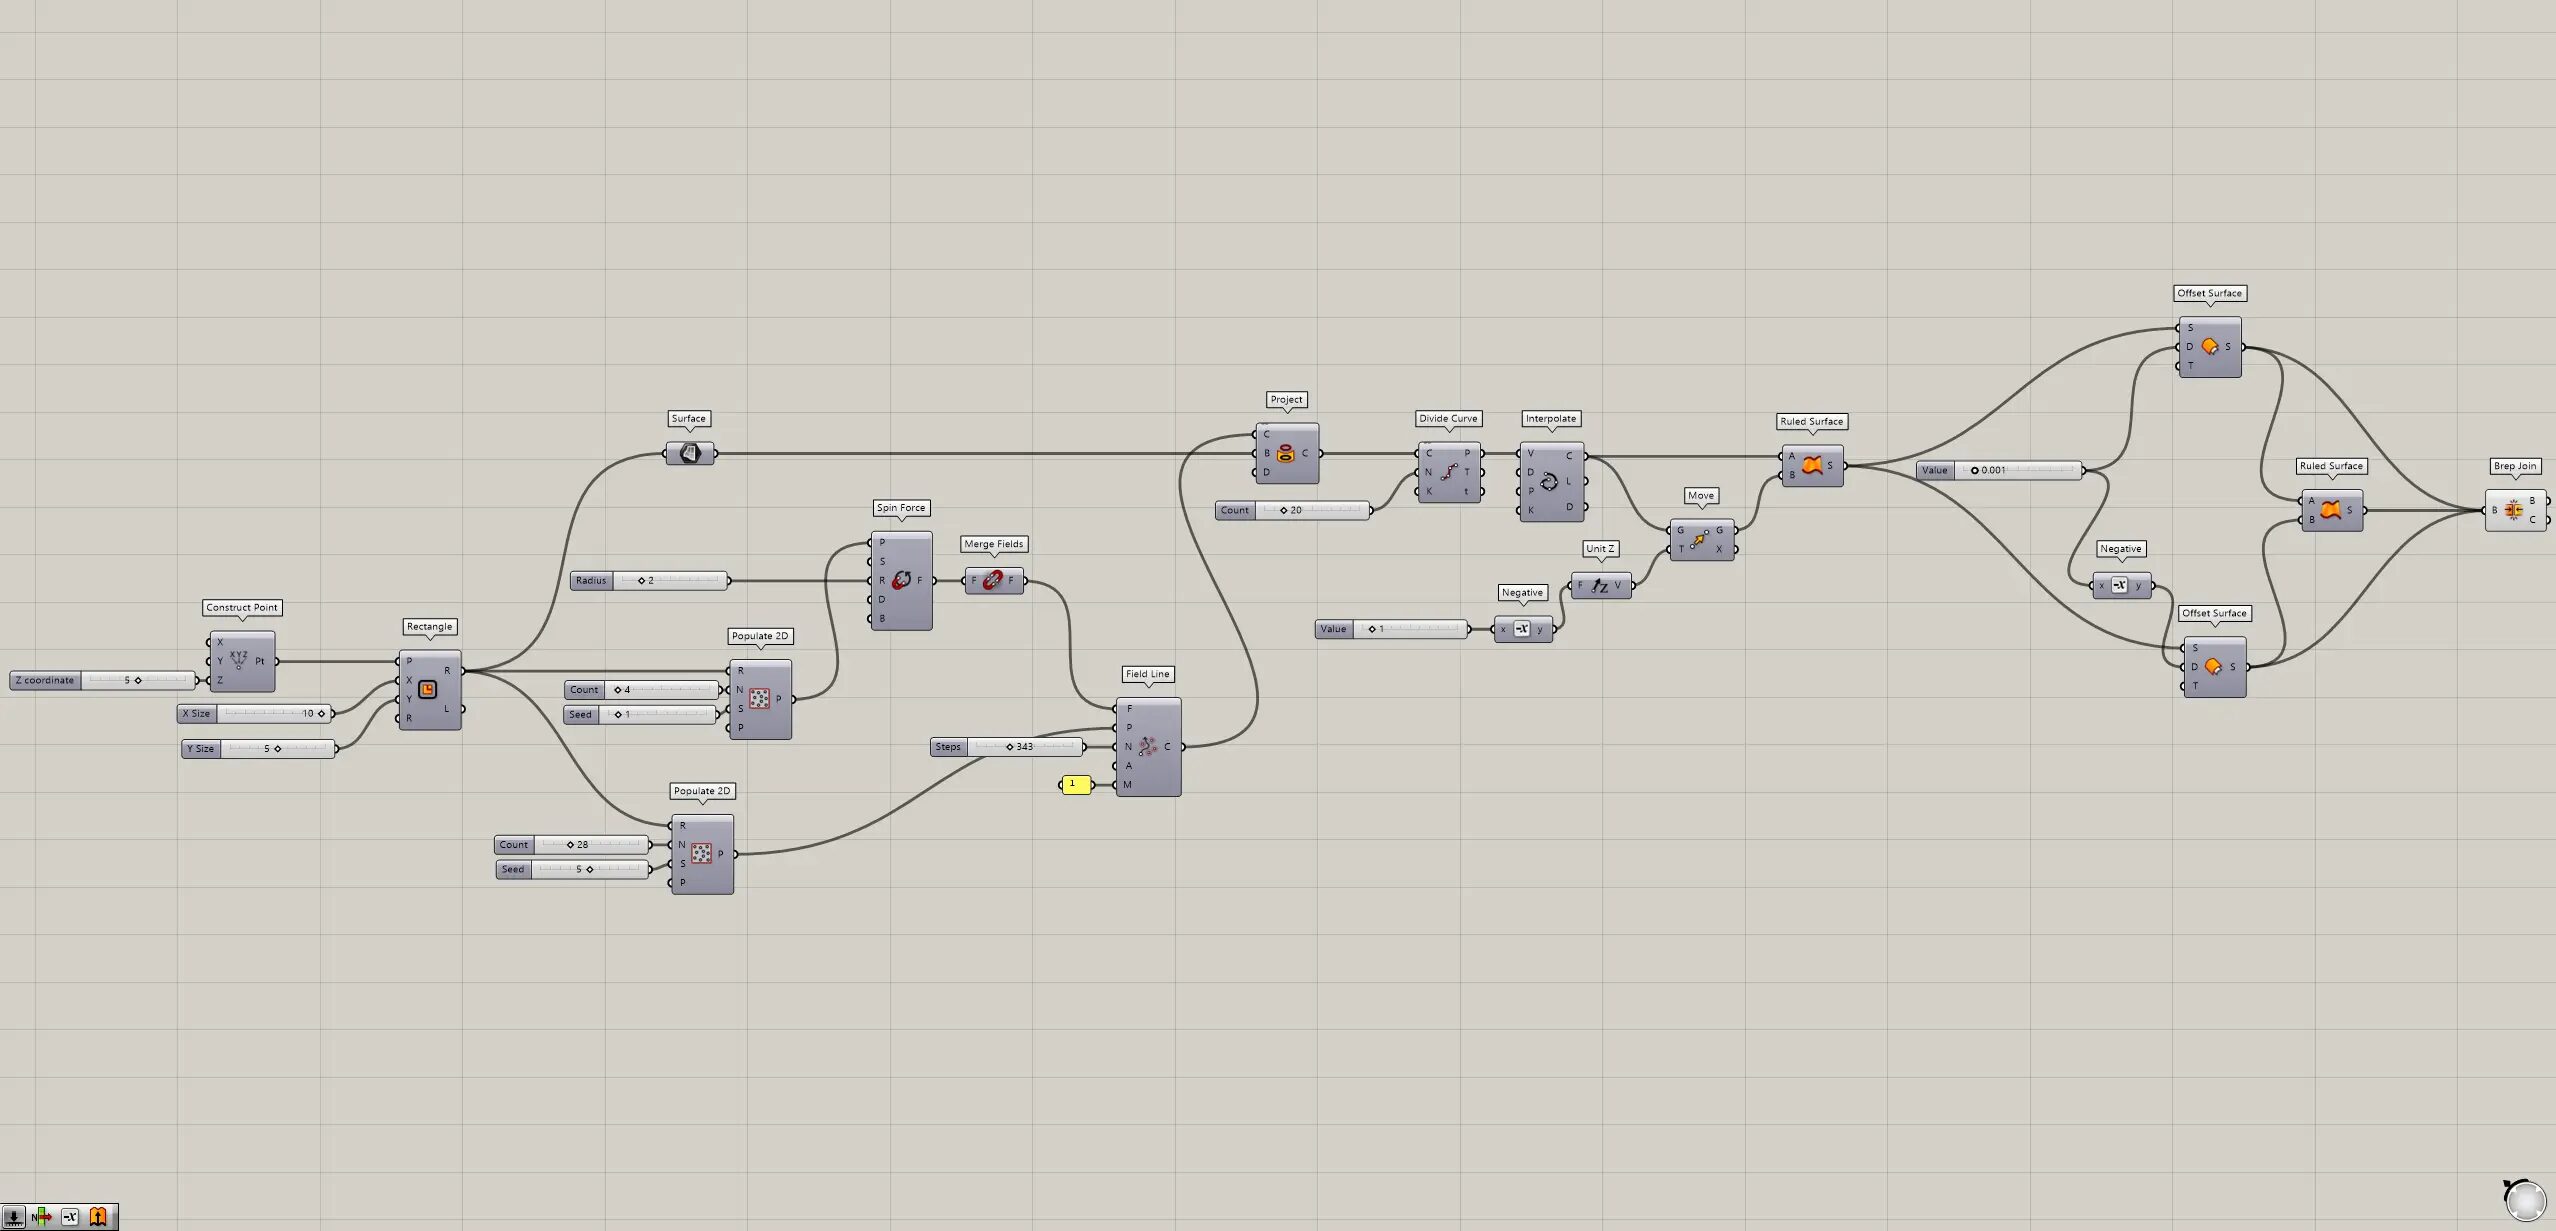
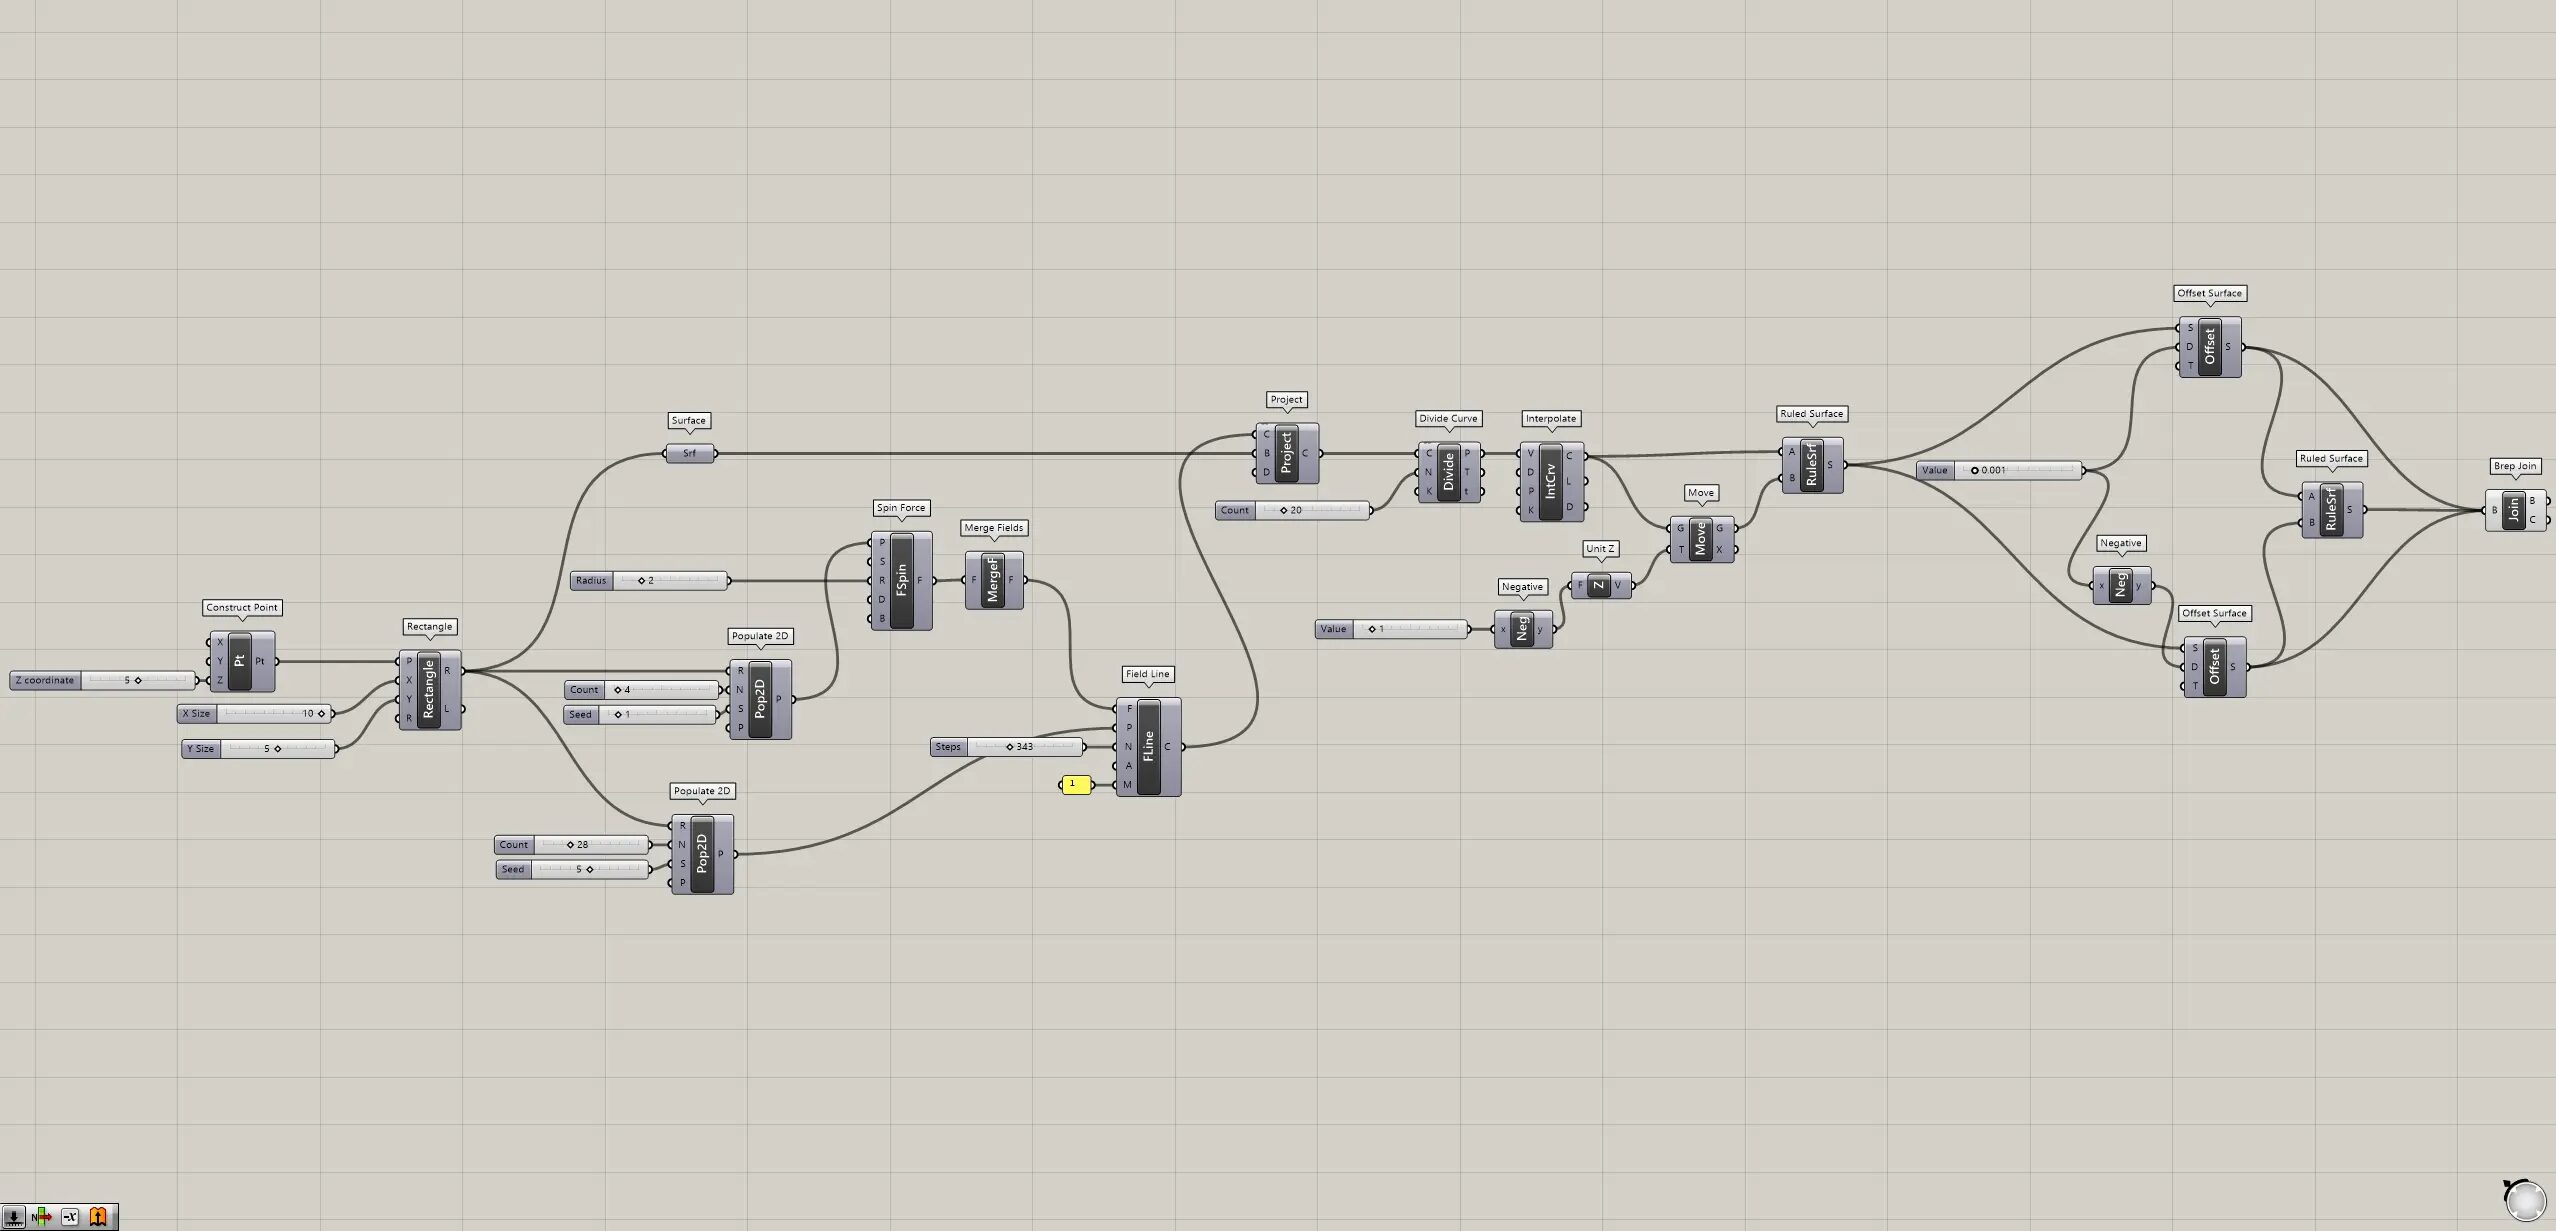
Grasshopper recipe
①Construct Point ②Rectangle ③Populate 2D ④Spin Force ⑤Merge Fields ⑥Field Line ⑦Surface ⑧Project ⑨Divide Curve ⑩Interpolate ⑪Negative ⑫Unit Z ⑬Move ⑭Ruled Surface ⑮Offset Surface ⑯Brep Join
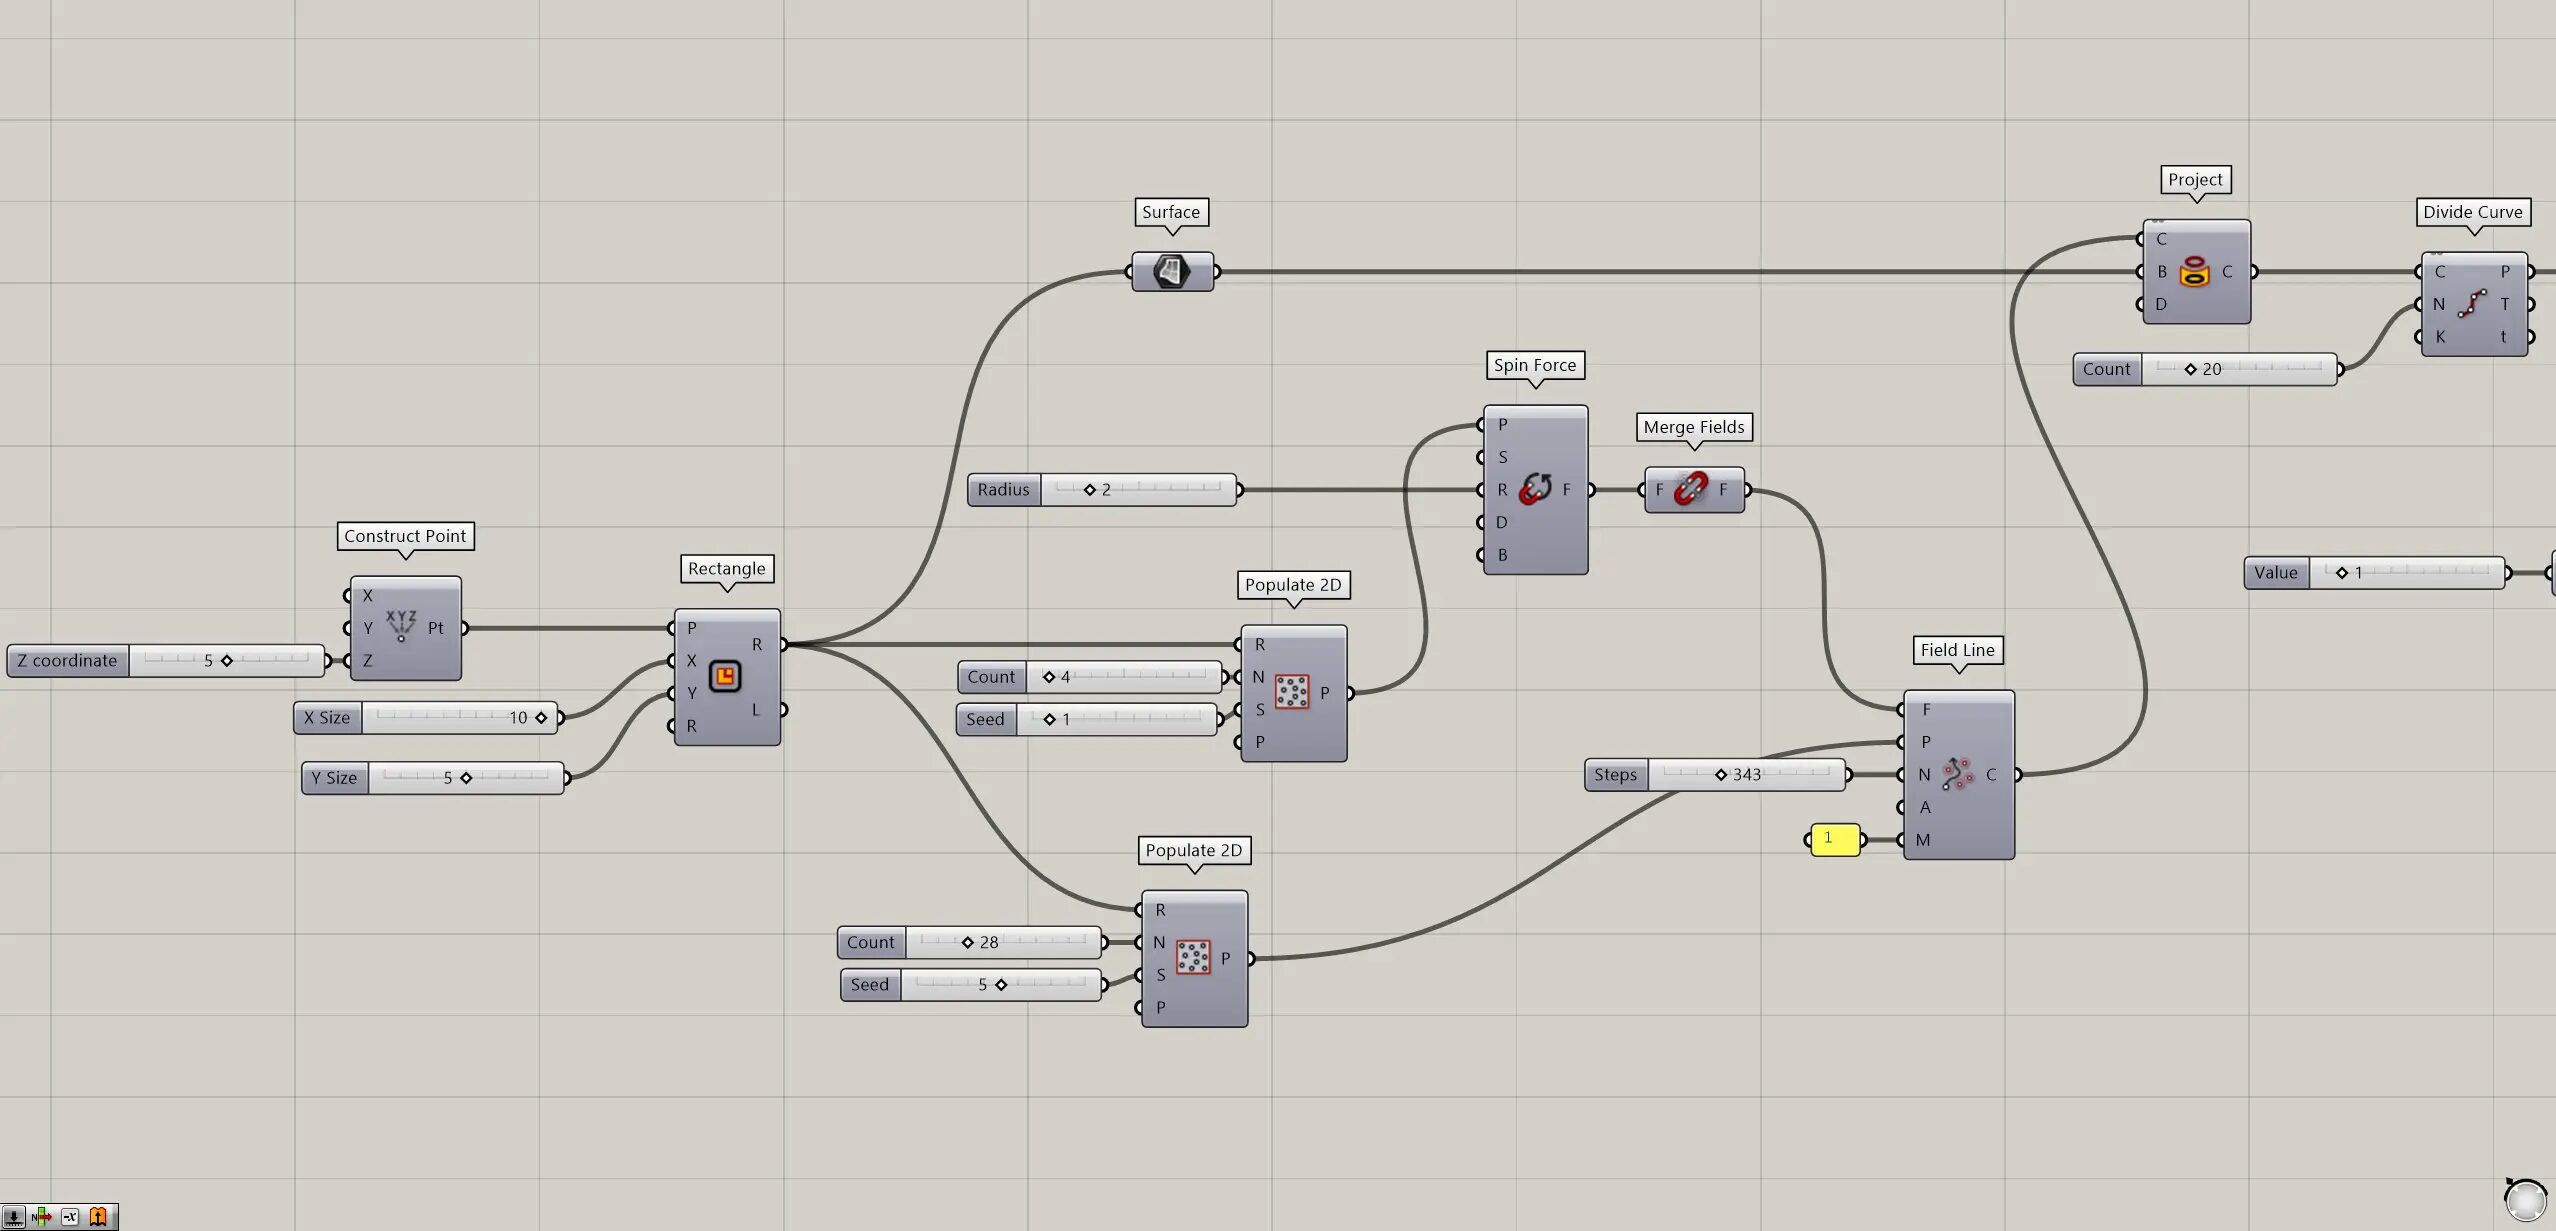
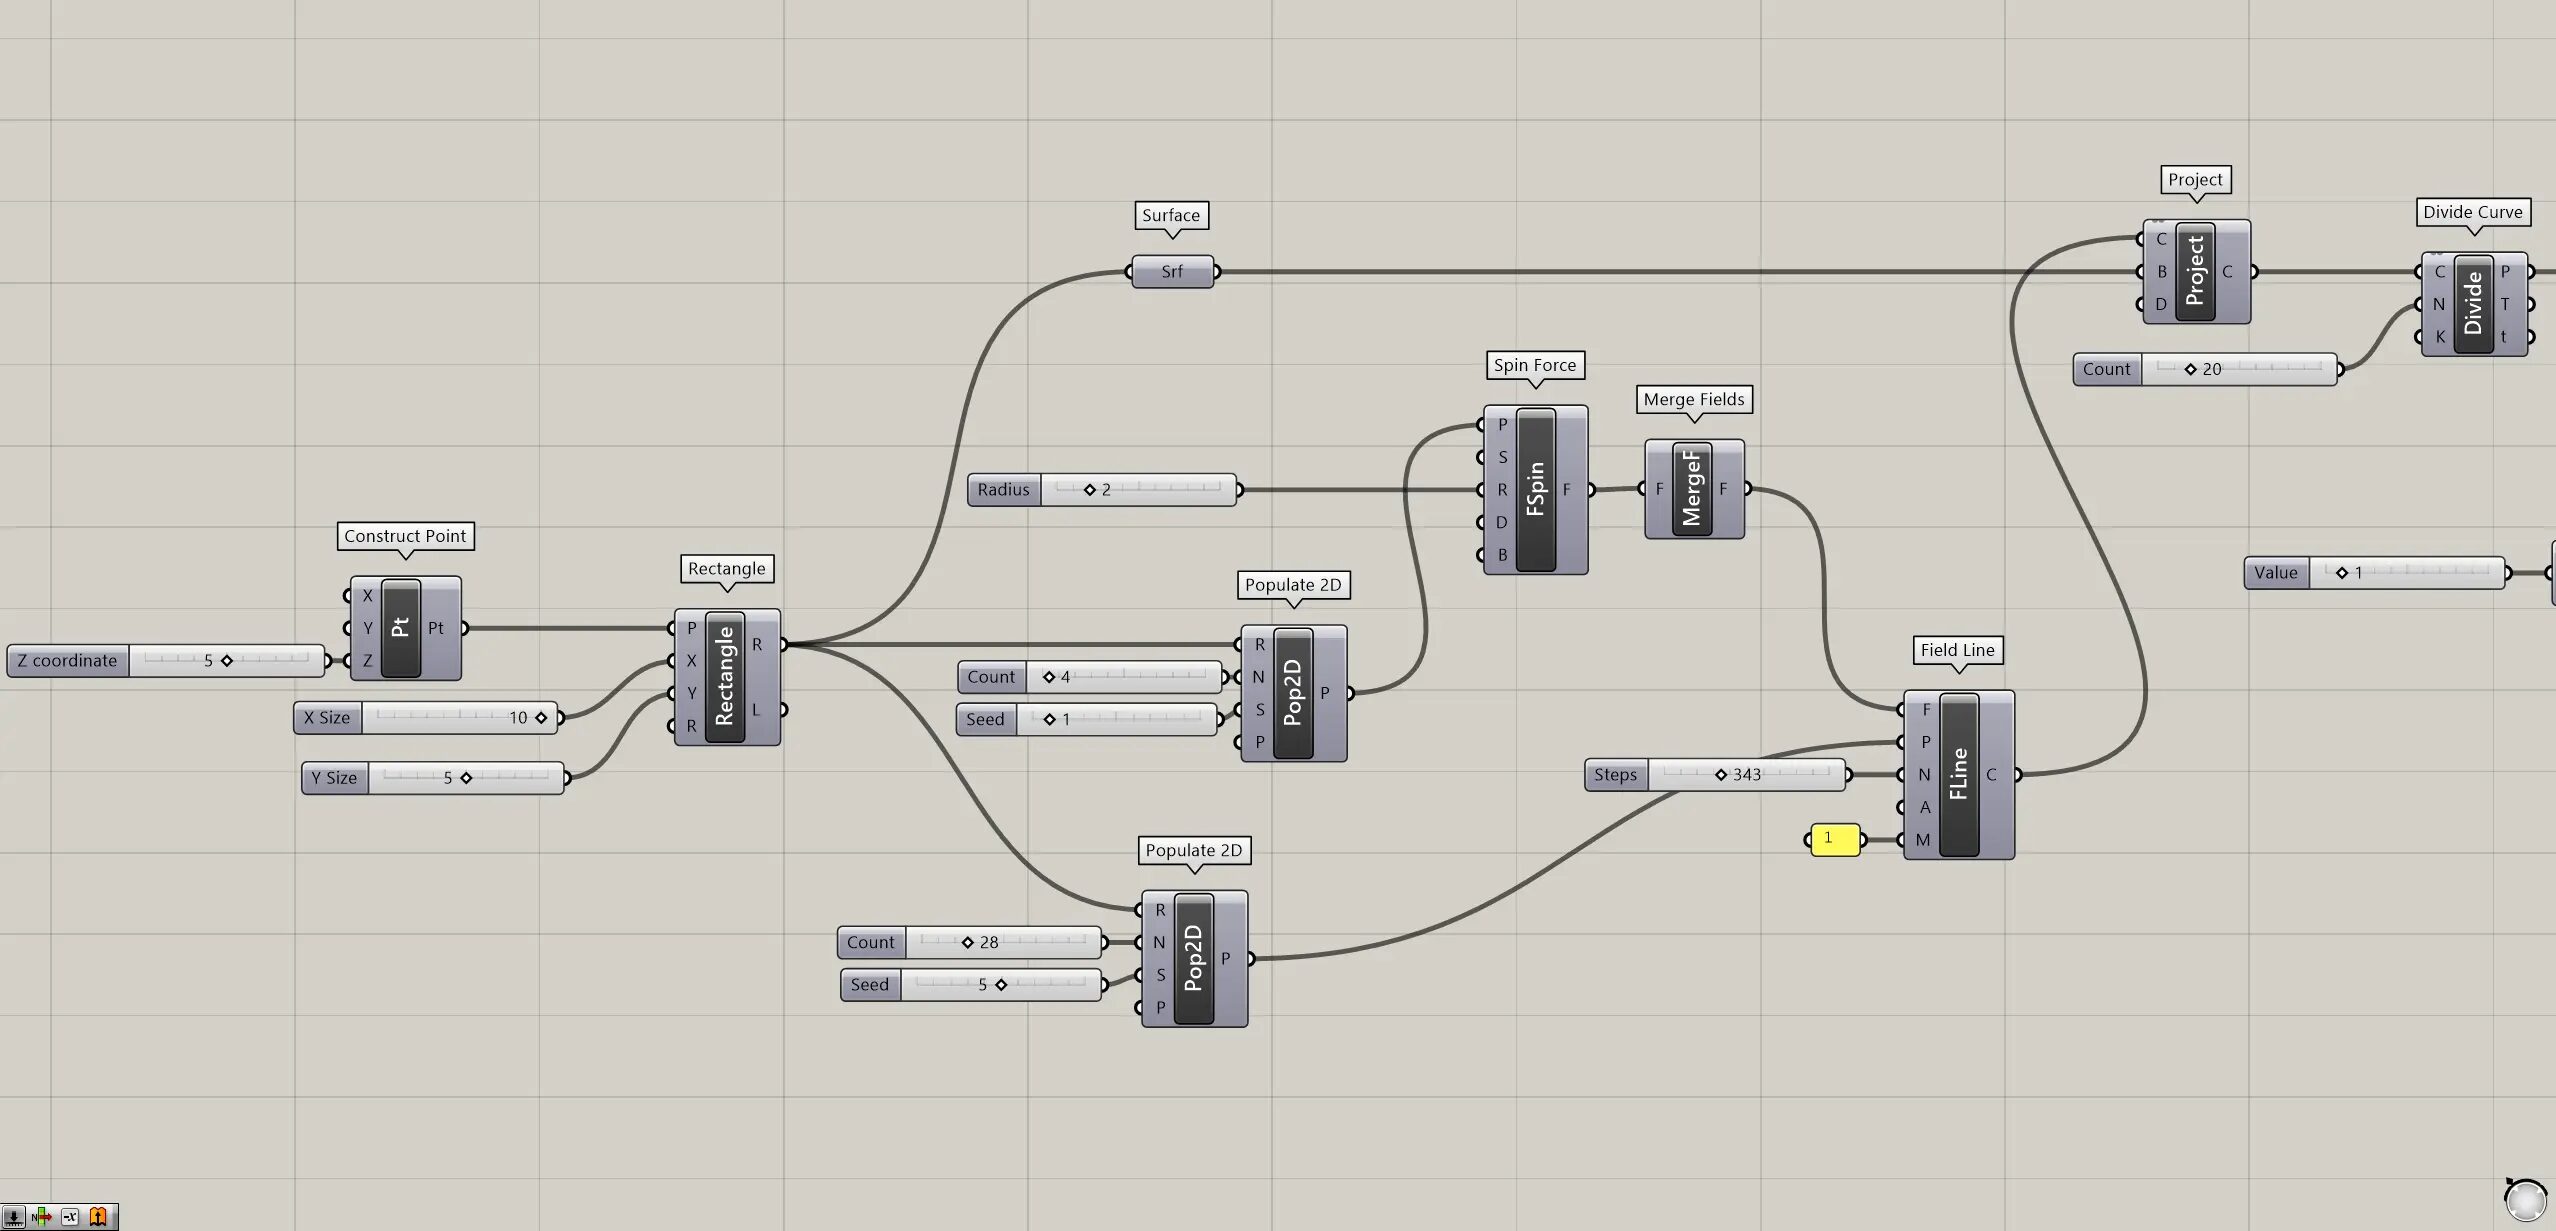

Create a magnetic field
First, we create a magnetic field.
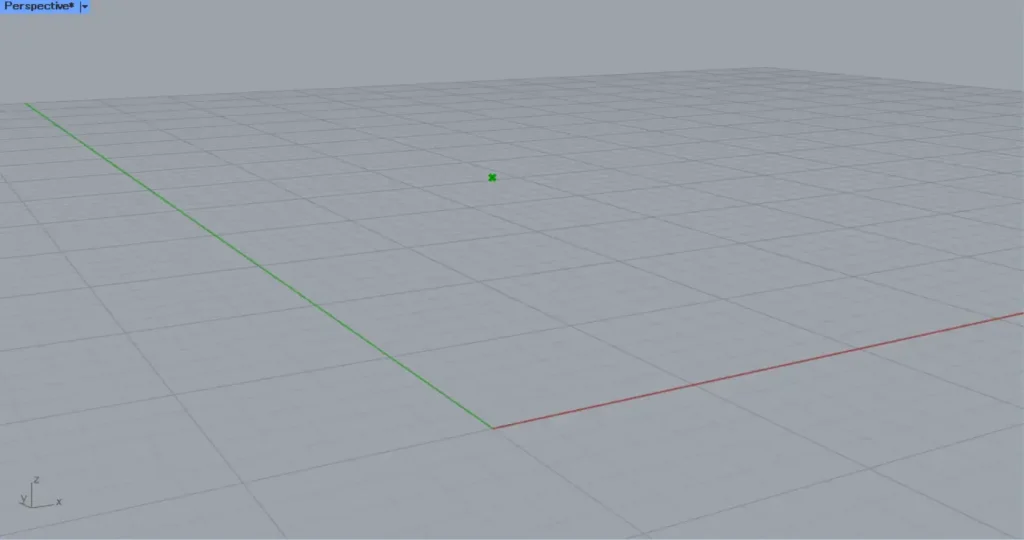
First, connect a height value to a Construct Point(Z).
This time, 5 is input.
Then a point is created at coordinates 0,0,5, as shown in the image above.
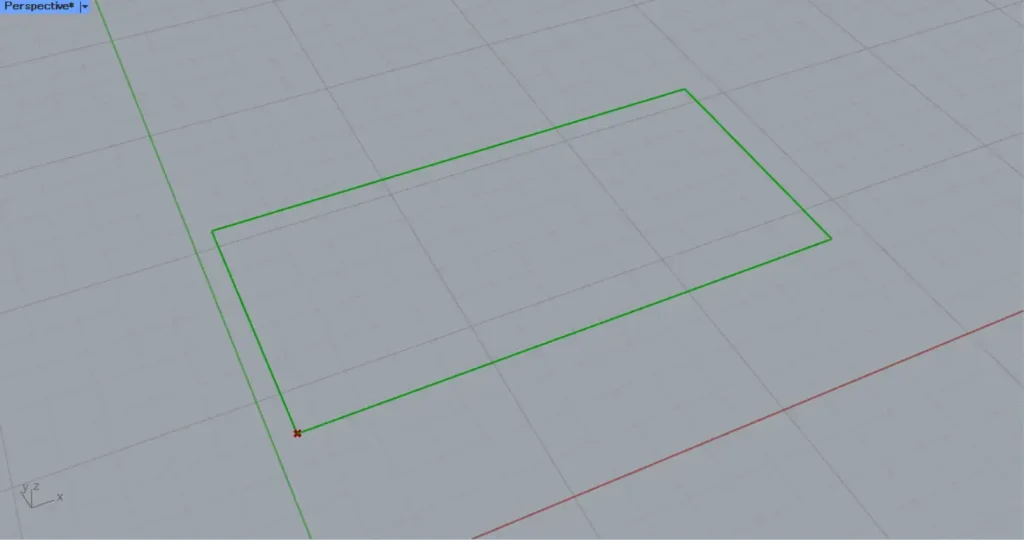
Then connect the Construct Point to a Rectangle(P).
Then, Connect side length values to Rectangle(X and Y).
This time, 10 for X and 5 for Y are connected.
Then a 10 x 5 square line is created, as shown in the image above.
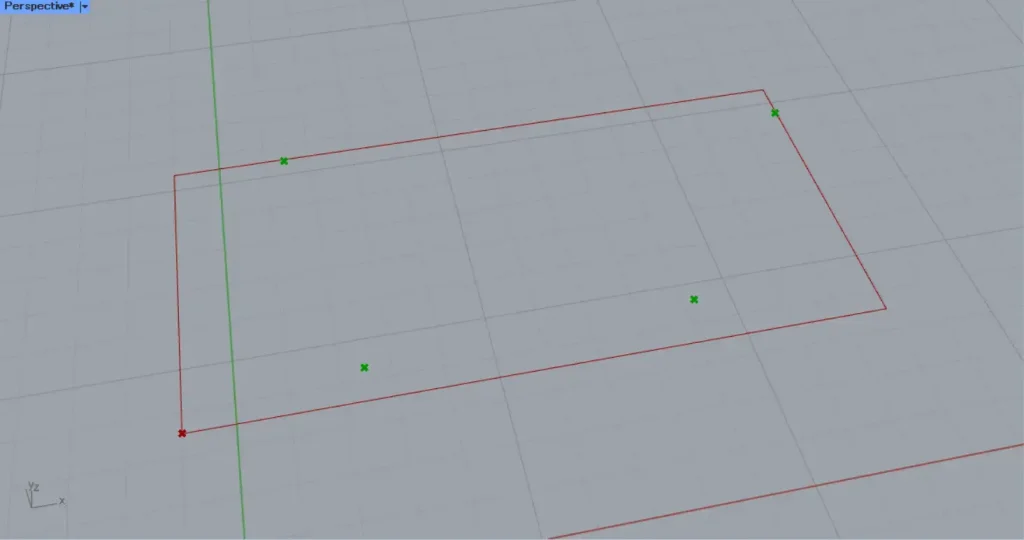
Then connect the Rectangle(R) to a Populate 2D(R).
Furthermore, connect a numerical value of the number of points to the Populate 2D(N).
This time, 4 is connected.
Furthermore, connect a seed value of any randomness to the Populate 2D(S).
This time, 1 is connected.
Then 4 points are created at random positions within the rectangle, as shown in the image above.
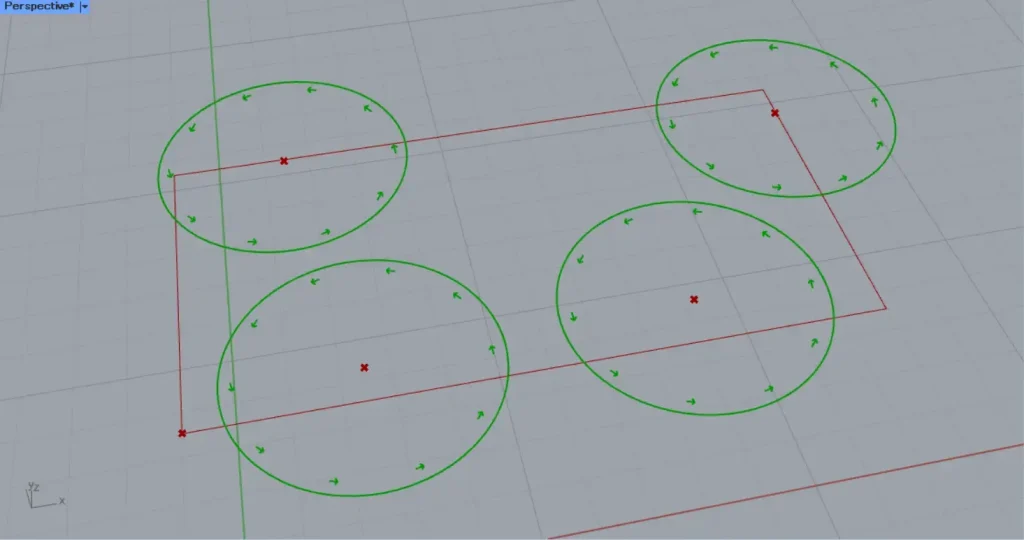
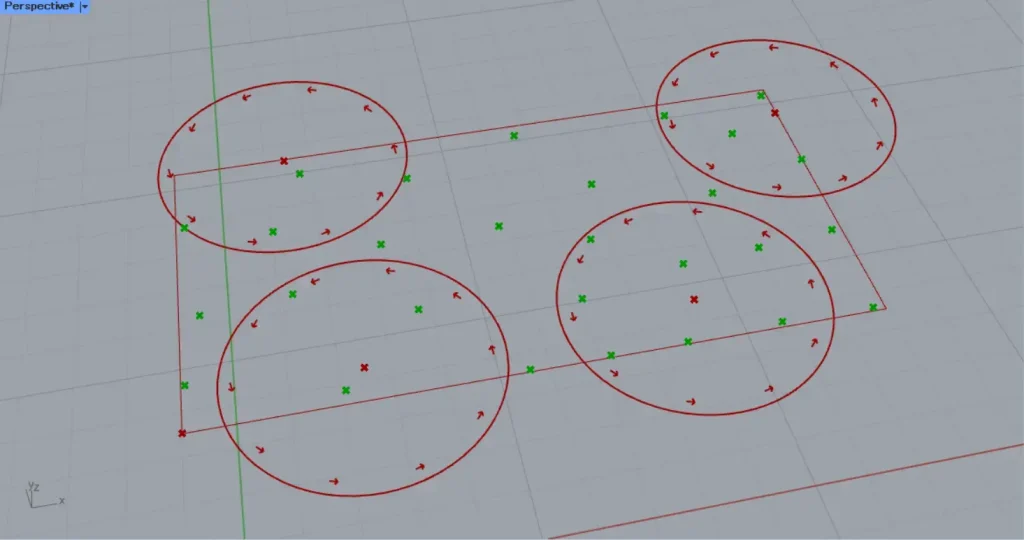
Then connect the Populate 2D to a Spin Force(P).
Furthermore, connect a magnetic field radius value to the Spin Force(R).
Then four rotating magnetic fields are created, as shown in the image above.
Then connect the Spin Force to a Merge Fields.
Then the four magnetic fields are combined.
Create curves from the magnetic field
Next, we will create curves from the magnetic field
Connect the Rectangle(R) to a new Populate 2D(R).
Furthermore, connect a numerical value of the number of points to the Populate 2D(N).
This time, 28 is connected.
Furthermore, connect a seed value of any randomness to the Populate 2D(S).
This time, 5 is connected.
Then 28 points are created at random positions within the rectangle, as shown in the image above.
These points are the starting points of curves.
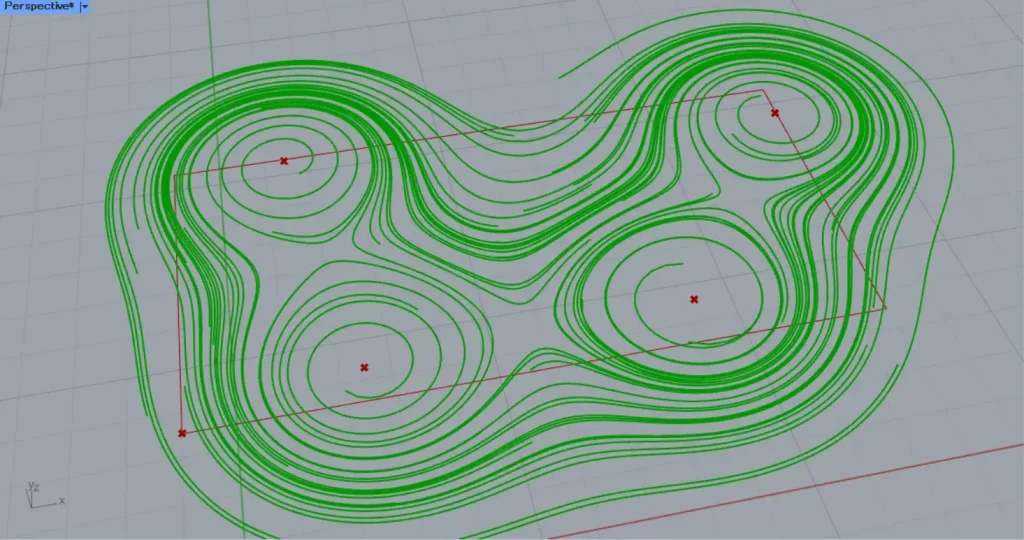
Then connect the Merge Fields to a Field Line(F).
Furthermore, connect the second Populate 2D to the Field Line(P).
Furthermore, connect the number of iterations to Field Line(N).
This time, 343 is input.
In addition, connect 1 to the Field Line(M).
Then lines is created from the starting points under the influence of the magnetic field, as shown in the image above.
This lines are currently not curves, but a series of straight lines joined together.
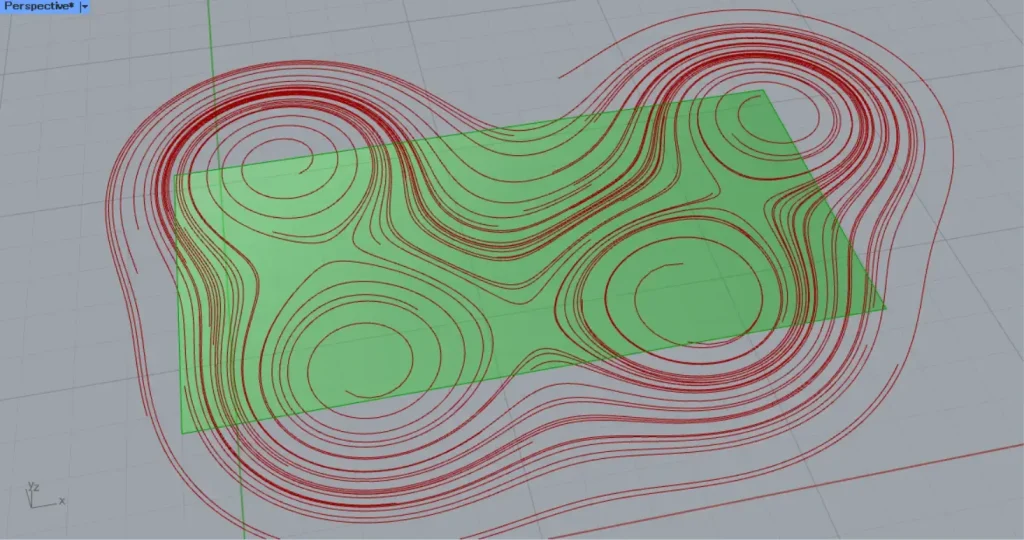
Then connect the Rectangle(R) to a Surface.
Then a surface is created from the lines of the rectangle, as shown in the image above.
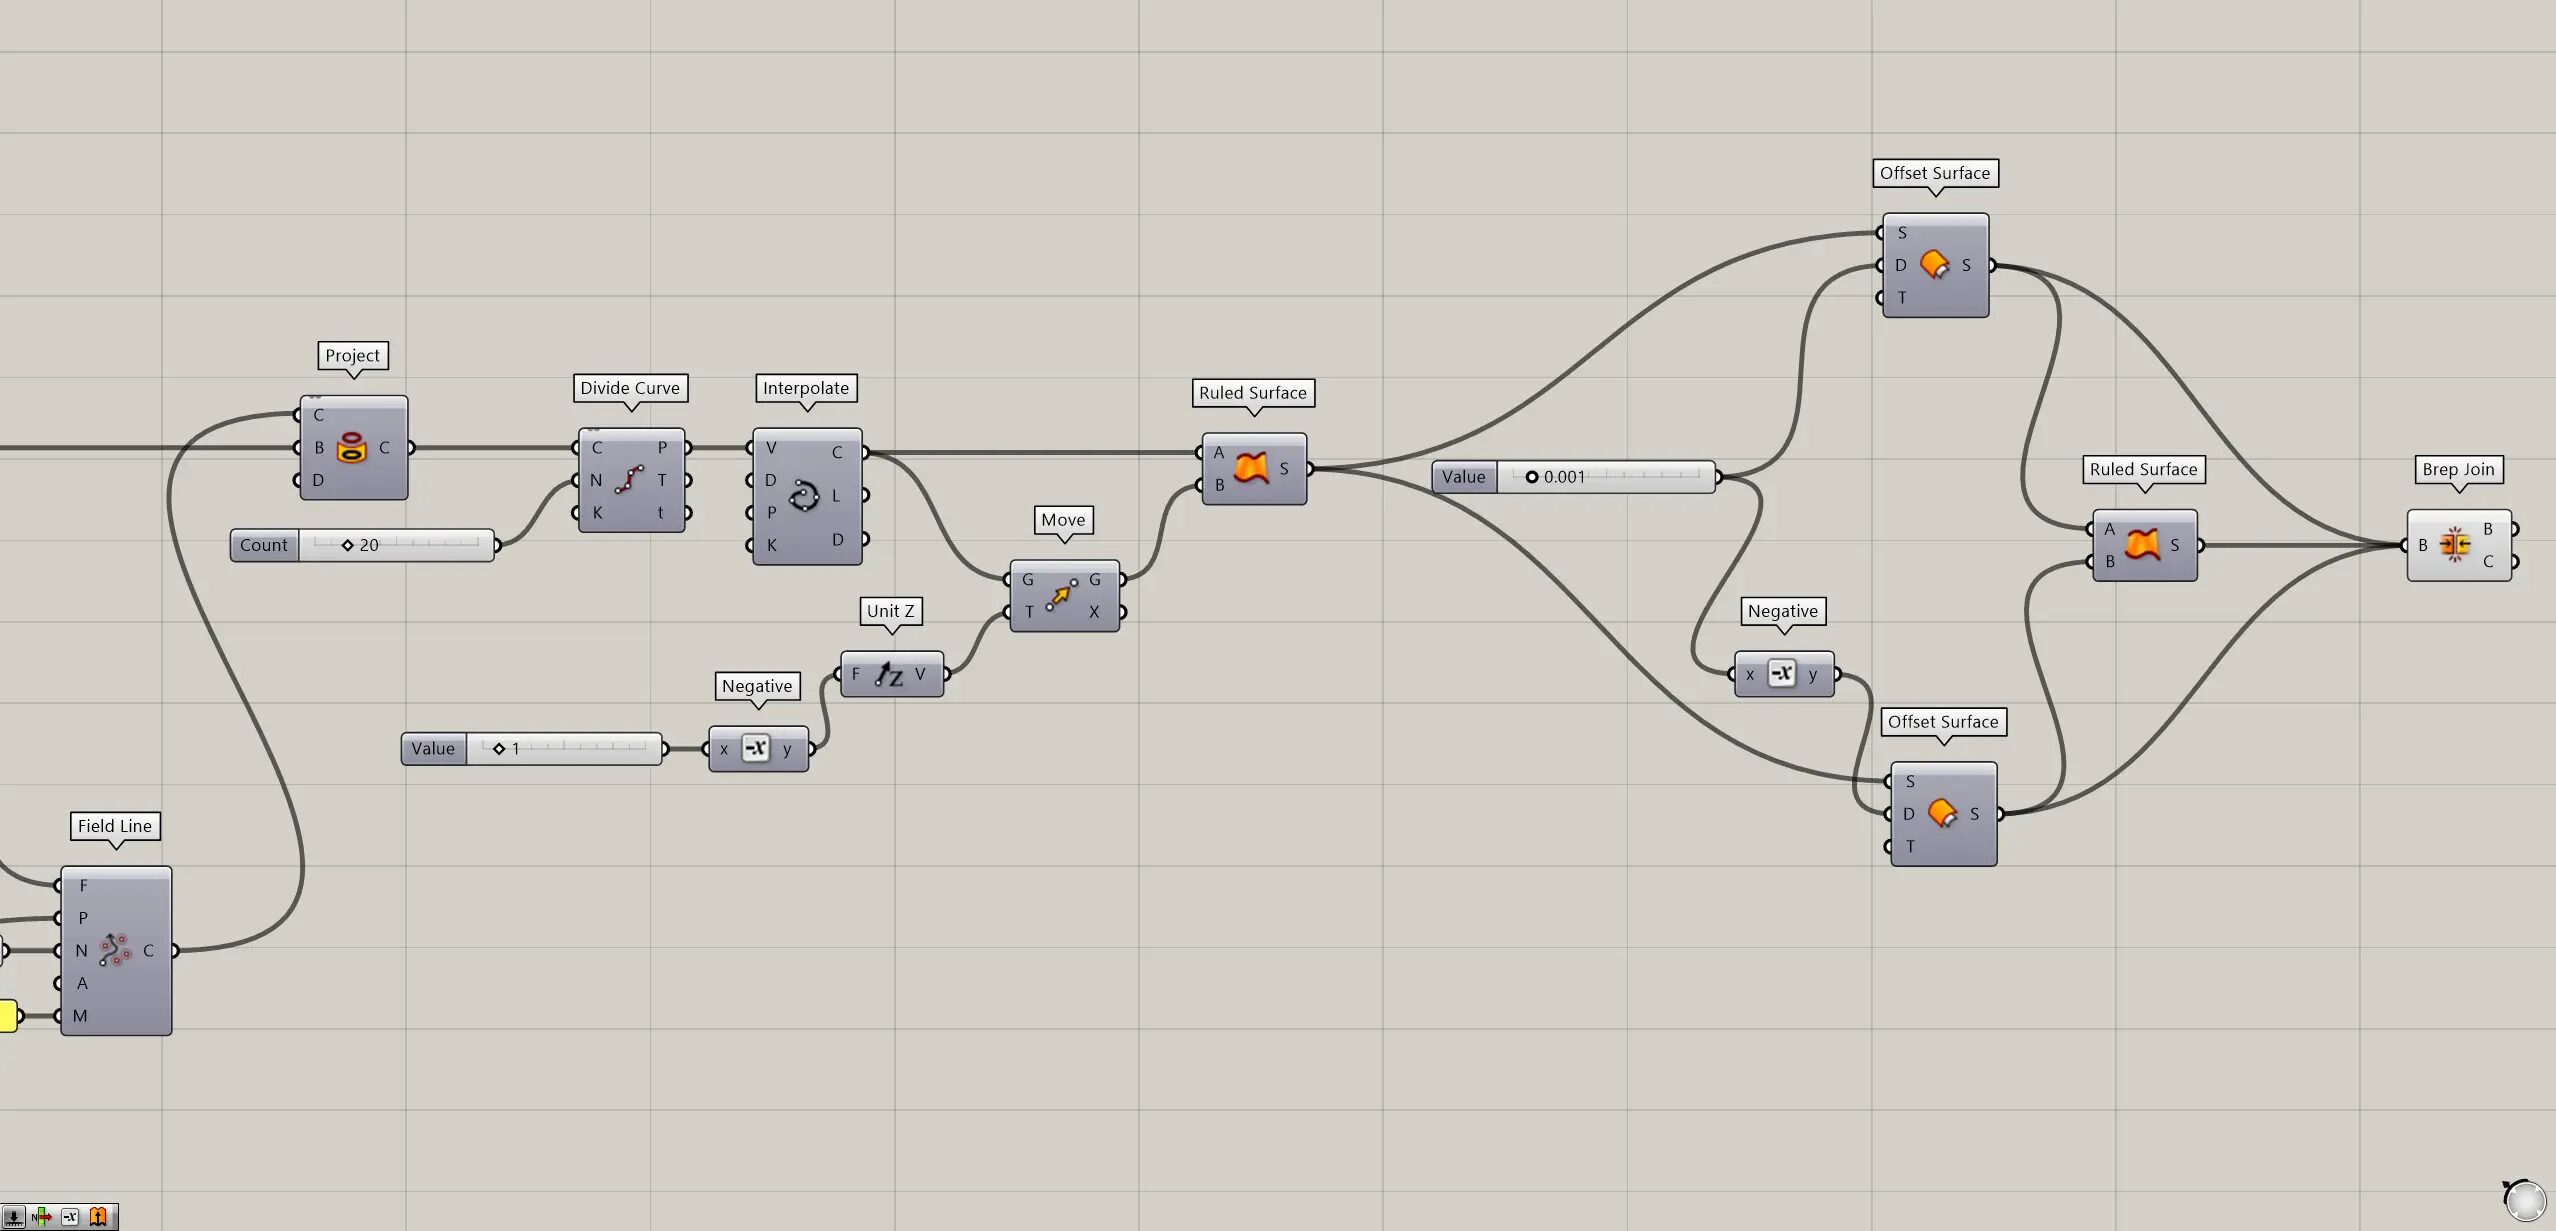
Then connect the Surface to a Project(B).
In addition, connect the Field Line to the Project(C).
Then the lines are projected on the surface, as shown in the image above.
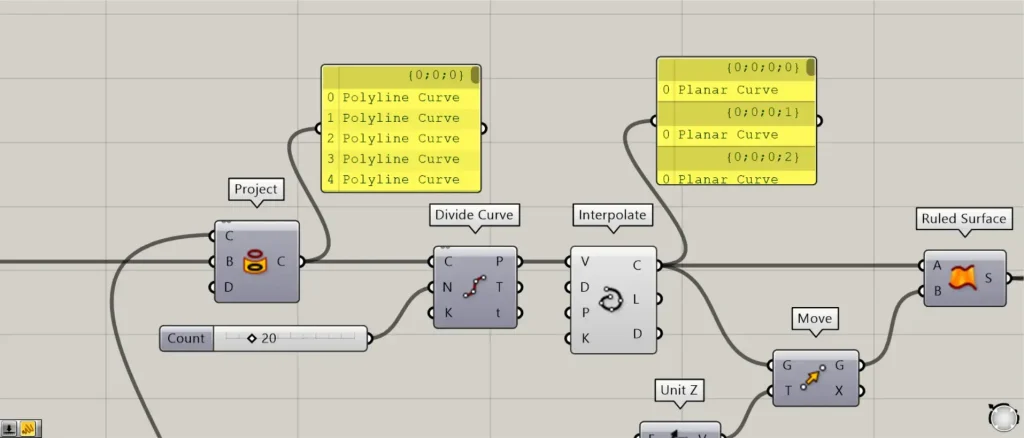
Then connect the Project to a Divide Curve(C).
Furthermore, connect the numerical value of the number of division points to the Divide Curve(N).
This time, 20 is connected.
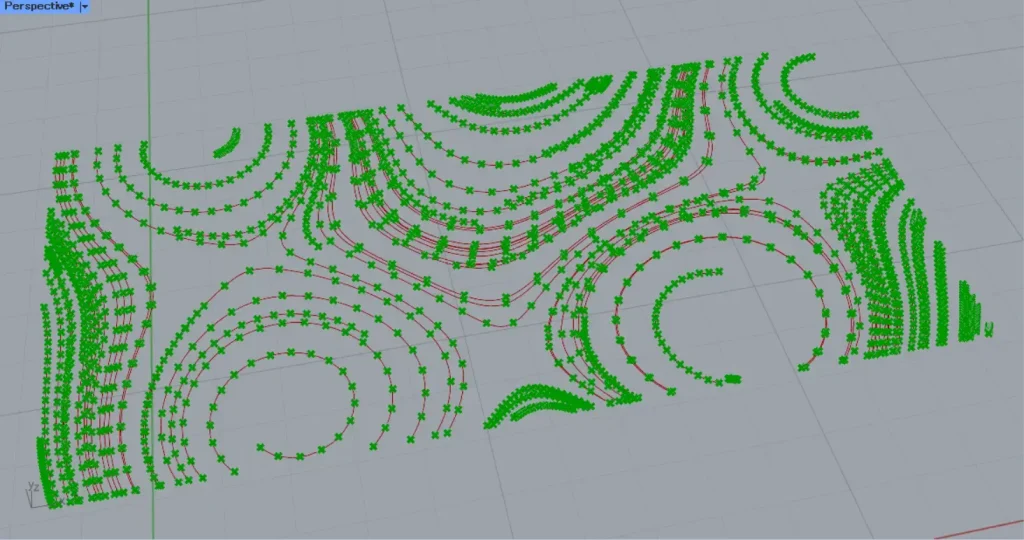
Then divided points are created at the location where each line is divided into 20, as shown in the image above.
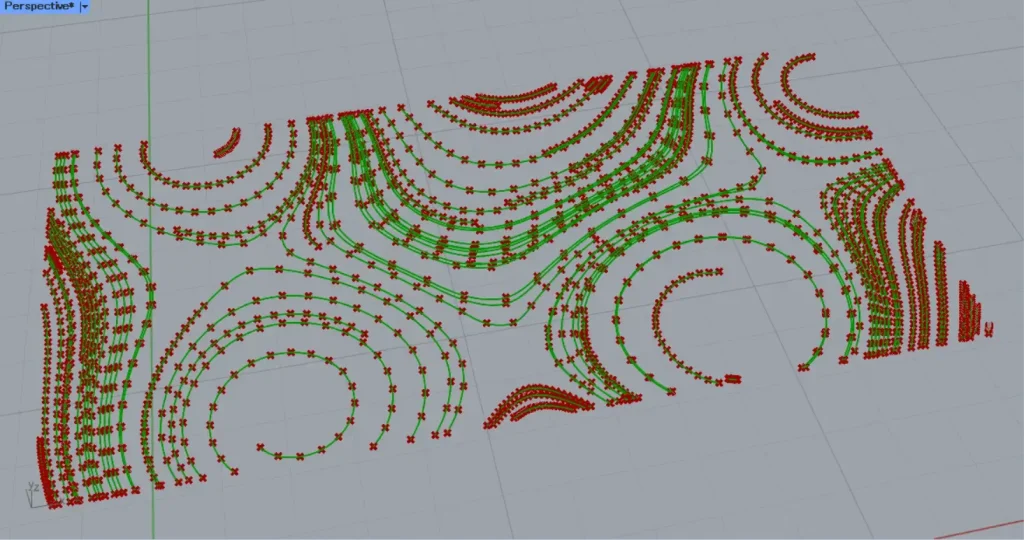
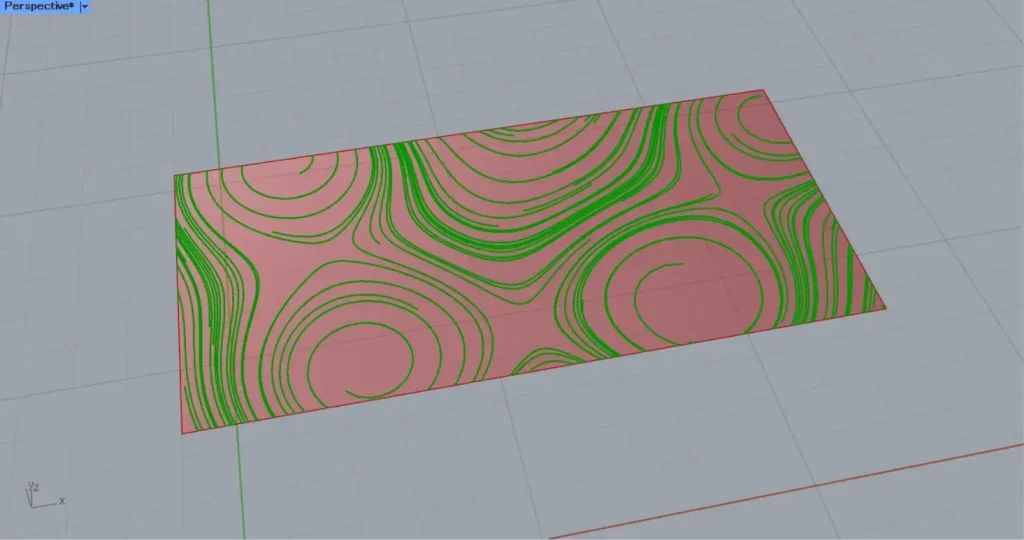
Then connect the Divide Curve(P) to an Interpolate(V).
Then curves connecting the divided points are created, as shown in the image above.
The curves are now created from continuous lines.
Create surfaces from the curves and add thickness
Finally, Create surfaces from the curves and add thickness.
Connect the values for the distance to be moved to a Negative.
This time, 1 is connected.
Then the number -1 is output.
Then connect the Negative to a Move(T).
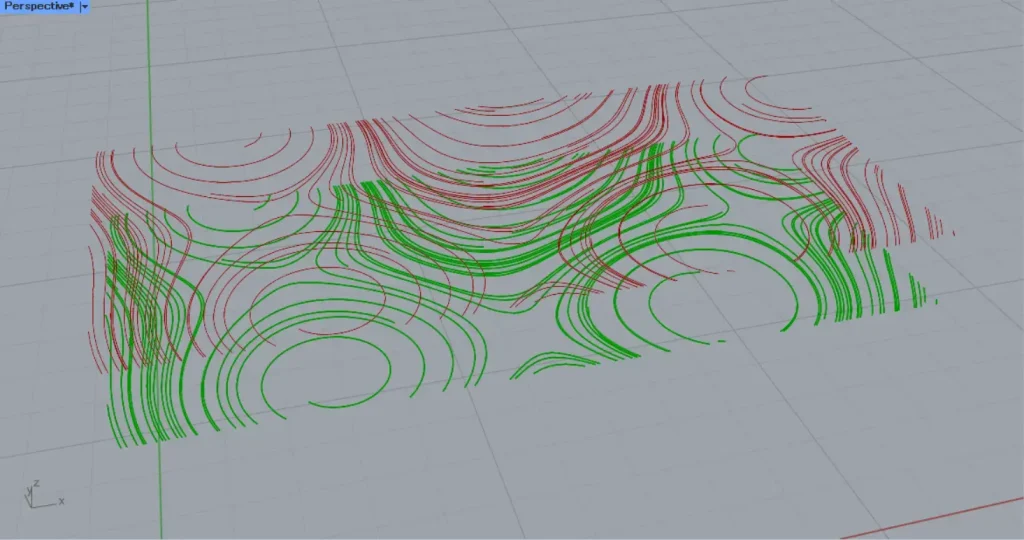
In addition, connect the Interpolate(C) to the Move(G).
Then the curves move downward, as in the image above.
Then Connect the Interpolate(C) and the Move(G) to a Ruled Surface.
Then surfaces are created connecting the curves, as shown in the image above.
Then connect the Ruled Surface to two Offset Surface(S).
Furthermore, connect the number to be offset to the first Offset Surface(D).
This time, 0.001 is connected.
For the second Offset Surface(D), connect 0.001 through a Negative.
This offsets the surface back and forth, as shown in the image above.
Then connect the two Offset Surface to a Ruled Surface.
Then surfaces are created connecting the two surfaces.

Then connect the two Offset Surface and Ruled Surface to a Brep Join.
Then the surfaces are combined, as shown in the image above.
That’s all for this time.


Comment