
![[Grasshopper] How to use Model Block Definition to define a block](https://iarchway.com/wp-content/uploads/2026/01/Model-Block-Definition.png)
This article explains how to use Model Block Definition to define a block.
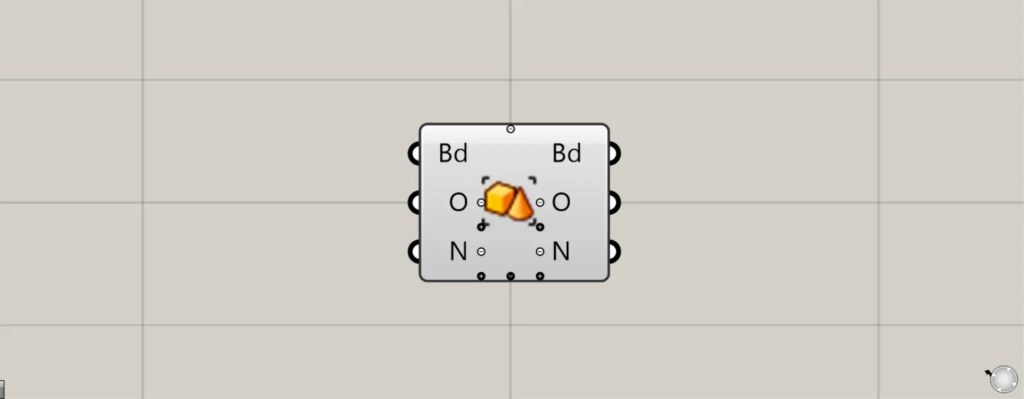
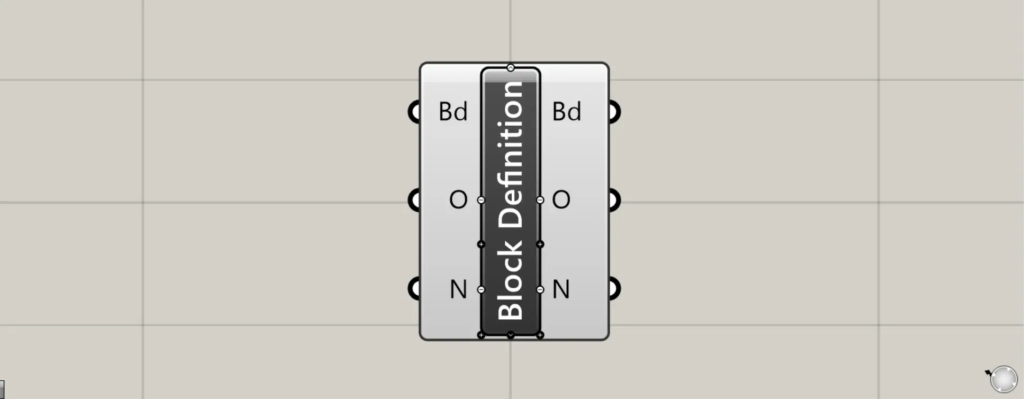
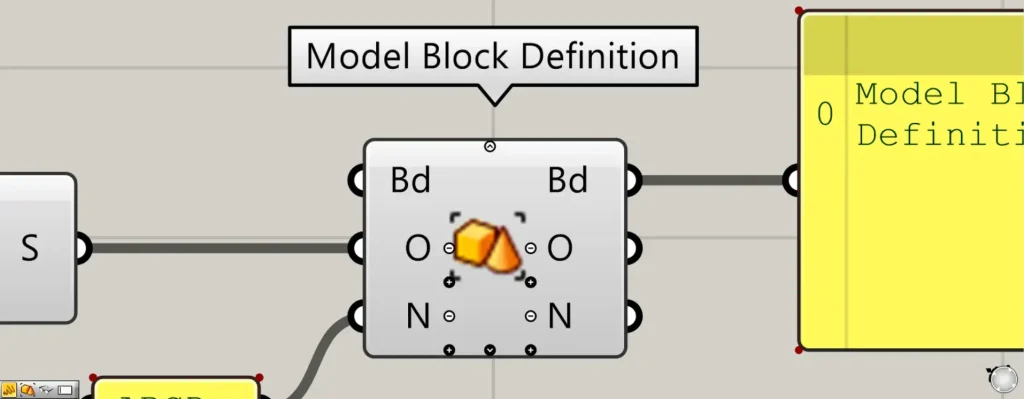
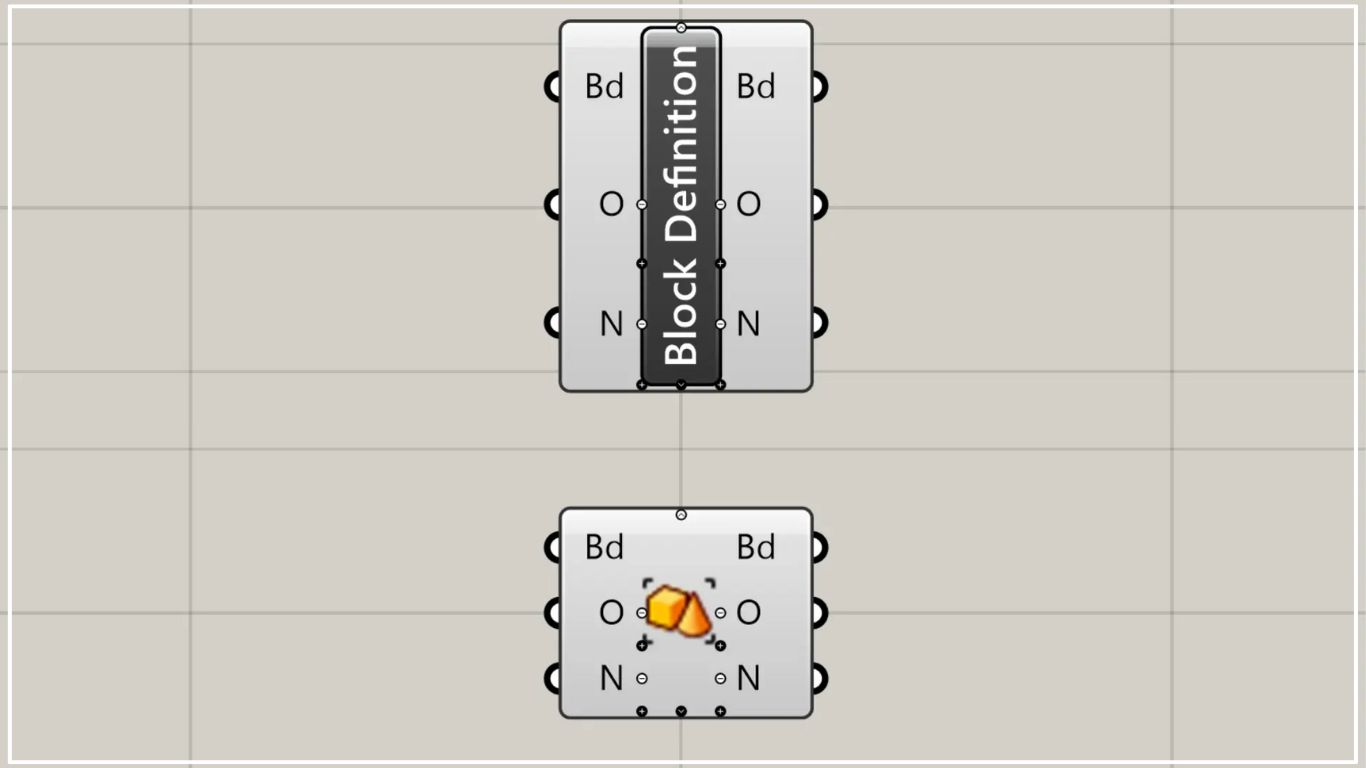
On the Grasshopper, it is represented by either of the two above.
Define a block
Using Model Block Definition, you can define blocks.
Defining objects as blocks allows you to easily place block-defined models, assign special information to models, and reduce model data size.
However, when defined as a block, you can change the position, rotation, or scale of the placed model, but you cannot alter its shape.
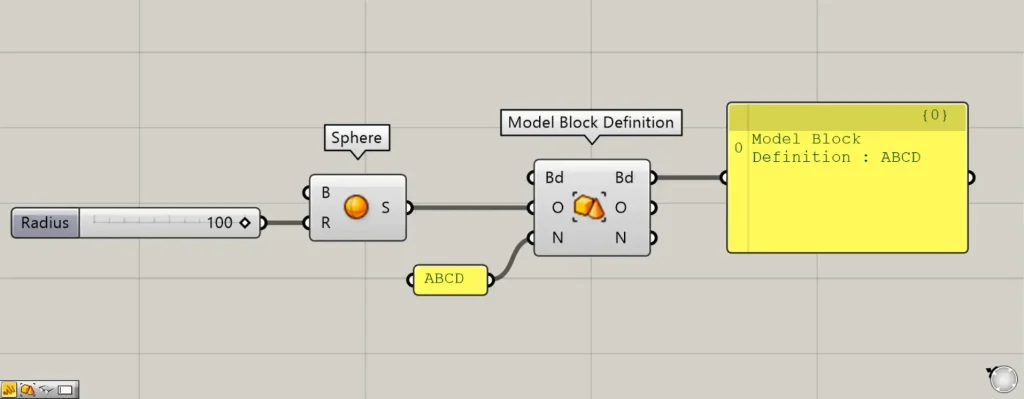
Components used: ① Sphere ② Model Block Definition
First, let’s look at the basic usage.
As a first example, we define a sphere as a block.
Enter the radius value into the Sphere(R) to create a sphere.
This time, since 100 was entered, a sphere with a radius of 100 has been created.
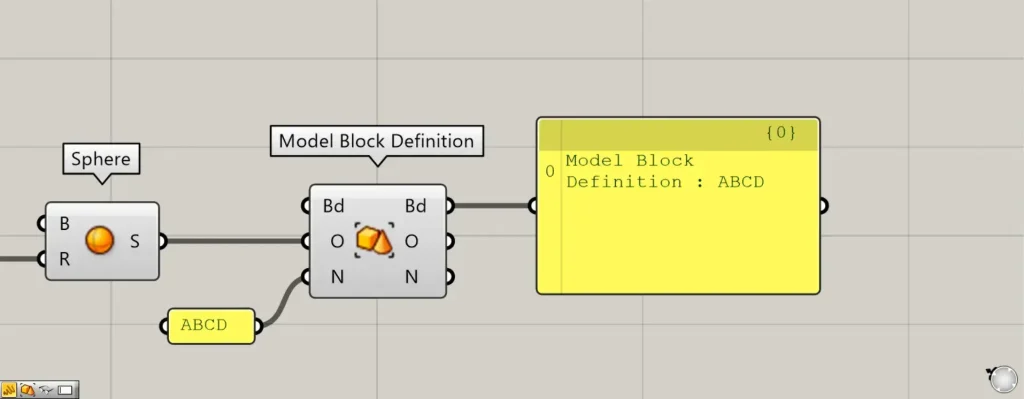
Then connect Sphere to the Model Block Definition(O).
Additionally, enter any desired definition name for the Model Block Definition(N).
This time, we entered the name ABCD.
Then, a block was defined with the definition name ABCD.
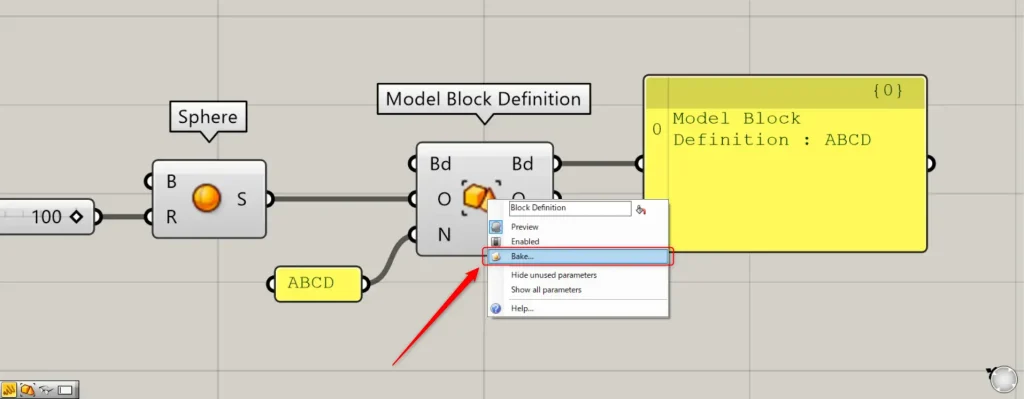
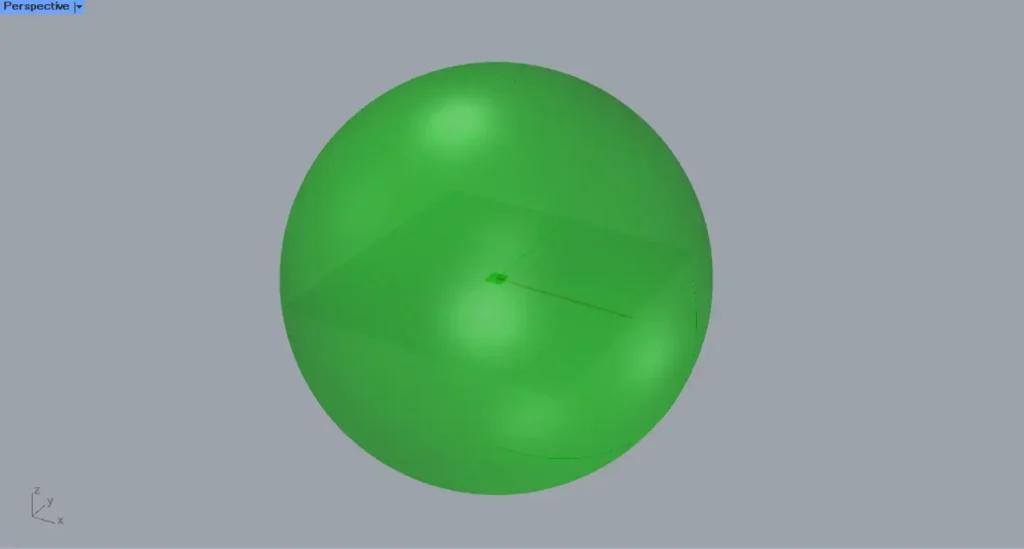
Let’s see how the defined block appears in Rhino.
In that case, right-click the Model Block Definition and select Bake.
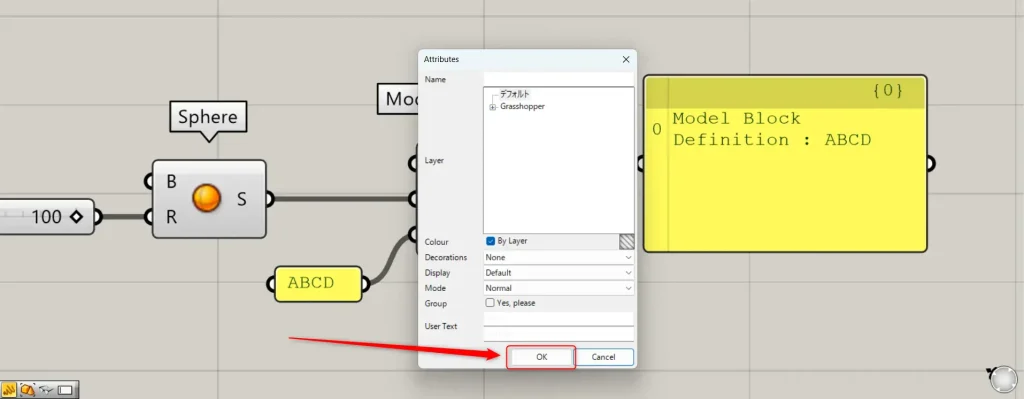
Then, a settings window like the one shown above will appear.
Basically, you can just press OK as is.
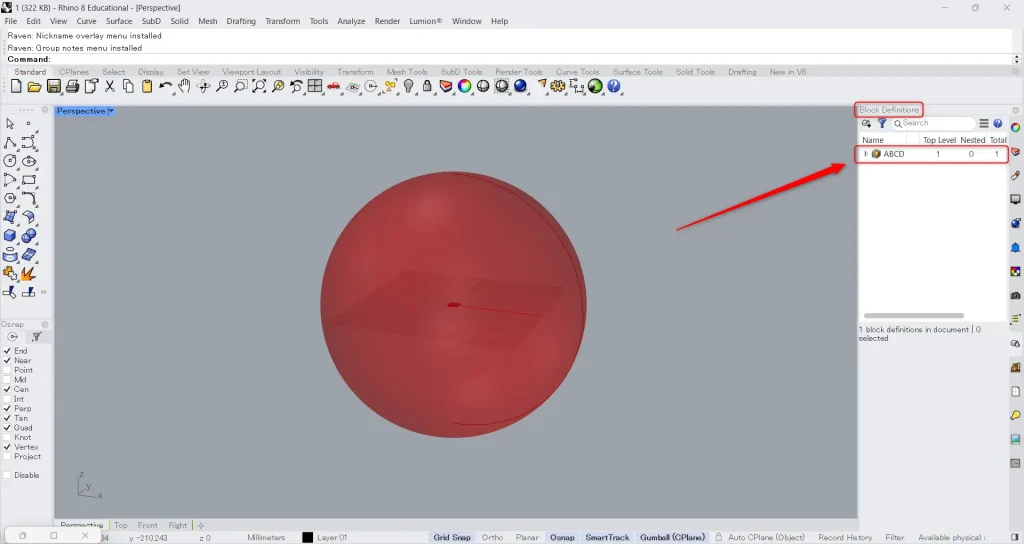
Then, the block you defined will be added to the Rhino Block Definition window.
In this case, a block named ABCD, as specified in the definition, has been added.
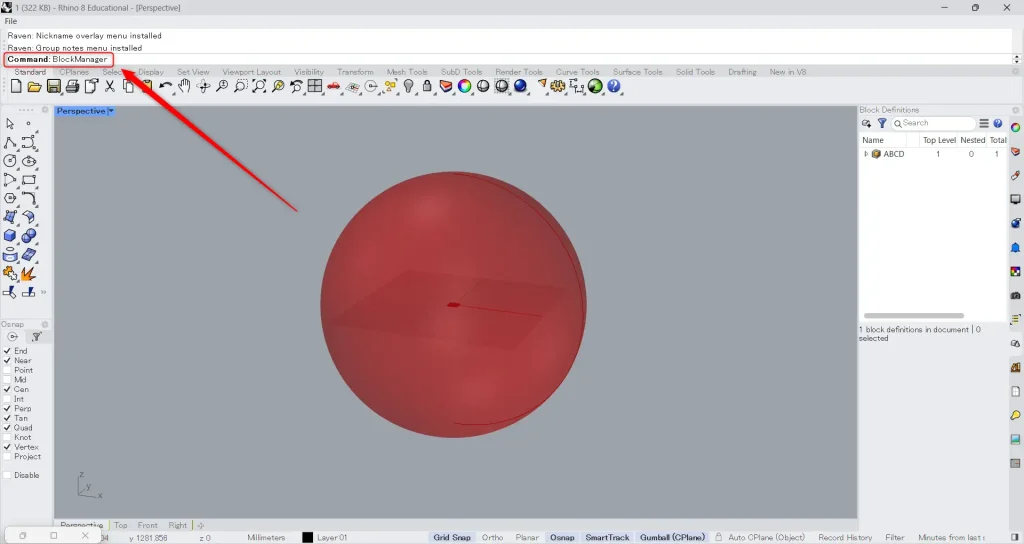
If the Block Definition window is not displayed, enter BlockManager in the command line.
Then, the block definition window will appear.
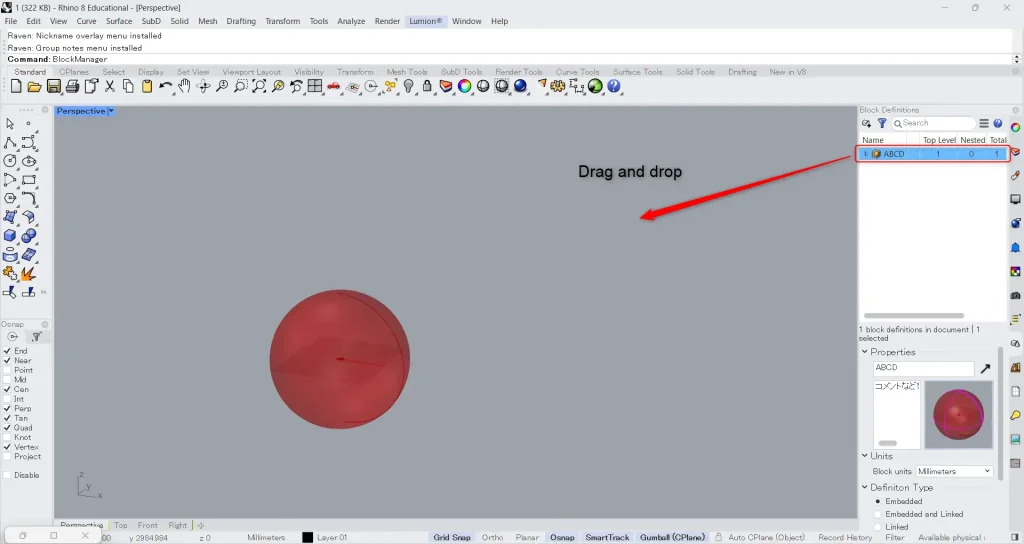
Then, with the definition name selected, drag and drop it onto the view.
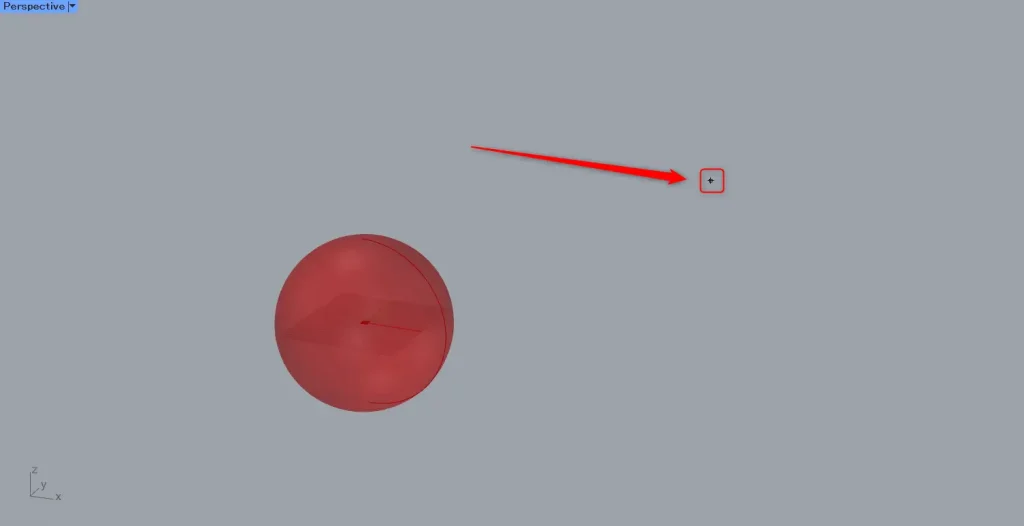
Select the insertion point at any location.
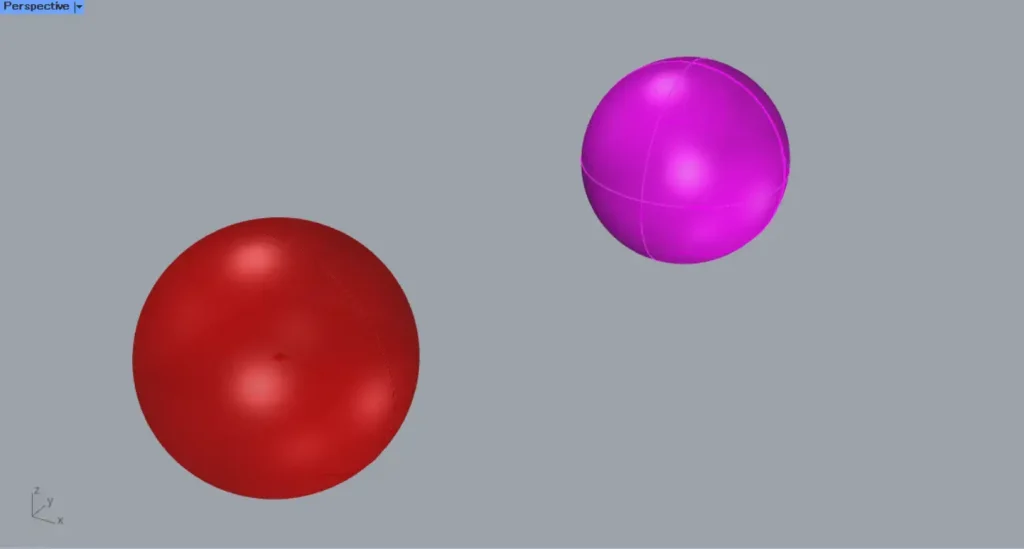
Then, a block instance object was placed from the defined block.
In this way, you can define blocks using the Model Block Definition.
Provide additional information to the block definition
You can also provide additional information in the block definition.
When you zoom in on the Model Block Definition, various small icons appear.
Clicking the plus icon or the down arrow icon will display additional terminals.

Additional Component: ①Unit System
When displaying all terminals, the U, Nt, U, and Ud terminals will be added.
Enter the unit information into the U terminal.
We generally recommend using the Unit System and entering unit information.
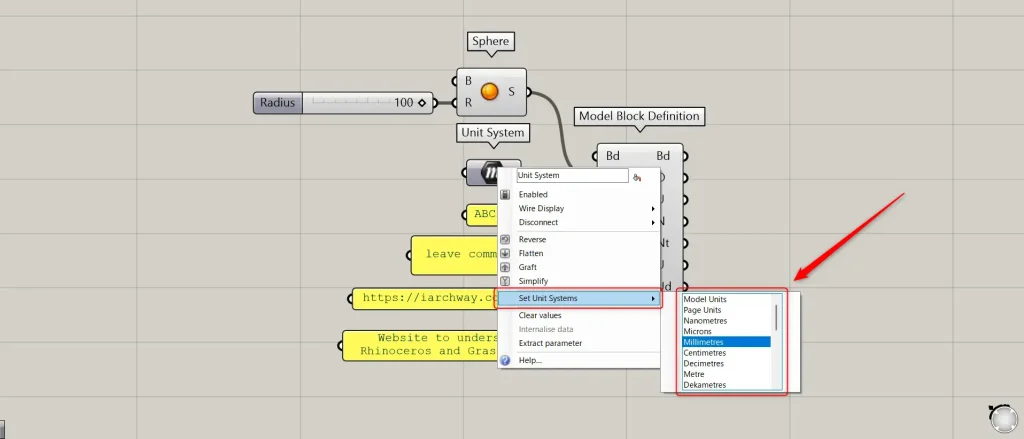
Right-click the Unit System and select “Set Unit Systems” to configure various units.
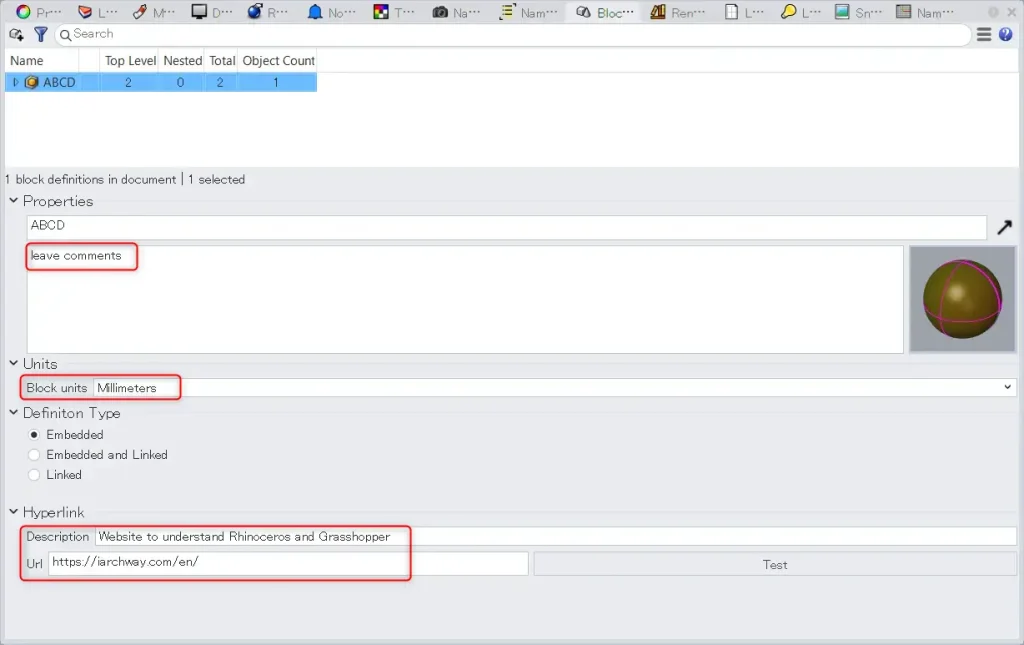
This time, we have selected Millimeters.
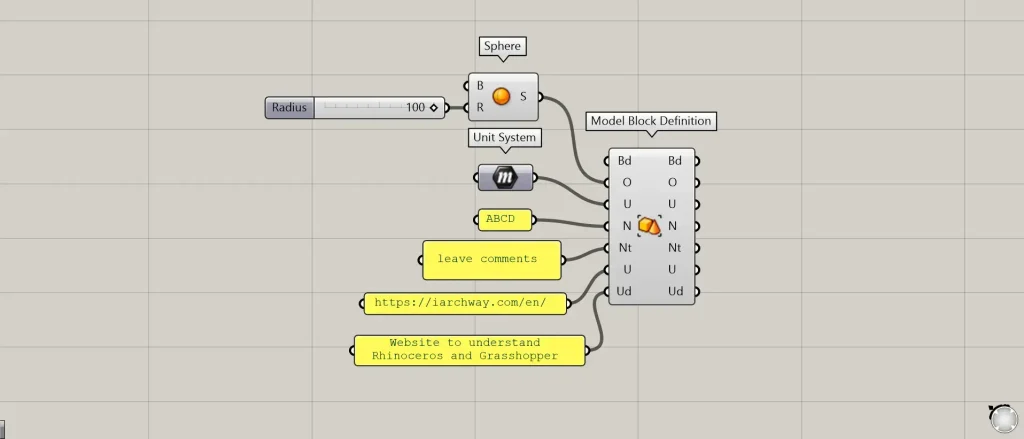
You can enter any comments in the Nt terminal.
This time, we’ve entered “leave comments”
You can enter the URL of the hyperlink (the URL to be embedded) in the U terminal.
This allows you to save information such as web pages you wish to reference.
This time, we’ve entered the URL for this site’s homepage.
You can enter a comment describing the hyperlink URL in the Ud field.
This time, we’ve entered “Website to understand Rhinoceros and Grasshopper”
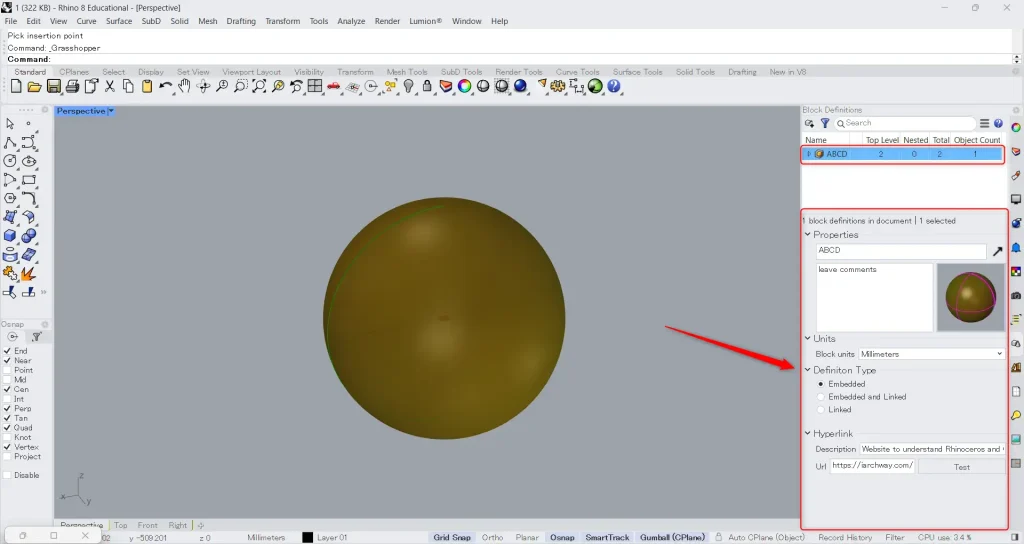
Let’s bake it onto Rhino and see how it looks.
Select the block name you created in the block definition.
You will then be able to view the detailed information for the block definition.
Looking at the detailed information, you can see that the comments, units, hyperlink URLs, and descriptions specified in Grasshopper are reflected.
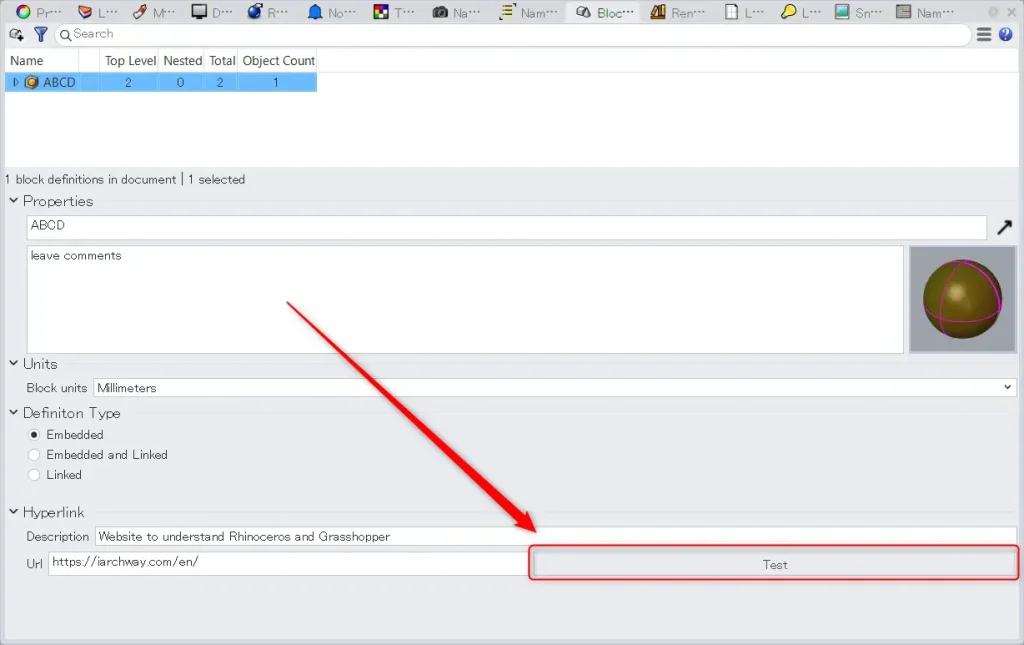
Click the test button next to the URL.
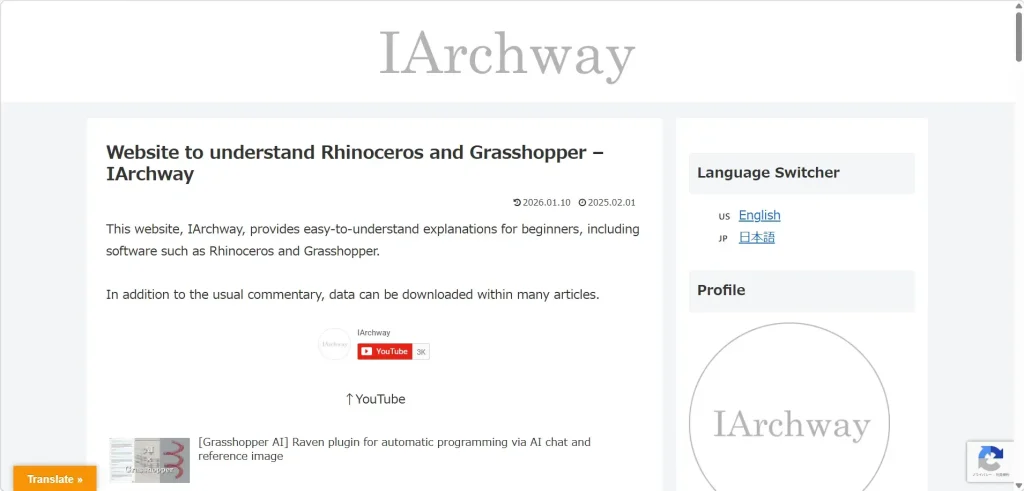
Then, the page at the specified URL will open.
This time, the top page of the specified site is displayed.
Retrieve and edit the elements that make up existing block definitions
You can also retrieve and edit the elements that make up existing block definitions.
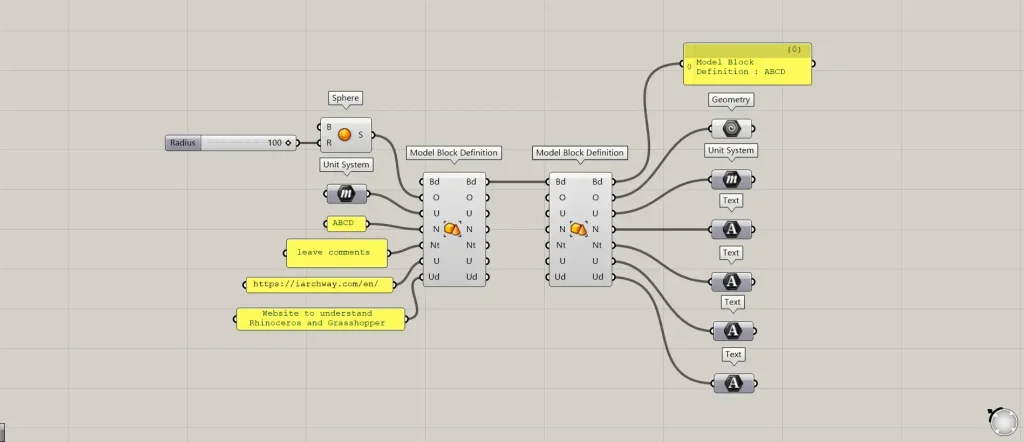
Additional Components: ①Geometry ②Text
Connect the existing block definition to the Bd terminal of the Model Block Definition.
Then, you can retrieve each element that makes up the existing block definition.
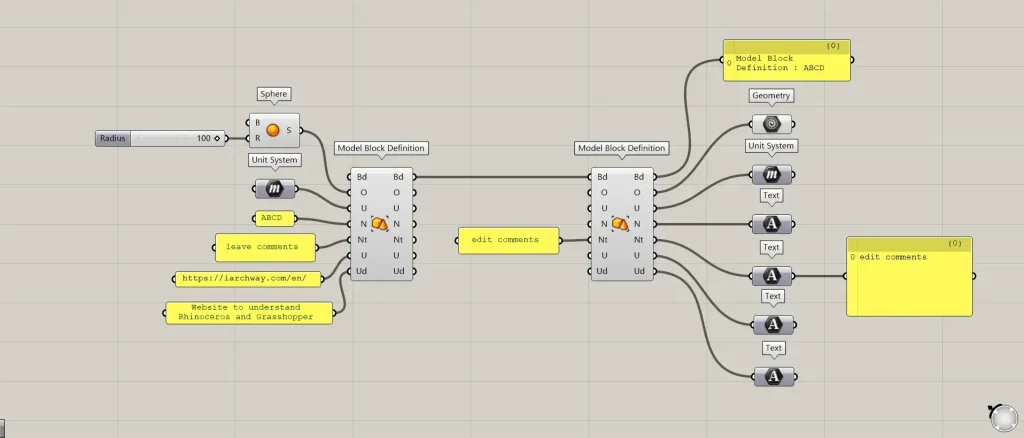
Additionally, you can edit only specific information by entering new data into the left-hand terminal.
In this case, we entered a new comment in the Nt terminal and edited only the comment.
List of Grasshopper articles using Model Block Definition component↓

Comment