
![[Grasshopper] How to use Model Hatch Pattern to create and edit hatch patterns](https://iarchway.com/wp-content/uploads/2026/01/Model-Hatch-Pattern-1.png)
This article explains how to use Model Hatch Pattern to create and edit hatch patterns.

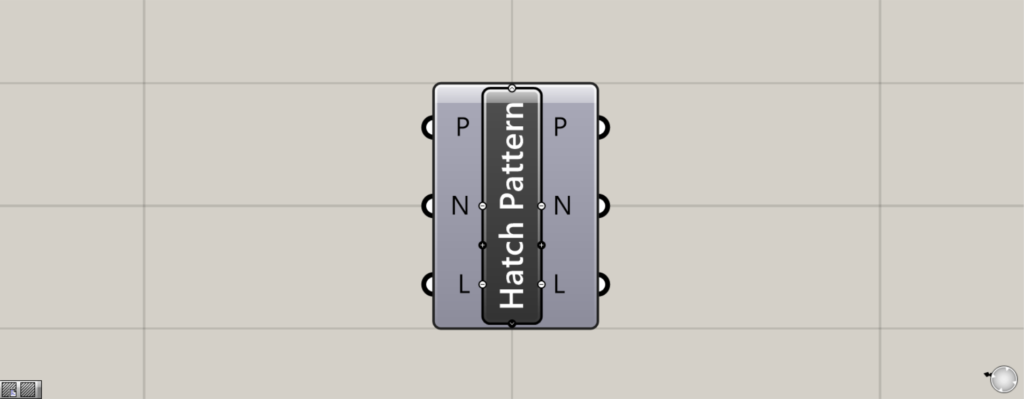
On the Grasshopper, it is represented by either of the two above.
Create a hatching pattern
Using the Model Hatch Pattern allows you to create hatch patterns.
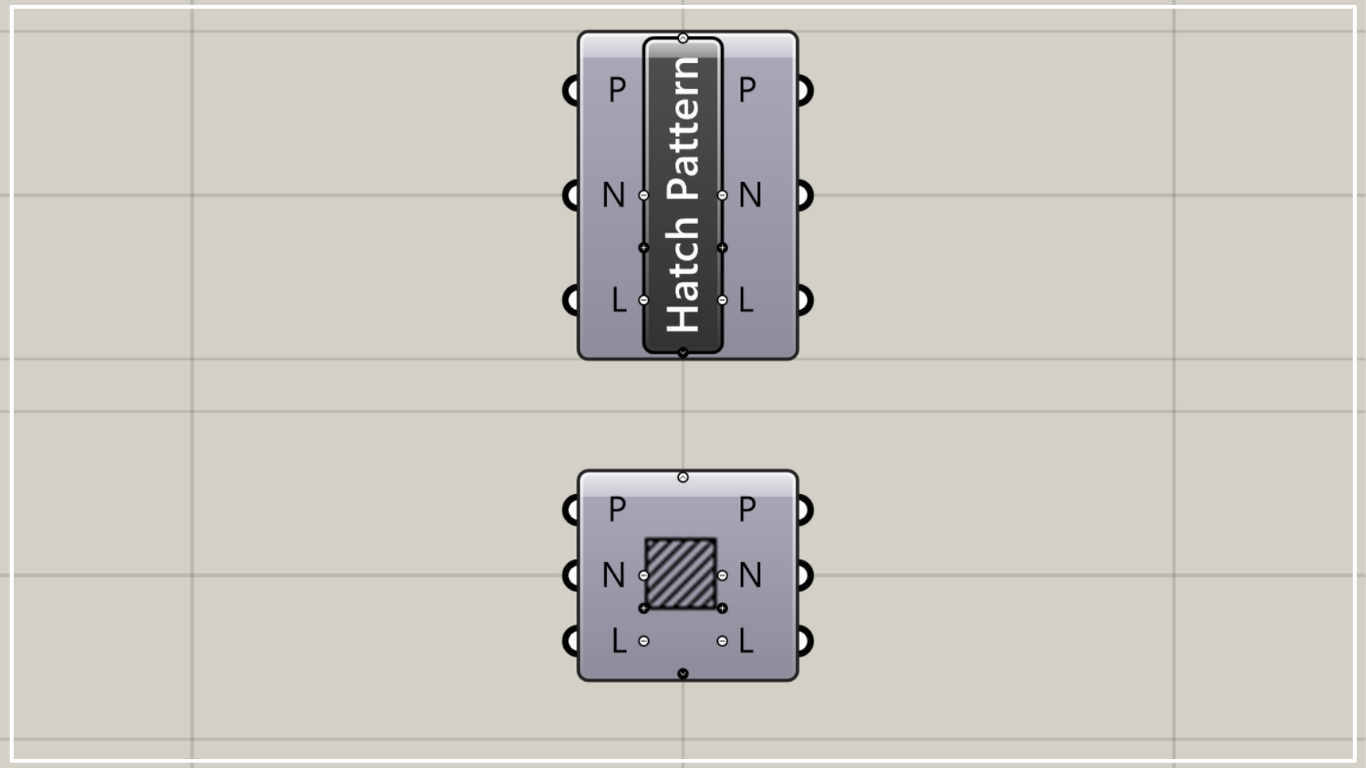
Components Used: ① Rectangle ② Unit Y ③ Hatch Line ④ Model Hatch Pattern ⑤ Model Hatch
As an example, let’s create a pattern and try creating hatching within a rectangle.
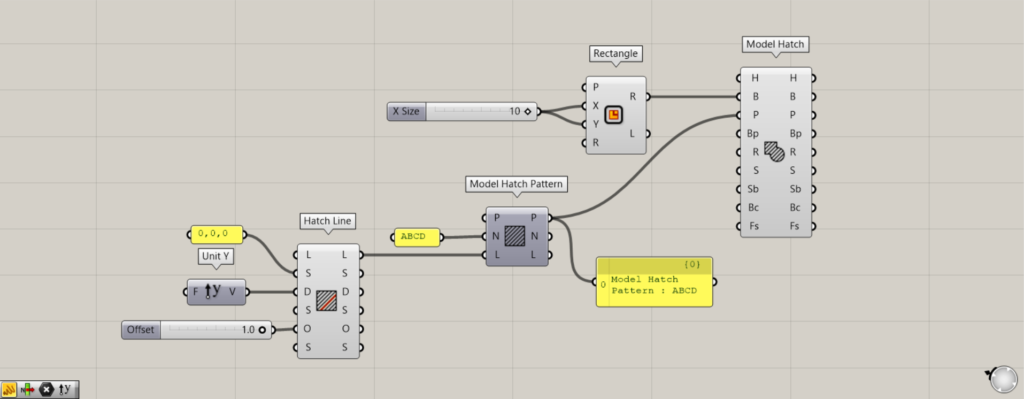
First, enter the numerical value for the length of one side into the Rectangle(X and Y).
This time, since 10 was entered, a 10×10 rectangle was created.
Next, create the hatch line data required for pattern creation.
Enter the coordinates or point data for the starting point of the hatch line into the Hatch Line(S).
This time, we are inputting the coordinates of the origin at 0,0,0.
Additionally, input the hatch line vector information into the Hatch Line(D).
This time, since Unit Y is entered, the hatch lines will extend along the Y-axis.
Additionally, enter the numerical value for the hatch line spacing into the Hatch Line(O).
Since 1 is entered this time, the hatch line spacing will be 1.
This completes the creation of the hatchline data.
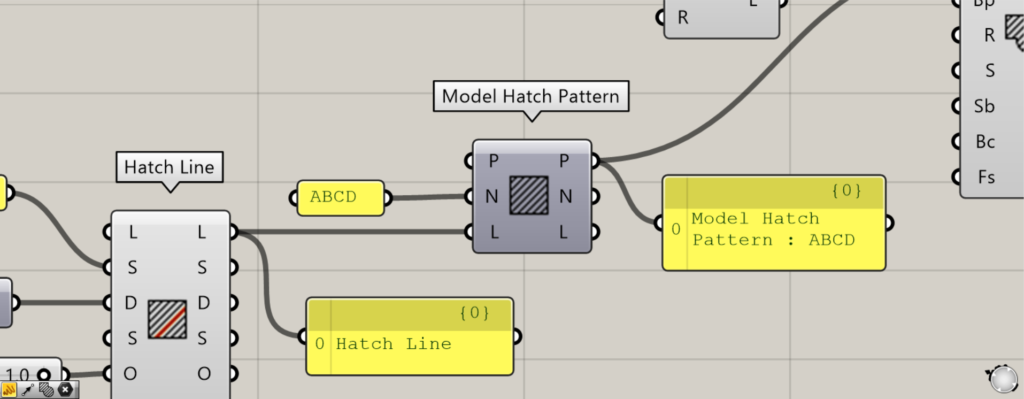
Next, create a pattern using the Model Hatch Pattern.
Enter the name of any pattern into the Model Hatch Pattern(N).
This time, it is set to the name ABCD.
Next, connect the Hatch Line(L) to the Model Hatch Pattern(L).
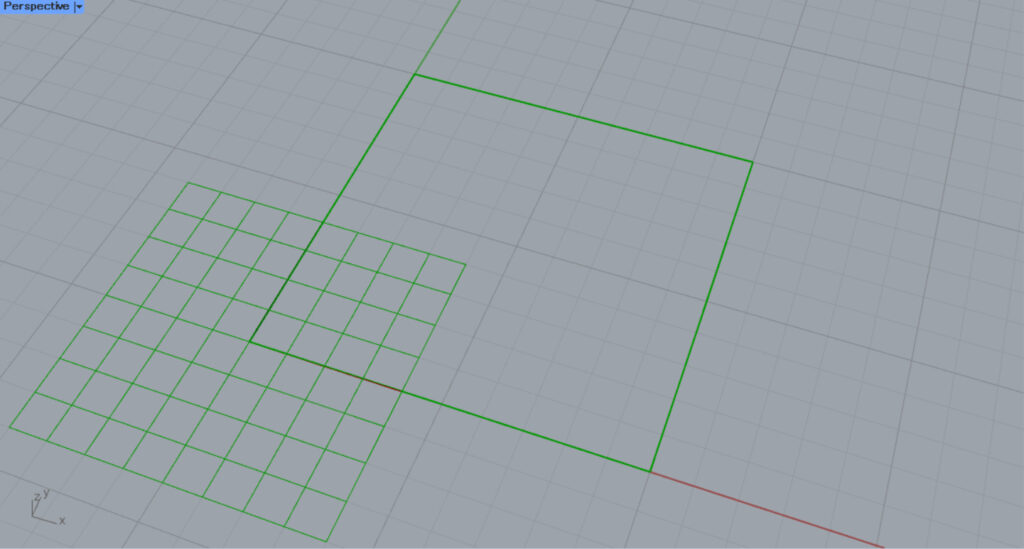
Then, a hatching pattern named ABCD was created.
However, at this stage, only the pattern is created; the hatching itself is not generated.
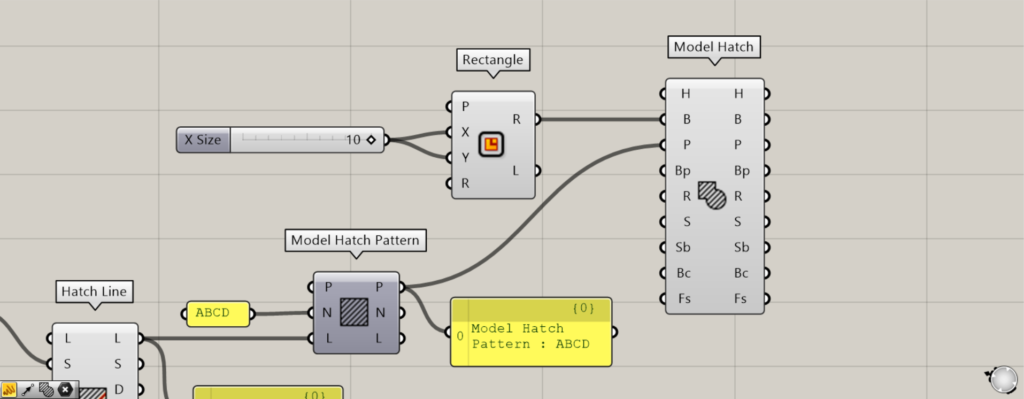
Finally, use the pattern created in Model Hatch Pattern to create the hatching.
Connect the Rectangle(R) to the Model Hatch(B).
Finally, connect the Model Hatch(P) to the Model Hatch Pattern(P).
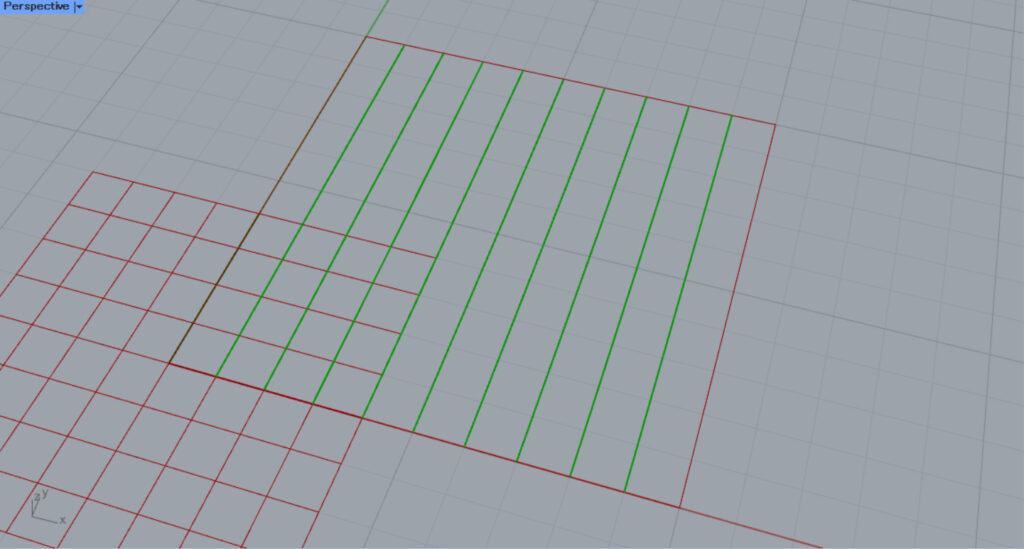
Then, we were able to create hatching from the pattern we created.
In this way, you can create hatching patterns using the Model Hatch Pattern.
Acquire and edit hatching patterns
You can also acquire and edit hatching patterns.
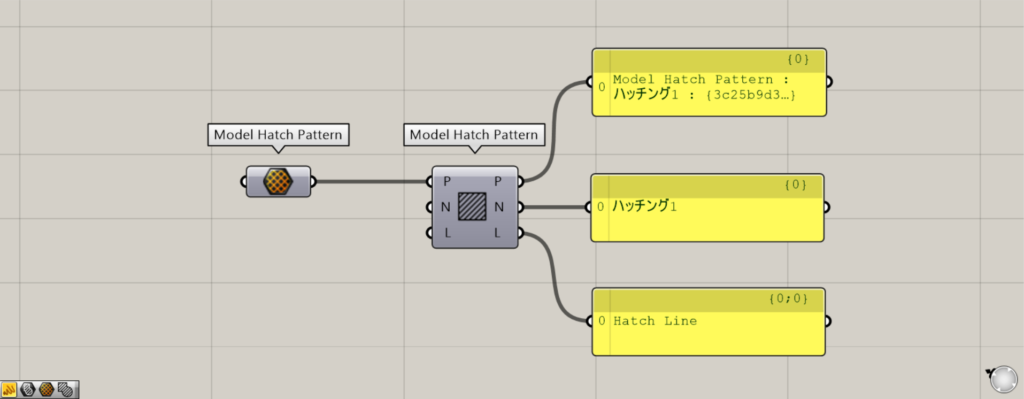
Additional Component: ① Model Hatch Pattern
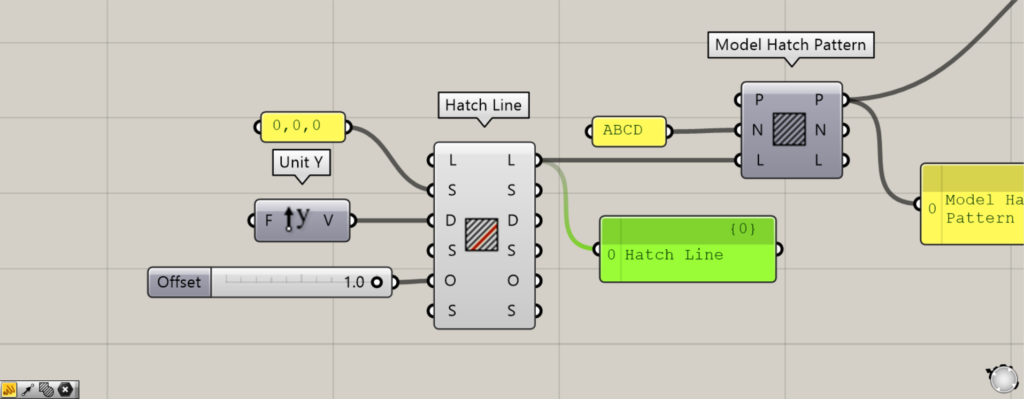
Please note that there is another component with the same name in the Model Hatch Pattern.
The other Model Hatch Pattern sets other pattern information.
Connect the other Model Hatch Pattern to this Model Hatch Pattern(P).
Then, you can retrieve the data that makes up the pattern from the right-side terminal.
Data for the pattern can be obtained from the P terminal on the right side.
You can obtain the pattern name from the N terminal on the right side.
From the L terminal on the right, you can obtain the data for the hatch lines used in the pattern.
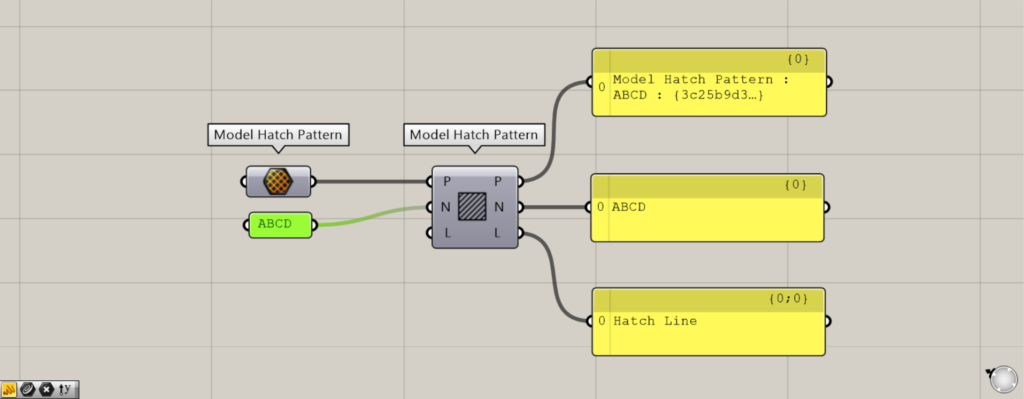
In this state, connecting data to the N terminal or L terminal on the left allows you to edit part of the existing pattern.
The example in the image above shows entering a new pattern name, ABCD, into the N terminal.
Then, only the pattern name could be edited.
List of Grasshopper articles using Model Hatch Pattern component↓

Comment