
![[Grasshopper]鳥の巣のような小屋の作成方法[データも配布]](https://iarchway.com/wp-content/uploads/2025/01/eyecatch_web-18.jpg)
This article describes Bird’s Nest Design using Grasshopper.
The Grasshopper file used in this project is also available for download.
Video
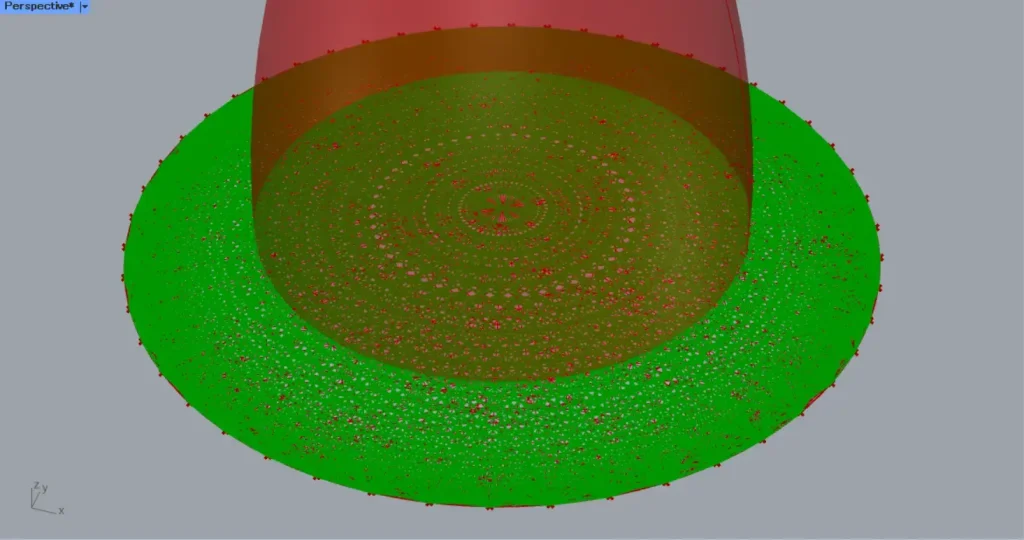
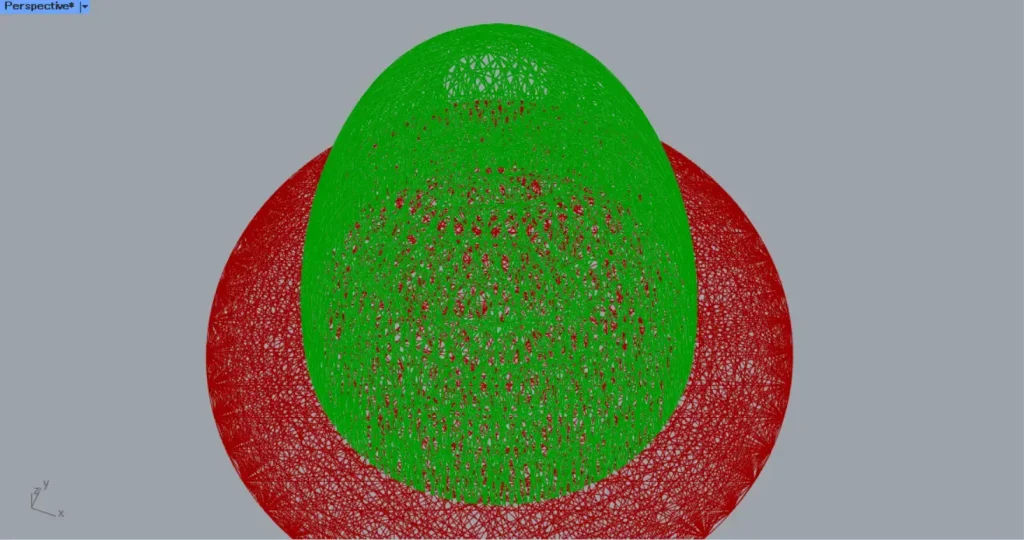
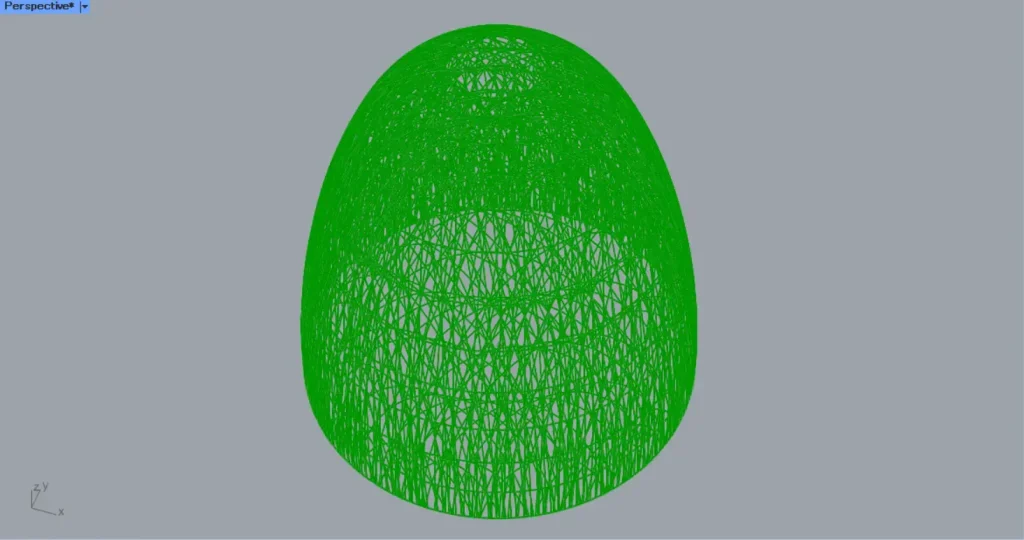
Model Images
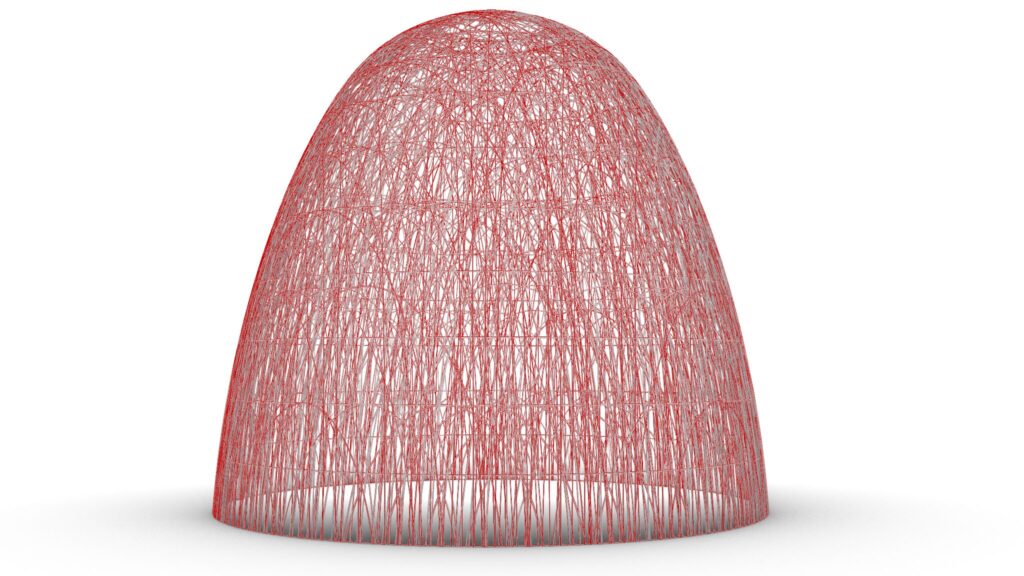
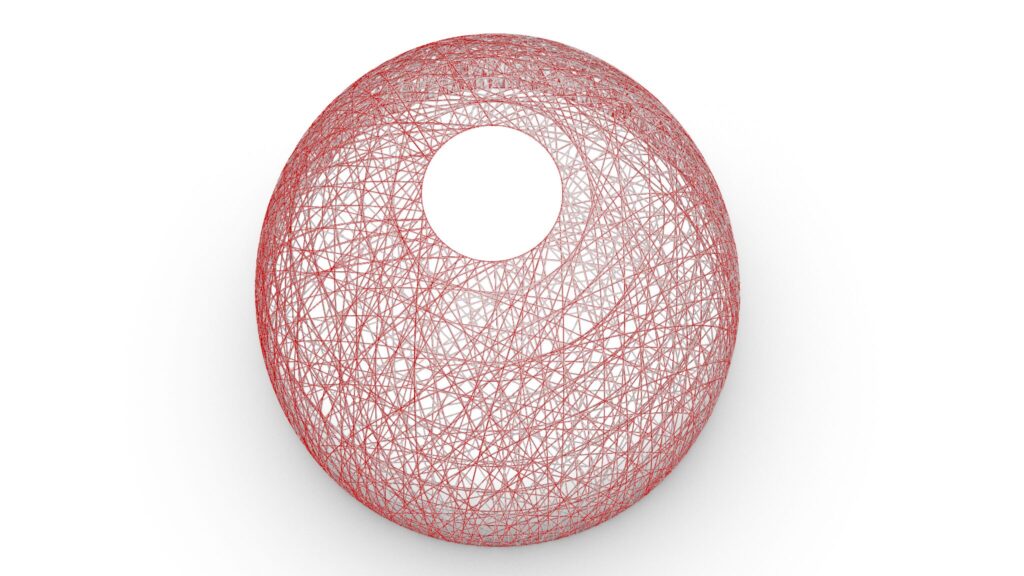
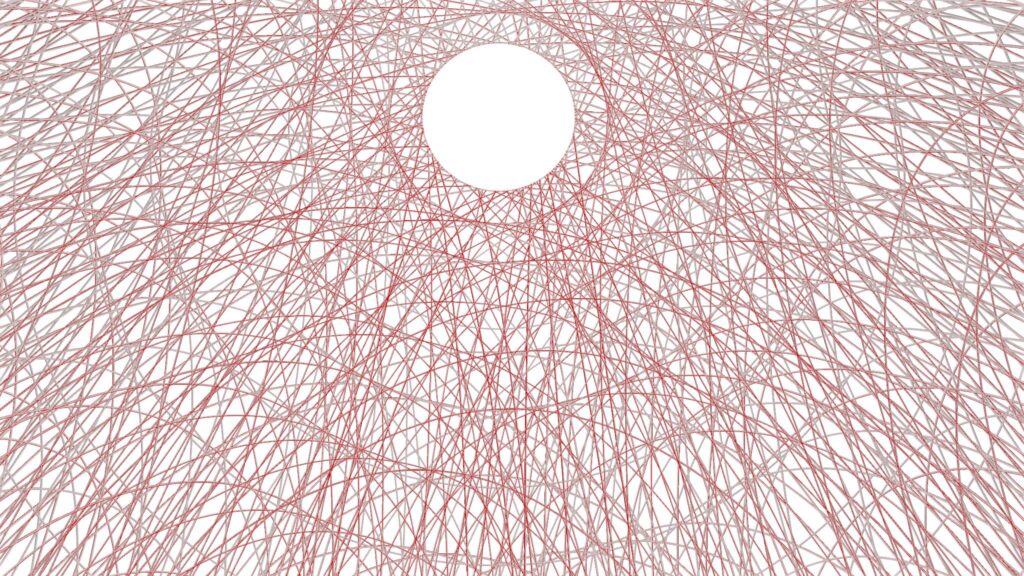
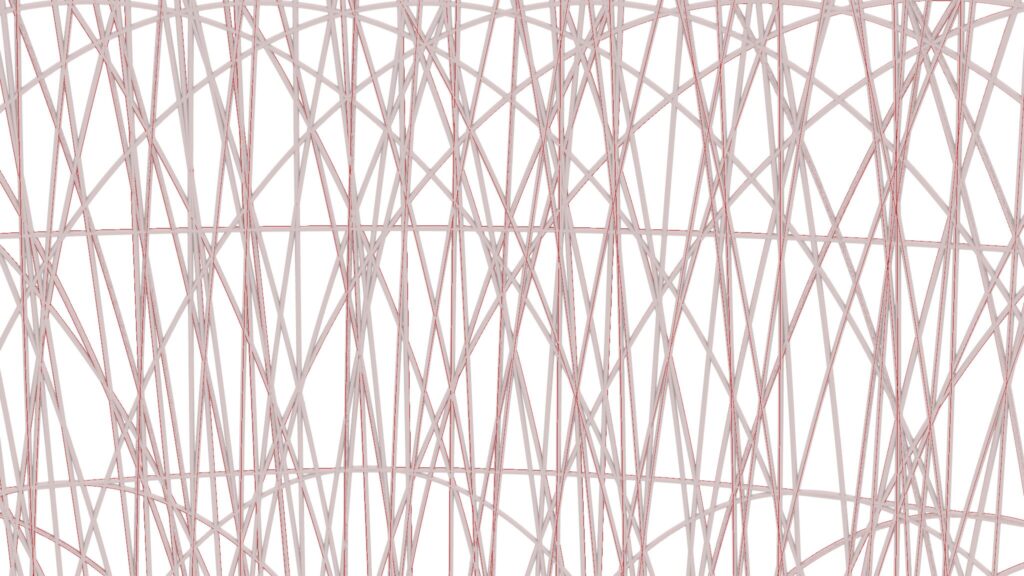
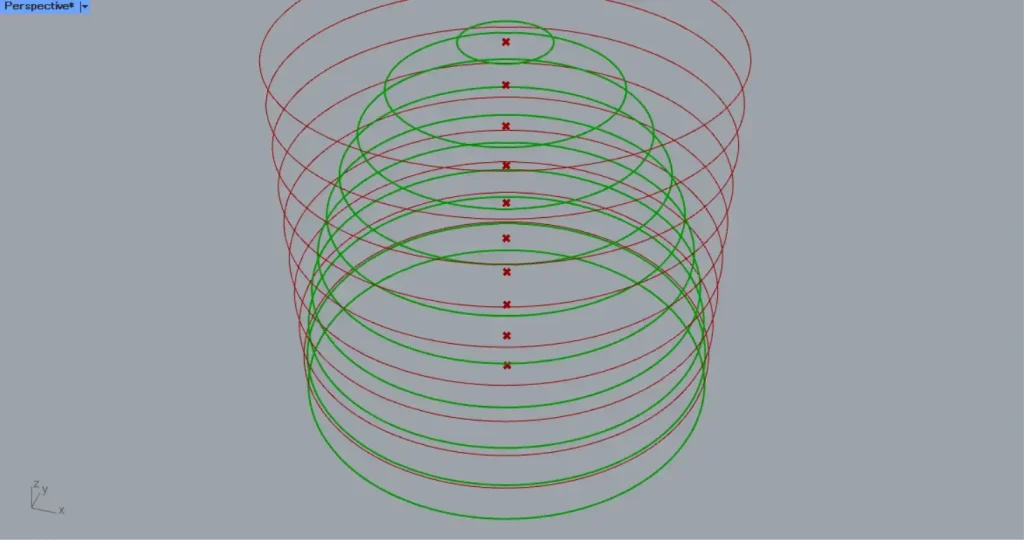
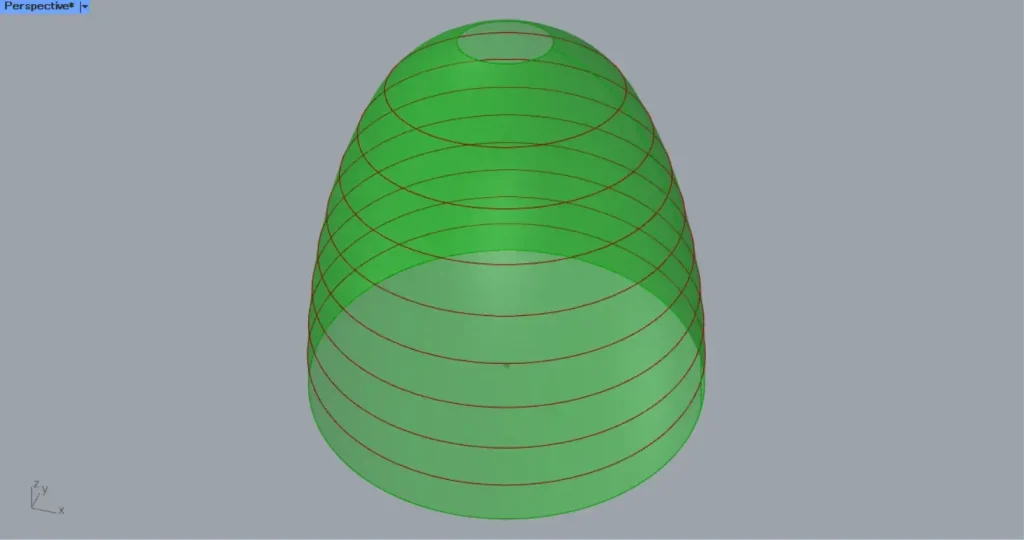
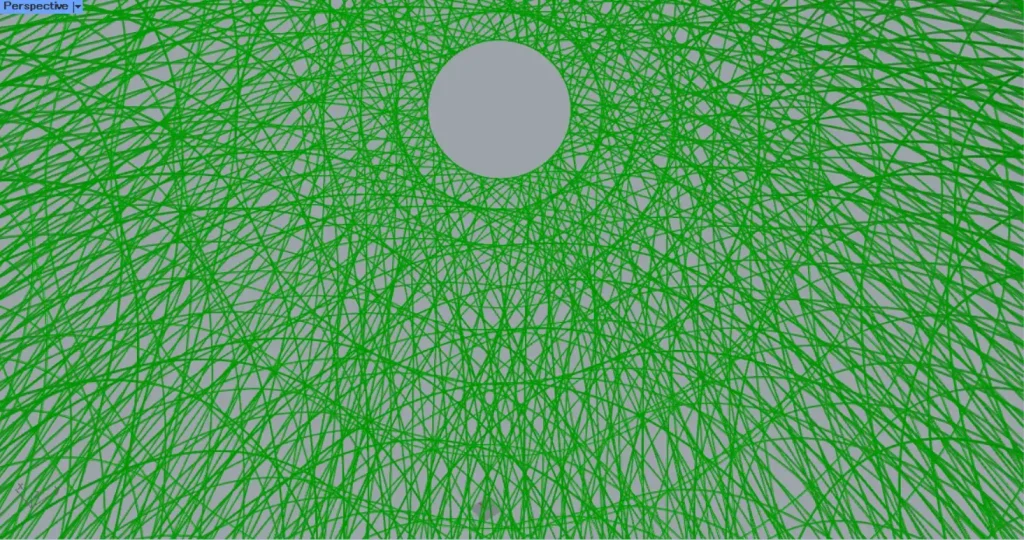
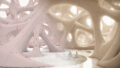
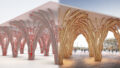
The top four images are from Grasshopper.
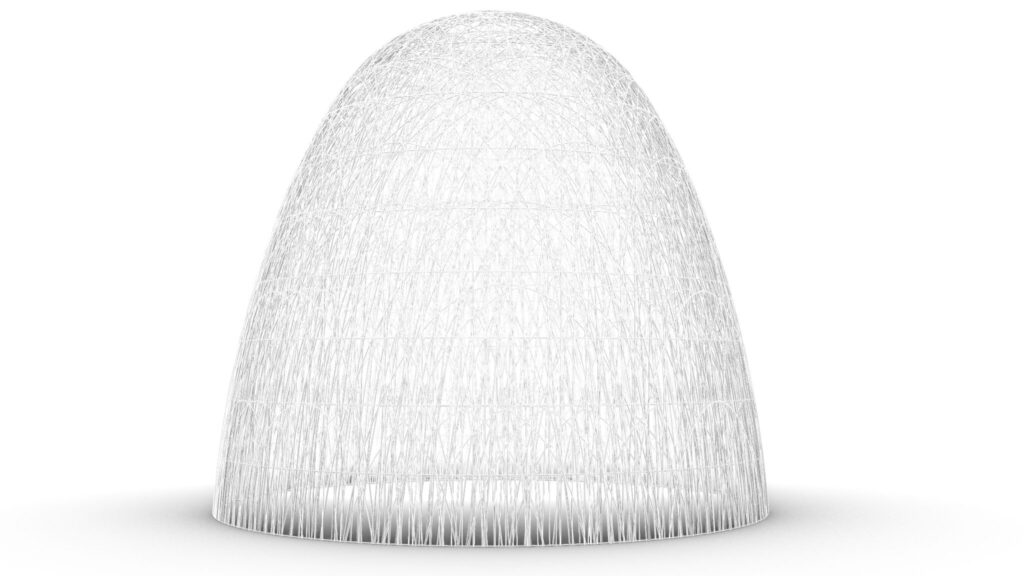


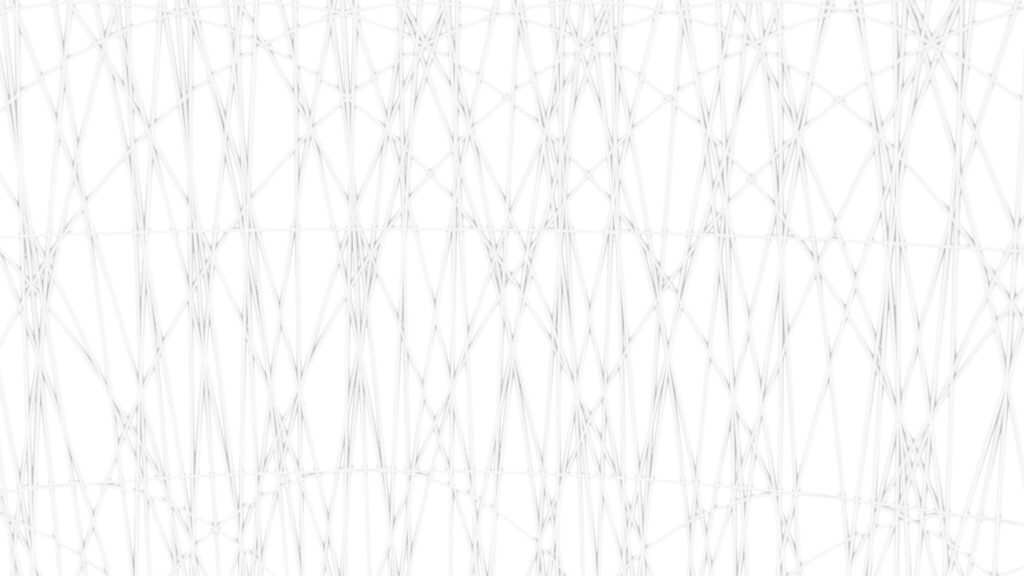
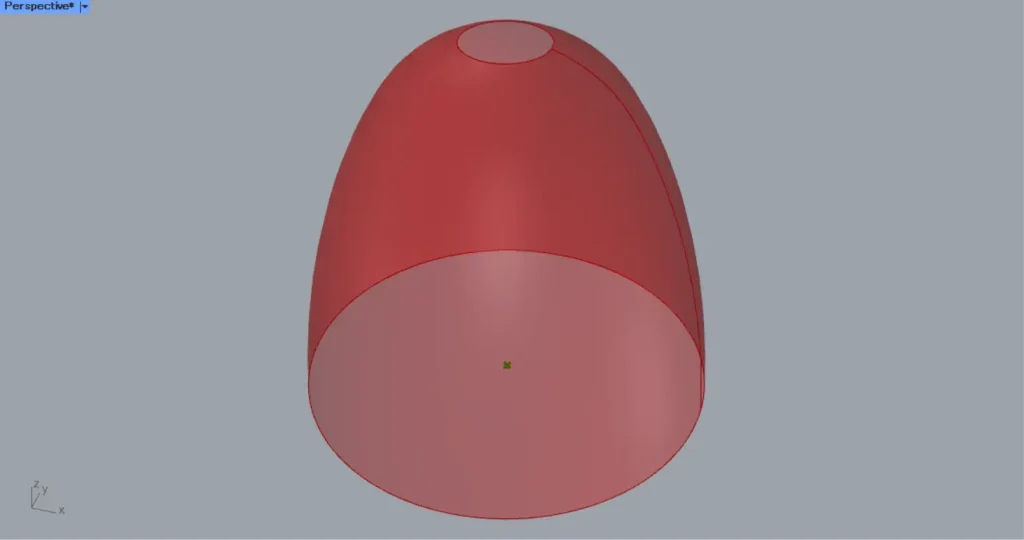
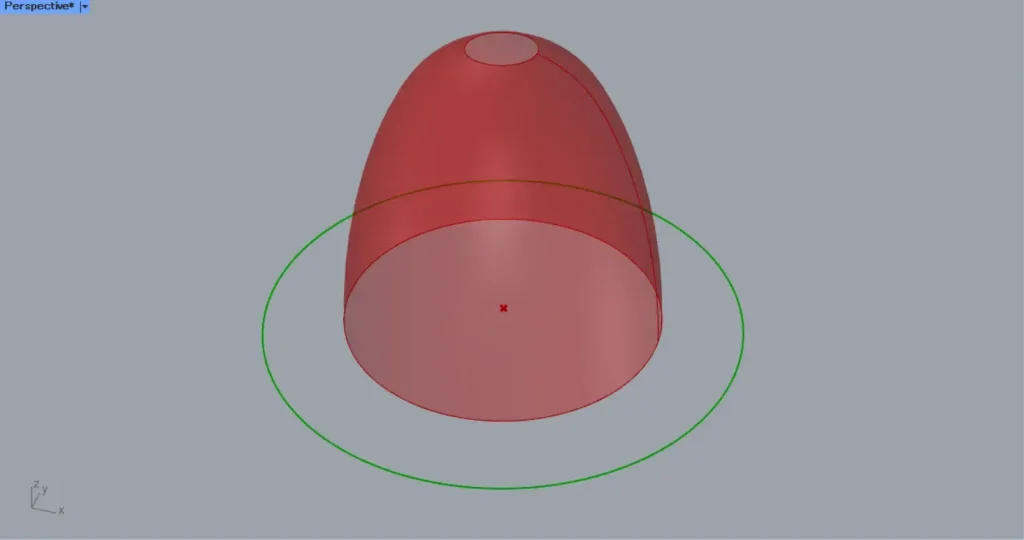
The top four images show the model exported on Rhinoceros.
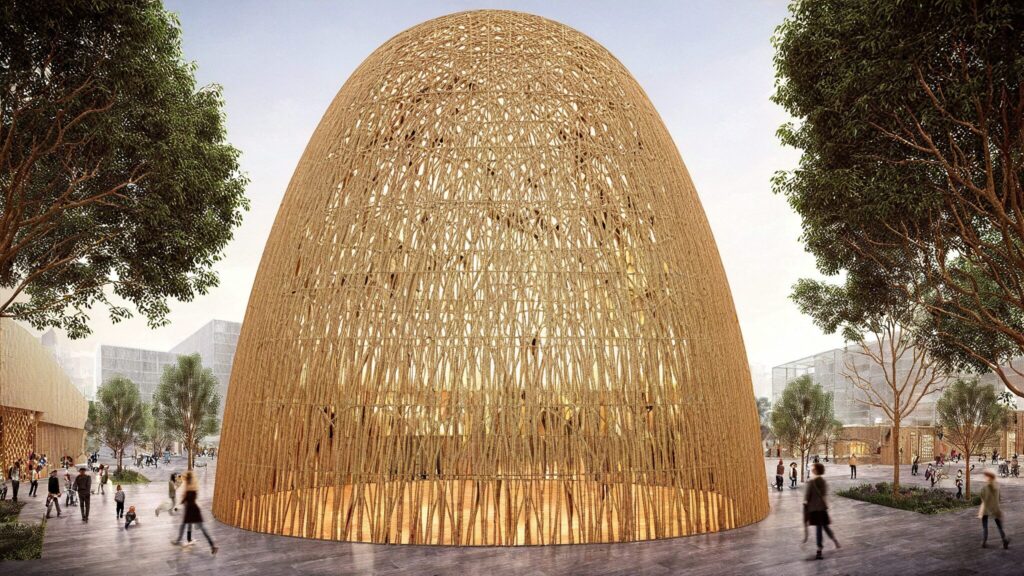
The image above shows the final rendering.
Click here to download the Grasshopper file
Please refer to the Terms of Use regarding the use of downloadable data.
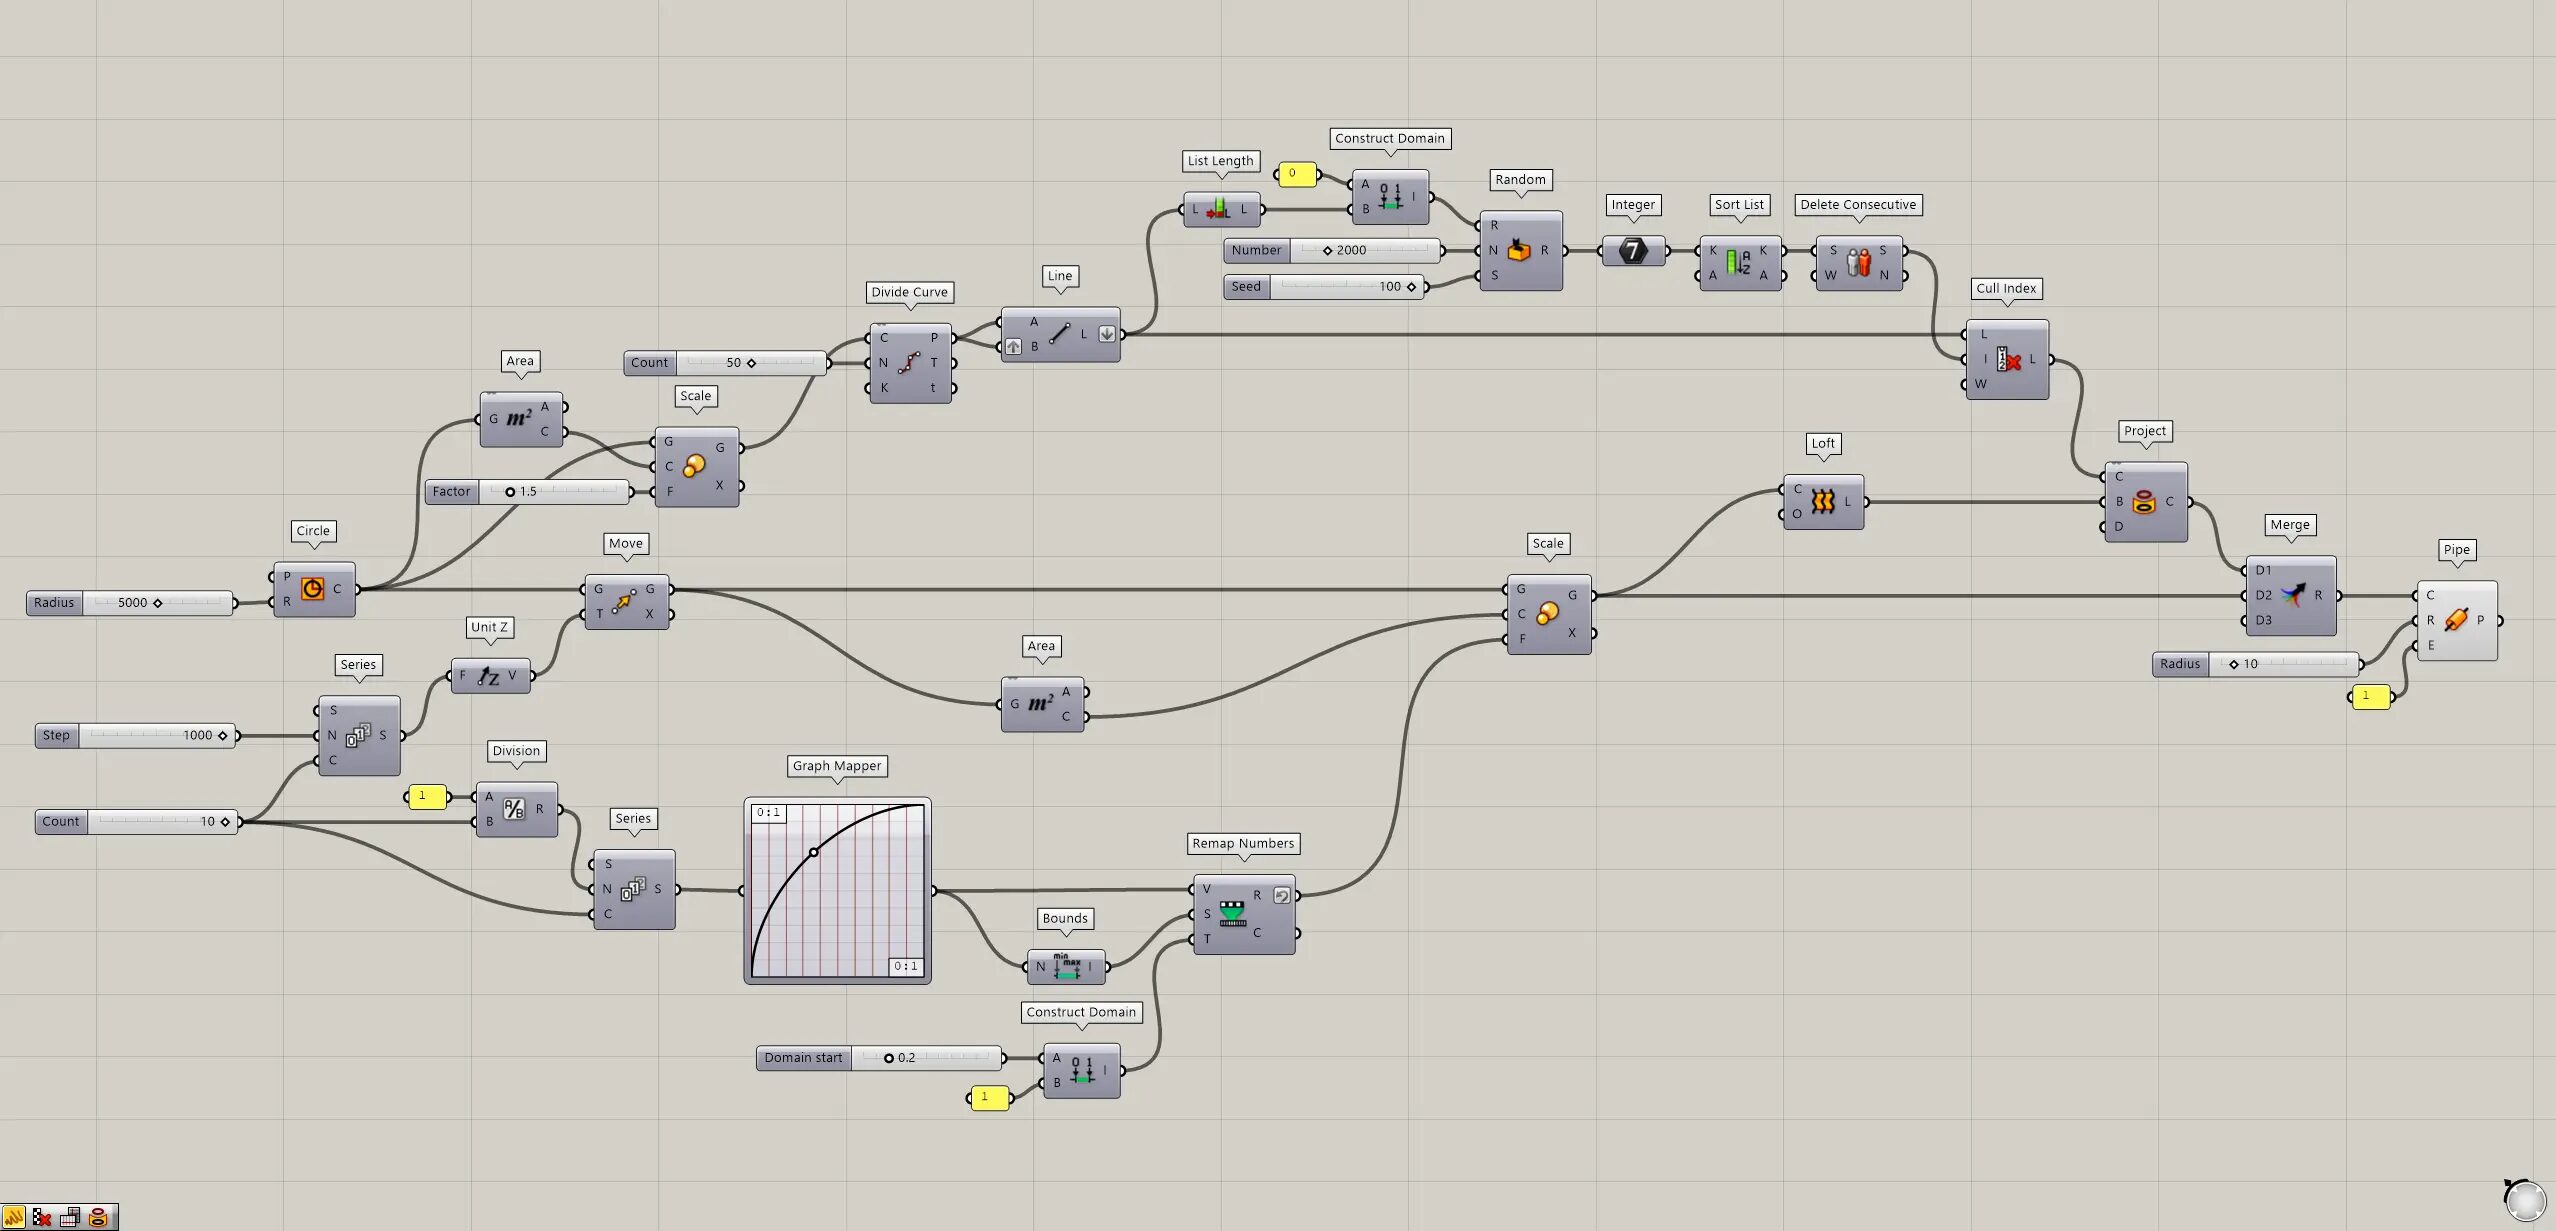
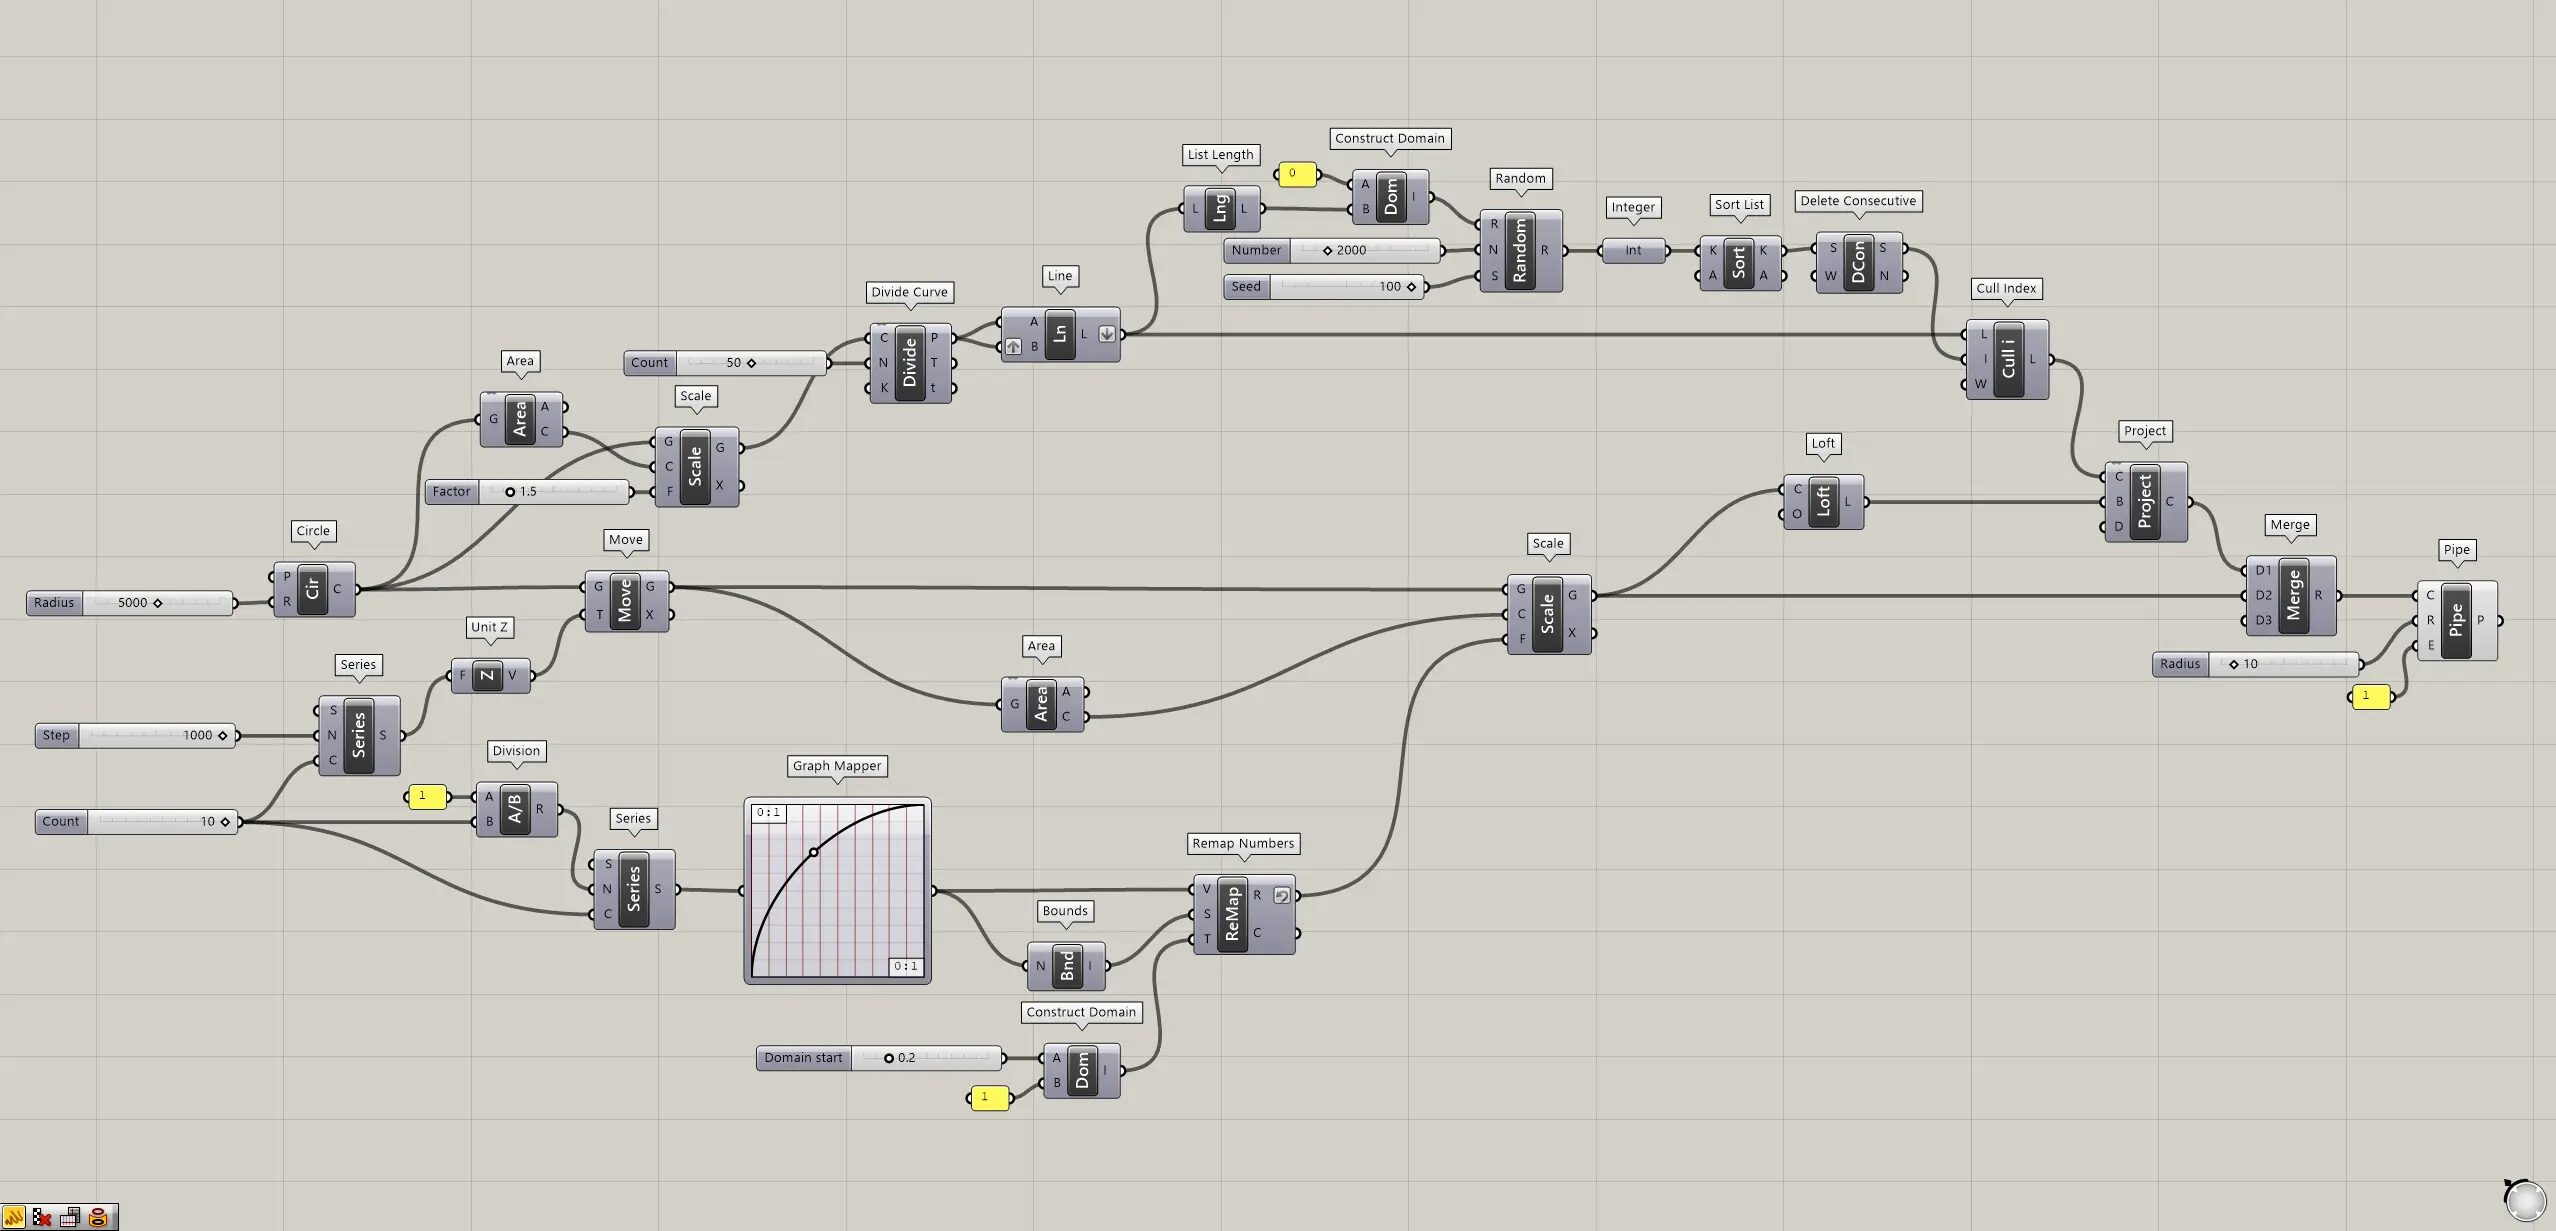
Grasshopper recipe
①Circle ②Series ③Unit Z ④Move ⑤Division ⑥Graph Mapper ⑦Bounds ⑧Construct Domain ⑨Remap Numbers ⑩Area ⑪Scale ⑫Loft ⑬Divide Curve ⑭Line ⑮List Length ⑯Random ⑰Integer ⑱Sort List ⑲Delete Consecutive ⑳Cull Index ㉑Project ㉒Merge ㉓Pipe
Array multiple circles directly above
First, Array multiple circles directly above.

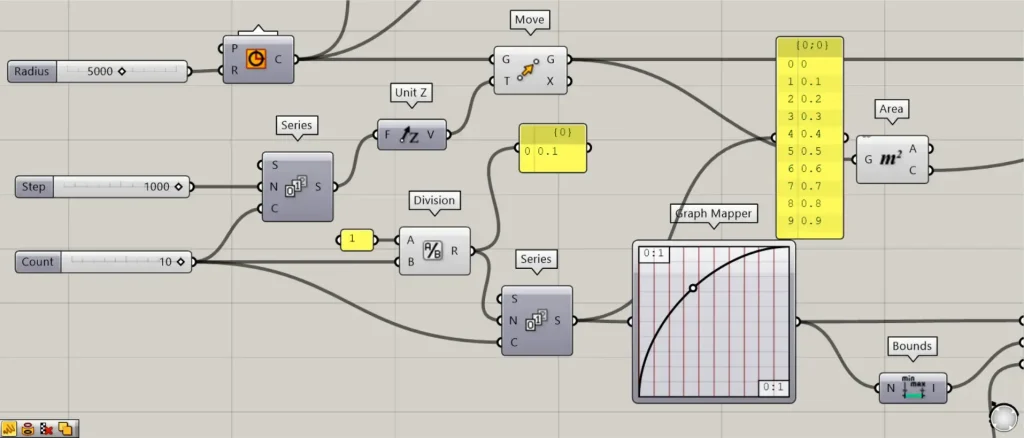
Enter a numerical value for the radius in a Circle(R).
In this case, 5000 is entered.
Then the circle line data is created, as shown in the image above.
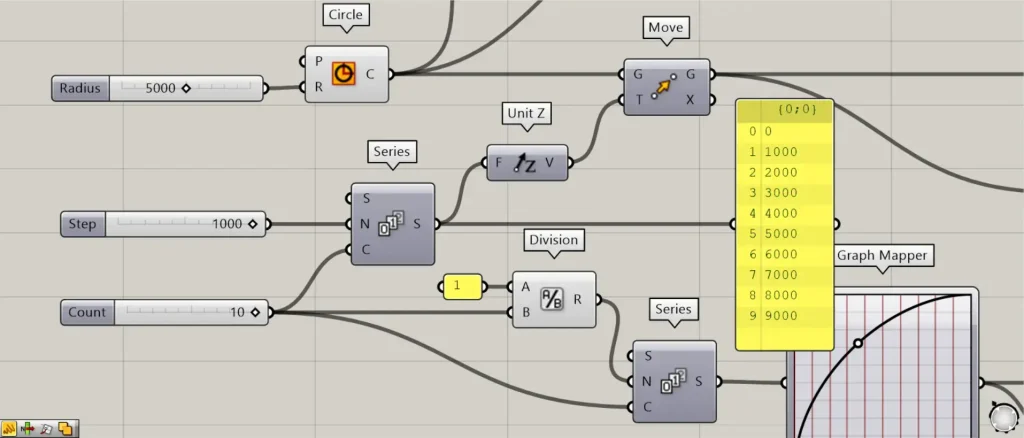
Then connect the numerical value of the interval to be moved to a Series(N).
In this case, 1000 is entered.
Furthermore, connect the numerical value of the number of circles to the Series(C).
In this case, 10 is entered.
Then 10 numbers will be created, each increasing by 1000 from 0.
Then connect the Series to a Unit Z.
Then connect the Unit Z to a Move(T).
In addition, connect the Circle to the Move(G).
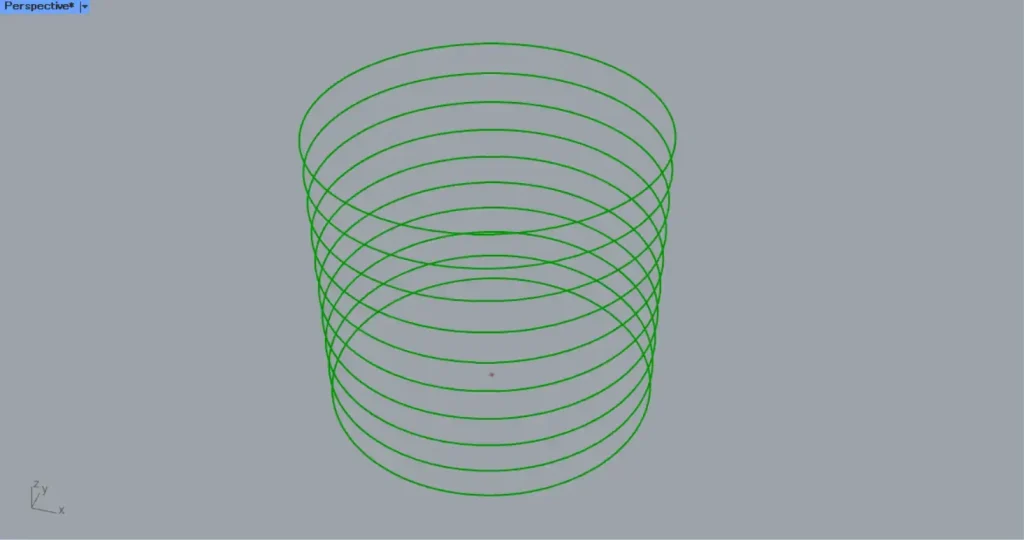
Then the circle line data is array-copied directly above, as shown in the image above.
Now we have an array copy of multiple circles directly above each other.
Create a surface connecting each circle at different scales
Next, Create a surface connecting each circle at different scales.
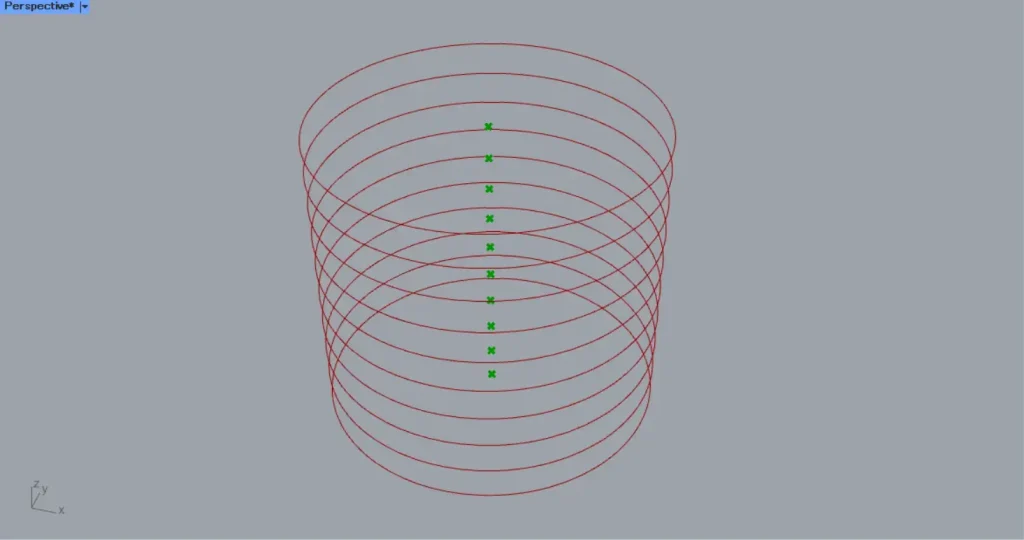
Then the center point of each circle is retrieved, as shown in the image above.
Next, we will create numbers that change the scales.
Connect 10 to a Division(B).
Furthermore, connect 1 to the Division(A).
Then the number 1 divided by 10 = 0.1 is output.
Then connect the Division to a Series(N).
Furthermore, connect 10 to the Series(C).
Then 10 numbers are created, each increasing by 0.1 from 0.
These numbers will be the X-axis number for the next graph.
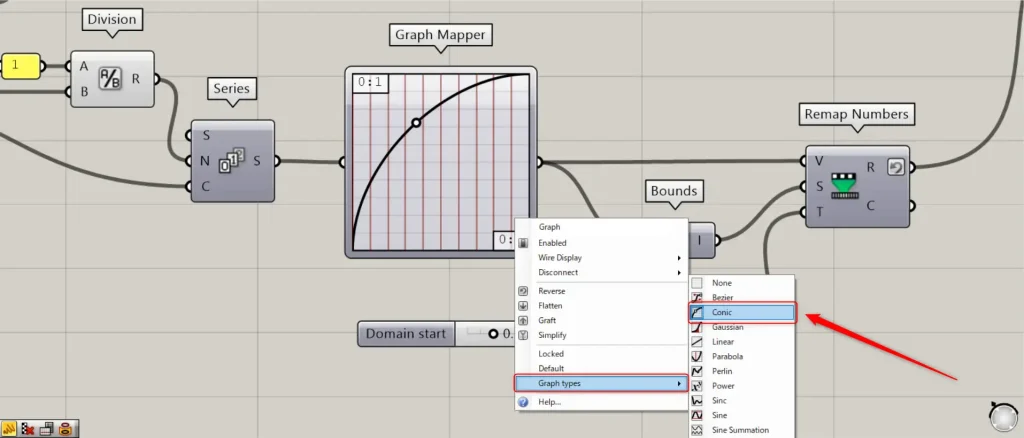
Then connect the Series to a Graph Mapper.
Then right click on the Graph Mapper and set it to Conic from Graph types.
Furthermore, please refer to the image above to set the shape of the graph.
Then the Y-axis values corresponding to the X-axis values entered from the Graph Mapper are output.
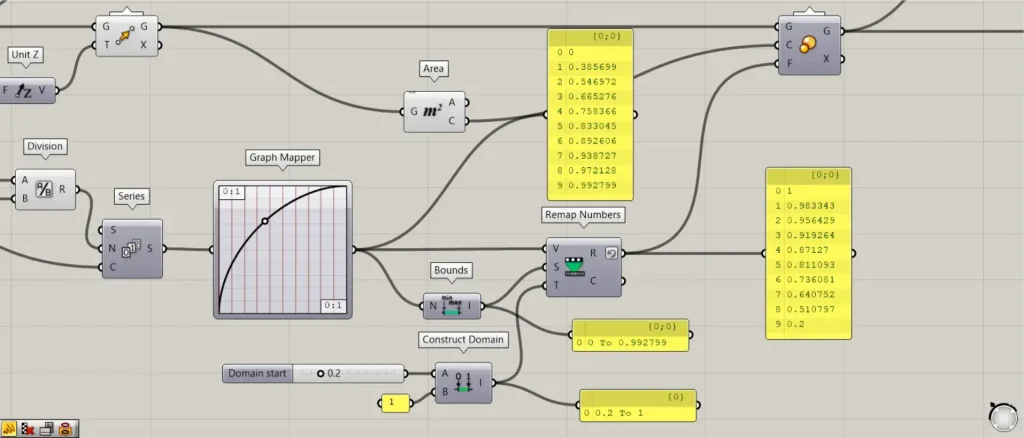
Then connect the Graph Mapper to a Bounds.
Then a numerical range is created from the minimum and maximum values of the numbers output from the Graph Mapper.
Then enter any multiplier value in a Construct Domain(A).
This time, 0.2 is entered.
Furthermore, connect 1 to the Construct Domain(B).
This will create a numeric range of 0.2 To 1.
Then connect the Graph Mapper to a Remap Numbers(V).
In addition, connect the Bounds to the Numbers(S).
In addition, connect the Construct Domain to the Remap Numbers(T).
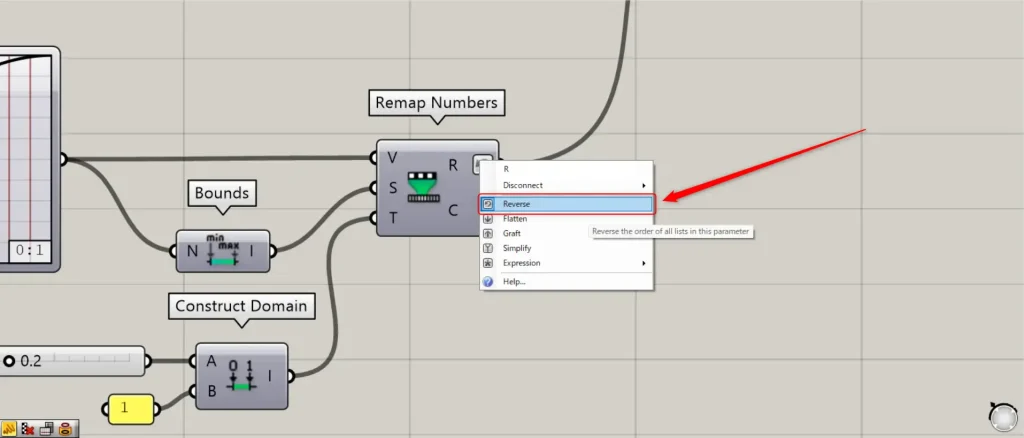
At this point, right click on the Remap Numbers(R) and set it to Reverse.
Then the numbers output from the Graph Mapper are converted to numbers in the 1~0.2 number range.
Then connect the Remap Numbers(R) to a Scale(F).
Furthermore, connect the Area(C) to the Scale(C).
Furthermore, connect the Move(G) to the Scale(G).
Then the scales of the circle lines changed, as shown in the image above.
Then connect the Scale(G) to a Loft(C).
Then a surface is created to connect each circle, as shown in the image above.
Now we have created a surface that connects each circle at different scales.
Create lines connecting the division points of the bottom circle
Next, Create lines connecting the division points of the bottom circle.
Connect the first Circle to a Area.
Then we get the center point of the bottom circle, as shown in the image above.
Then connect the Circle to a Scale(G).
Furthermore, connect the Area(C) to the Scale(C).
Furthermore, connect a numerical magnification factor bigger than 1 to the Scale(F).
In this case, 1.5 is entered.
Then the scale of the bottom circle is increased, as shown in the image above.
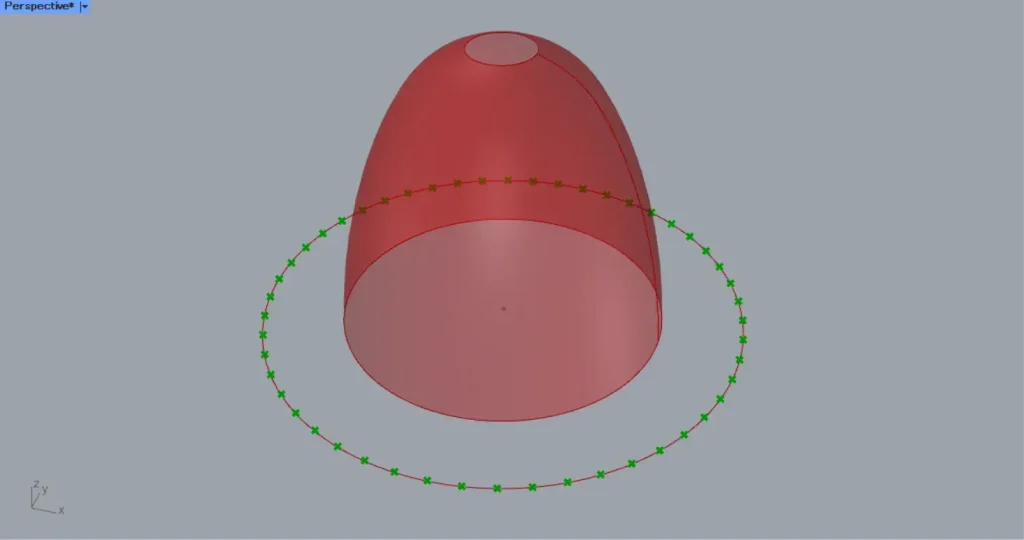
Then connect the Scale(G) to a Divide Curve(C).
Furthermore, connect the number of divisions to Divide Curve(N).
This time, 50 is entered.
Then points has been created at the location where the circle line is divided into 50, as shown in the image above.
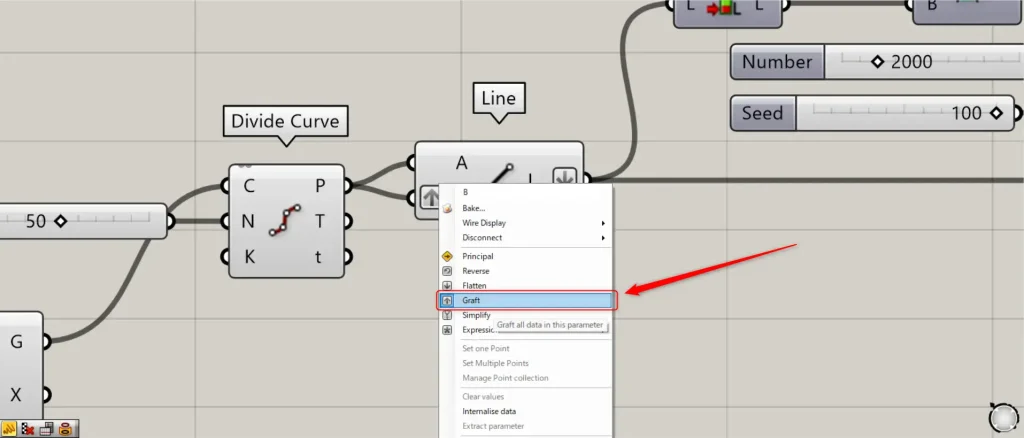
Then connect the Divide Curve(P) to a Line(A and B).
At this point, right click on the Line(B) and set Graft.
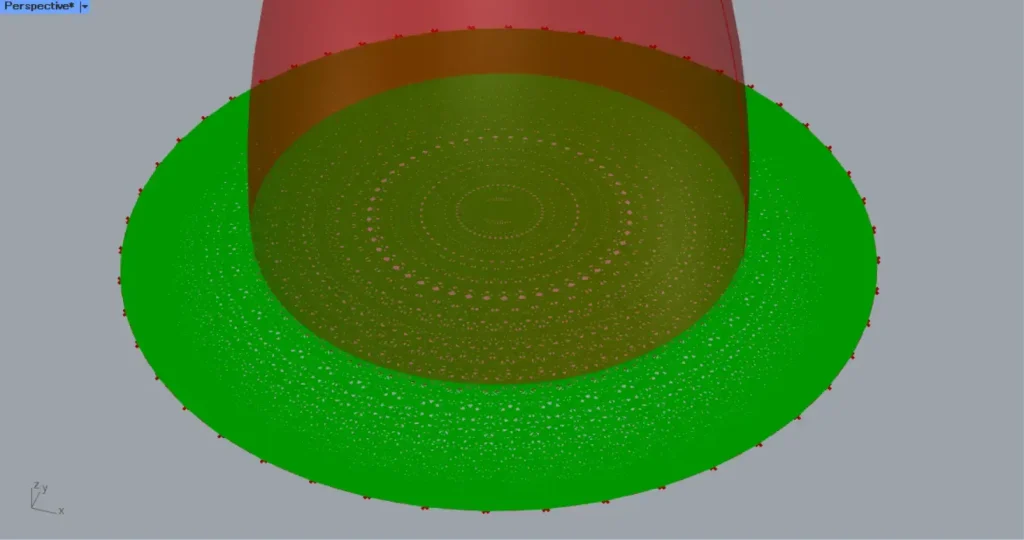
Then lines are created connecting the divided points, as shown in the image above.
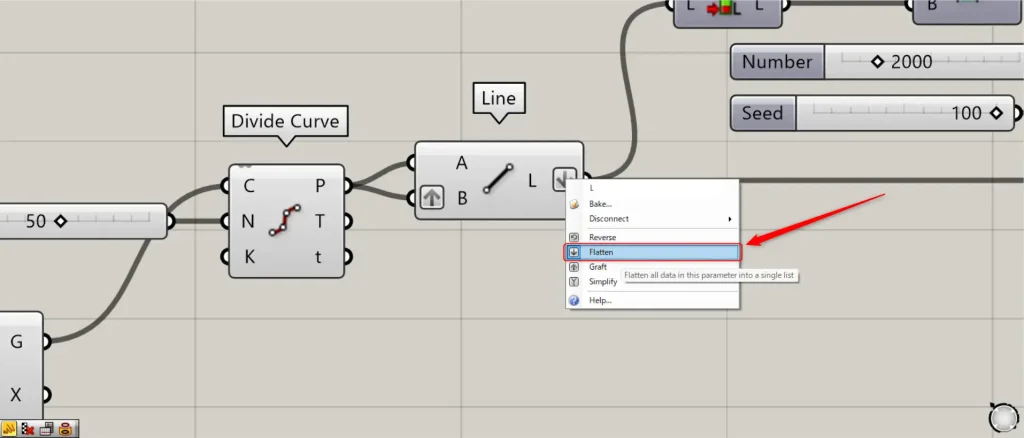
At this point, right click on the Line(L) and set it to Flatten.
Now we have lines connecting the dividing points of the bottom circle.
Randomly delete lines
Next, we will randomly delete lines.
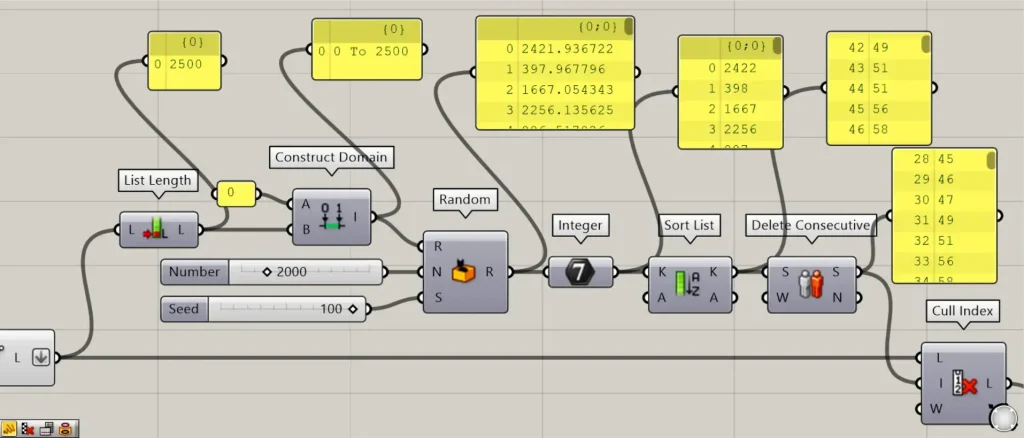
We will create numbers to randomly delete the lines.
Connect the Line to a List Length.
Then the numerical value of the number of lines will be output.
In this case, 2500 is output.
Then connect 0 to a Construct Domain(A).
In addition, connect the List Length to the Construct Domain(B).
Then a numeric range of 0 To 2500 is created.
Then connect the Construct Domain to a Random(R).
Furthermore, the number of random numbers to be created is connected to the Random(N).
In this case, 2000 is entered.
Furthermore, connect a seed value of arbitrary randomness to the Random(S).
This time, 100 is entered.
Then 2000 random numbers are created in the 0~2500 number range.
Then connect the Random to an Integer.
Then the fractional numbers are converted to integer numbers.
Then connect the Integer to Sort List(K).
Then it is sorted in decreasing numerical order.
Then connect the Sort List(K) to the a Delete Consecutive(S).
Then we removed the duplicate numbers.
Then connect the Delete Consecutive(S) to Cull Index(I).
In addition, connect the Line to the Cull Index(L).
Then we were able to randomly remove lines, as shown in the image above.
Project the lines onto the surface
Finally, Projecting the lines onto the surface.
Connect the Cull Index to a Project(C).
In addition, connect the Loft to the Project(B).
Then the lines was projected on the surface, as shown in the image above.
Then connect the Project and Scale(G) to aMerge.
Then we were able to combine the lines and circle lines, as shown in the image above.
Then connect the Merge to a Pipe(C).
Furthermore, connect the radius value to the Pipe(R).
This time, 10 is connected.
Then pipes are created from the lines.
Finally, connect 1 to the Pipe(E).
Then the hole in the pipe closes.
This completes the process.
That’s all for this issue.

Comment