
![[Grasshopper]ランダムに回転するボロノイのファサード[データも配布]](https://iarchway.com/wp-content/uploads/2025/02/eyecatch_web-4.jpg)
This article describes how to design randomly rotating voronoi facade using Grasshopper.
The Grasshopper file used in this project is also available for download.
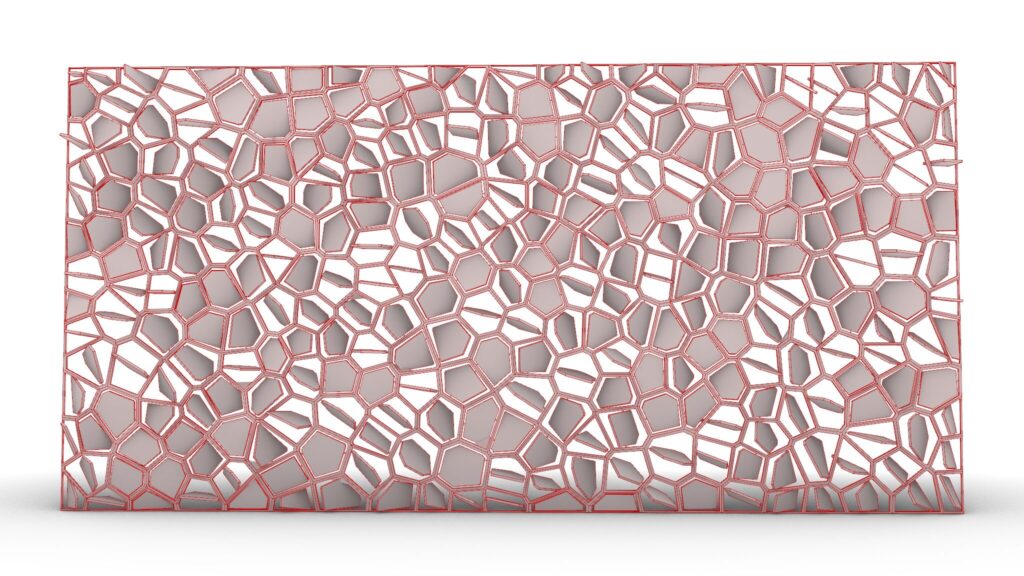
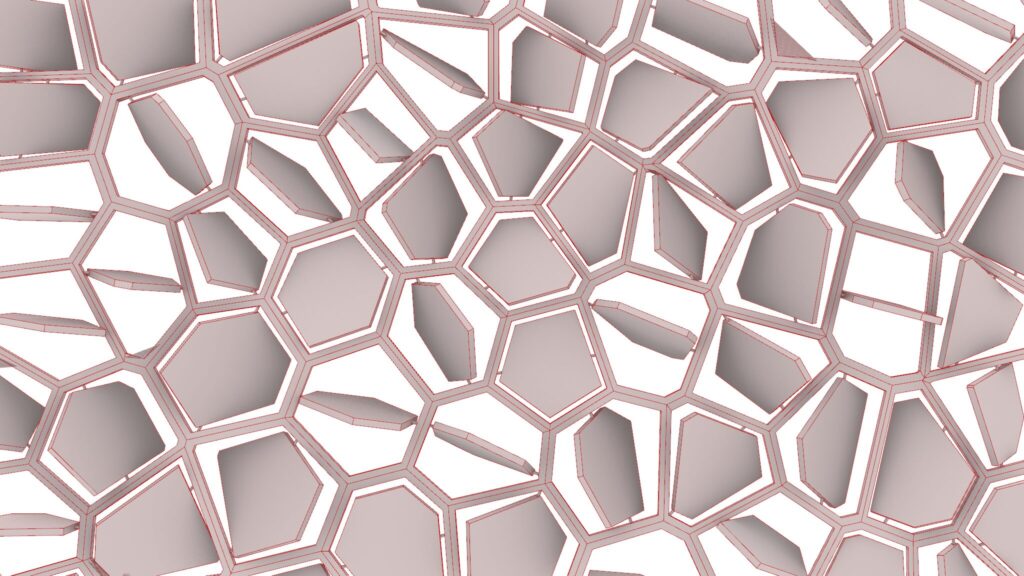
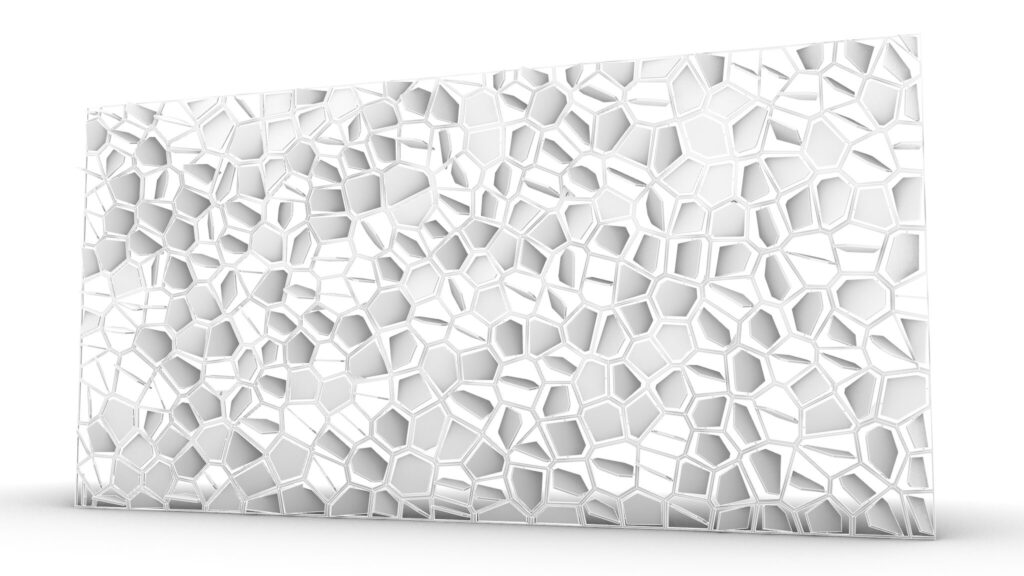
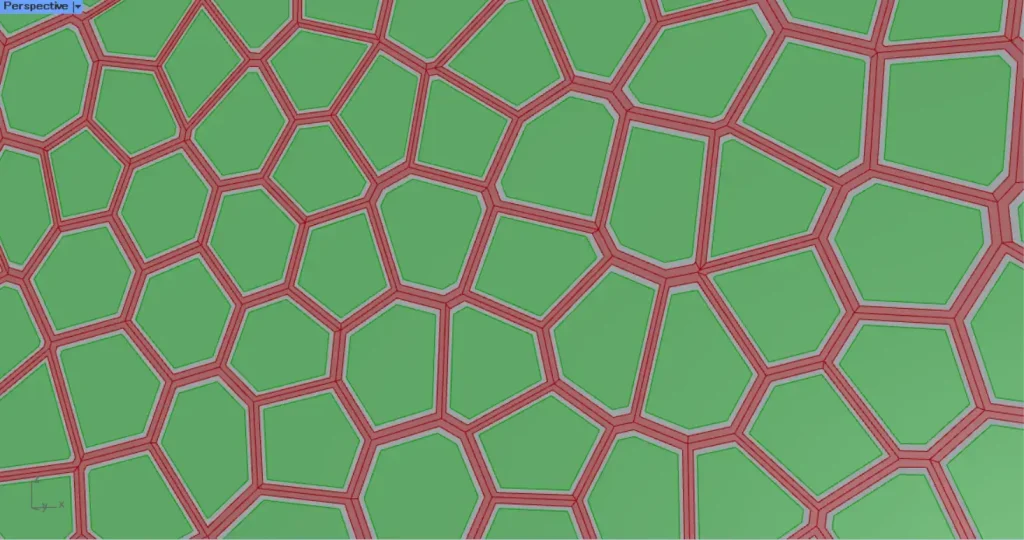
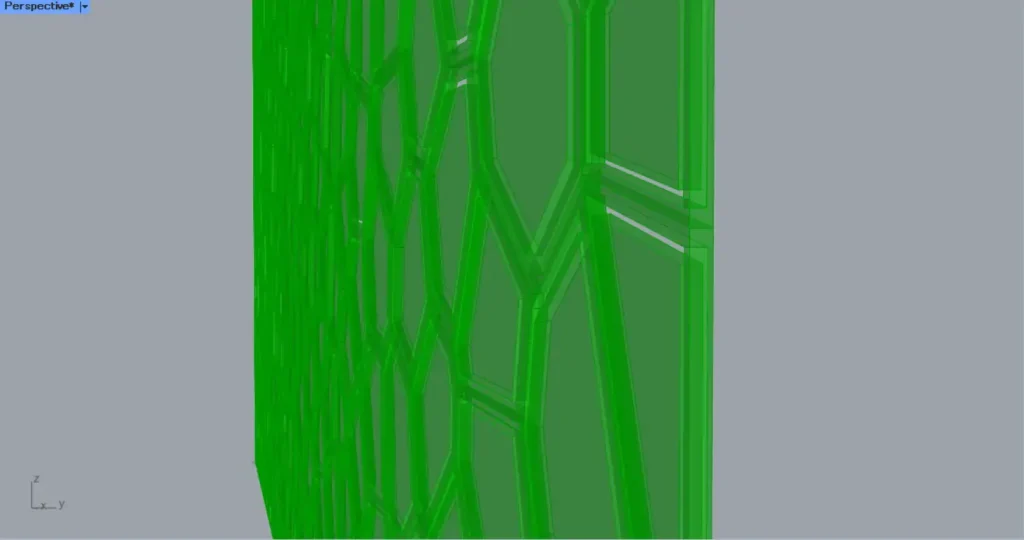
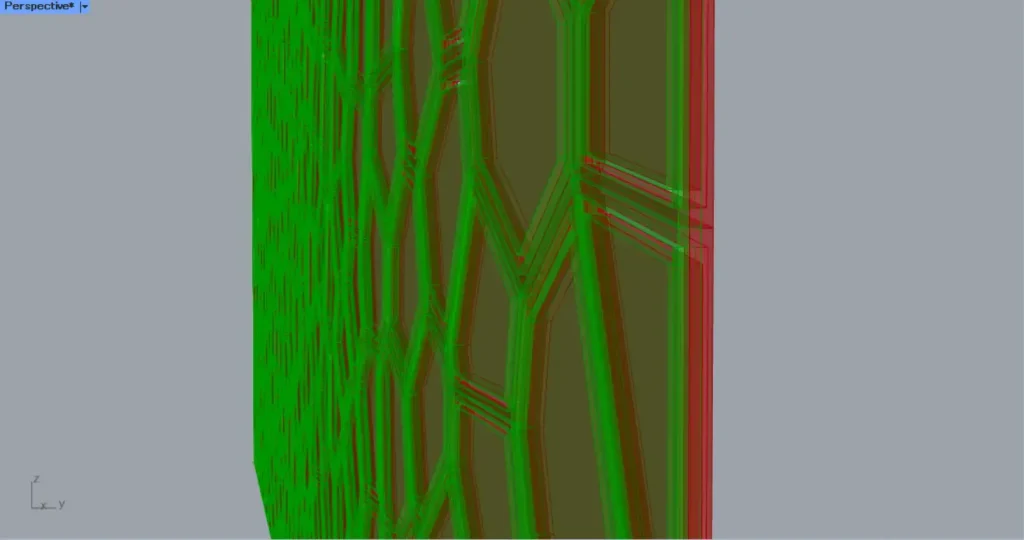
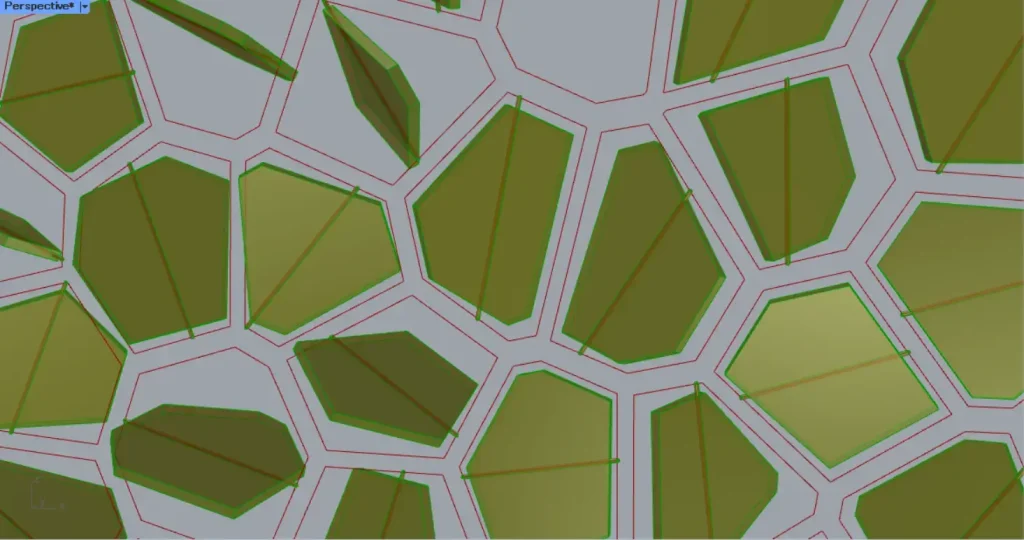
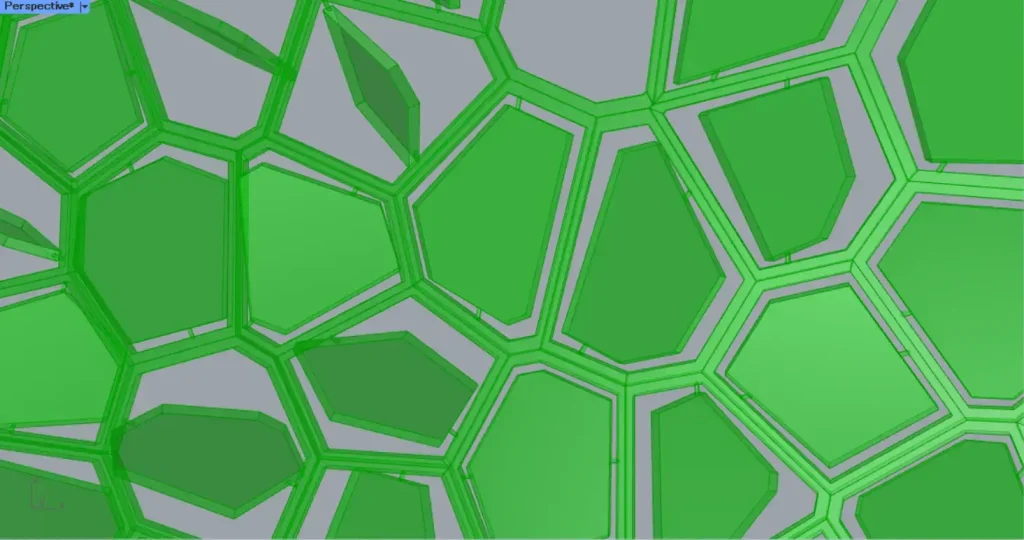
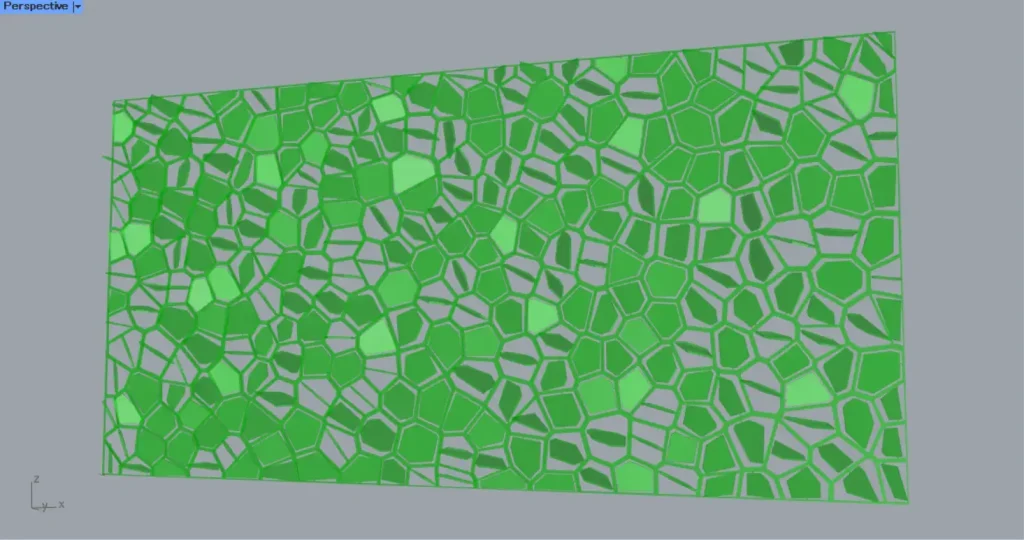
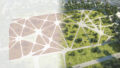
Model Images
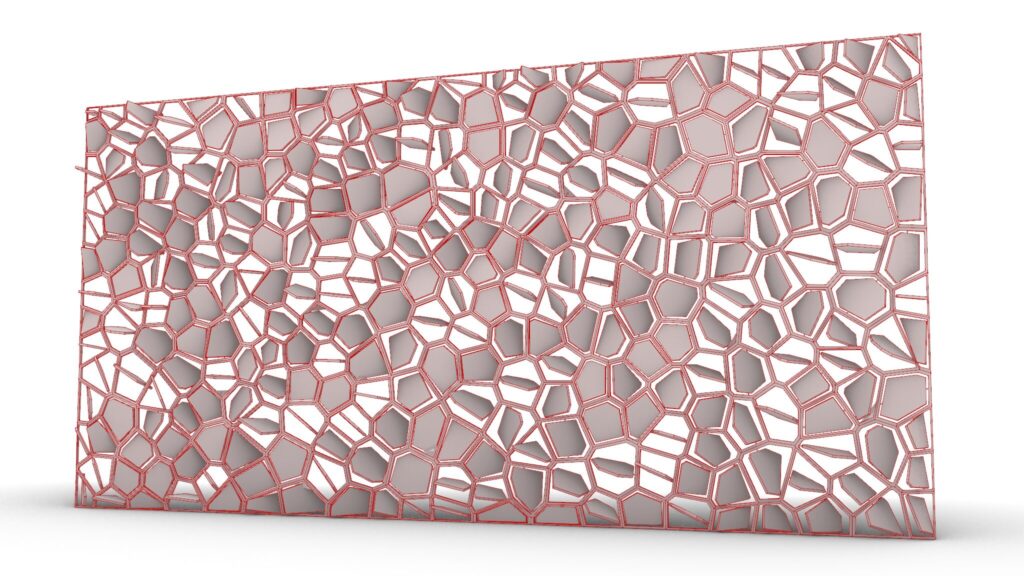
The top three images are from Grasshopper.
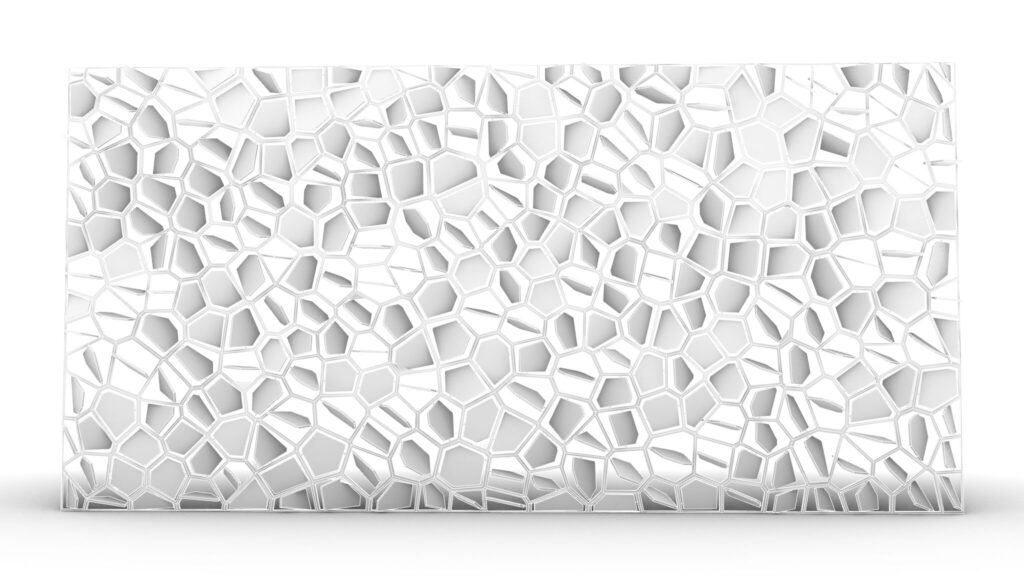
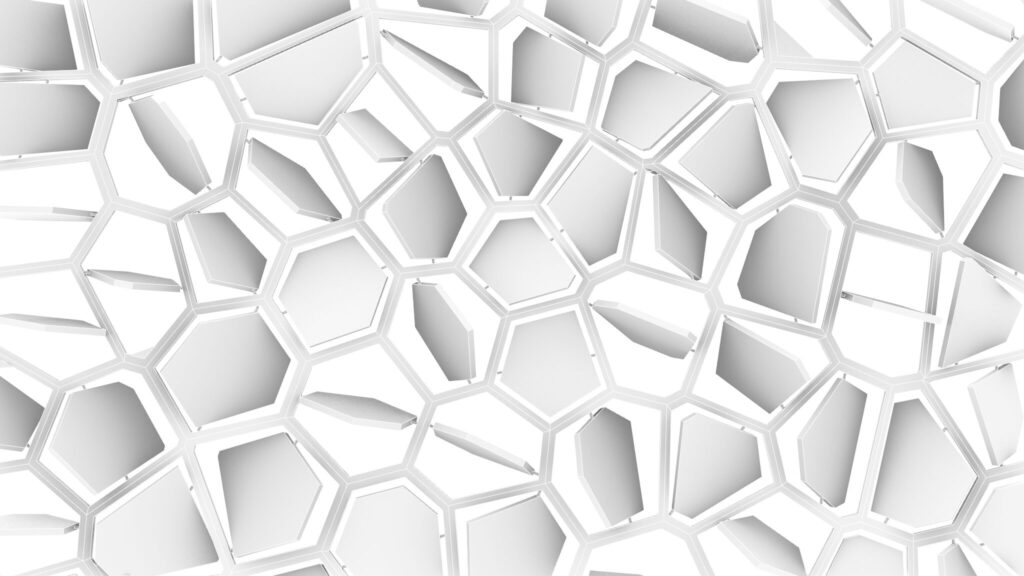
The top three images show the model exported on Rhinoceros.
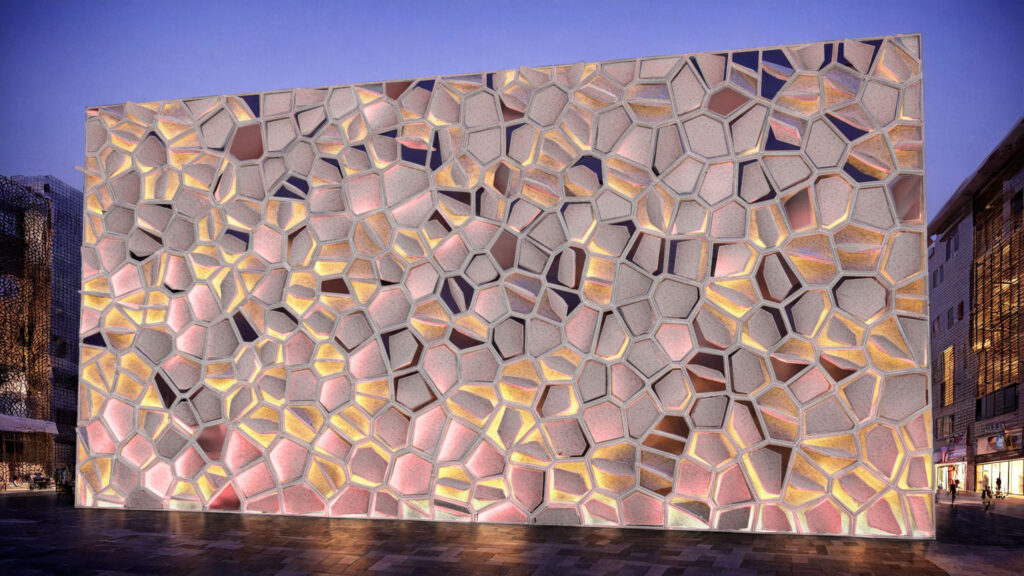
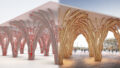
The image above shows the final rendering.
Click here to download the Grasshopper file
Please refer to the Terms of Use regarding the use of downloadable data.
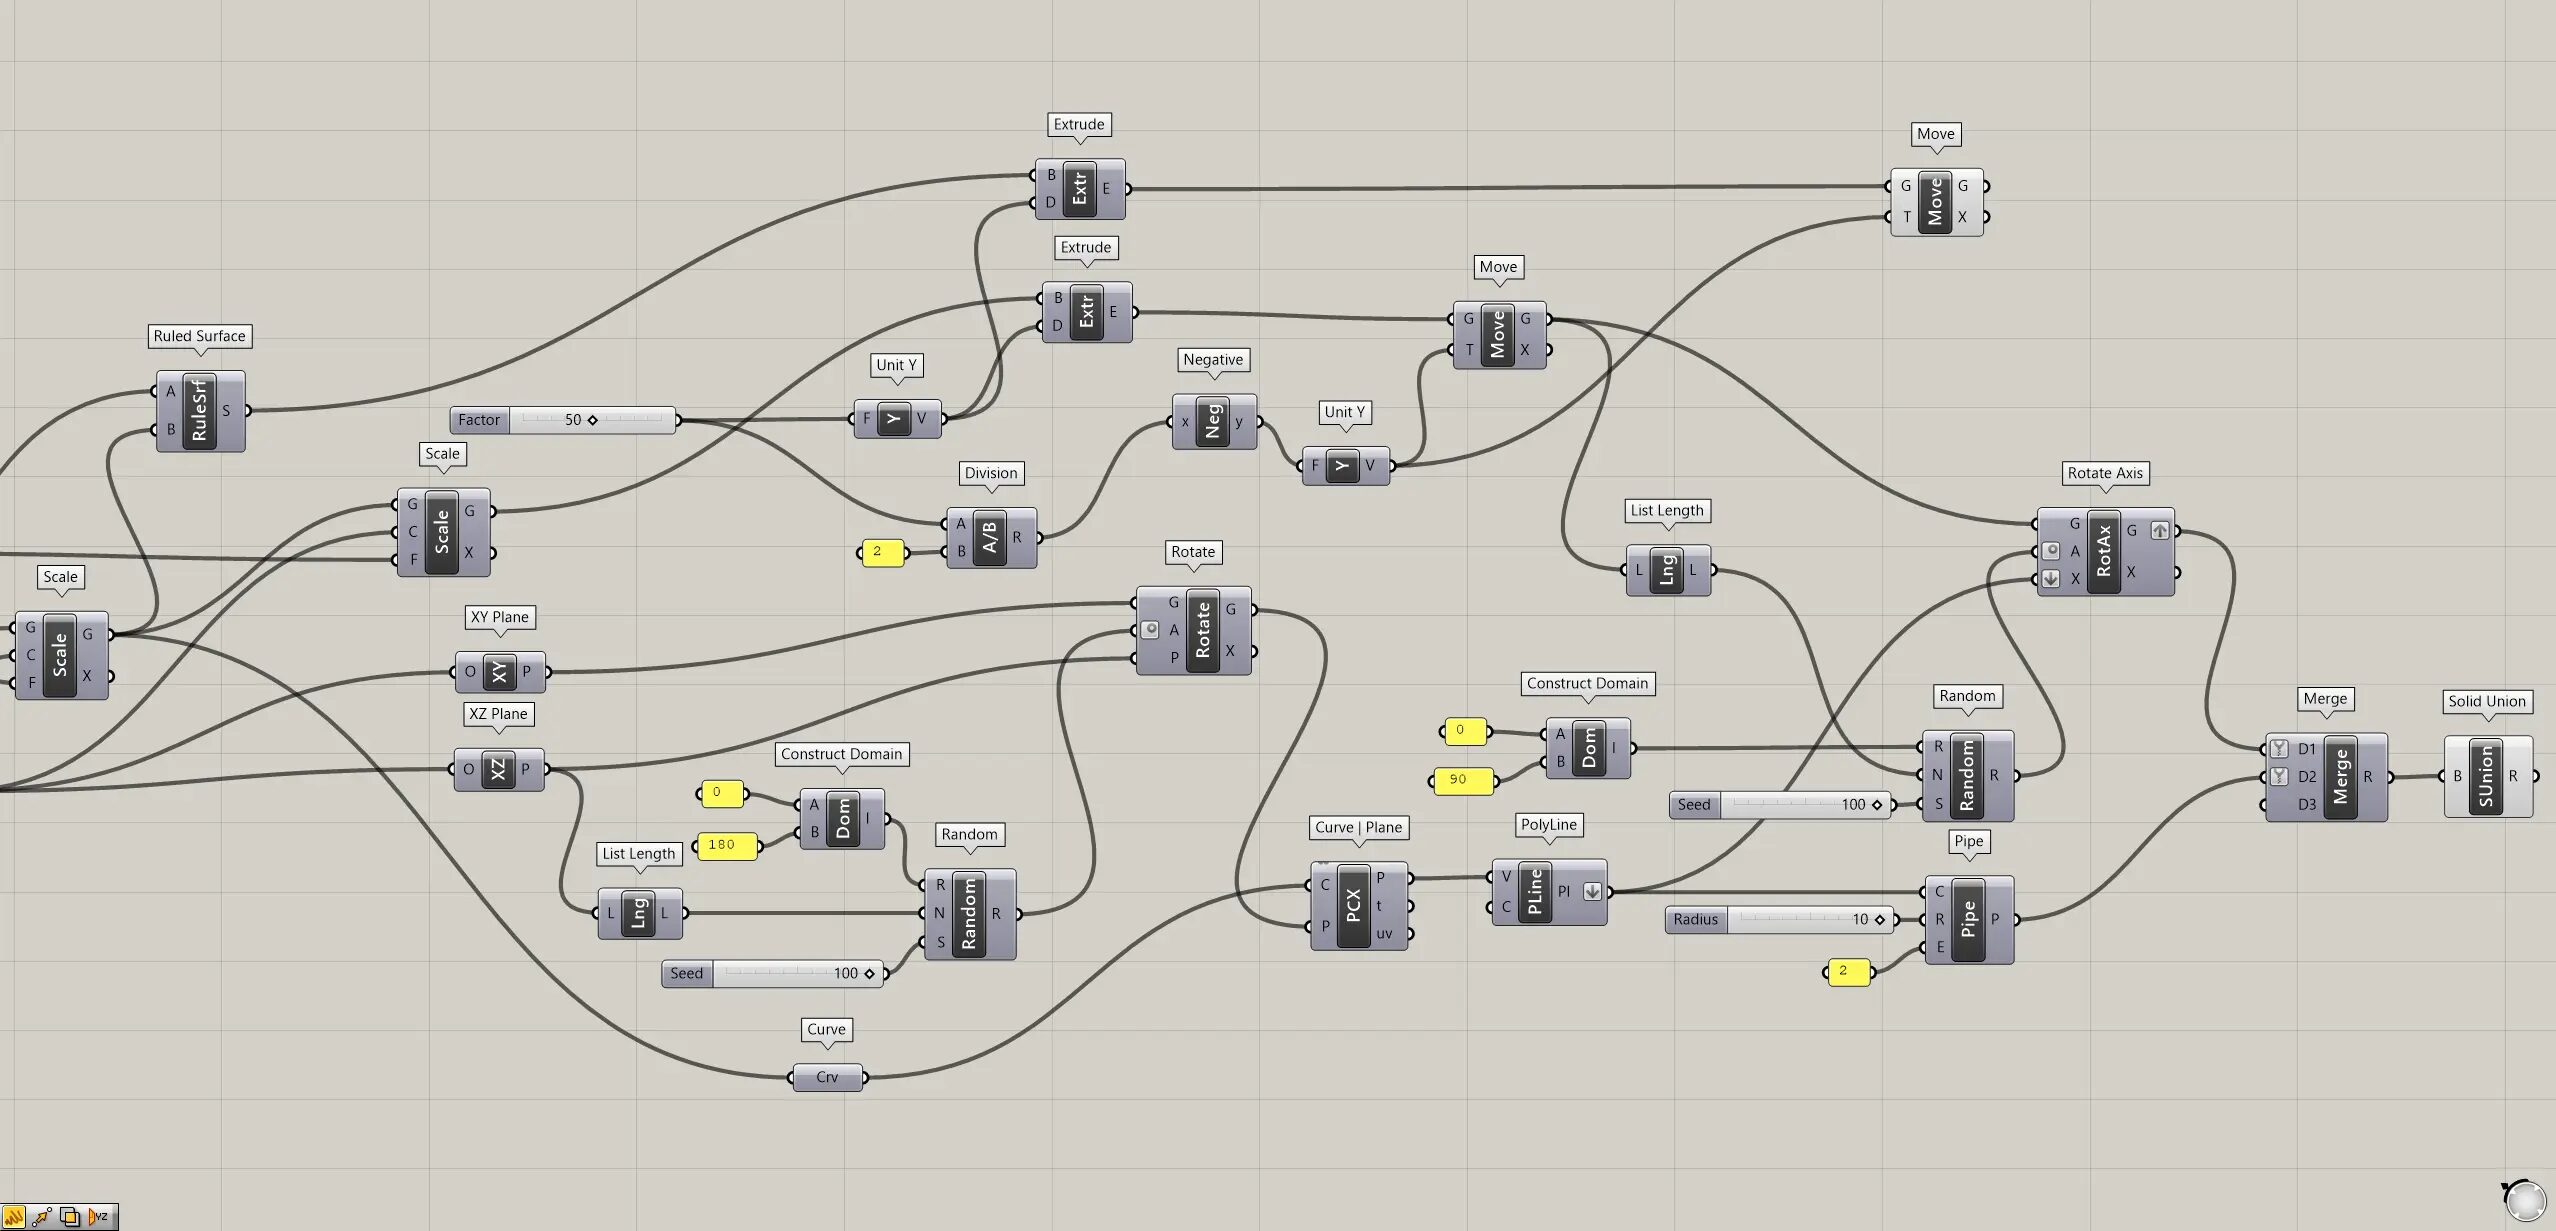
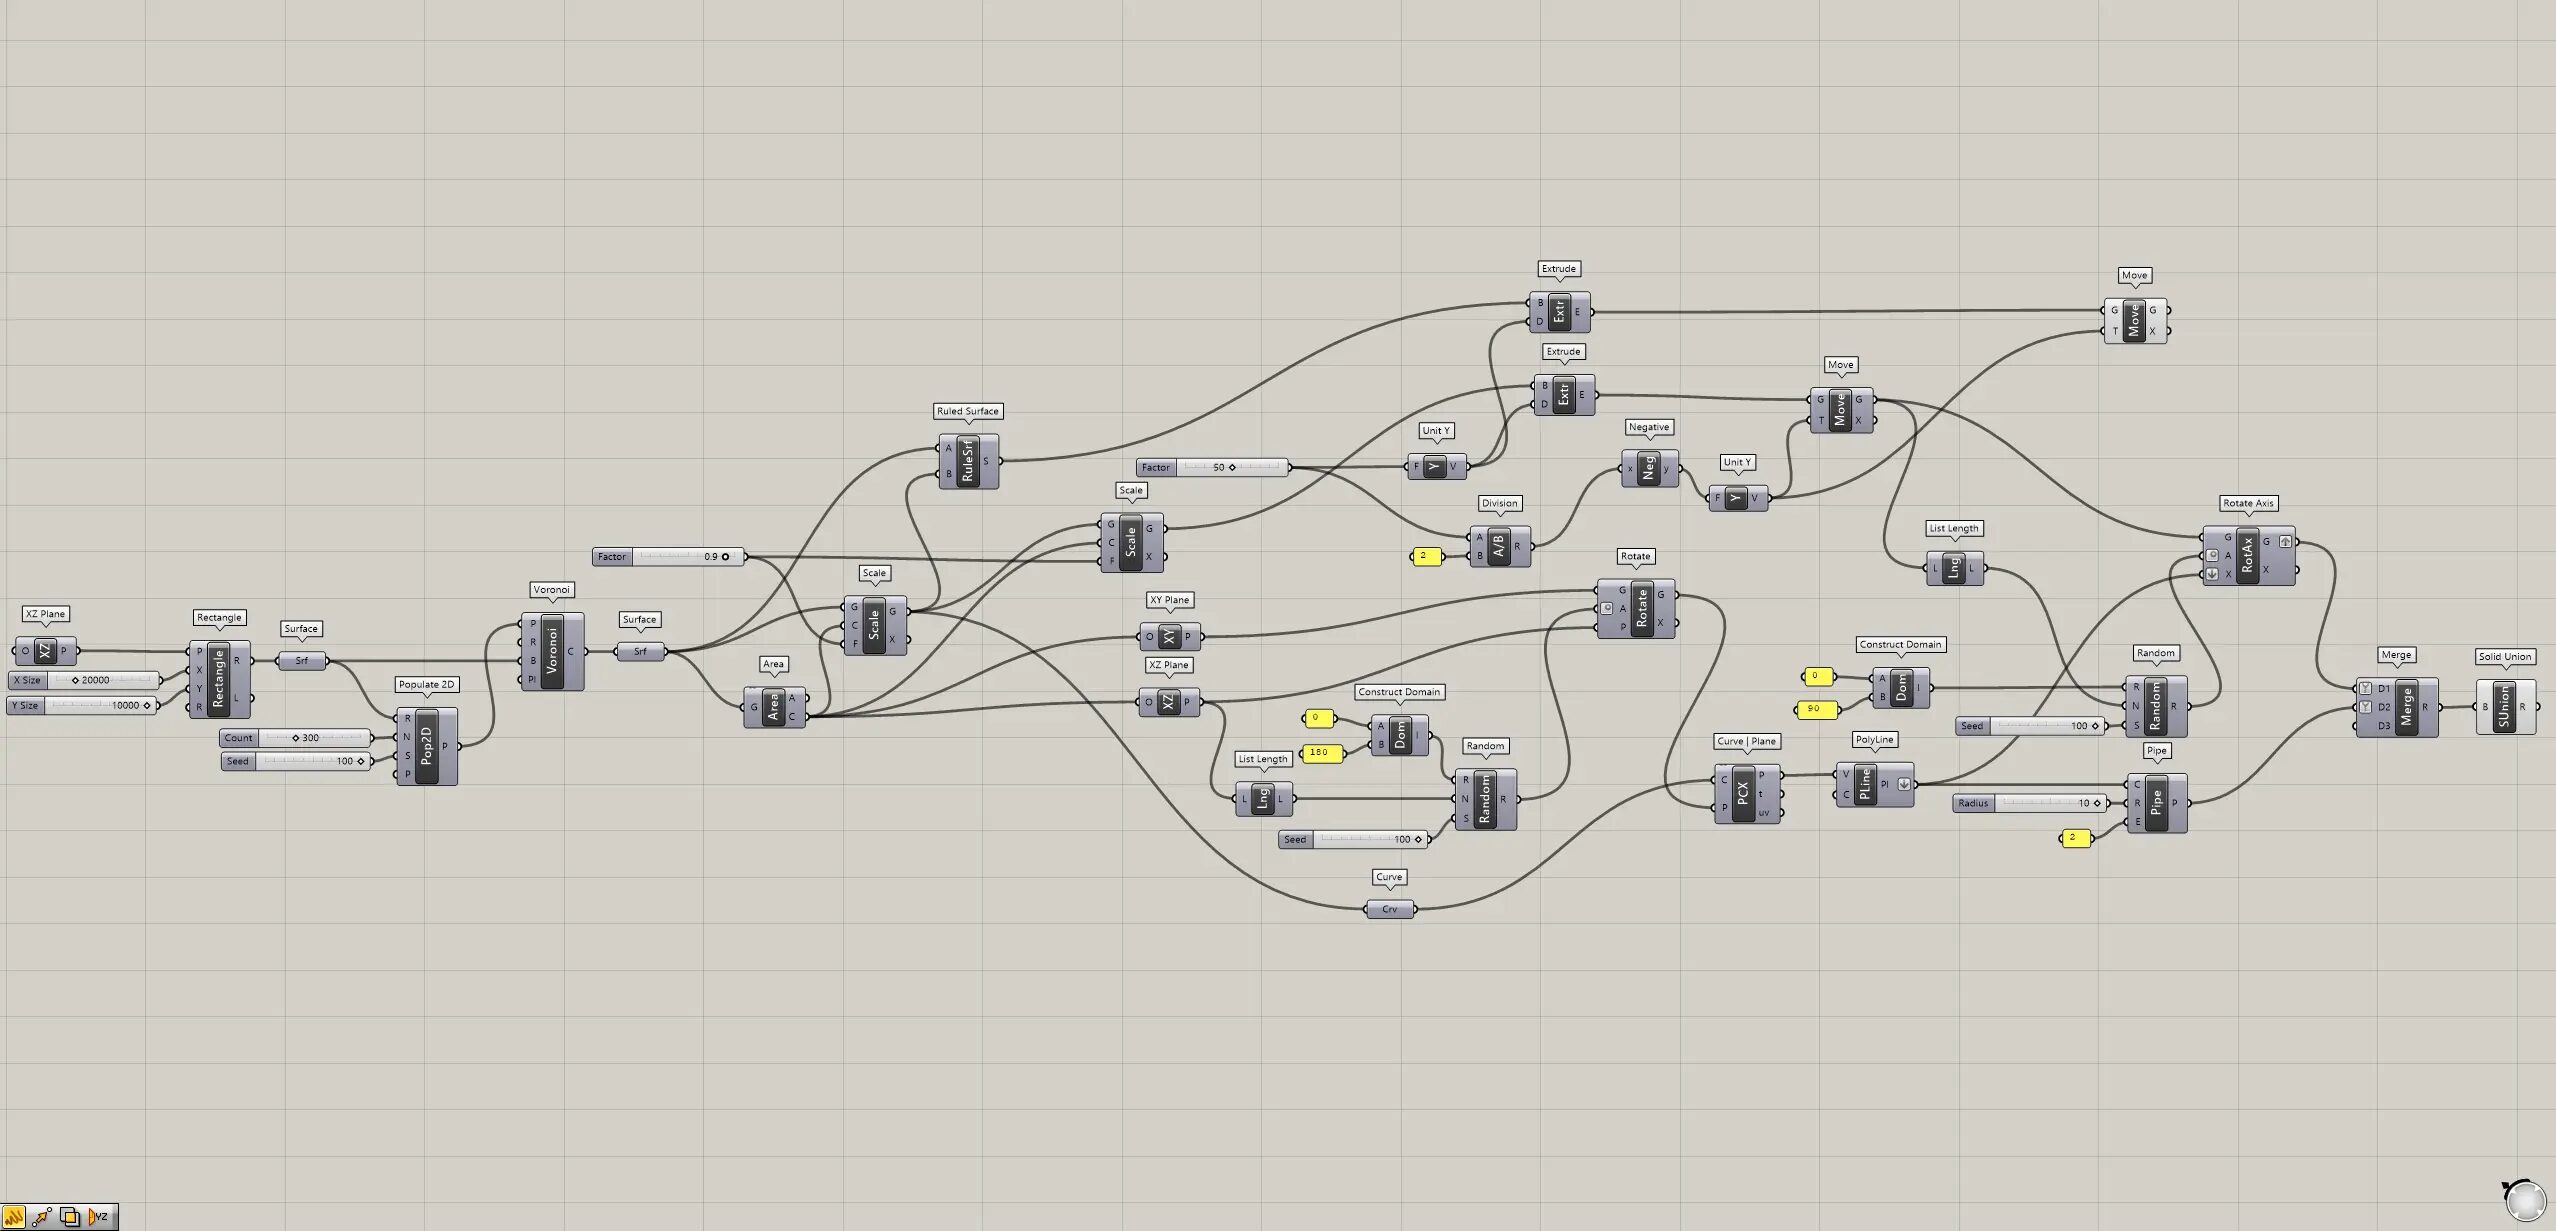
Grasshopper recipe
①XZ Plane ②Rectangle ③Surface ④Populate 2D ⑤Voronoi ⑥Area ⑦Scale ⑧Ruled Surface ⑨Unit Y ⑩Extrude ⑪Division ⑫Negative ⑬Move ⑭XY Plane ⑮List Length ⑯Construct Domain ⑰Random ⑱Rotate ⑲Curve ⑳Curve | Plane ㉑PolyLine ㉒Rotate Axis ㉓Pipe ㉔Merge ㉕Solid Union
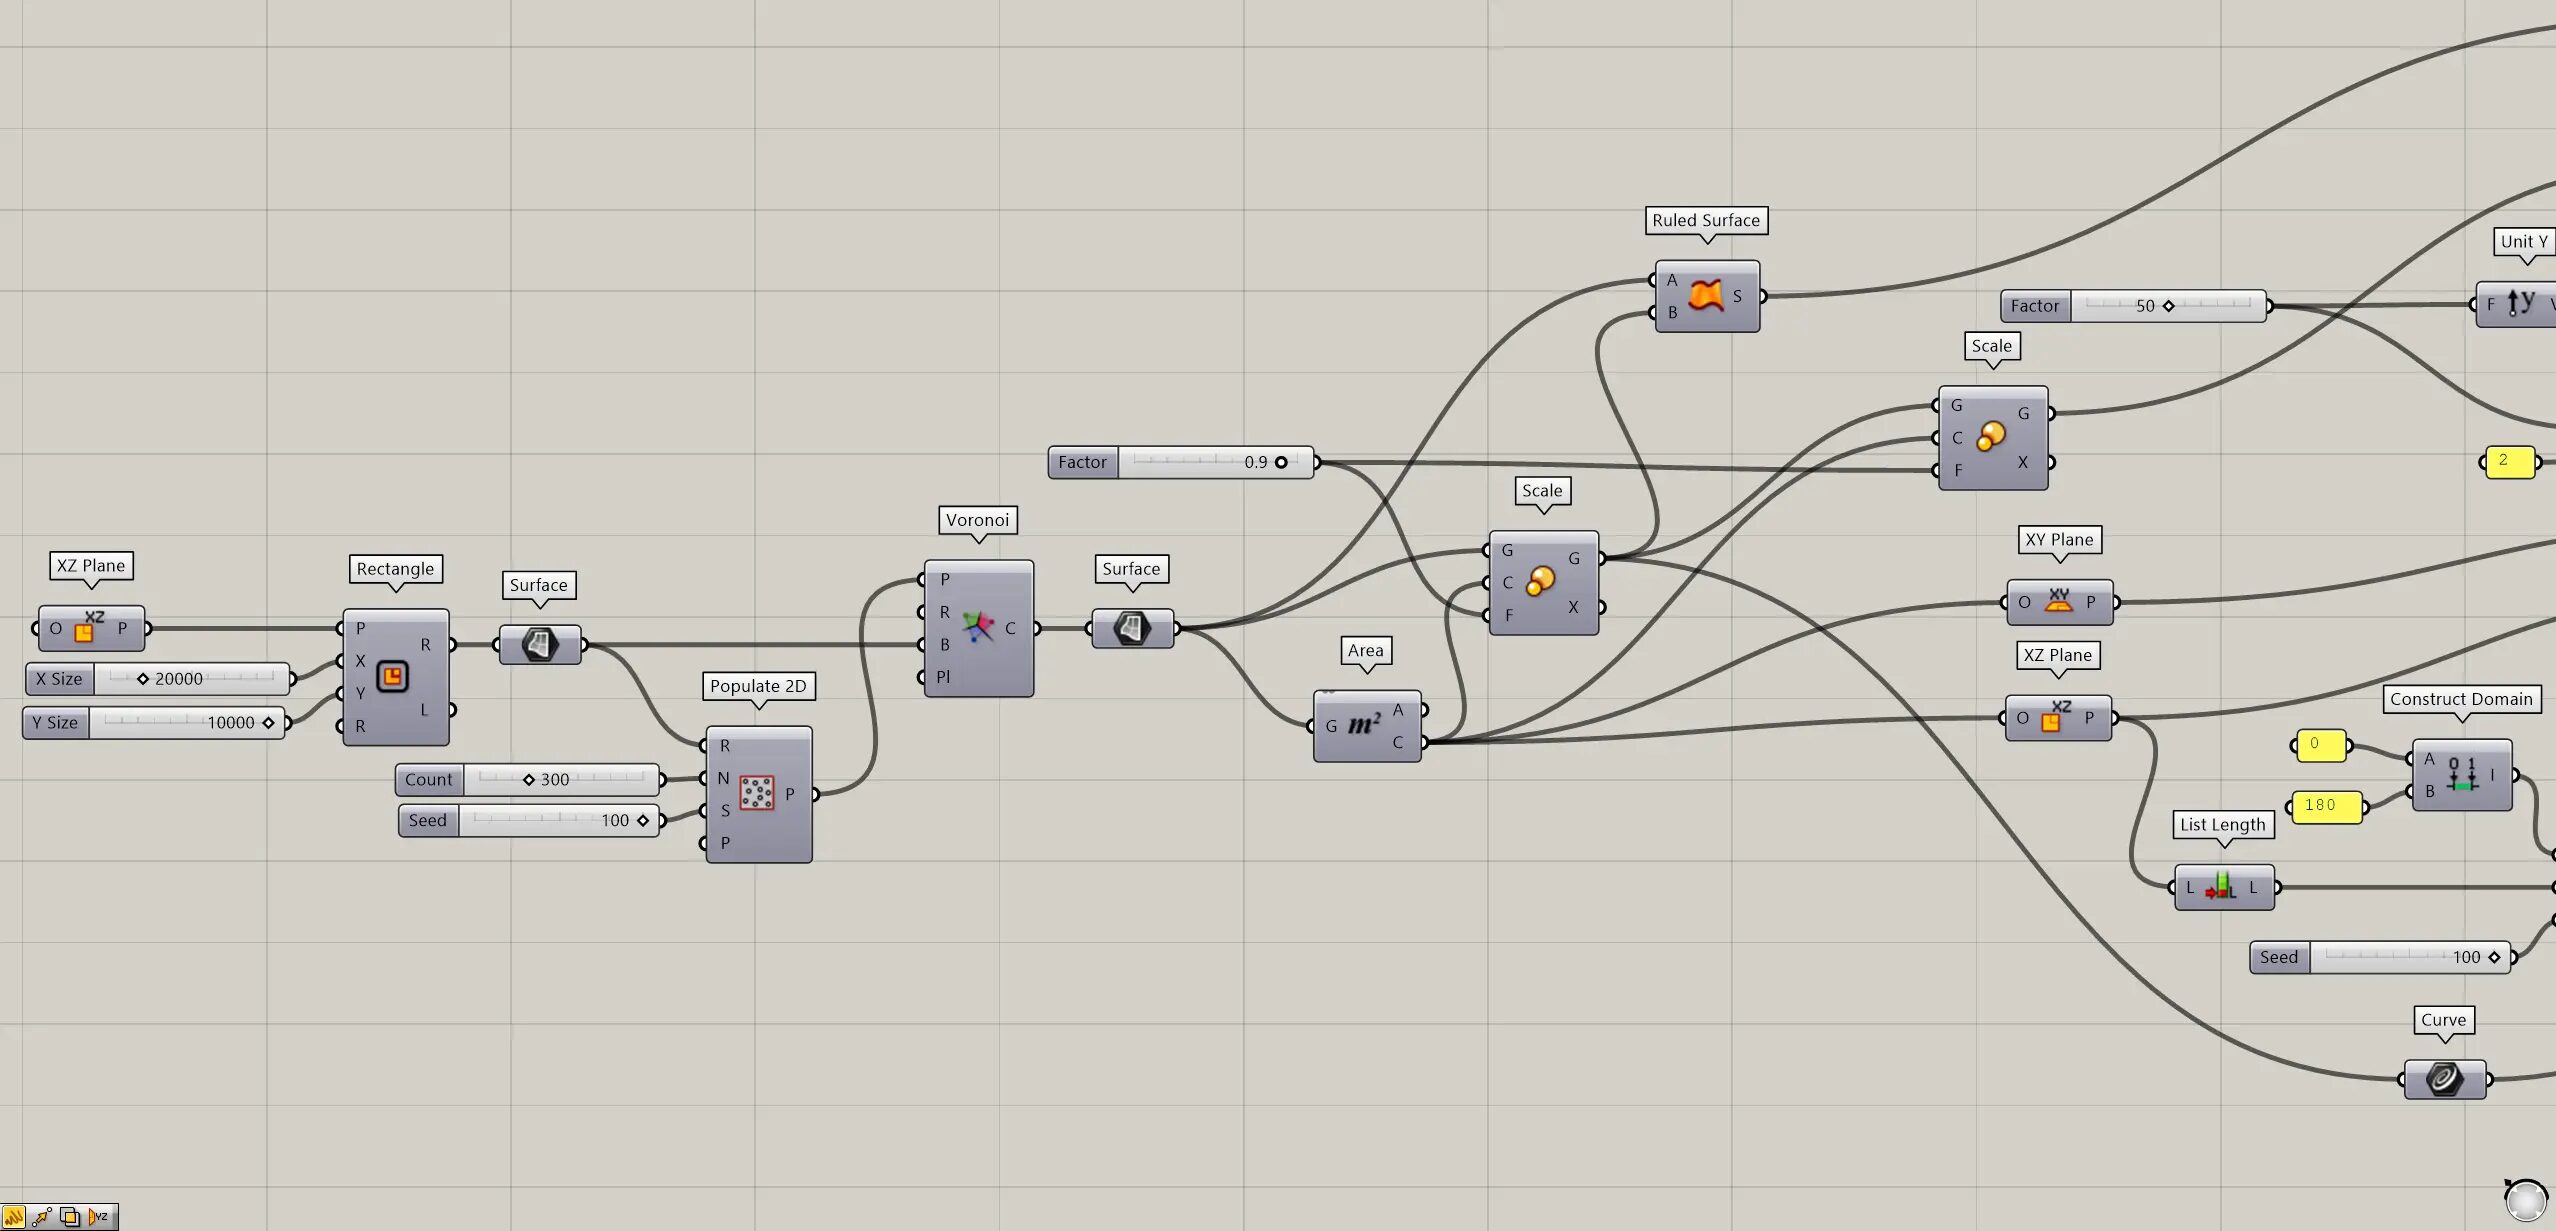

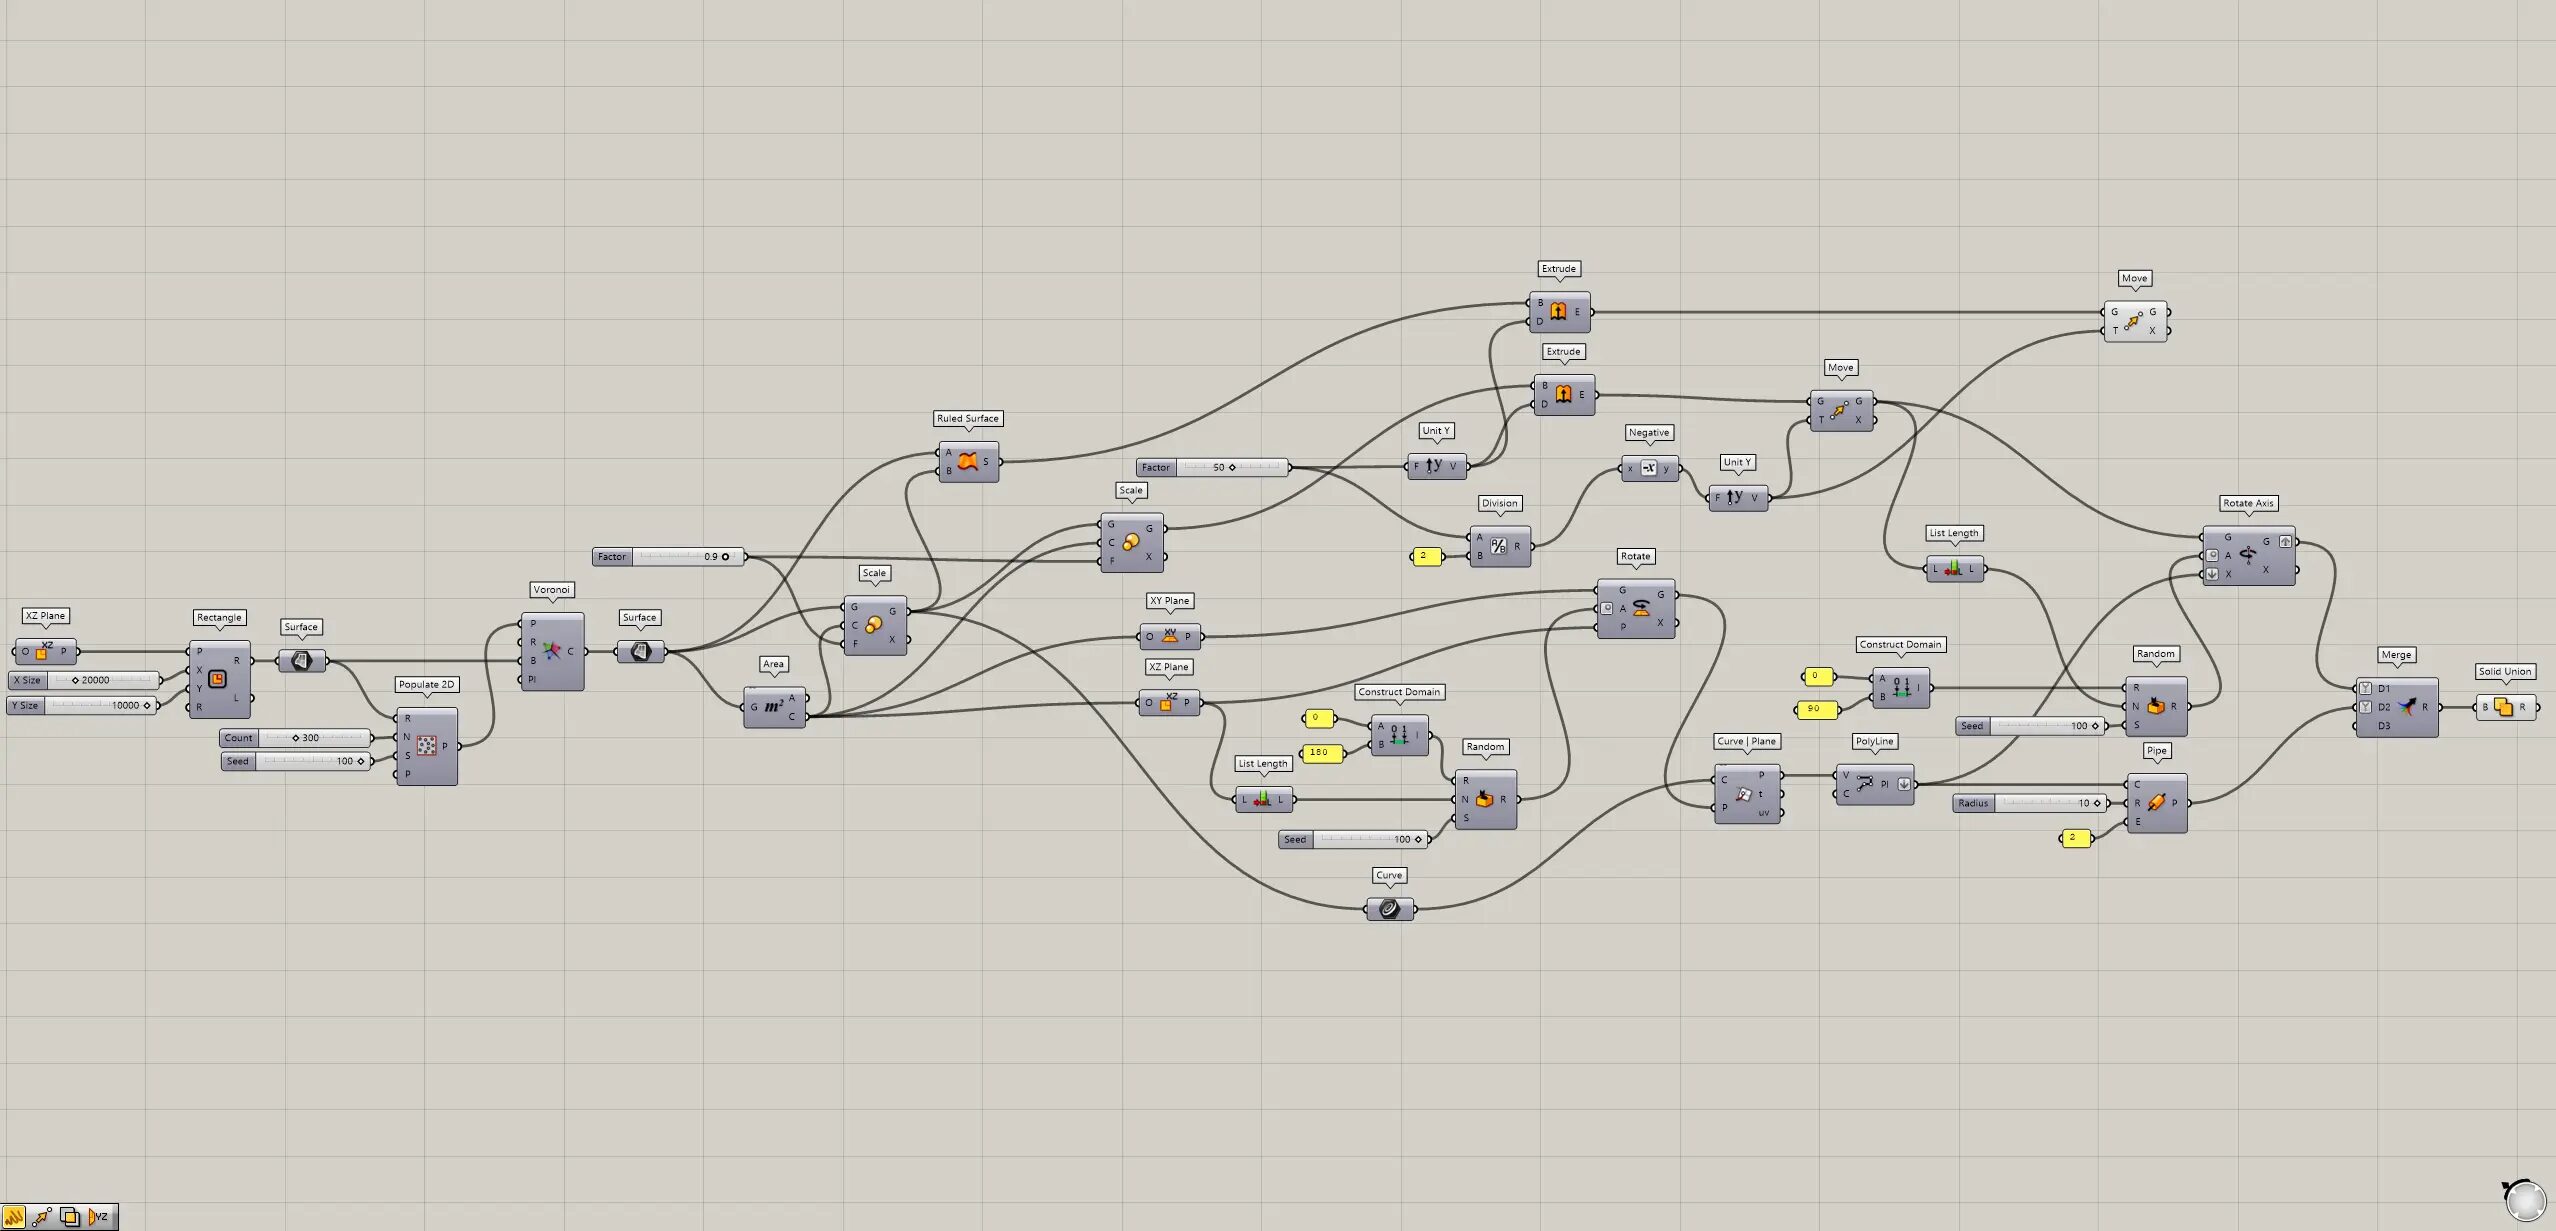
Create Reference Voronoi Surfaces
First, Create Reference Voronoi Surfaces.
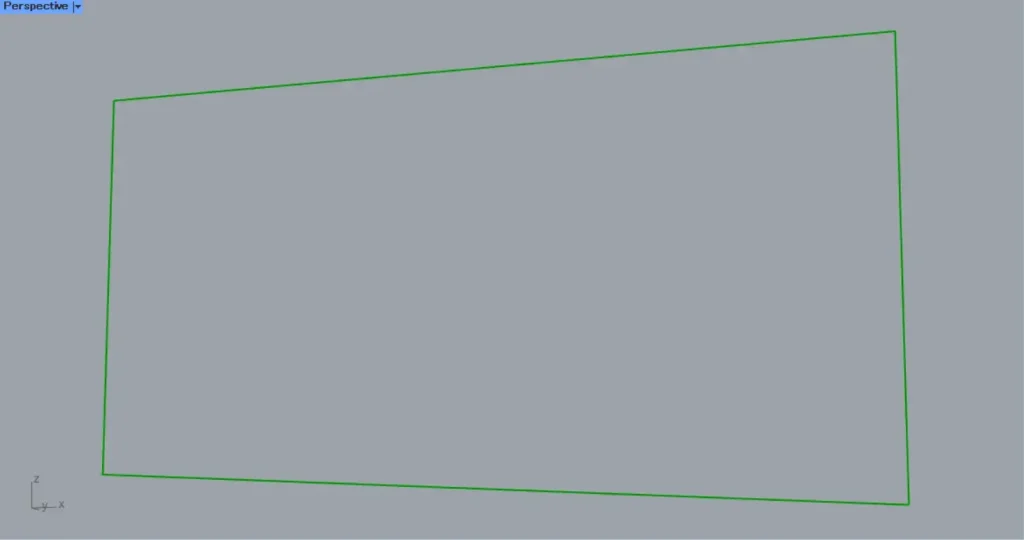
First, place a XZ Plane.
This creates a plane created from the X and Z directions.
Then connect the XZ Plane to a Rectangle(P).
In addition, enter the side length values in the Rectangle(X and Y).
In this case, 20000 and 10000 are entered in the X and Y, respectively.
Then, as shown in the image above, a rectangular line is created.
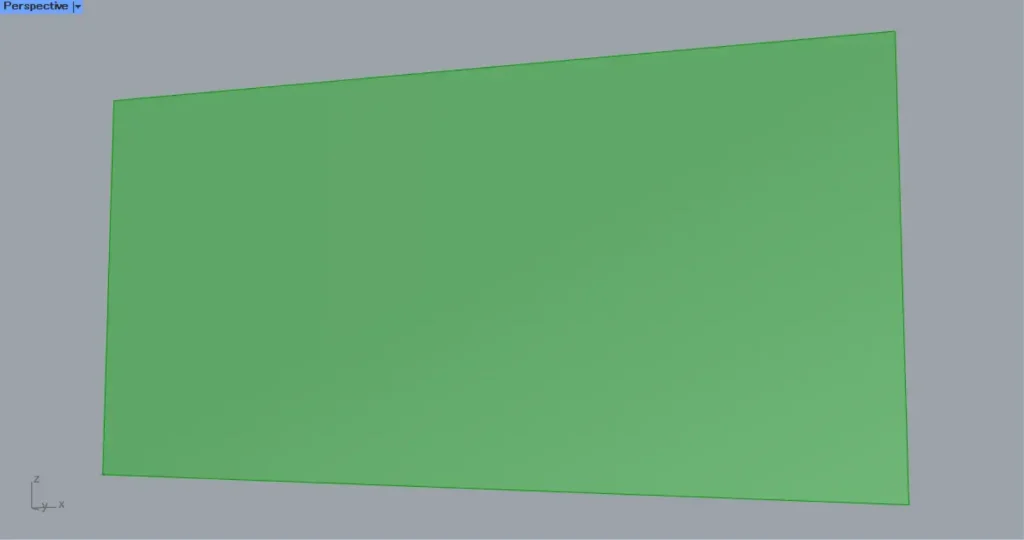
Then connect the Rectangle(R) to a Surface.
Then a surface is created from the rectangle line, as shown in the image above.
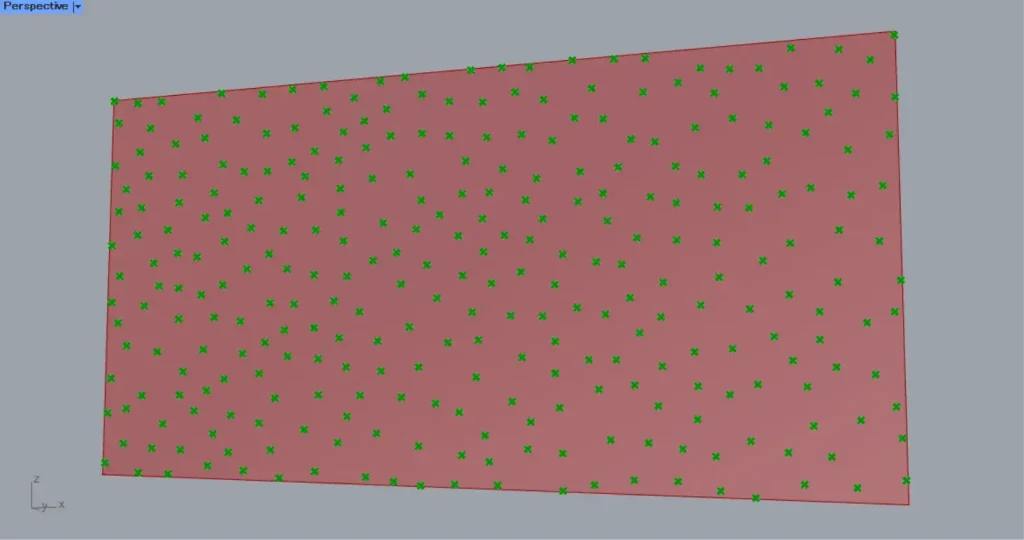
Then connect the Surface to a Populate 2D(R).
Furthermore, connect the number of points to the Populate 2D(N).
This time, 300 is input.
In addition, connect any randomness-changing seed value to the Populate 2D(S).
This time, 100 is entered.
Then 300 random points are created, as shown in the image above.
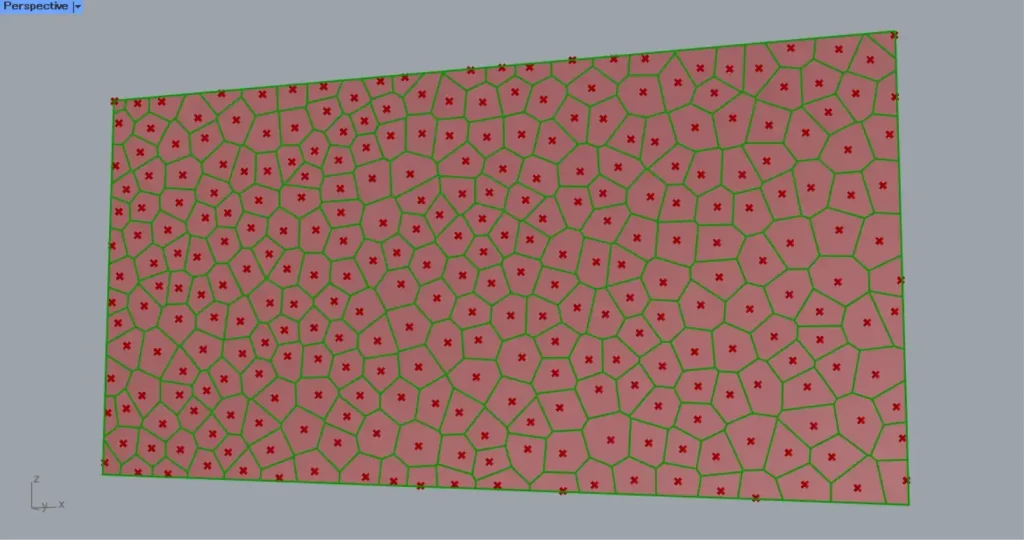
Then connect the Populate 2D to a Voronoi(P).
In addition, connect the Surface to the Voronoi(B).
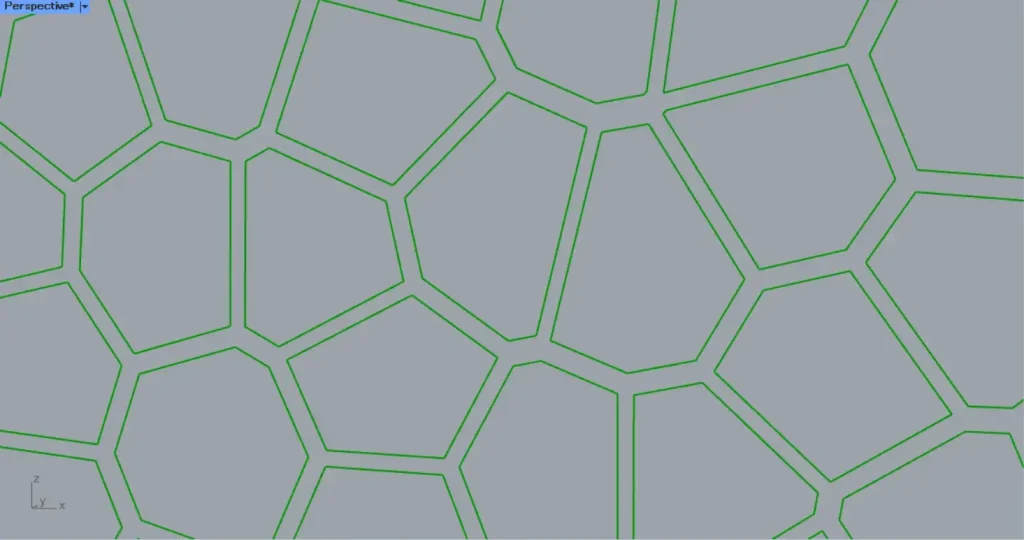
Then Voronoi lines are created, as shown in the image above.
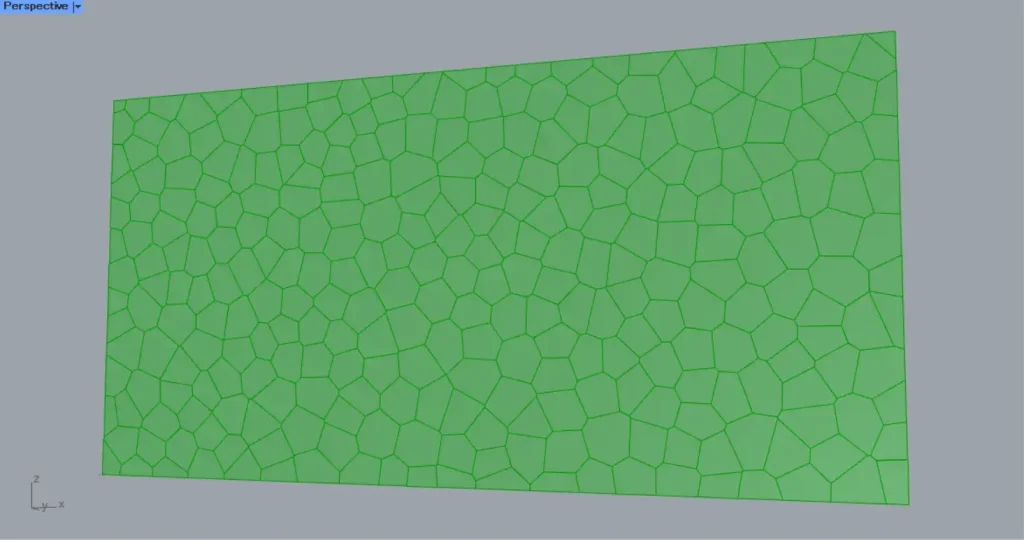
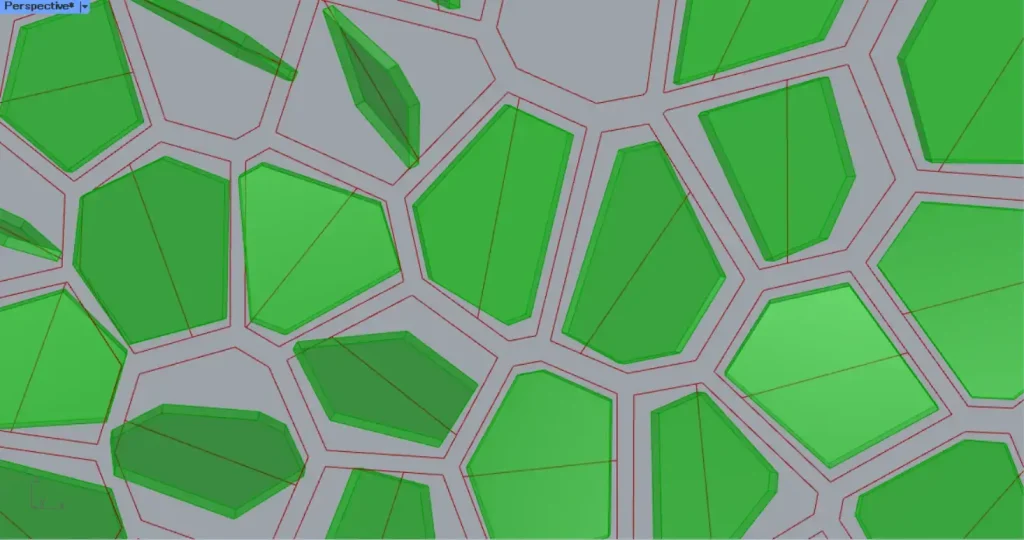
Then connect the Voronoi to a Surface.
Then Voronoi surfaces are created from the Voronoi lines, as shown in the image above.
Create frames
Next, create frames.
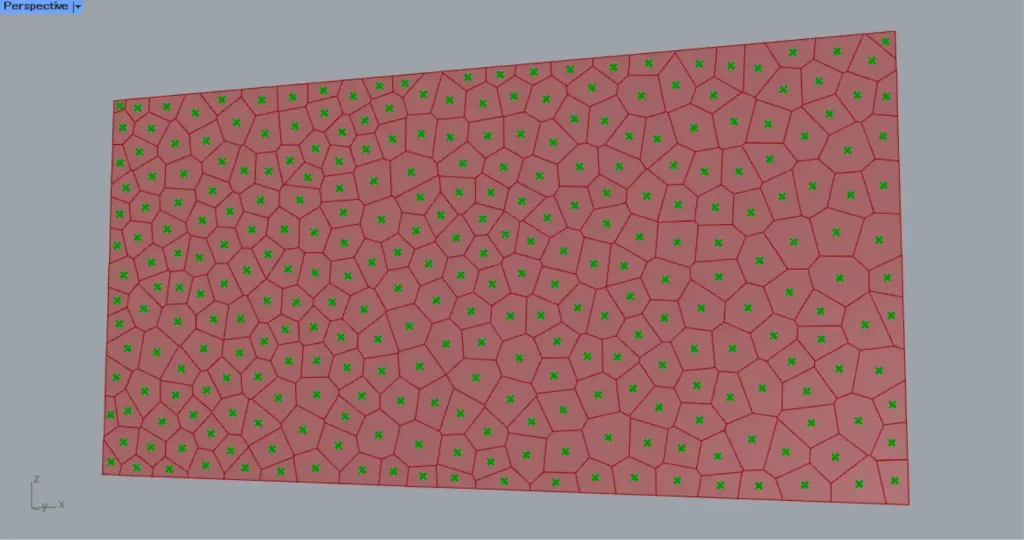
Connect the Surface to an Area.
Then you can get the center point of each surface, as in the image above.
Then connect the Area(C) to a Scale(C).
In addition, connect the Surface to the Scale(G).
Then connect a magnification value to Scale(F).
This time, a value of 0.9 is entered.
Then the scale of each surface is reduced, as shown in the image above.
Then Surface and Scale(G) are connected to a Ruled Surface.
Then border surfaces are created, connecting the before and after border lines as shown in the image above.
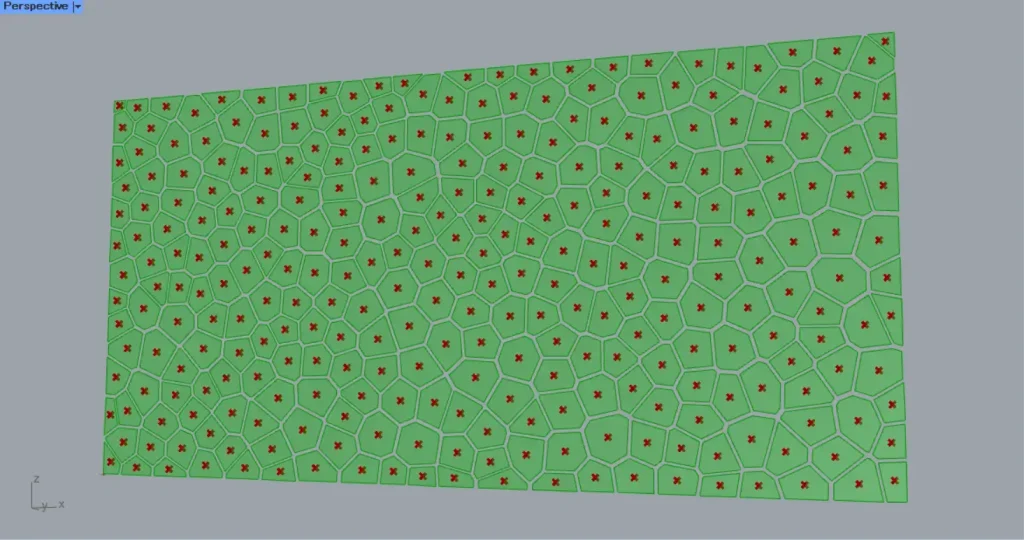
Then connect the Scale(G) to a new Scale(G).
Furthermore, connect the Area(C) from earlier to the new Scale(C).
Furthermore, connect the 0.9 value from earlier to a new Scale(F).
Then a new, smaller Voronoi surfaces are created, as shown in the image above.
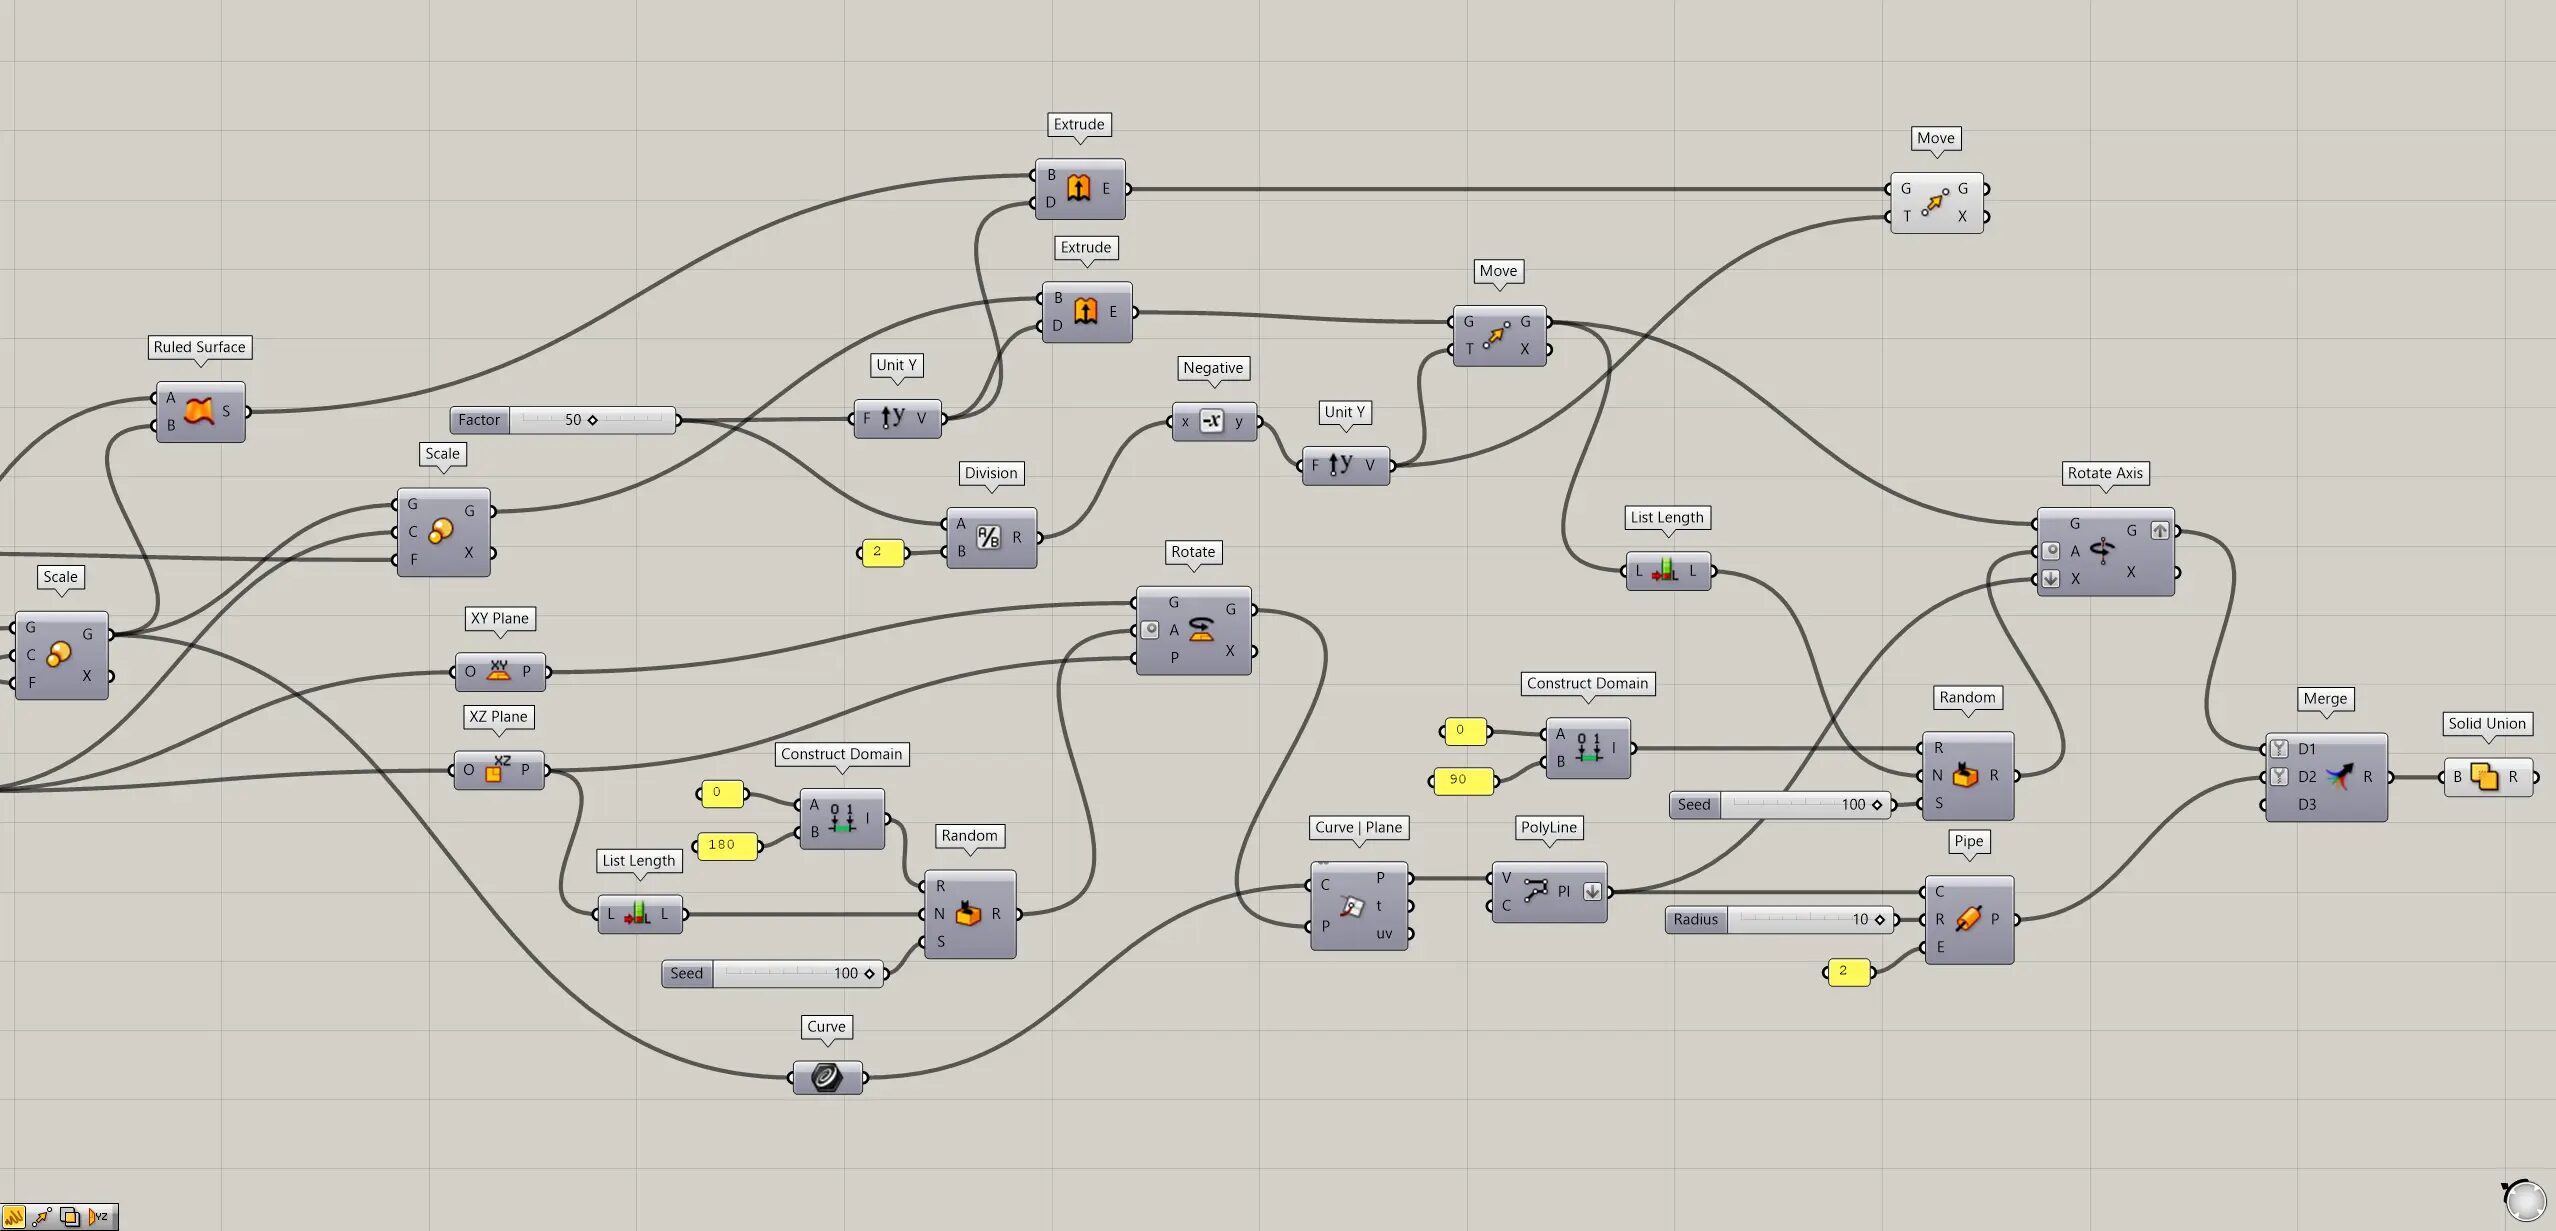
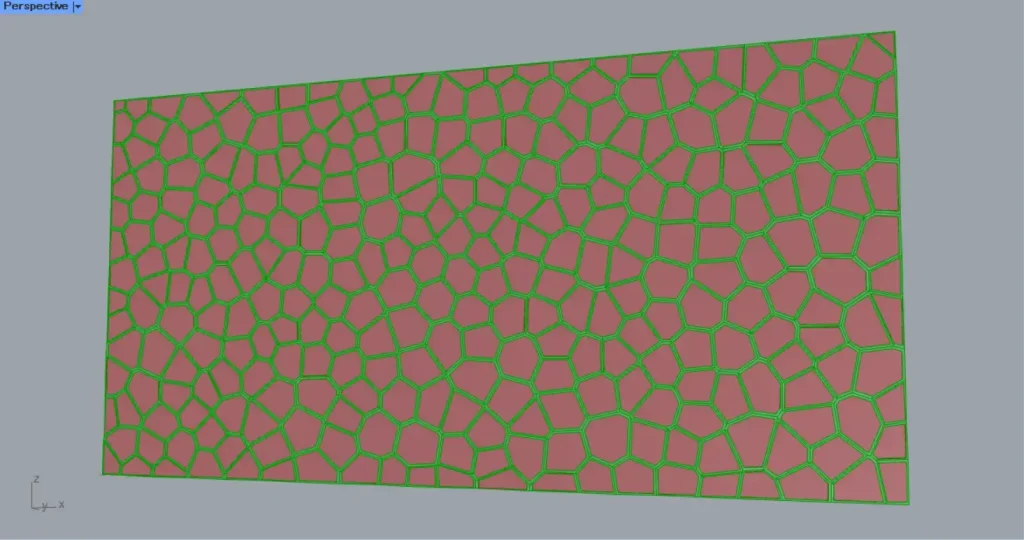
Then place two Extrude.
Connect the Ruled Surface and the Scale(G) to the Extrude(B) respectively.
Then connect the thickness values to a Unit Y.
In this case, 50 is input.
In addition, connect the Unit Y to the two Extrude(D).
Then we were able to add thickness, as shown in the image above.
Then connect the 50 from earlier to Division(A).
Furthermore, connect 2 to Division(B).
Then the number 50÷2=25 is output.
Then connect the Division to a Negative.
Then the number of 25 is now -25.
Then connect the Negative to a Unit Y.
Then place two Move.
Connect the Unit Y to the two Move(T).
Then connect the Extrude to the two Move(G) each.
Then, as shown in the image above, it moved only half of its thickness in the opposite direction from the previous one.
This move is made so that the axis of rotation, which will be created later, will be at the center of the frame.
Create rotation axes and rotate the Voronois
Next, Create rotation axes and rotate the Voronois.
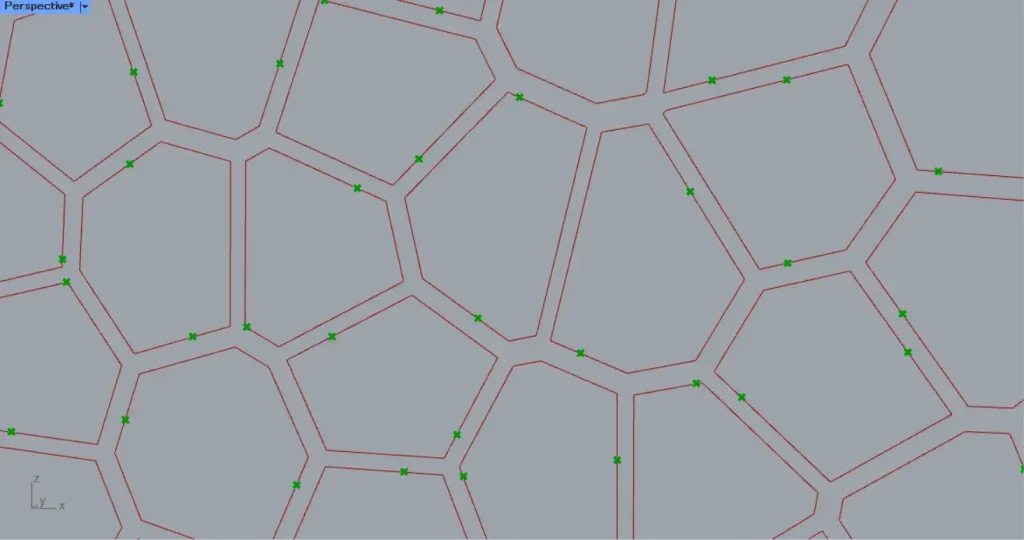
Connect the first Scale(G) to a Curve.
Then you get the Voronoi lines, as in the image above.
Connect the Area(C) to a XY Plane and a XZ Plane.
Then planes created from the X and Y directions and the X and Z directions are created at each center point.
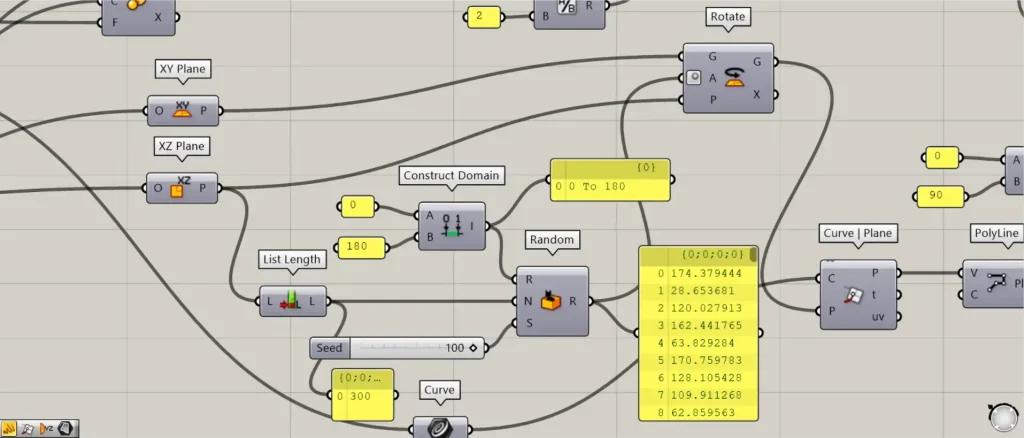
Then connect the XZ Plane to a List Length.
Then you can get the numerical value of the number of planes.
In this case, 300 is obtained.
Then connect the number 0 to Construct Domain(A).
Further, connect the 180 numbers to Construct Domain(B).
This will create a numeric range of 0 To 180.
Then connect the Construct Domain to a Random(R).
In addition, connect the List Length to the Random(N).
Furthermore, connect any randomness-changing seed value to the Random(S).
In this case, 100 is entered.
Then 300 numbers will be created in the 0~180 number range.
Then connect the XY Plane to a Rotate(G).
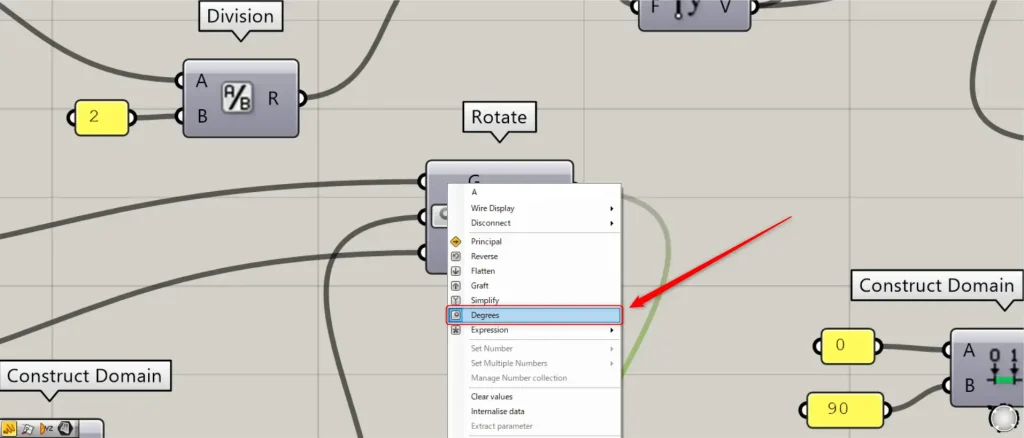
Furthermore, connect the Random to the Rotate(A).
At this point, right click on the Rotate(A) and set it to Degrees.
In addition, connect the XZ Plane to the Rotate(P).
Then each XY plane rotates randomly on the XZ plane.
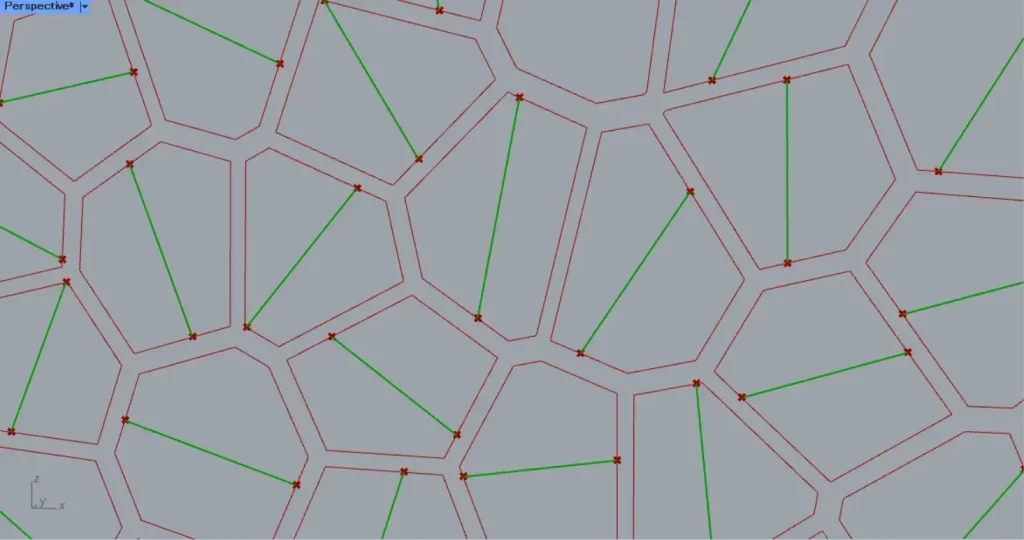
Then connect the Curve to a Curve | Plane(C).
In addition, connect the Rotate(G) to the Curve | Plane(P).
Then points are created at the intersection of the Voronoi lines and the planes, as shown in the image above.
Then connect the Curve | Plane(P) a PolyLine(V).
Then lines connecting the points are created, as shown in the image above.
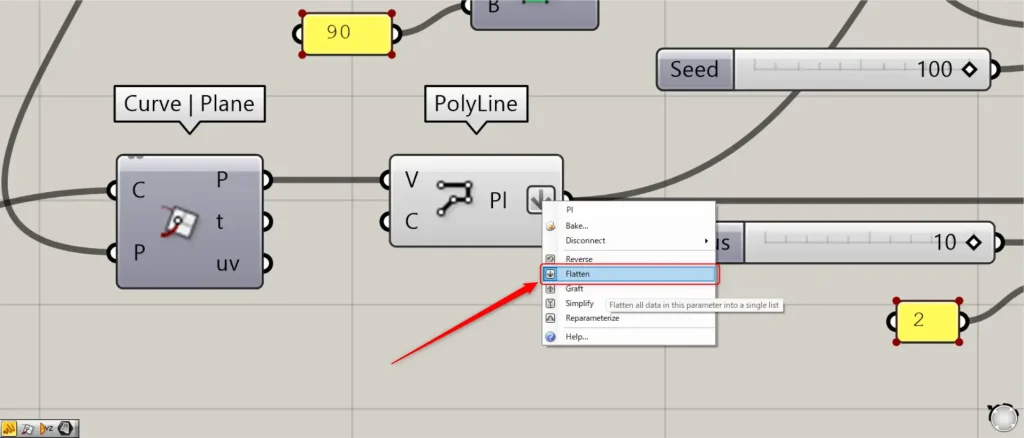
In this case, right click on the PolyLine(Pl) and set Flatten.
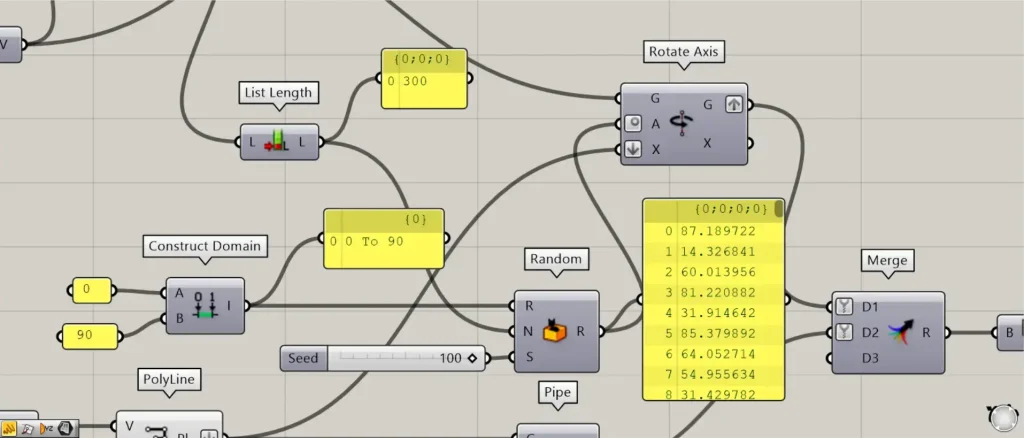
Then connect the inner Voronoi’s Move(G) to a List Length.
Then you can get the numerical value of the number of inner Voronoi.
In this case, 300 is output.
Then connect the number 0 to Construct Domain(A).
In addition, connect the 90 numbers to Construct Domain(B).
This creates a numeric range of 0 To 90.
Then connect the Construct Domain to a Random(R).
In addition, connect the List Length to the Random(N).
Furthermore, we connect a seed value that changes an arbitrary randomness number to the Random(S).
In this case, 100 is input.
Then 300 numbers will be created within the numerical range of 0~90.
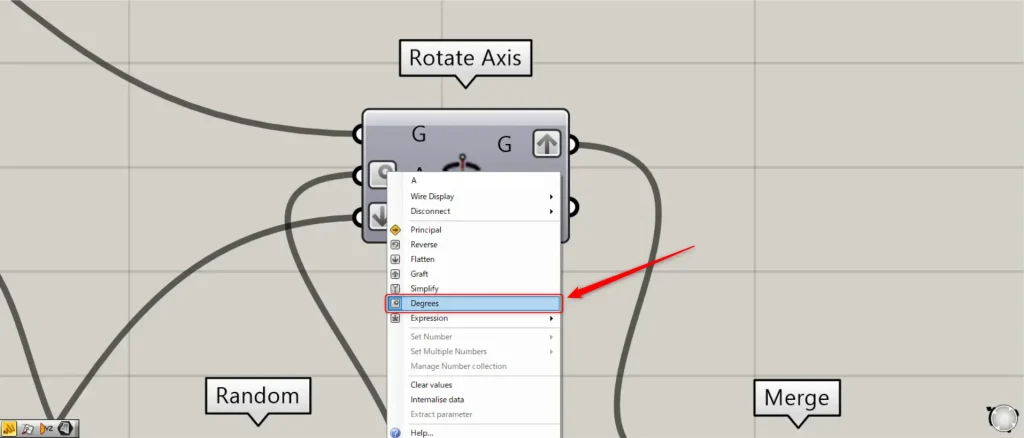
Then connect the Random to a Rotate Axis(A).
At this point, right click on the Rotate Axis(A) and set it to Degrees.
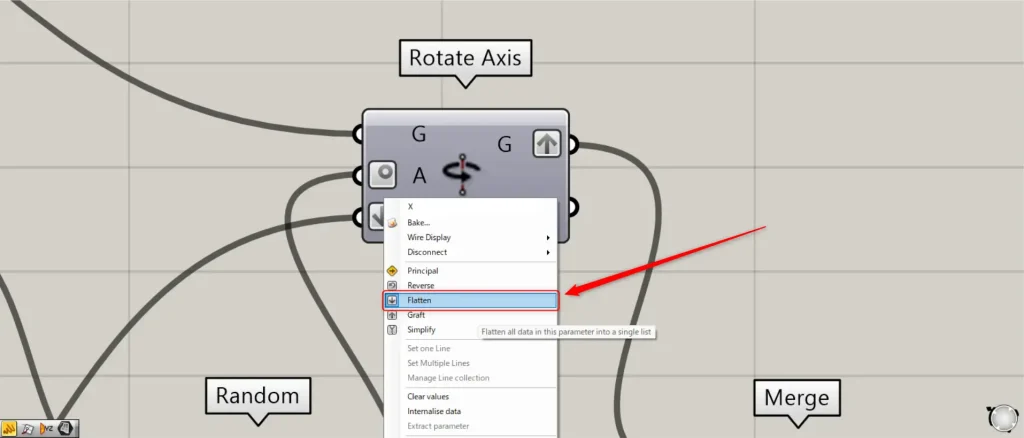
Then connect the PolyLine to the Rotate Axis(X).
At this point, right click on the Rotate Axis (X) and set Flatten.
Then connect the inner Voronoi’s Move(G) to the Rotate Axis(G).
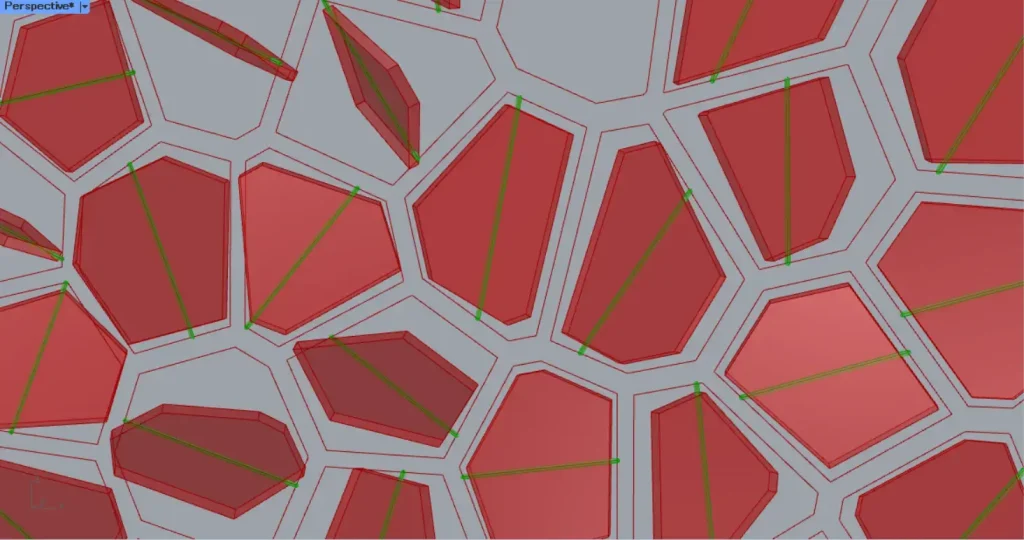
Then the Voronoi models rotated with the lines as the axis of rotation, as shown in the image above.
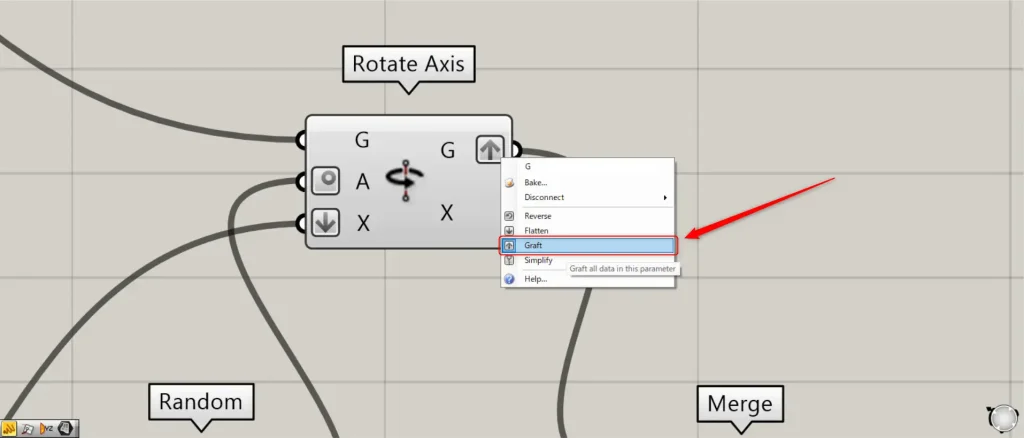
At this point, right click on the Rotate Axis(G) and set Graft.
Join the voronoi models with the pipes on the axis of rotation.
Finally, we join the pipe and the Voronoi models.
Connect the PolyLine to a Pipe(C).
Furthermore, connect the radius value to the Pipe(R).
In this case, 10 is input.
Furthermore, connect the number 2 to Pipe(E).
Using the number 2, the corners of the pipe will be rounded.
This creates pipes from the lines, as shown in the image above.
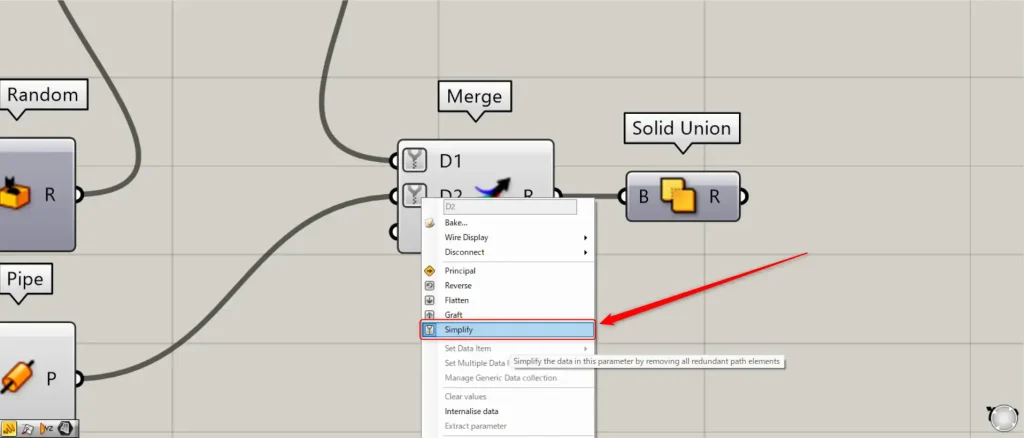
Then connect the Rotate Axis(G) and the Pipe to a Merge.
At this point, right click on the Merge(D1 and D2) and set Simplify.
The data can then be combined.

Then Connect the Merge to a Solid Union.
Then the Voronoi models and pipe models are combined.
This completes the process.
That’s all for this issue.

Comment