
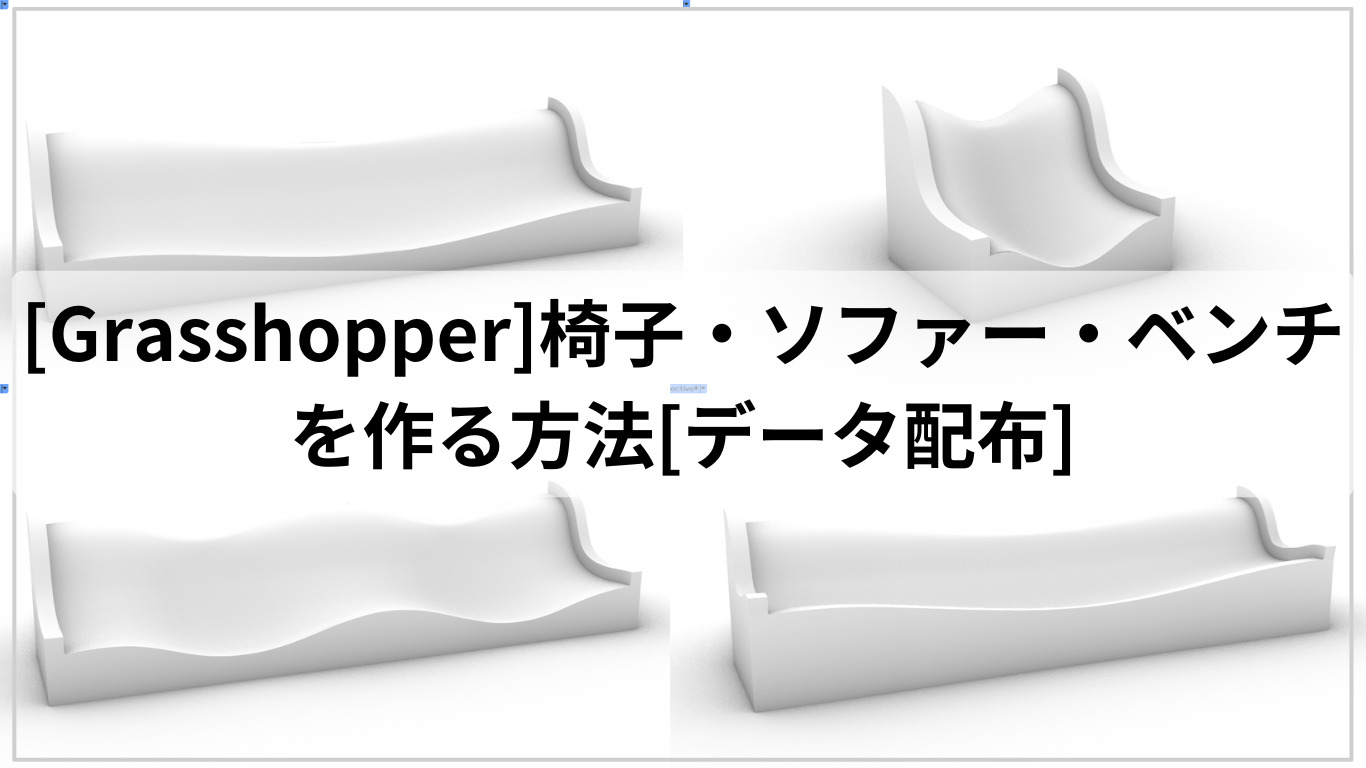
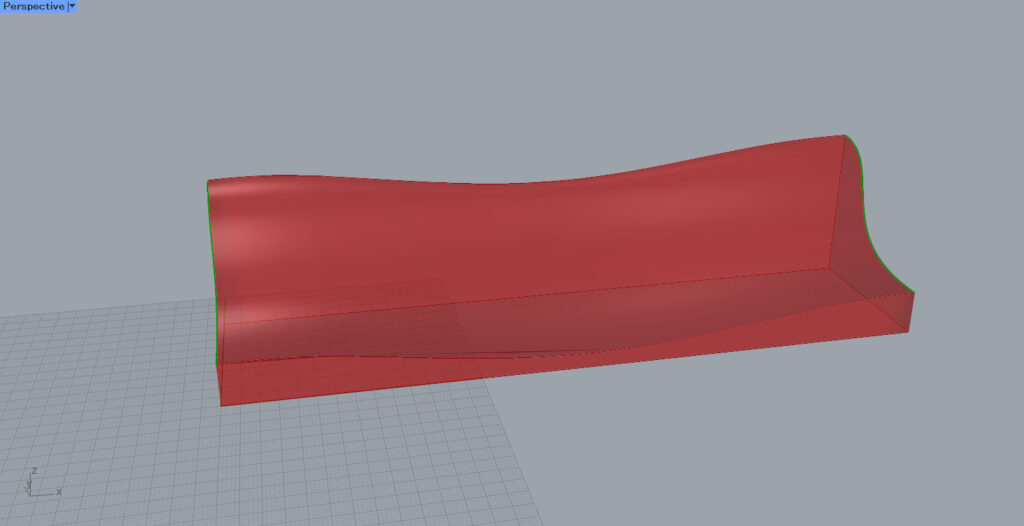
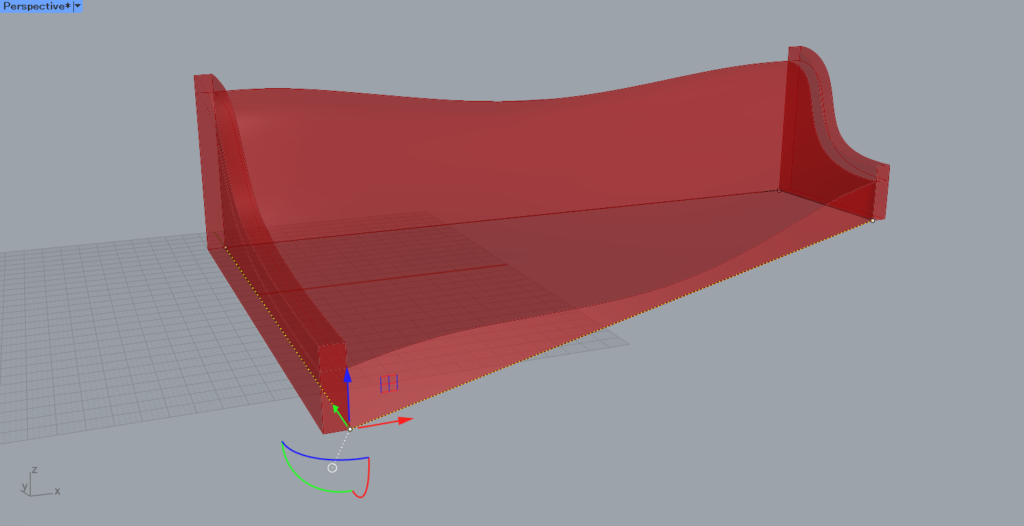
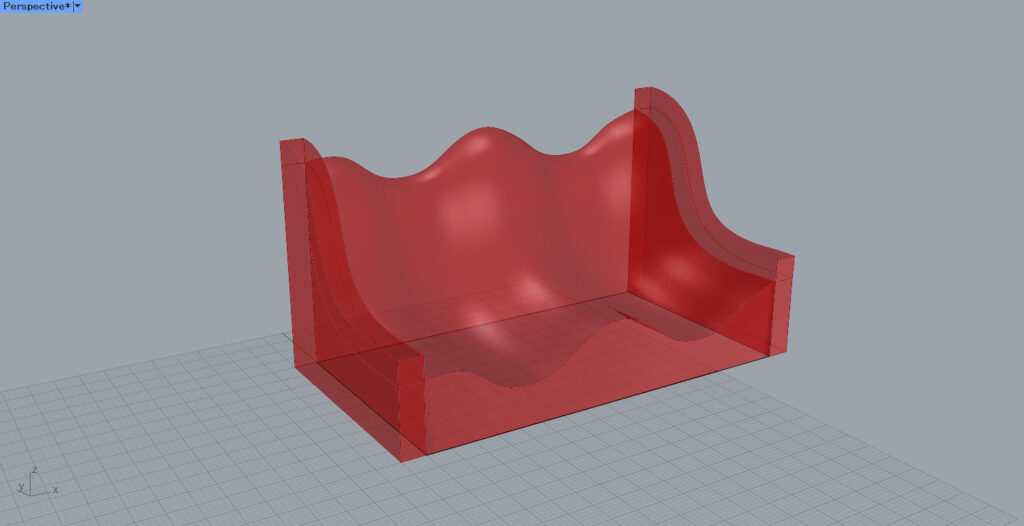
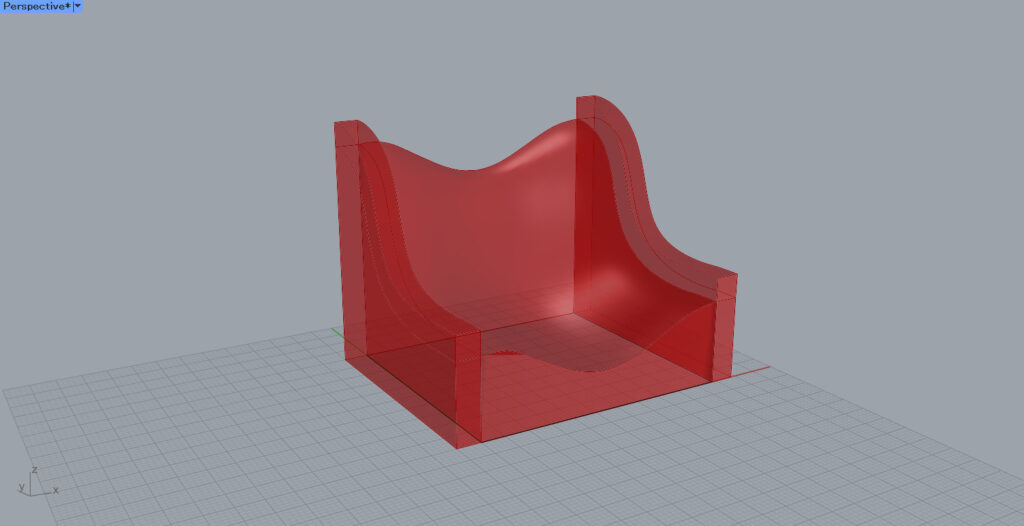
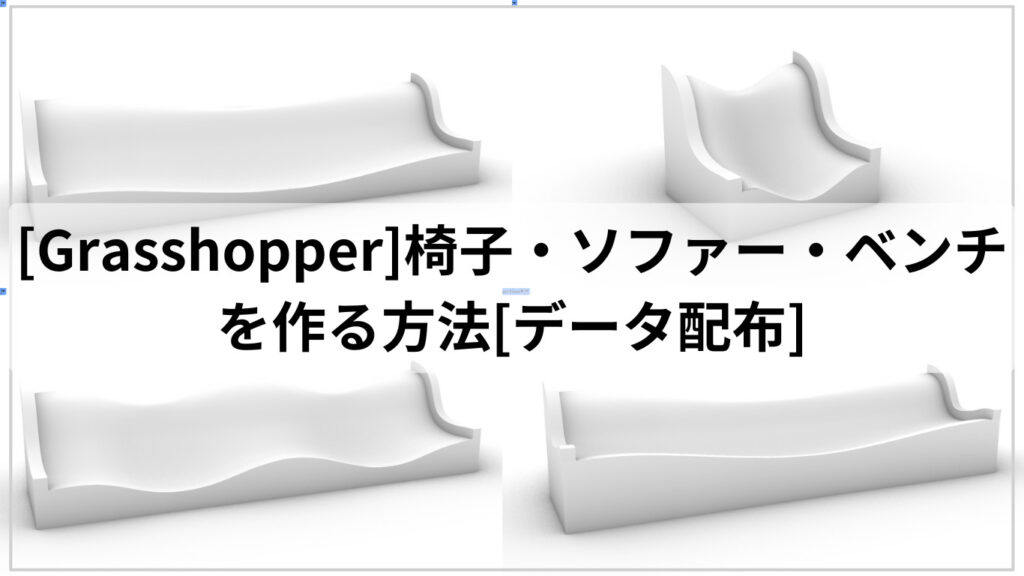
今回は、グラスホッパーでパラメトリックな、椅子・ソファー・ベンチを作る方法を解説します。

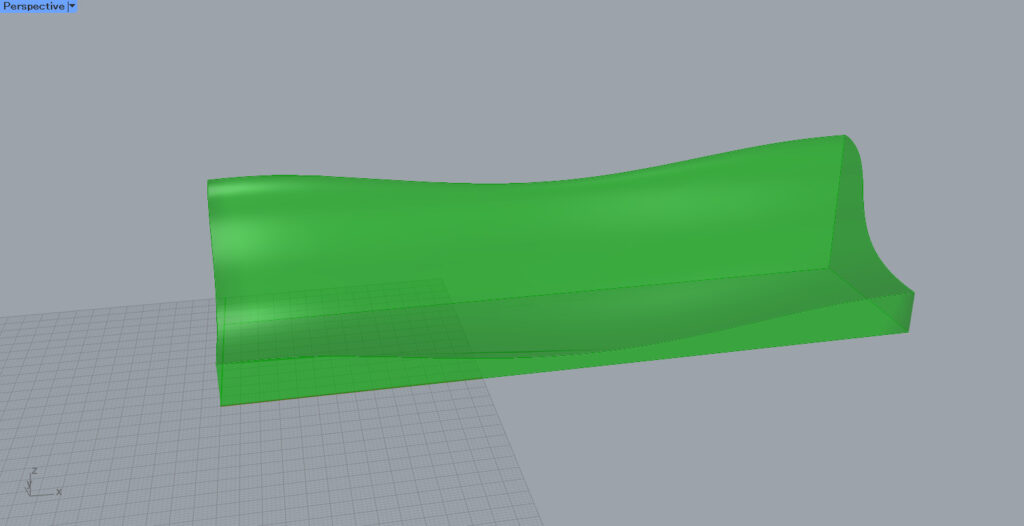
今回の方法では、パラメーターを変えることで、上のような椅子・ソファー・ベンチを作ることができるようになります。
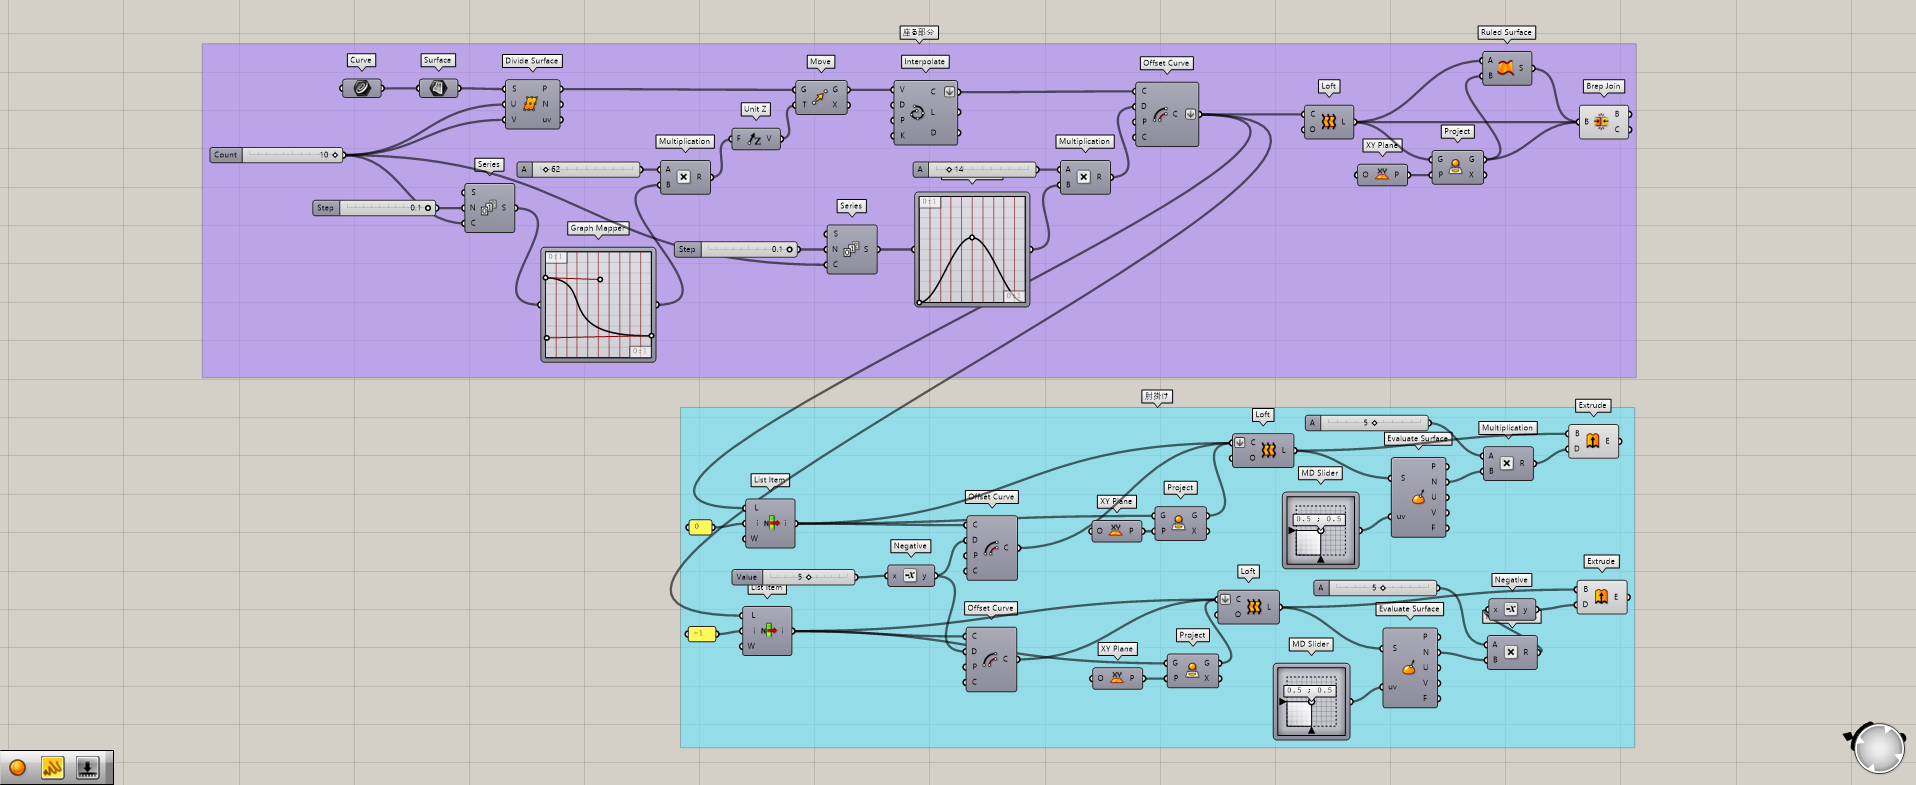
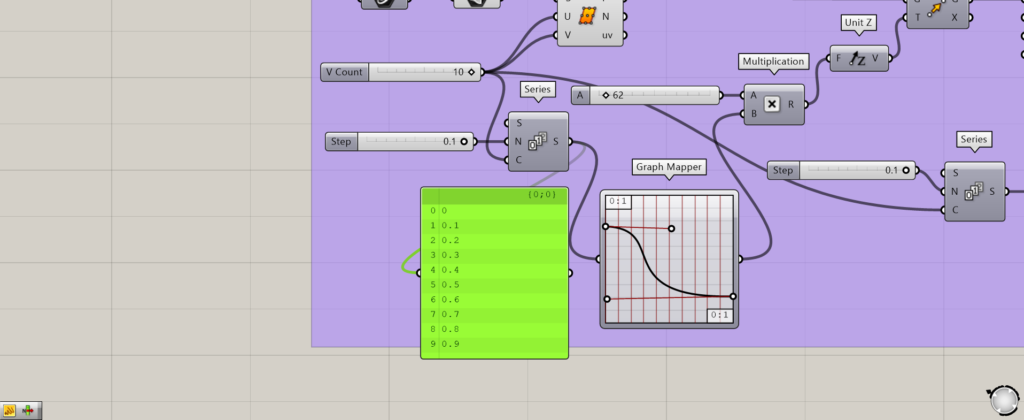
こちらが、今回の全体コンポーネントになります。
それでは、順番に解説していきます。
今回のグラスホッパーとライノセラスのデータダウンロードはこちら
ダウンロードできるデータのご利用に関しては、利用規約をご覧ください。
動画で見る
座る部分
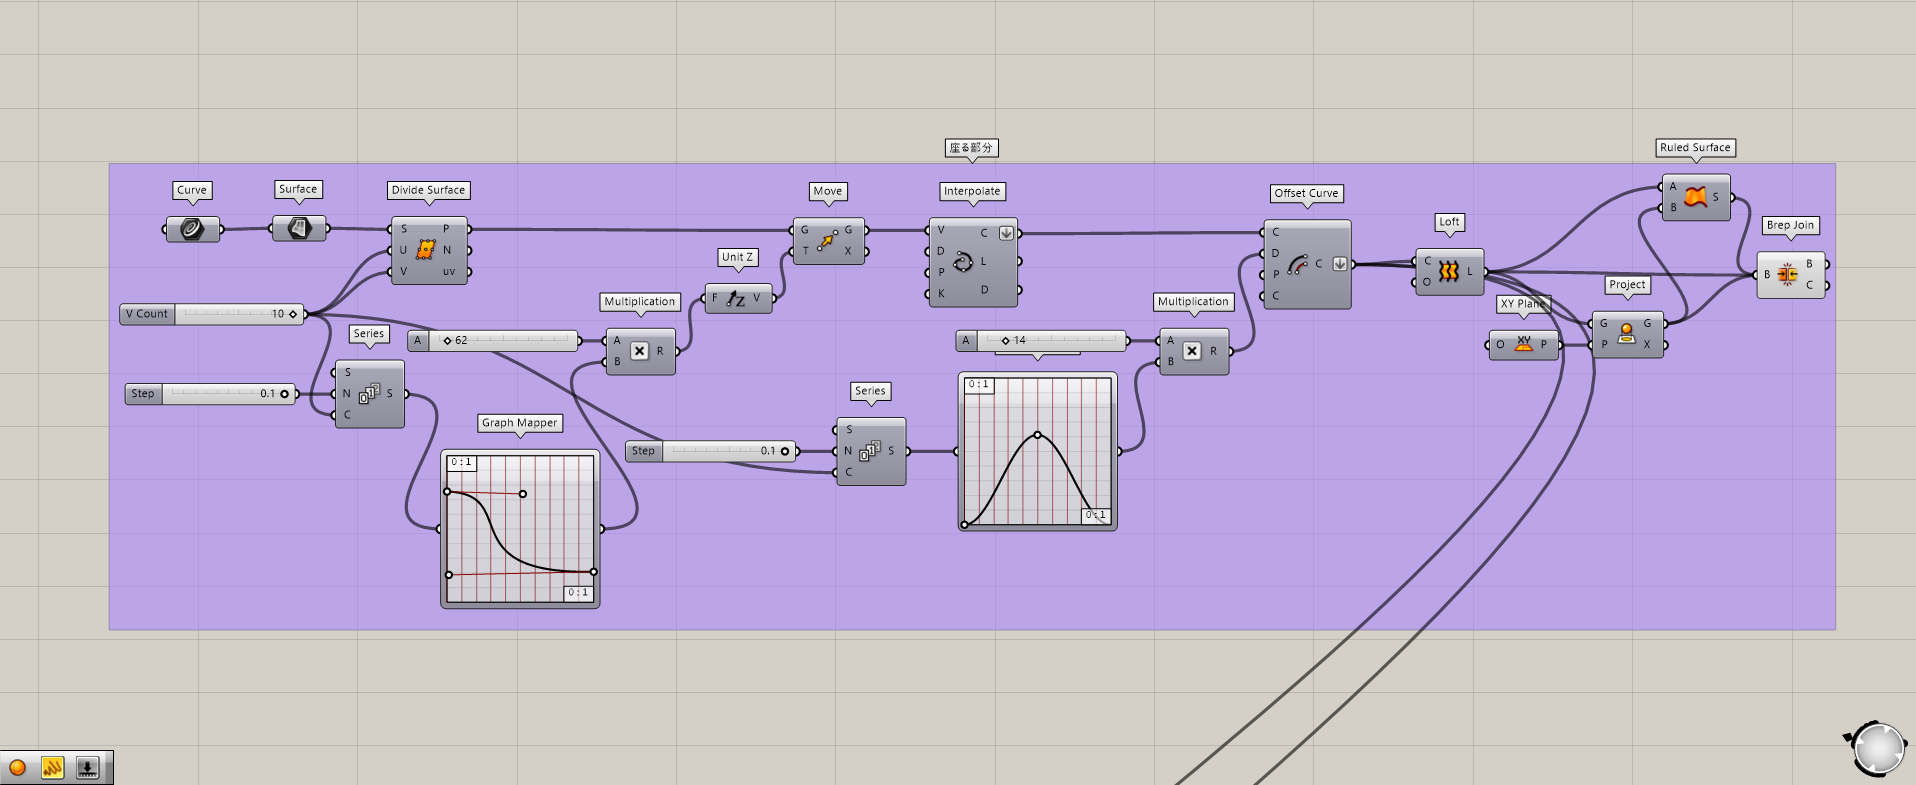
使用コンポーネント:①Curve ②Surface ③Divide Surface ④Series ⑤Graph Mapper ⑥Multiplication ⑦Unit Z ⑧Move ⑨Interpolate ⑩Offset Curve ⑪Loft ⑫XY Plane ⑬Project ⑭Ruled Surface ⑮Brep Join
最初は、椅子・ソファー・ベンチの座る部分を作っていきます。
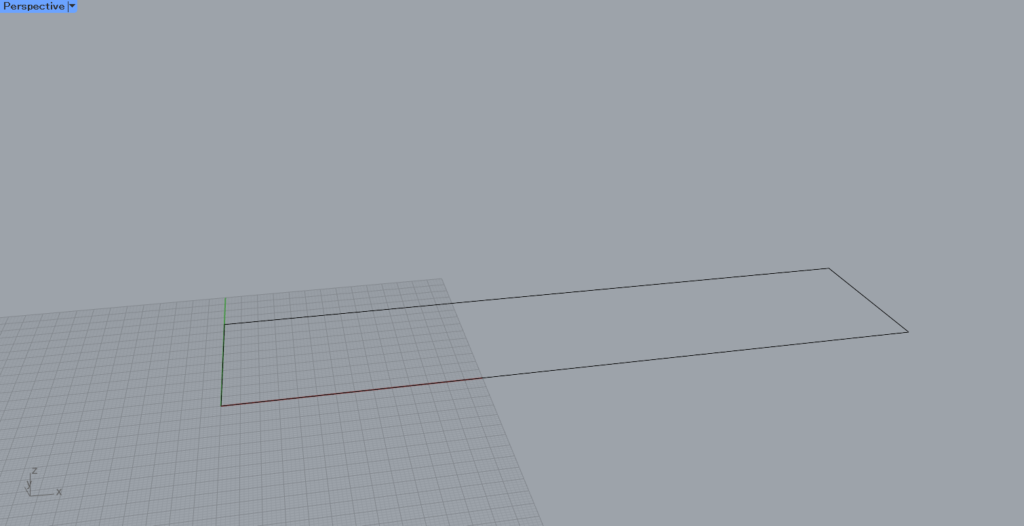
まずは、ライノセラス上に四角形を用意します。

ライノセラス上の四角形を、Curveに格納します。
次に、CurveをSurfaceにつなげ、サーフェスにします。
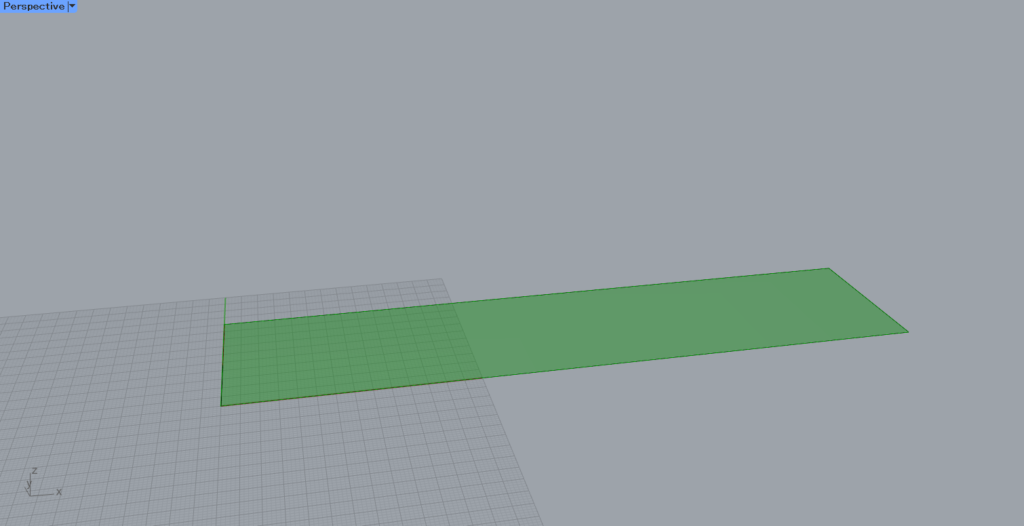
次に、Divide Surfaceを使い、点でサーフェスを分割します。
UとV端子に、縦方向と横方向の分割数を入力します。
今回は、どちらにも10を入力しています。
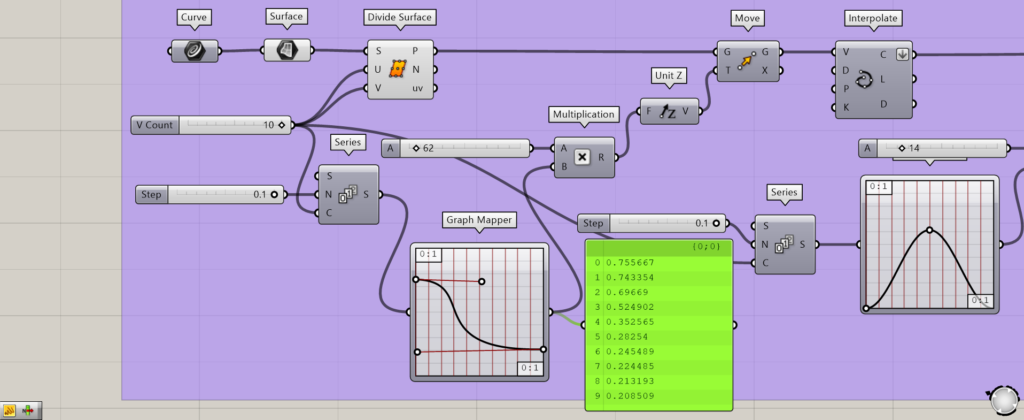
次に、作成した線を上方向に移動させ、座る部分の形を作ります。
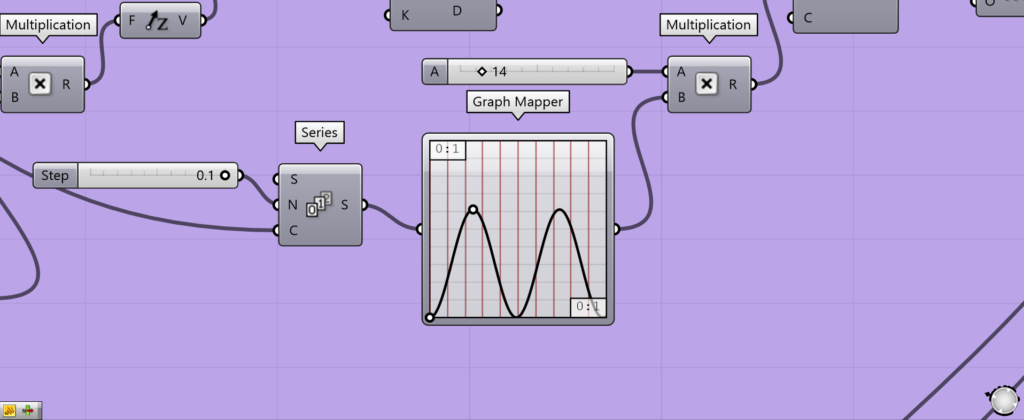
まずはSeriesを使い、数列を作ります。
N端子に0.1を入力し、C端子にサーフェスを分割した分割数である10をつなげます。
これで、0.1ずつ増加する数列が作れました。
これは、次に使うGraph Mapperのxの数値になります。
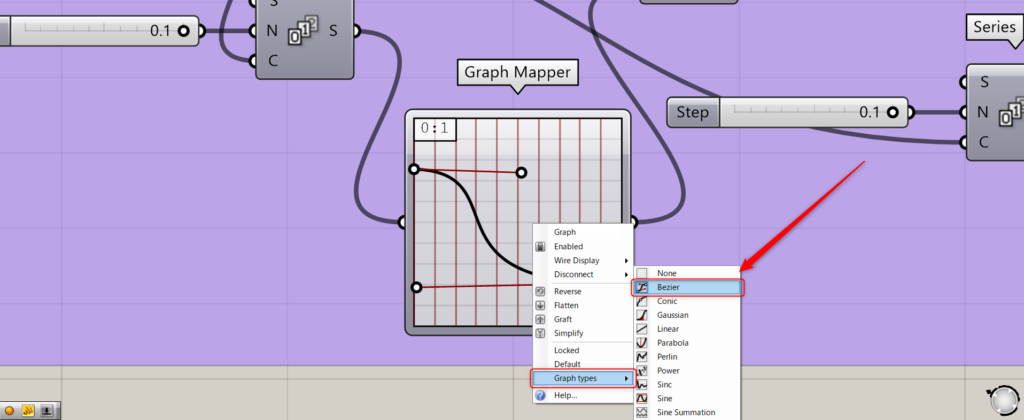
Graph Mapperを使います。
Graph Mapperを右クリックし、Graph typesから今回はBezierを選択します。
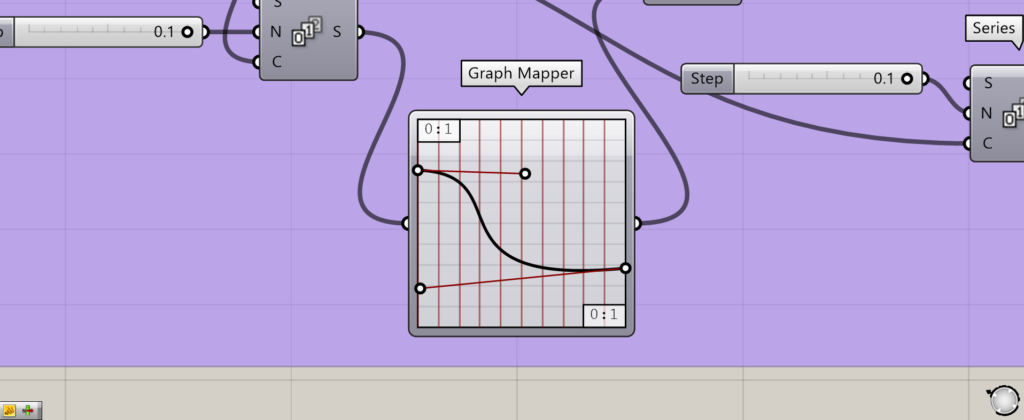
その後、グラフを座る部分の形にします。
今回は、上の画像のような形にしました。
そしてSeriesを、Graph Mapperにつなげます。
Seriesからは、関数のxの数値が出力され、Graph Mapperからは、グラフのyの数値が出力されます。
今回は、これが座る部分の高さを決める数値になります。
その後、MultiplicationにGraph Mapperをつなげ、もう1つの端子に任意の数値を入力します。
今回は、62を入力しています。
これで、62とGraph Mapperの数値の掛け算が、座る部分の点の高さになります。
その後、MultiplicationをUnit Zにつなげます。
そして、MoveのG端子にDivide Surfaceをつなげ、T端子にUnit Zをつなげます。
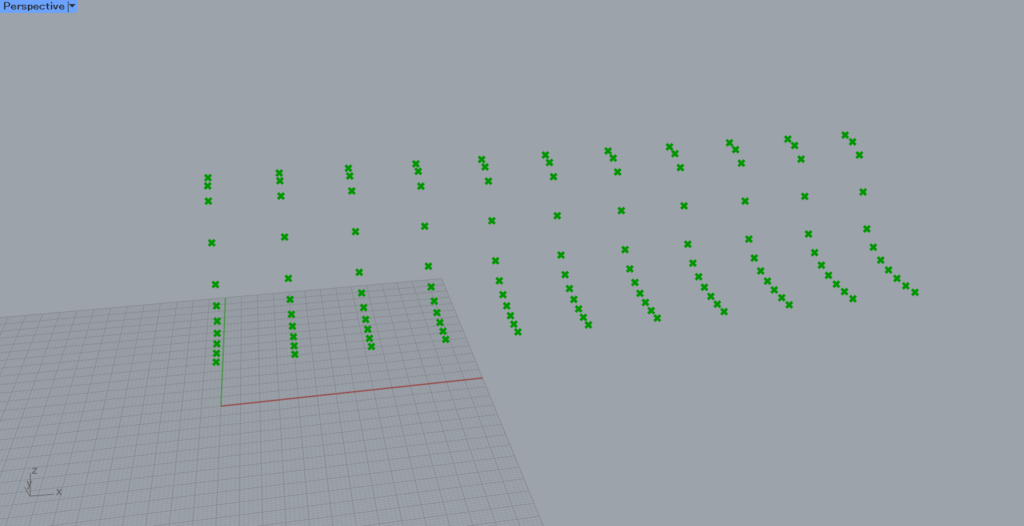
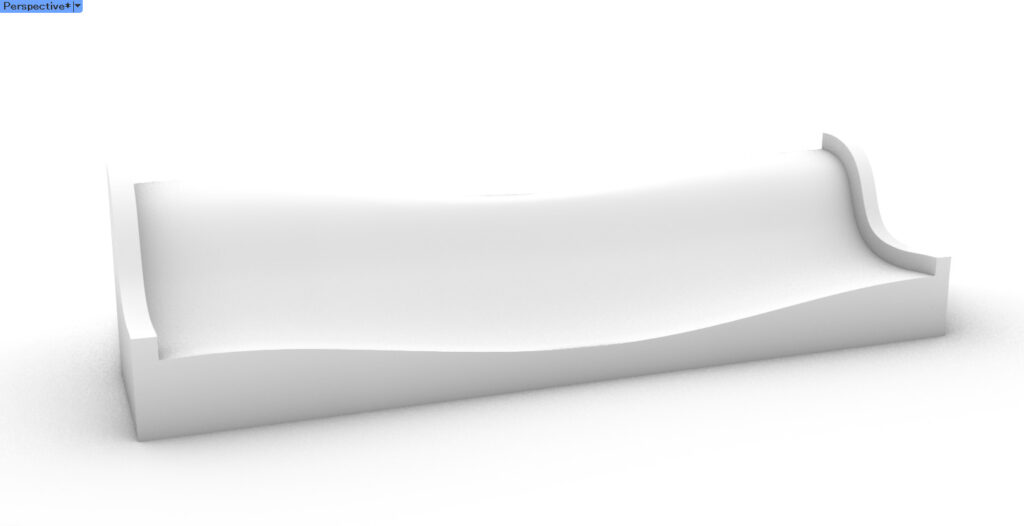
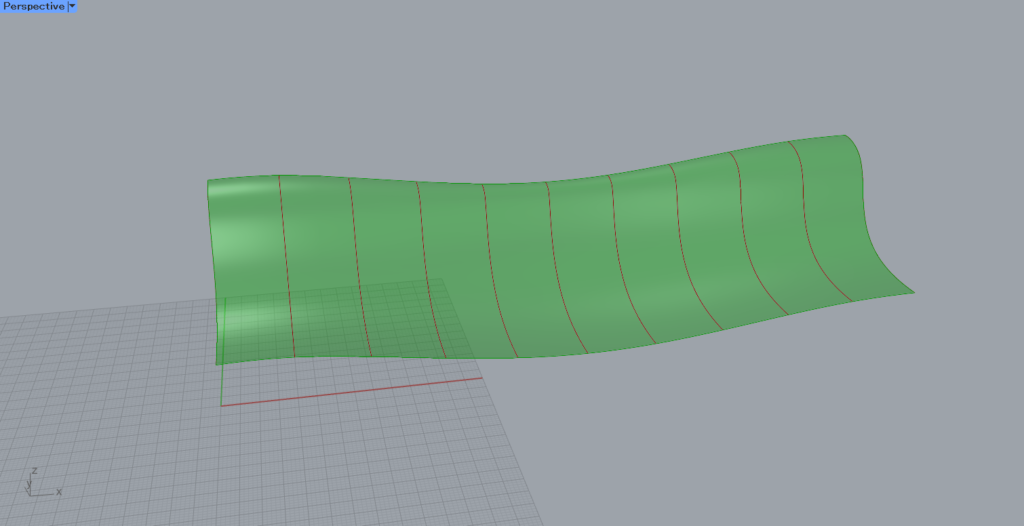
これにより、座る部分の形ができました。

別の角度から見ます。
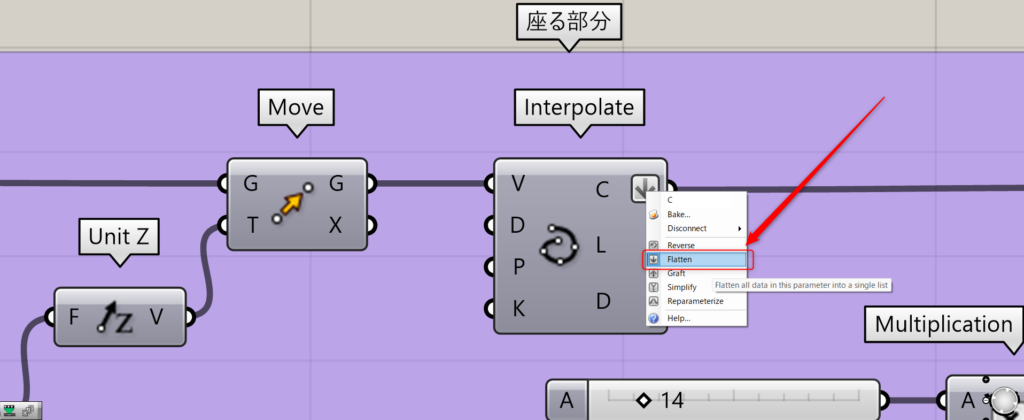
その後、MoveをInterpolateにつなげます。
この際に、InterpolateのC端子を右クリックし、Flattenにしてください。
すると、点をつなぐ線ができました。
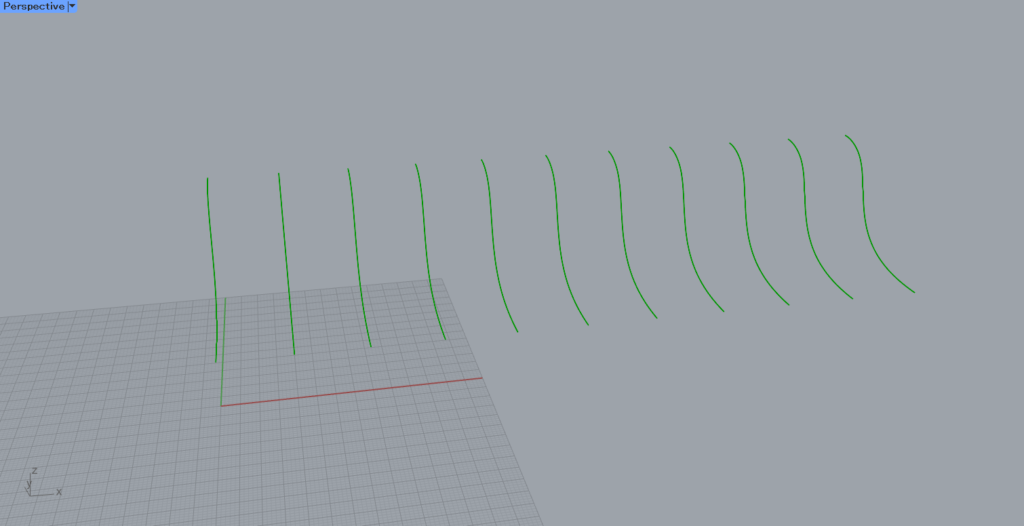
次は、座る部分の高さを変えていきます。
もう一度、SeriesとGraph Mapperを使います。
Seriesは先程と同じで、N端子に0.1、C端子にサーフェスの分割数である10を入力します。
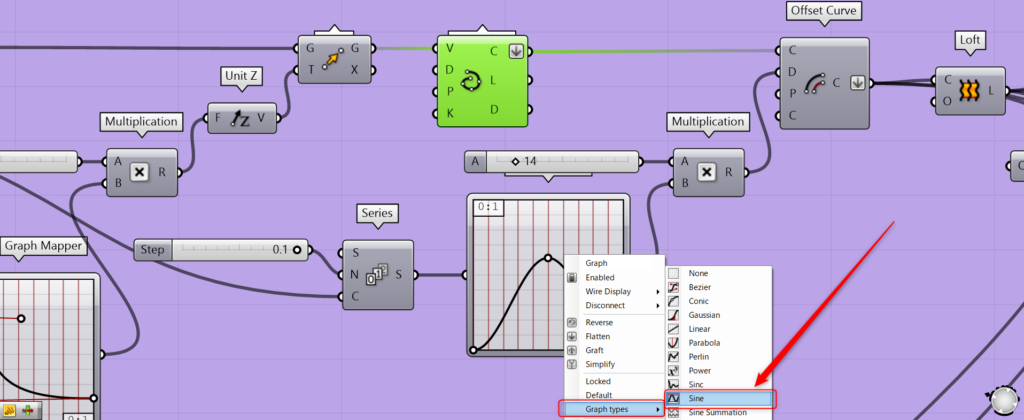
Graph Mapperは、今回はSineを選択し、波のような形を使います。
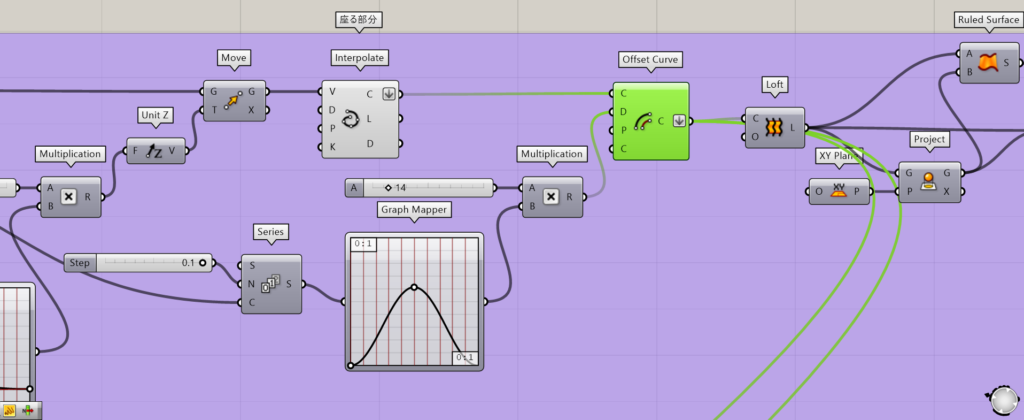
SeriesをGraph Mapperにつなげ、Graph Mapperを今回は上のようなグラフにします。
そして、Graph MapperをMultiplicationにつなげ、任意の数値をもう1つの端子につなげます。
今回は、14を入力しました。
その後、MultiplicationをOffset Curveにつなげます。
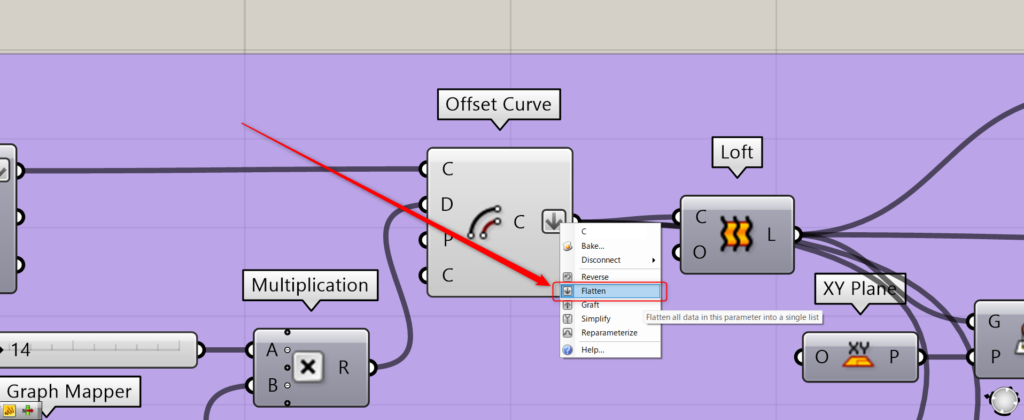
この際に、右側のC端子を右クリックし、Flattenにしてください。
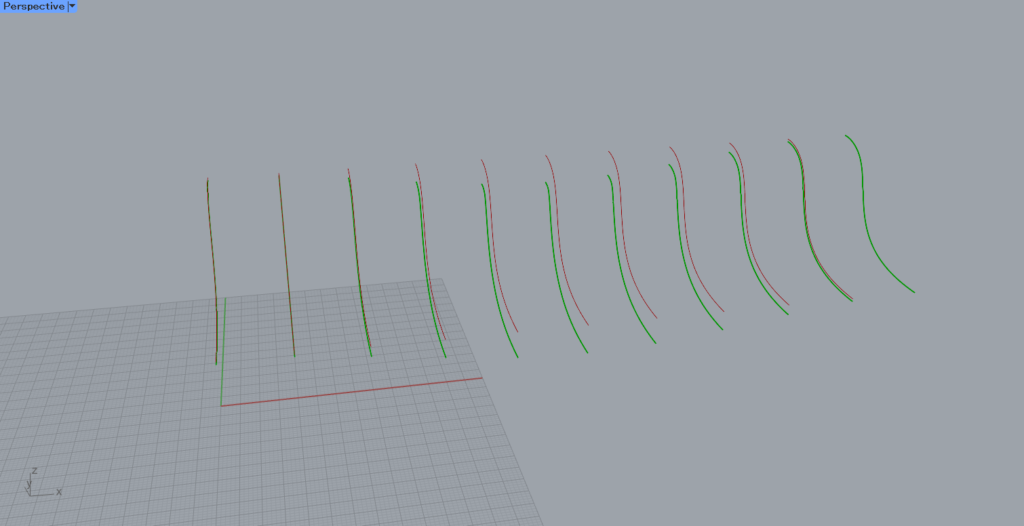
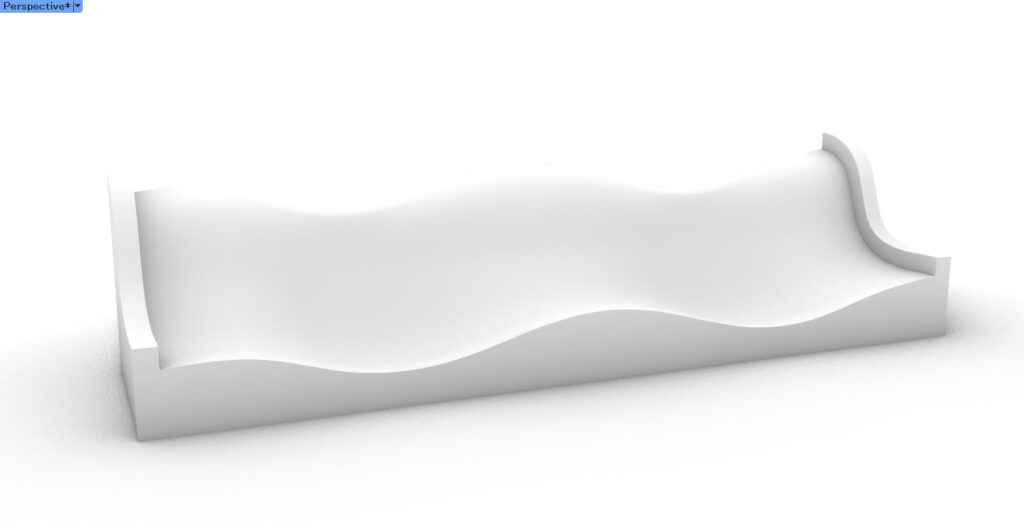
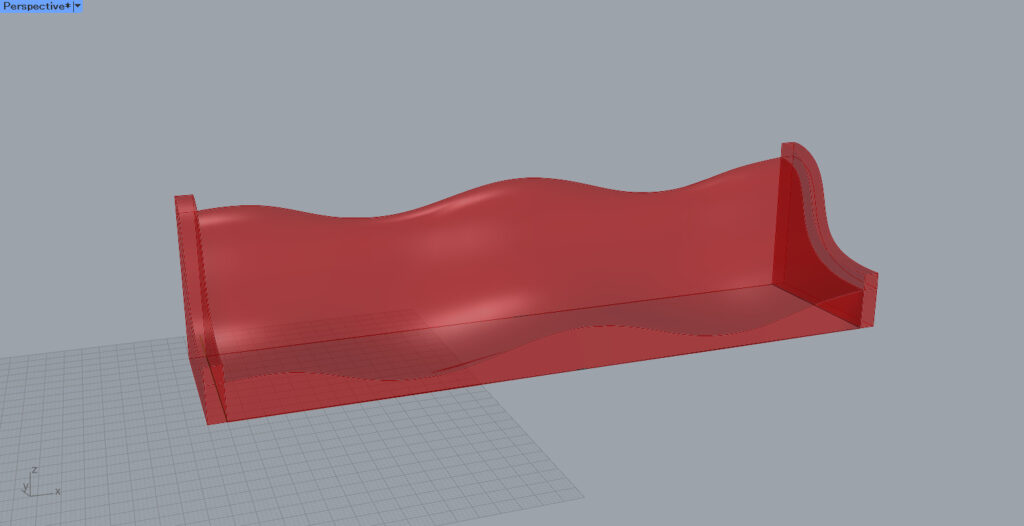
すると、波のように高さが変わりました。
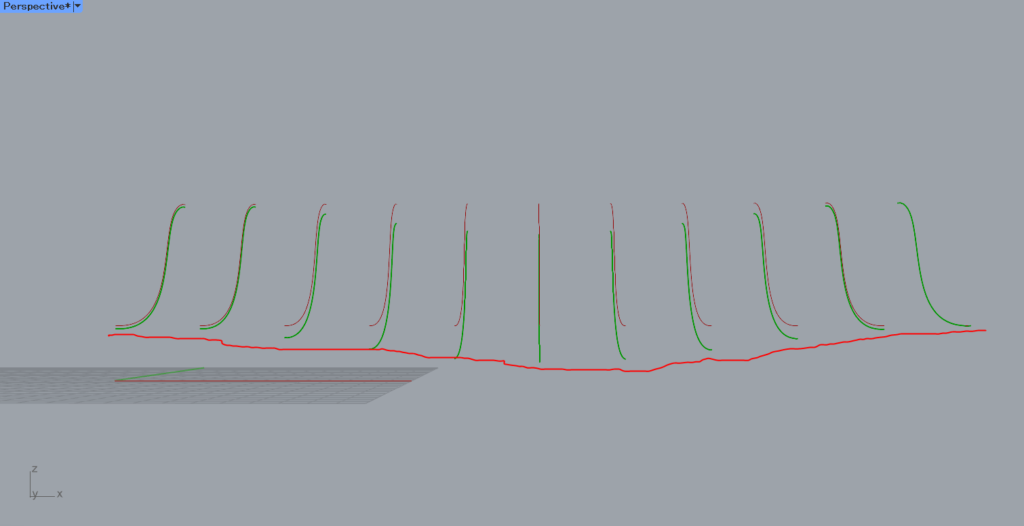
横から見ると、波のようになってることが分かりやすいです。
その後、Loftを使うことで、複数の線からサーフェスが作成されました。
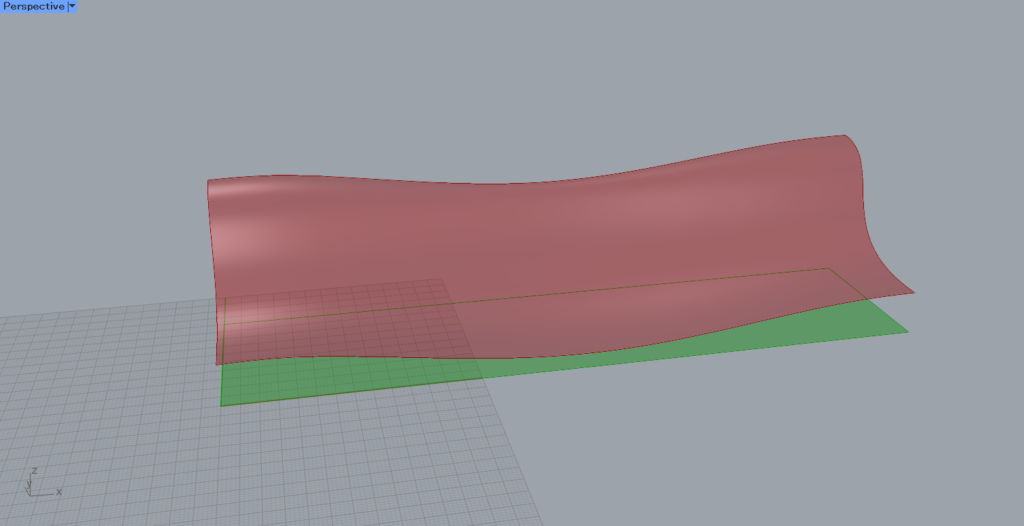
そして、P端子にXY Planeをつなげます。
すると、XY平面にLoftで作成したサーフェスを真上から投影して、新しい平面を作成します。
別角度から見ると、このように平面にサーフェスができていることが分かります。
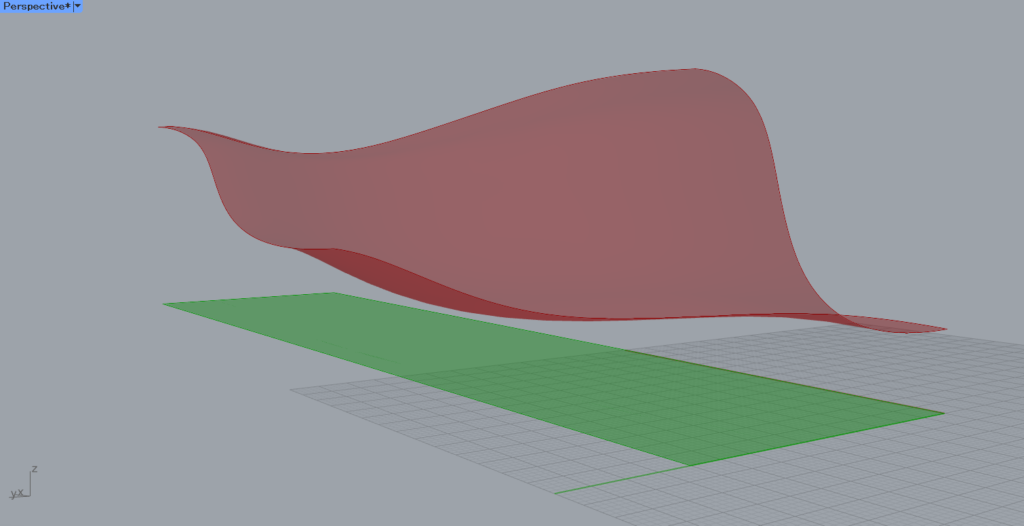
その後LoftとProjectを、Ruled Surfaceにつなげます。
すると、2つのサーフェスをつなぐ、新しいサーフェスを作ることができます。
そして、Brep JoinにLoft・Project・Ruled Surfaceのサーフェスをつなげ、結合します。
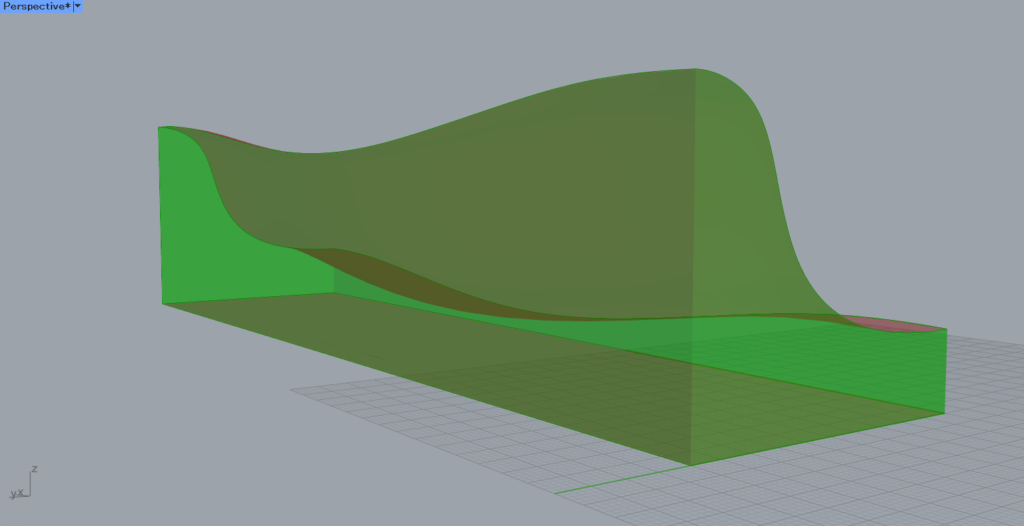
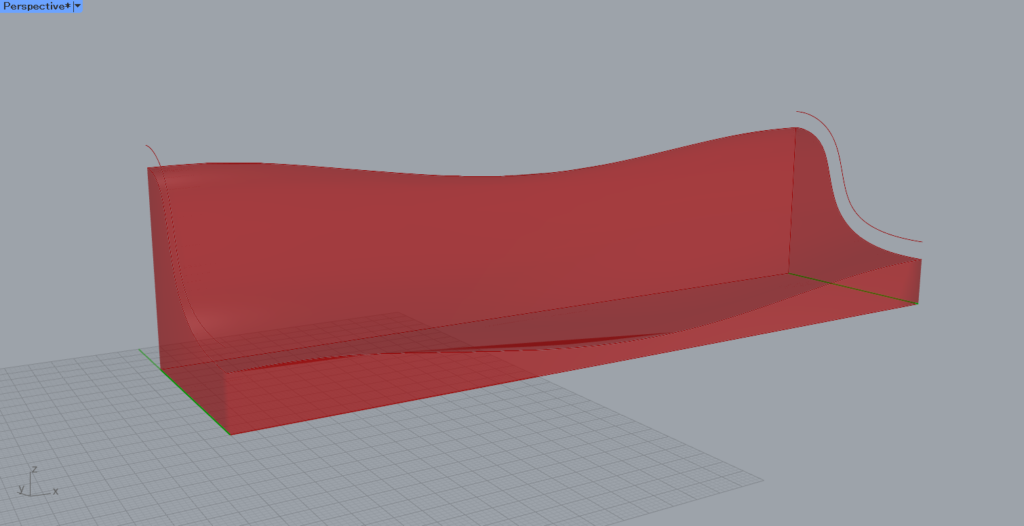
これで、椅子・ソファー・ベンチの座る部分は完成です。
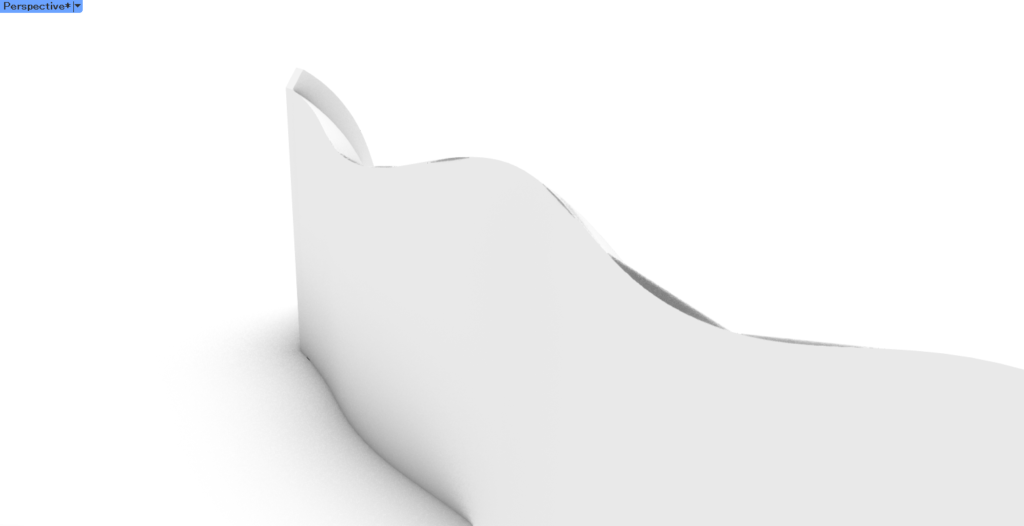
肘掛け
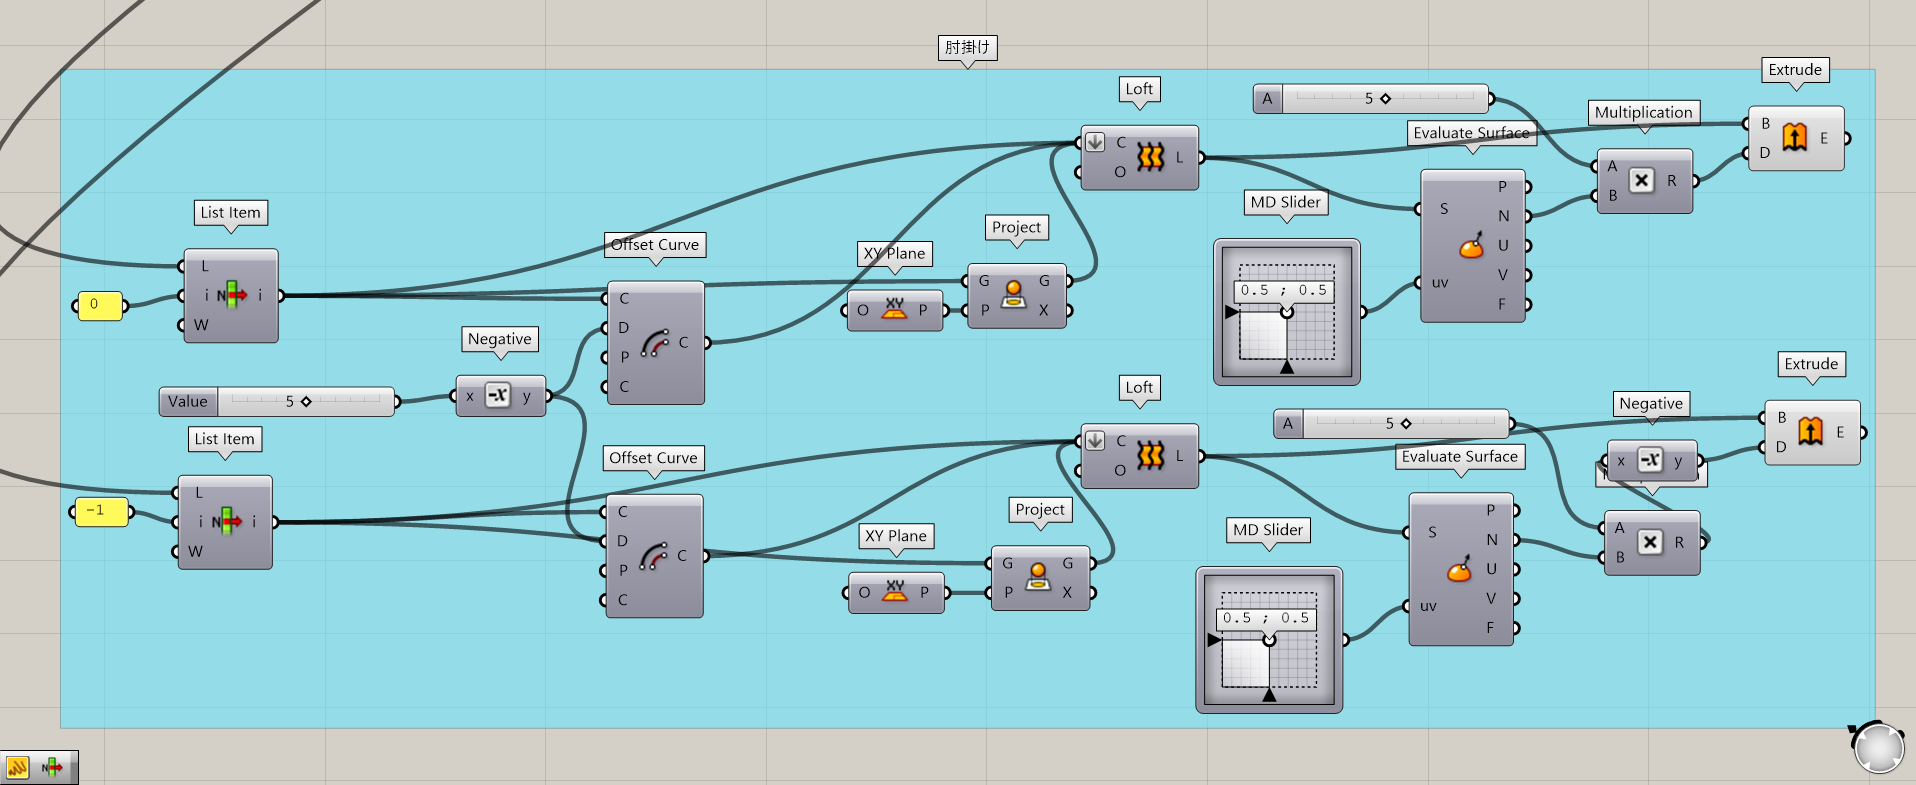
使用コンポーネント:①List Item ②Negative ③Offset Curve ④XY Plane ⑤Project ⑥Loft ⑦MD Slider ⑧Evaluate Surface ⑨Multiplication ⑩Extrude
次は、肘掛けを作っていきます。
まずは、先程使用したOffset Curveを、2つのList Itemにつなげます。
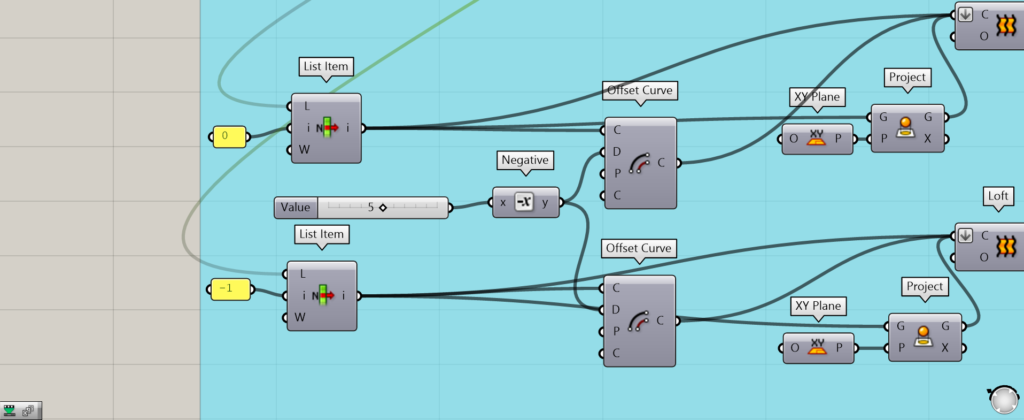
その後、List Itemのi端子に0と-1を入力します。
すると、最初と最後の曲線が抽出されました。

その後、Offset Curveを使い、線をオフセットします。
今回は数値の5を、Negativeにつなげ、-5に変換してからOffset CurveのD端子につなげています。
Negativeを使わないと、逆方向にオフセットされてしまします。
その後、List Itemで抽出した線を、ProjectでXY Planeに投影します。
すると、XY平面に線が投影されました。
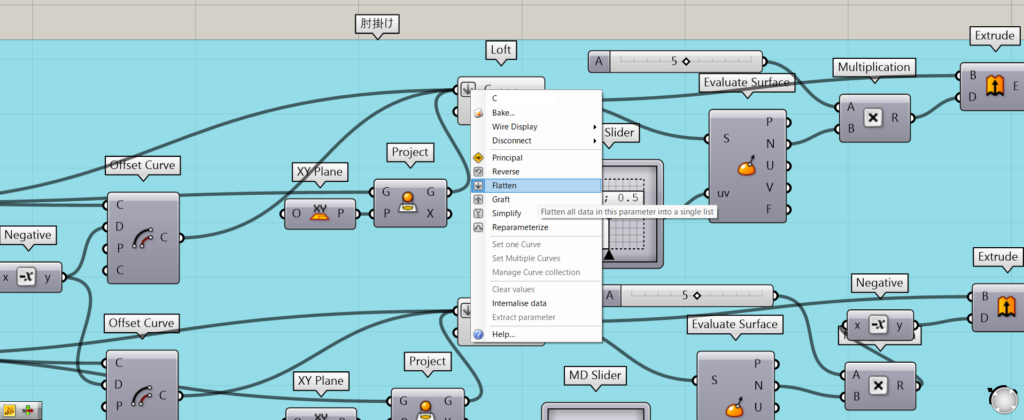
Loftに、Project→List Item→Offset Curveの順番でつなげます。
この際に、LoftのC端子を右クリックし、Flattenにします。

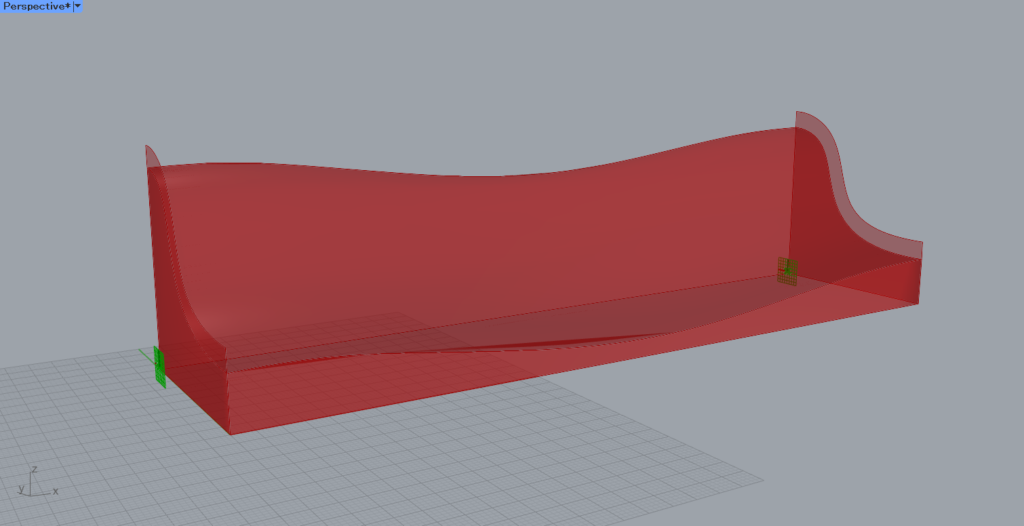
すると、このようにサーフェスができ、肘掛けの形ができました。
その後、Evaluate Surfaceにつなげます。
Evaluate SurfaceのUV端子に、MD Sliderをつなげます。
これにより、サーフェスを押し出す方向の、ベクトルを抽出できます。

Multiplicationに、Evaluate SurfaceのN端子と、押し出す距離の数値を入力します。
方向のベクトルと、数値はMultiplicationで掛け合わせて、使うことができます。
2つのうち、1つはNegativeで数値をマイナスにし、逆方向に押し出せるようにしてください。
LoftをExtrudeのB端子に、D端子にMultiplication、もしくはNegativeをつなげます。
これにより、指定した数値の分押し出すことができました。
これで肘掛けが完成し、椅子・ソファー・ベンチができあがりました。
形態を変える
ライノセラス上の四角形や、グラスホッパー上のパラメーターを変えることで、形態を変えることができます。
ライノセラス上で四角形の形を変えると、このように形が変わります。
グラフの形を変えてみます。
このように、座る部分の形が変わりました。
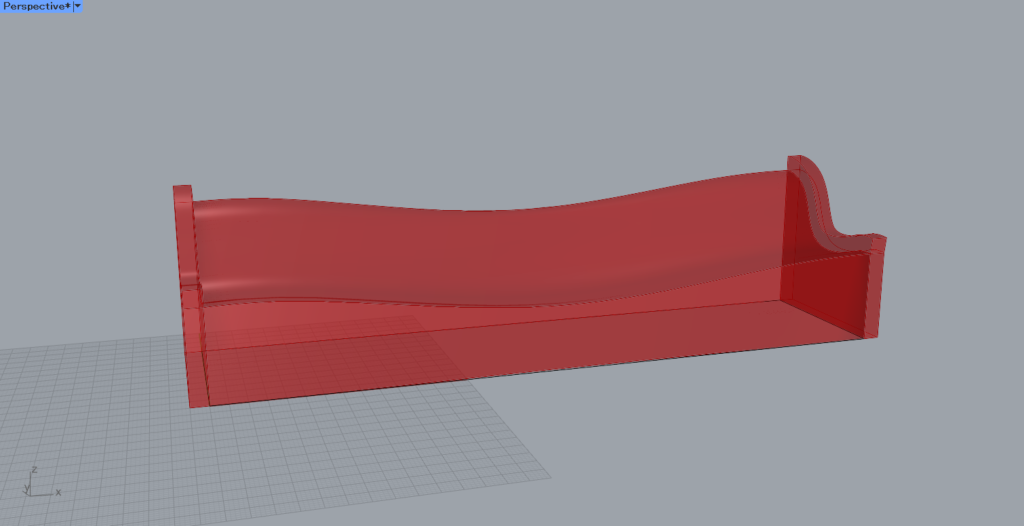
座る部分の高さも変えることができます。
ライノセラス上の四角形を小さくすることで、サイズを小さくすることもできます。


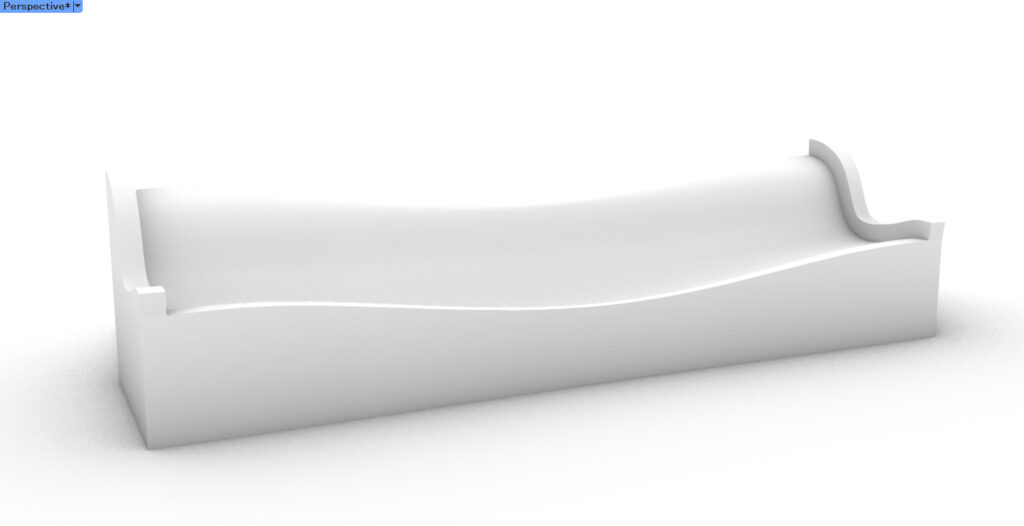
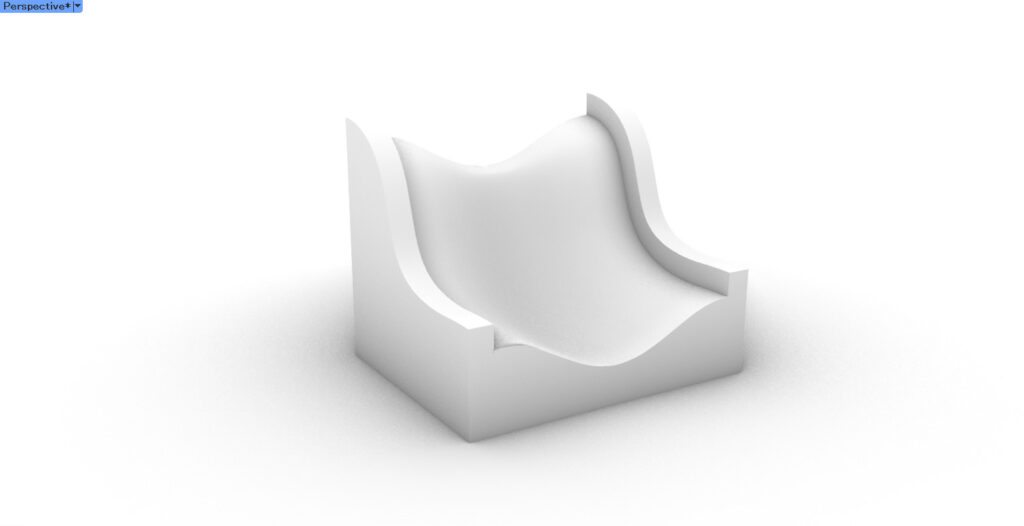
ライノセラス上に書き出して、レンダリングビューで見てみました。
注意点
極端な形にしてしまうと、形にエラーが起きることがあります。
グラスホッパー上では大丈夫なのですが、ライノセラスに書き出すと、上の画像のように穴が開いていることがあります。
そのため、極端な形にはしないようにしてください。
まとめ
今回は、グラスホッパーで椅子やソファー、ベンチを作る方法を解説しました。
是非この方法を活用して、様々な形態の椅子やソファー、ベンチを作成してください。
今回は以上になります。


Comment